
Related Manuals for Cedar dns 8 live


Summary of Contents for Cedar dns 8 live
- Page 1 DNS 8 Live dialogue noise suppressor Owner’S Manual © 2012 - 2016 audio ltd CeDar Manual version 4.00: June 2016 Page 1...
- Page 2 Intentionally left blank Page 2...
-
Page 3: Table Of Contents
Table of Contents an Introduction to the DnS 8 live ..............4 Safety instructions ..................5 Setting up the DnS 8 live ................6 Operation ...................... 8 Summary view ..................8 Summary view: single-channel tutorial ..........10 Multi-channel use .................. 11 Detail view ..................... -
Page 4: An Introduction To The Dns 8 Live
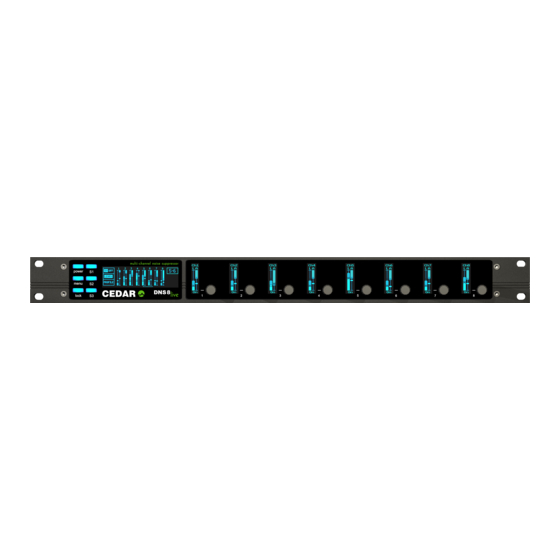
An IntroductIon to the dnS 8 LIve The DNS 8 Live is a further development of the DNS technology first introduced in the Academy Award winning DNS1000, and it is designed specifically for live use. Offering eight simultaneous channels of dialogue noise suppression, it hosts a new DNS algorithm boasting a simplified ‘2-knob’... -
Page 5: Safety Instructions
Mounting and ventilation ■ You should place the DNS 8 Live on a flat, stable surface or mount it in a standard 19” equipment rack. use the supplied rubber feet to avoid scratching the surface, or the rackmounting accessories, as appropriate. -
Page 6: Setting Up The Dns 8 Live
DnS 8 live carefully. Save the carton and all packing materials since you may need them to transport the unit in the future. In addition to the DnS 8 live and its packaging, the box should contain the following: this manual in paper or electronic form ■... - Page 7 The BnC sync input can be terminated (75Ohms) using the recessed rear panel switch. IMPORTANT NOTE: The digital audio signals feeding the DnS 8 live must be at the same sample rate and synchronous or clicks, ticks, or even loud broadband noise may result from the consequent data errors.
-
Page 8: Operation
Power on/off Switch the DnS 8 live on by pressing the power button. Switch it off by pressing and holding the power button for five seconds. The current settings will be stored during shutdown. If the unit is not shut down in this manner, the settings will not be stored and corruption of the internal memory may result. - Page 9 Level / Gain knobs ■ In basic use, these allow you to tell the DnS 8 live how much noise is present in the signal presented to each input and the amount by which you wish to attenuate The full range of operations is shown overleaf:...
-
Page 10: Summary View: Single-Channel Tutorial
rotate: adjust the level/gain Click: toggle the focus between the level and gain Double-click: toggle the process on/off in that channel Press/Hold/release: preview process on/off in that channel Multi-click: click two encoders near-simultaneously to create/delete channel groups (see below) SummAry vIew: SIngLe-chAnneL tutorIAL ensure that the channel you are interested in processing is the channel in focus (clicking on its knob will do this) and that the DnS process is switched on. -
Page 11: Multi-Channel Use
Process On/Off while determining the settings, you can bypass processing by pressing and holding the channel knob (preview), or by double-clicking on the channel knob (toggle processing on/off), or by pressing S1. each of these methods allows you to audition the signal before and after processing to ensure optimal results. muLtI-chAnneL uSe Having achieved an acceptable result for one channel, you should now proceed to monitor each of the other channels to be processed (if any) and set these up as... -
Page 12: Detail View
• No channel can be in two groups simultaneously. This architecture allows you to create desirable combinations such as dual 4-channel operation, or four stereo pairs. detAIL vIew Press S3 in the default display to enter Detail view. This offers a multi-band view of the current channel, and allows you to control each of the bands independently. -
Page 13: Detail View: Tutorial
detAIL vIew: tutorIAL Adjusting the settings in Detail view is an extension of setting them in the summary view described above. To do this manually for each band, you would follow the same procedure: • Set all the Level and Gain controls to minimum (Level= -80 and Gain= -20). •... -
Page 14: Menus
menuS Select the menus by pressing the menu button. Select the desired submenu by pressing the S1, S2 and S3 buttons. when appropriate, press the menu button to return to the previous screen. The menu map is as follows: Status Status information Edit... -
Page 15: Moving And Editing Within Menus
2 when it shows the following in its associated screen: StAtuS The status page reports the current audio and network status of the DnS 8 live. no editing is possible on this page. In the example above, 44.1kHz audio is being received on channels 1 and 2 of the Xlr inputs, but no audio is being received on channels 3 to 8. -
Page 16: Presets
Press the menu button followed by S2 (Presets) to enter the preset manager. note: The eight channel displays will continue to show the Summary or Detail views (as appropriate) so you can continue to control the DNS 8 Live while saving and recalling presets. - Page 17 The Edit screen when edit screen is selected, the channel 1 and 2 knobs allow you to edit the name of the current preset in the usual fashion. S1 (Edit) Click: no action Press/Hold/release: no action Double-click: no action S2 (Erase / Clr) Click: erase the character under the cursor or to the left of the cursor if it is positioned at the end of the name...
-
Page 18: Setup
Setup Press S3 Setup in the default or detail screens to access the three setup options. Click on S1, S2 or S3 to enter the audio, Options and network screens respectively. Having done so, all three pages offer the same edit options: S1 (Edit) Click: edit the fields (see below) - Page 19 Audio and wordclock sources Select the desired audio and wordclock sources. Input Xlr3: audio is accepted from the Xlr inputs DB25: audio is accepted from the DB25 input Sync Input: wordclock is derived from the lowest numbered input channel that has lock BnC: aeS11 wordclock is used if detected at the BnC input, otherwise the display will report wClK and assume that...
- Page 20 Gateway: Note for network administrators The DnS 8 live sends its serial number as its host name in DHCP requests. If your DHCP server registers host names in the domain name server, you can access your DnS 8 live as dns-8-xxxxx.yourdomain.com instead of directly by its numeric IP address.
-
Page 21: Remote Control
The DnS 8 live incorporates its remote control software in the form of an internal web page, and you may connect to this using a suitable browser. Connect the DnS 8 live to your ethernet network and enter its address into your browser’s address bar. -
Page 22: Firmware Upgrades
The DNS 8 Live firmware may be upgraded over the network using a standard web browser. Determine the address of your DnS 8 live by inspecting the Status window, then launch your browser and type the following into the address bar…... -
Page 23: Declaration Of Conformity
CeDar products that have reached their end of use. alternatively such products can be returned to CeDar audio ltd in the uK at the owner’s cost and they will then be reprocessed correctly free of charge. -
Page 24: Contact Information
InformAtIon Headquarters: CeDar audio ltd, 20 Home end, Fulbourn, Cambridge, CB21 5BS, united Kingdom t: +44 1223 881771 f: +44 1223 881778 e: support@cedaraudio.com USA Office: CeDar audio uSa 43 Deerfield Road, Portland, ME 04101-1805, USA t: +1 207 828 0024 f: +1 207 773 2422 e: cedarusa@cedaraudio.com... -
Page 25: Specifications
SpecIfIcAtIonS General Power supply: 85–260VaC; 50–60Hz Power consumption: 15w Overall dimensions: 45 x 483 x 240mm Weight: 3kg (net); 4kg (gross) Audio I/O type: Digital PCM Sample rates: up to 96kHz I/O resolution: 24 bits Varispeed: approx. ±4% Data format: aeS/eBu Processor power: >3GFlOPs latency: <10 samples Process resolution: 40 bits... -
Page 26: Licence And Limited Warranty
In this Licence and Limited Warranty the following words and phrases shall bear the following meanings: ‘the Company’ is CEDAR Audio Limited of 20 Home End, Fulbourn, Cambridge CB21 5BS, UK; ‘a/the System’ means an instance of the DNS 8 L sound processing system comprising hardware and software developed by the Company;... -
Page 27: Limitation Of Liability
wAIver The waiver by either party of a breach of the provisions hereof by the other shall not be construed as a waiver of any succeeding breach of the same or other provisions, nor shall any delay or omission on the part of either party to exercise any right that it may have under this Licence operate as a waiver of any breach or default by the other party. - Page 28 Copyright CeDar audio ltd, © 2012 - 2016 CeDar is a registered trademark of CeDar audio ltd DnS One, DnS 8 live, DnS 8 CS, DnS1000, DnS1500, DnS2000 and DnS3000 are trademarks of CeDar audio ltd e&Oe, Subject to revision at the Company’s sole discretion...
Need help?
Do you have a question about the dns 8 live and is the answer not in the manual?
Questions and answers