Panasonic KX-TGE632 Operating Instructions Manual
Cordless telephone with digital answering machine
Hide thumbs
Also See for KX-TGE632:
- Operating instructions manual (72 pages) ,
- Operating instructions manual (72 pages)
Table of Contents
Advertisement
Quick Links
Cordless Telephone with Digital Answering Machine
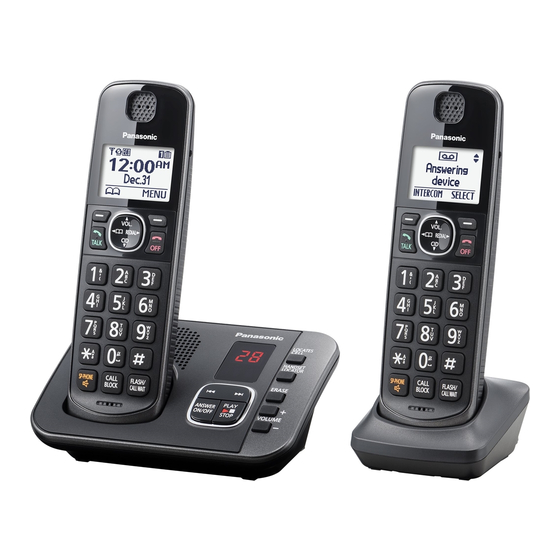
Model shown is KX-TGE632.
Before initial use, see "Getting Started"
on page 10.
Thank you for purchasing a Panasonic product.
Please read these operating instructions before using the unit and save them for
future reference.
Consulte "Guía Rápida Española", página 63.
For assistance, visit our Web site: http://shop.panasonic.com/support for
customers in the U.S.A.
Please register your product: http://shop.panasonic.com/support
Operating Instructions
Model No.
KX-TGE632
KX-TGE633
KX-TG3834
KX-TGE645
KX-TG3845
Advertisement
Table of Contents

Related Manuals for Panasonic KX-TGE632


Summary of Contents for Panasonic KX-TGE632
- Page 1 Thank you for purchasing a Panasonic product. Please read these operating instructions before using the unit and save them for future reference. Consulte “Guía Rápida Española”, página 63. For assistance, visit our Web site: http://shop.panasonic.com/support for customers in the U.S.A. Please register your product: http://shop.panasonic.com/support...
-
Page 2: Table Of Contents
Table of Contents Introduction Caller ID Service Model composition ........3 Using Caller ID service .......42 Accessory information ........3 Caller list ............42 Graphical symbols for use on equipment and Answering System their descriptions ..........5 Answering system ........44 Important Information Turning the answering system on/off ..44 For your safety ..........6 Greeting message ........44 Important safety instructions ......7... -
Page 3: Introduction
Introduction Model composition n KX-TGE630 series n KX-TGE640 series R Model shown is KX-TGE632. R Model shown is KX-TGE645. Base unit Handset Series Model No. Part No. Part No. Quantity KX-TGE630 KX-TGE632 KX-TGE630 KX-TGEA60 series KX-TGE633 KX-TGE630 KX-TGEA60 KX-TG3834 KX-TGE630... - Page 4 This product can be purchased online. Please visit our Web site: http://shop.panasonic.com/support By registering the key detector (4 max.) to a Panasonic Digital Cordless Phone and attaching it to an easy-to-lose item in advance, you can locate and find the mislaid item to which the key detector is attached.
-
Page 5: Graphical Symbols For Use On Equipment And Their Descriptions
Double Insulation or Reinforced Insulation) Direct current (D.C.) “ON” (power) Protective earth “OFF” (power) Protective bonding earth Stand-by (power) Functional earth “ON”/“OFF” (power; push-push) For indoor use only Caution, risk of electric shock For assistance, please visit http://shop.panasonic.com/support... -
Page 6: Important Information
R The AC adaptor is used as the main such devices to malfunction resulting in an disconnect device. Ensure that the AC accident. outlet is installed near the product and is easily accessible. For assistance, please visit http://shop.panasonic.com/support... -
Page 7: Important Safety Instructions
Failure to follow these instructions may Base unit location/avoiding noise cause the batteries to swell or explode. Attention: The base unit and other compatible Panasonic units use radio waves to communicate with each other. R For maximum coverage and noise-free communications, place your base unit: –... -
Page 8: Other Information
R Do not use benzine, thinner, or any abrasive powder. Other information CAUTION: Risk of explosion if battery is replaced by an incorrect type. Dispose of used batteries according to the instructions. For assistance, please visit http://shop.panasonic.com/support... -
Page 9: Specifications
Standby: 1.0 W Maximum: 4.3 W Charger: Standby: 0.1 W Maximum: 1.8 W R Operating conditions: 0 °C – 40 °C (32 °F – 104 °F), 20 % – 80 % relative air humidity (dry) For assistance, please visit http://shop.panasonic.com/support... -
Page 10: Getting Started
DSL/ADSL service. R Confirm correct polarities ( Note: R Use only the supplied Panasonic AC adaptor PNLV226. R Follow the directions on the display to set up the unit. For assistance, please visit http://shop.panasonic.com/support... - Page 11 Note for battery installation R Use the supplied rechargeable batteries. For replacement, we recommend using the Panasonic rechargeable batteries noted on page 4, 7. Note for battery charging R It is normal for the handset to feel warm during charging.
-
Page 12: Controls
Intelligent eco mode This feature automatically reduces handset power consumption by suppressing handset transmission power when the handset is close to the base unit. R When this feature is activated, displayed. KX-TGE630 KX-TGE640 For assistance, please visit http://shop.panasonic.com/support... - Page 13 MHOLDN MCONFN MREDIALN MPAUSEN MFLASHN MCALL WAITN MZN (SP-PHONE: Speakerphone) SP-PHONE indicator Message counter N (Repeat) N (Skip) N (PLAY/STOP) Message indicator ( MANSWER ON/OFFN MLOCATES CELLN MLOCATORN MINTERCOMN MERASEN MMUTEN MjN/MkN (VOLUME: Volume up/down) Microphone For assistance, please visit http://shop.panasonic.com/support...
-
Page 14: Display Icons
Enter the current hour and minute Line in Someone is using the line. (12-hour clock format) by selecting 2 digits for each. Example: 9:30 09 30 *: Select “AM” or “PM”. For assistance, please visit http://shop.panasonic.com/support... -
Page 15: Recording Your Greeting Message
When this feature is turned on, the unit notifies you as follows. n When you end a call: – The unit plays a voice announcement when the battery is low or needs charging. For assistance, please visit http://shop.panasonic.com/support... -
Page 16: Making/Answering Calls
Dial the phone number. R A 3.5 second pause is inserted each time you press MDN (Pause) on the handset or When the other party answers, speak into MPAUSEN on the base unit. the microphone. For assistance, please visit http://shop.panasonic.com/support... -
Page 17: Answering Calls
Press MjN or MkN repeatedly to select the desired volume. Mute R To turn the ringer off, press and hold MkN until the unit beeps. Handset Press MMUTEN during a call. To return to the call, press MMUTEN. For assistance, please visit http://shop.panasonic.com/support... - Page 18 To switch between calls, press MCALL WAITN. R Depending on the condition and quality of your telephone line, this feature may emphasize existing line noise. If it becomes difficult to hear, turn this feature off. For assistance, please visit http://shop.panasonic.com/support...
- Page 19 MHOLDN. To resume the conference, ear-receiver mode to the press MCONFN. speakerphone mode. Wait for the paged party to answer. R If the paged party does not answer, press MBACKN to return to the outside call. For assistance, please visit http://shop.panasonic.com/support...
-
Page 20: Handset Locator
R To change the handset ringer volume and ringer tone for intercom, see page 33. MMENUN#248 Press and hold MCLEARN until all digits Making an intercom call are erased. a MSAVEN a MOFFN Handset MMENUN a MbN: “Intercom” a MSELECTN For assistance, please visit http://shop.panasonic.com/support... -
Page 21: Power Backup Operation
When you finish talking, press MZN. R Do not lift the power supplying handset from the base unit during power backup mode. Turning auto intercom on/off Handset / Base unit KX-TGE640 series: page 3 For assistance, please visit http://shop.panasonic.com/support... - Page 22 Please use the handset close to the base unit. Making a call using the redial list n When only 1 handset is registered: Lift the handset. MEN REDIAL MbN: Select the desired entry. For assistance, please visit http://shop.panasonic.com/support...
-
Page 23: Call Block
MMENUN a MbN: “Add” a MSELECTN Single phone numbers and ranges of numbers Enter the phone number (24 digits max.). can be stored in the call block list up to 1000 a MSAVEN a MOFFN items in total. For assistance, please visit http://shop.panasonic.com/support... - Page 24 MbN: “Blocked calls count” a MSELECTN a MSELECTN R To exit, press MOFFN. MbN: Select the desired setting. a MCLEARN MSAVEN a MOFFN MbN: “Yes” a MSELECTN a MOFFN Viewing/editing/erasing call block numbers MCALL BLOCKN For assistance, please visit http://shop.panasonic.com/support...
-
Page 25: Automated Call Block
– when programming (depending on (3 digits max.). The default setting is “1”. settings) MCALL BLOCKN a MSELECTN For assistance, please visit http://shop.panasonic.com/support... - Page 26 The unit will play the recorded greeting MbN: “Allow name list” a MSELECTN message for automated call block. a MbN: Select the desired entry. MOFFN R After viewing, press MOFFN to exit. MERASEN a MbN: “Yes” a MSELECTN a MOFFN For assistance, please visit http://shop.panasonic.com/support...
- Page 27 MbN: “Pre-recorded” a MSELECTN MYESN a MOFFN Playing back the greeting message for automated call block MCALL BLOCKN a MSELECTN MbN: “Automated call greeting” a MSELECTN MbN: “Check greeting” a MSELECTN To exit, press MOFFN. For assistance, please visit http://shop.panasonic.com/support...
-
Page 28: Phonebook
R To enter another character that is located on the same dial key, first press MEN to move the cursor to the next space. R If you do not press any dial key within 2 seconds after entering a character, the For assistance, please visit http://shop.panasonic.com/support... - Page 29 Find the desired entry (page 29). to chain dial (page 28). MMENUN a MbN: “Edit” a MSELECTN Edit the name if necessary. a MOKN Edit the phone number if necessary. a MOKN For assistance, please visit http://shop.panasonic.com/support...
-
Page 30: Speed Dial
Edit the phone number if necessary. a MOKN a MSELECTN a MOFFN Erasing an entry Press and hold the desired speed dial key (1 to 9). a MMENUN MbN: “Erase” a MSELECTN MbN: “Yes” a MSELECTN a MOFFN For assistance, please visit http://shop.panasonic.com/support... -
Page 31: Programming
Code Play new message – – #323 Play all message – – #324 Erase all – – #325 message Greeting – #302 Record greeting Check greeting – #303 – #304 Pre-recorded (Reset to pre-recorded greeting) For assistance, please visit http://shop.panasonic.com/support... - Page 32 “Set date & time” Sub-menu 1 Sub-menu 2 Settings Code – – #101 Date and time Memo alarm Alarm1-3 <Off> #720 Once Daily Weekly *1, *4 – <Caller ID auto> #226 – Time adjustment Manual For assistance, please visit http://shop.panasonic.com/support...
- Page 33 06:00 AM> Select group #G241 Group 1-9 Set date & time – #101 Date and time Memo alarm <Off> #720 – Alarm1-3 Once Daily Weekly *1, *4 <Caller ID auto> #226 – Time adjustment Manual For assistance, please visit http://shop.panasonic.com/support...
- Page 34 #790 Block a single – #217 Call block number Block range of – numbers Block unknown CID #240 Block (CID: Caller ID) <Unblock> One ring for <Yes> #173 blocked call Blocked calls count – #177 For assistance, please visit http://shop.panasonic.com/support...
- Page 35 80 ms #121 Set flash time 90 ms 100 ms 110 ms 160 ms 200 ms 250 ms 300 ms 400 ms 600 ms <700 ms> 900 ms *1, *12 #122 – Set line mode <B> For assistance, please visit http://shop.panasonic.com/support...
- Page 36 If you subscribe to a distinctive ring service (such as IDENTA-RING), select a tone (tone 1 to 2). If you select a melody, you cannot distinguish lines by their ringers. The preset melodies in this product (“Tone 3” - “Melody 10”) are used with permission of © 2004-2013 Copyrights Vision Inc. For assistance, please visit http://shop.panasonic.com/support...
-
Page 37: Alarm
“Weekly” activated. Alarm sounds weekly at the set time(s). R If you want to make an outside call when the snooze function is activated, please stop the snooze function before making the call. For assistance, please visit http://shop.panasonic.com/support... -
Page 38: Silent Mode
R If the unit is connected to a PBX system, For handset setting: MMENUN#237 you cannot set the baby monitor. For base unit setting (using a R During the monitoring mode, battery handset) : MMENUN#*237 consumption is faster than usual. We For assistance, please visit http://shop.panasonic.com/support... - Page 39 MbN: “On” a MSELECTN Edit the name if necessary. a MOKN MbN: Select “Outgoing call” to Edit the phone number if necessary. a monitor from outside. a MADDN MOKN a MSELECTN MbN: “Phonebook” a MSELECTN For assistance, please visit http://shop.panasonic.com/support...
-
Page 40: Other Programming
MOFFN, then press M base unit. – To answer the call with the base unit, Important: press MZN 3 times. If MMUTEN is pressed, press MZN 2 R See page 5 for information on the available times. model. For assistance, please visit http://shop.panasonic.com/support... - Page 41 This allows the handset to end its wireless connection with the system. MMENUN#131 R All handsets registered to the base unit are displayed. MbN: Select the handset you want to cancel. a MSELECTN MbN: “Yes” a MSELECTN a MOFFN For assistance, please visit http://shop.panasonic.com/support...
-
Page 42: Caller Id Service
R If the entry has already been viewed or phonebook, the stored name in the answered, “ ” is displayed. phonebook is displayed and logged in the caller list. For assistance, please visit http://shop.panasonic.com/support... - Page 43 This feature can be set for each unit (page 35). The default setting is “On”. Note: R Phone numbers from the 4 most recently edited area codes are automatically edited. Erasing selected caller information MCN CID MbN: Select the desired entry. For assistance, please visit http://shop.panasonic.com/support...
-
Page 44: Answering System
“Greeting only”, callers’ messages are not recorded and the unit Base unit plays a different pre-recorded greeting message asking callers to call again. Press MANSWER ON/OFFN to turn on/off the answering system. Handset To turn on: MMENUN#327 For assistance, please visit http://shop.panasonic.com/support... -
Page 45: Listening To Messages
2 or MEN Skip message (during playback) Operation Enter the “Settings” menu MjN or MkN Adjust the speaker volume Play new messages Repeat message Play all messages Skip message Play greeting message N (STOP) Stop playback For assistance, please visit http://shop.panasonic.com/support... -
Page 46: Advanced New Message Alerting Features
From the phonebook: MMENUN#325 MMENUN#338 MbN: “Yes” a MSELECTN a MOFFN MbN: “Notification to” a MSELECTN a MADDN MbN: “Phonebook” a MSELECTN MbN: Select the desired phonebook entry. a MSAVEN a MOFFN For assistance, please visit http://shop.panasonic.com/support... -
Page 47: Remote Operation
If you activate this feature, you must enter the keys to perform different operations. remote access code (page 48) to play the new message from the new message alert call. This is so that unauthorized parties For assistance, please visit http://shop.panasonic.com/support... - Page 48 R You can either hang up, or enter your To start the voice guidance, press 9. The remote access code again and begin voice guidance announces the available remote operation (page 47). remote commands (page 48). For assistance, please visit http://shop.panasonic.com/support...
-
Page 49: Answering System Settings
(page 12). MMENUN#211 MbN: Select the desired setting. a MSAVEN a MOFFN Caller’s recording time You can change the maximum message recording time allowed for each caller. The default setting is “3 min”. For assistance, please visit http://shop.panasonic.com/support... -
Page 50: Useful Information
MbN: Select the desired setting. a R When storing your voicemail access MSAVEN a MOFFN number and your mailbox password, press MDN (Pause) to add pauses (page 16) between the access number and the password as necessary. Contact your For assistance, please visit http://shop.panasonic.com/support... -
Page 51: Wall Mounting
To listen to voicemail messages, you have to Tuck the telephone line cord inside the dial your voicemail access number manually. wall mounting adaptor (A). Connect the AC adaptor cord and telephone line cord (B). AC adaptor cord For assistance, please visit http://shop.panasonic.com/support... - Page 52 Adjust the adaptor to hold the base unit, then push it in the direction of the arrow until it clicks into place. Mount the unit on a wall then slide down to secure in place. AC adaptor cord For assistance, please visit http://shop.panasonic.com/support...
- Page 53 Useful Information To remove the wall mounting adaptor While pushing down the release levers (A), remove the adaptor (B). Charger Drive the screws ( ) (not supplied) into the wall. 27.2 mm (1 inches) For assistance, please visit http://shop.panasonic.com/support...
-
Page 54: Error Messages
Caller ID service, this to Caller ID. message will not be displayed. R A wrong type of battery such as alkaline or manganese was rechargeable inserted. Use only the rechargeable Ni-MH batteries noted on battery. page 4, 7. For assistance, please visit http://shop.panasonic.com/support... -
Page 55: Troubleshooting
– the first ring is turned off (“No”) (page 24) – automated call block is set to “Block” (page 25) Menu list Problem Cause/solution The display is in a language I R Change the display language (page 14). cannot read. For assistance, please visit http://shop.panasonic.com/support... - Page 56 R The ringer volume is turned off. Adjust the ringer volume (page 17). R Silent mode is turned on. Turn it off (page 38). I cannot make a call. R The dialing mode may be set incorrectly. Change the setting (page 15). For assistance, please visit http://shop.panasonic.com/support...
- Page 57 R The Caller ID number auto edit feature is turned off. Turn numbers are not edited it on and try again (page 35). automatically. R You need to call back the edited number to activate Caller ID number auto edit. For assistance, please visit http://shop.panasonic.com/support...
- Page 58 R You are entering the wrong remote access code. If you have forgotten your remote access code, enter the remote access code setting to check your current code (page 48). R The answering system is turned off. Turn it on (page 48). For assistance, please visit http://shop.panasonic.com/support...
- Page 59 Insert the batteries and charge fully before use. If the unit does not work properly, contact an authorized service center. Caution: R To avoid permanent damage, do not use a microwave oven to speed up the drying process. For assistance, please visit http://shop.panasonic.com/support...
-
Page 60: Fcc And Other Information
(if But if advance notice isn't practical, the applicable) when using this phone. Consult telephone company will notify the customer with your audiologist or Hearing Aid as soon as possible. Also, you will be For assistance, please visit http://shop.panasonic.com/support... - Page 61 If this equipment does cause harmful interference to radio or television reception, which can be determined by turning the equipment off and on, the user is For assistance, please visit http://shop.panasonic.com/support...
- Page 62 Useful Information Compliance with TIA-1083 standard: Telephone handsets identified with this logo have reduced noise and interference when used with T-Coil equipped hearing aids and cochlear implants. Compatible with Hearing Aid T-Coil TIA-1083 For assistance, please visit http://shop.panasonic.com/support...
-
Page 63: Guía Rápida Española
(RJ11C) hasta que escuche un clic. 5 Se requiere un filtro DSL/ADSL (no incluido) si tiene este tipo de servicio. Nota: L Use solo el adaptador de corriente alterna Panasonic PNLV226 que se suministra. Cargador 1 Conecte el adaptador de corriente alterna a la toma de corriente. - Page 64 L NO utilice baterías alcalinas, de manganeso ni de Ni-Cd. L Confirme que las polaridades estén correctas (S, T). L Cambie el idioma de la pantalla. L Confirme que aparezca “Cargando” ( Retire la batería Para obtener ayuda, visite http://shop.panasonic.com/support (solo en inglés)
- Page 65 Después de que se emita un pitido, sostenga el auricular a una distancia aproximada de 20 cm (8 pulgadas) y hable con claridad en el micrófono (máx. de 2 minutos). Oprima {PARAR} para dejar de grabar. s {OFF} Para obtener ayuda, visite http://shop.panasonic.com/support (solo en inglés)
- Page 66 L En el paso 3, puede cambiar el idioma de introducción de caracteres. ( s {r}: Seleccione el idioma deseado. s {OK} {<} k s {r}: Seleccione la entrada deseada. s {C} Para hacer llamadas Para obtener ayuda, visite http://shop.panasonic.com/support (solo en inglés)
- Page 67 Esto no daña las baterías. tiempo? L Oprima {CALL WAIT} cuando escuche el tono de llamada en espera. ¿Cómo se contestan las llamadas en espera (segunda llamada)? Para obtener ayuda, visite http://shop.panasonic.com/support (solo en inglés)
-
Page 68: Appendix
Appendix Customer services Shop Accessories! for all your Panasonic gear Go to h p://shop.panasonic.com/support Get everything you need to get the most out of your Panasonic products Accessories & Parts for your Camera, Phone, A/V products, TV, Computers & Networking, Personal Care, Home Appliances, Headphones, Ba eries, Backup Chargers &... -
Page 69: Limited Warranty (Only For U.s.a.)
If your product does not work properly because of a defect in materials or workmanship, Panasonic Corporation of North America (referred to as “the warrantor”) will, for the length of the period indicated on the chart below, which starts with the date of original purchase (“warranty period”), at its option either (a) repair your product with new or refurbished parts,... - Page 70 Service Center. If the problem is not handled to your satisfaction, then write to: Consumer Affairs Department Panasonic Corporation of North America 661 Independence Pkwy Chesapeake, VA 23320 PARTS AND SERVICE, WHICH ARE NOT COVERED BY THIS LIMITED WARRANTY, ARE YOUR RESPONSIBILITY.
-
Page 71: Index
Index Flash: 18, 35 Groups: 28 Index Handset Deregistration: 41 3-way conference: 19 Locator: 20 Additional handset: 40 Name: 40 Alarm: 37 Registration: 41 Answering calls: 17 Hold: 17 Answering system Intercom: 20 Call screening: 49 Erasing messages: 45, 46, 48 Key detector: 34, 36 Greeting message: 44 Key tone: 35... - Page 72 3 Use rechargeable Ni-MH batteries. (Alkaline/Manganese/Ni-Cd batteries CANNOT be used.) 4 Read troubleshooting page in the Operating Instructions. Visit our Web site: http://shop.panasonic.com/support L FAQ and troubleshooting hints are available. For your future reference We recommend keeping a record of the following information to assist with any repair under warranty.
Need help?
Do you have a question about the KX-TGE632 and is the answer not in the manual?
Questions and answers
is it possible to connect the kx-tgr632 phone to the internet
No, the Panasonic KX-TGE632 phone cannot connect to the internet.
This answer is automatically generated