
Related Manuals for SixThreeZero EVRYJOURNEY


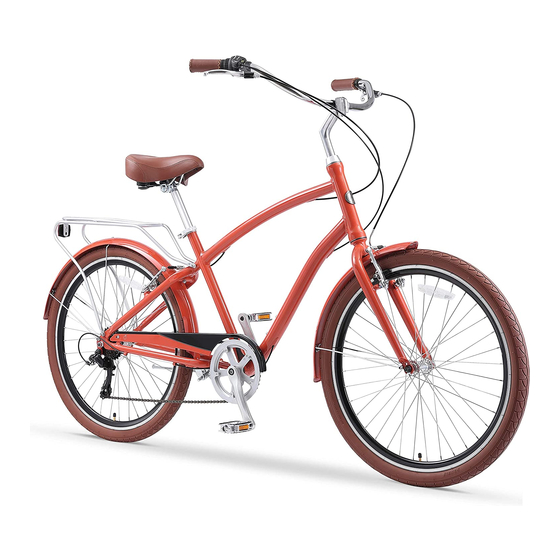
Summary of Contents for SixThreeZero EVRYJOURNEY
- Page 1 E B I K E A SS EMB LY G UI DE E V RYJ O U R N E Y 1 , 3 , 7 , & 2 1 S P E E D S I X T H R E E Z E R O...
- Page 3 O UR C OM M ITME NT We want you to love your bike as much as we do. If you run into any issues, no matter how small, let us know and we’ll take care of it. S I X T H R E E Z E R O T H E T E A M @ S I X T H R E E Z E R O .
- Page 4 MEET JACO B, O UR MEC HANIC Need assembly, repair, or installation assistance? He’s your guy! Want live help? Call or email to schedule an appointment. M E C H A N I C S @ S I X T H R E E Z E R O . C O M 3 1 0 .
- Page 5 A N OT E F R O M O U R M E C H A N I C Welcome to the sixthreezero experience. Now for the fun rush, and enjoy the process. Part of the fun in building your part...
-
Page 6: Tool Syou'll Ne E D
TOOL S YOU’LL NE E D Creating something wonderful with your own hands is basically the best feeling ever. We want you to have fun building your new bike, so there’s only a few things you need to get started. - Page 7 S C I S S O R S 8 , 1 0 , 1 3 , A N D 1 5 M M 4 , 5 , A N D 6 M M C R E S C E N T W R E N C H E S A L L E N K E Y ( u s e t o c u t z i p t i e s ) o r u s e t h e m u l t i - t o o l p r o v i d e d...
- Page 8 W HAT ’S IN EACH BOX? Lay out all the parts in front of you. Make sure you have all the parts before getting started. P E D A L S + R E A R A X E L 1 4 M M 1 5 M M 1 2 M M...
- Page 9 F R O N T R E F L E C T O R p r e - i n s t a l l e d B AT T E RY Q U I C K R E L E A S E F R O N T W H E E L Seat Post B AT T E RY C H A R G E R...
- Page 10 E X P E R I E N C E A S S E M B LY B O O K L E T G U I D E M U LT I -T O O L 4 , 5 , A N D 6 M M A L L E N K E YS B O X 2...
- Page 11 P E DA L S LO C K N U T C A P S E AT Q U I C K R E L E A S E S K E W E R B O X 3 B O X 4...
-
Page 12: Bike Parts
BIKE PARTS R EF E RE NCE All the names of all the parts for your bike, all in one place. Keep this handy during assembly, and everything will go just fine. - Page 13 H A N D L E B A R T H R OT T L E G R I P S LC D D I S P L AY B R A K E L E V E R S E AT S E AT P O S T R E F L E C TO R S E AT P O S T C L A M P...
- Page 14 F RO NT W HE EL , F E ND ER + REAR RACK Parts required: Tools you’ll need: F R O N T F E N D E R Q U I C K R E L E A S E P H I L L I P S 4 M M 1 0 M M...
- Page 15 Spin the front fork so that the the handlebars are Pinch front brake arms, pulling the metal tubing up and pointing inwards. out until it is disengaged and the brake arms are open. M E TA L T U B I N G C O R R E C T I N C O R R E C T The brakes are behind the fork.
- Page 16 Locate the arrow on the wall of the tire and position the Reattach the brake arms by connecting the metal tire like the image below. With the arrow pointing tube as shown. forward, insert the wheel into the fork dropouts. The axle nuts will fall inside the fork entry.
- Page 17 QR2 QR3 - QR1 All of the components for the quick release skewer are Insert the quick release skewer through the hub opening attached out of the box. on either side of the wheel, as shown below. and remove QR4. Do not remove Unscrew Slide quick release skewer completely through the hub.
- Page 18 - QR1 Place on the open side of the quick skewer, with the Making sure the wheel is straight, attach smaller end pointing inward. by compressing the spring completely. Hold the quick release lever in place and tighten lightly. W E S T R I V E F O R P E R F E C T, A LT H O U G H I T ’ S N OT A LWAYS P O S S I B L E , W E N E V E R L E AV E A R I D E R B E H I N D .
- Page 19 Lift the lever up towards the fork. If the lever does not Once the front wheel is secured, lower the kickstand lock in place smoothly, loosen slightly and try again. and locate the front fender. It will take a small amount of strength, but that is normal. N O T E The lever should be tight enough to feel resistance at a 90º...
- Page 20 P H I L L I P S 1 0 M M ( 2 ) WA S H E R S , N U T F R O N T F E N D E R S C R E W D R I V E R M U LT I -TO O L A N D LO N G B O LT + S T R U T...
- Page 21 P H I L L I P S ( 2 ) P H I L L I P S 4 M M ( 2 ) 4 M M A L L E N R E A R S C R E W D R I V E R H E A D S C R E W S A L L E N K E Y K E Y S C R E W S...
- Page 22 4 M M ( 2 ) 4 M M A L L E N P H I L L I P S ( 2 ) P H I L L I P S A L L E N K E Y K E Y S C R E W S S C R E W D R I V E R H E A D S C R E W S...
- Page 23 H AN D L EBAR, S EAT + PEDAL S Seat Post H A N D L E B A R P E D A L S 6 M M B I C Y C L E A L L E N K E Y P U M P 1 3 M M + 1 5 M M LO C K...
- Page 24 Seat Post LO C K N U T C A P H A N D L E B A R ST2. Place the lock nut cap in between Line up the stem, frame, and front wheel, then tighten the handlebar stem bolt.
- Page 25 6 M M P H I L L I P S A L L E N K E Y S C R E W D R I V E R Loosen handlebar adjustment bolt using the 6mm Allen Straighten the reflector so that it points forward. key.
- Page 26 1 3 M M M U LT I -TO O L Open seat post clamp. Holding the seat post firmly, insert Place the seat onto the seat post, using the 13mm multi- into seat post tube until the top is level with your waist. tool to tighten the nuts under the seat.
- Page 27 P E D A L S 1 5 M M M U LT I -TO O L Select the pedal stamped R and locate the right side of the Locate the pedal stamped L and align with the left crank bike (with the chain and chain guard).
- Page 28 B I C Y C L E P U M P Pump air into the tires to PSI 40-65MAX, as recommended Sit on the bike and check the angle formed by your knee. on the sidewall of the tire. If your knee forms the incorrect angle, use the seat post clamp lever to raise the seat until you have a subtle bend or achieve a comfortable height.
- Page 29 H AV I N G T R O U B L E ? C A L L 3 1 0 . 9 8 2 . 2 8 7 7 O R E M A I L T H E T E A M @ S I X T H R E E Z E R O . C O M...
- Page 30 MEC HAN IC AL DI SC BRAK E ALIGNM ENT D I AG R A M D I AG R A M C A B L E + H O U S I N G B R A K E L E V E R A D J U S T E R S PA D S M O U N T I N G B O LT S...
- Page 31 Before beginning the caliper alignment process, it is Check that the lever arm is released and in its relaxed important to check other components that could effect position by loosening the cable pinch bolt. This ensures your brake adjustment are set correctly. full lever arm travel during braking.
- Page 32 Begin by loosening the caliper mounting bolts. This alows the caliper to float. Turn the inner pad adjuster all the way in (clockwise), then back off about 1/4 turn Pull and hold the brake lever tight. This aligns the caliper body to the rotor.
- Page 33 F I N A L A D J U S T M E N T S These final adjustments apply to all mechanical disc brakes. The end goal is a caliper that is parallel to the rotor, with even gaps on each side and an adequate lever feel.
- Page 34 Spin the wheel and check for pad rub. If there is no pad rub, the alignment is complete — skip to STEP 5. If the wheel slows quickly, or makes a rubbing noise, the pads need further adjustment. Inspect the alignment of the pads to the rotor.
- Page 35 If the pads are not parallel to the rotor, the caliper body Finish by fully tightening the pinch bolt and each needs to be adjusted. Loosen one bolt, move the body mounting bolt. Typical torque specs are about 6 Nm for slightly to the side that has no gap, snug the bolt and the mounting bolts and 4 Nm for the pinch bolt.
- Page 36 C O N S I D E R AT I O N S The brake is now properly adjusted and ready to test ride. Here are some other considerations that may come into play during this process: BRAKE PAD WEAR As the pads wear, you will need to make further adjustments to keep the lever feel consistent.
- Page 37 CAB LE & HOUSING WEAR Worn, dirty or corroded cable and housing can drastically affect the performance of the braking system. Replace these components if necessary — see Brake Housing & Cable Installation for Upright Bars or Drop Bars. MOUNT FACING In some cases, frame mounts may not be perfectly square to the rotor, causing lateral misalignment at the caliper.
- Page 38 7 S P EED D ER AILLE U R TU NI NG D I AG R A M TO O L S R E Q U I R E D B A R R E L C A B L E A D J U S T E R H L I M I T S C R E W L L I M I T S C R E W...
- Page 39 To adjust the rear derailleur, first twist the shifter until the Rotate pedals until the chain falls into the smallest cog. number 7 is highlighted on the shift knob. S M A L L E S T C O G H AV I N G T R O U B L E ? C A L L 3 1 0 .
- Page 40 P H I L L I P S S C R E W D R I V E R Turn the barrel adjuster located on the rear derailleur If the chain still hasn’t reached the smallest cog, then you clockwise until it stops. will need to adjust the “High Gear”...
- Page 41 9 M M M U LT I -TO O L Now adjust the cable tension, which controls how your bike will shift. Using a 9mm crescent wrench or the multi-tool, loosen the cable adjustment screw and pull on the cable. While keeping tension on the cable, tighten the cable adjustment screw. Rotate the pedals and try to shift between gears.
- Page 42 2 1 SP EED D ER AILLE U R TU NI NG D I AG R A M F R O N T D E R A I L L E U R R E A R C A S S E T T E S H I F T E R C A B L E ( C O G S ) C L A M P, N U T &...
- Page 43 N O T E F R I C T I O N S H I F T E R C A U T I O N We tune every bike before packaging, but The front shifter is a “Friction” shifter. This Please be careful with the derailleur cage as it I would still recommend checking the tun- just means that there is no specific level set...
- Page 44 D E R A I L L E U R P O S I T I O N Check your bike’s tuning by taking it for a test ride. Shift Shift the front derailleur to the smallest gear. the front derailleur up and down to check each gear while riding.
- Page 45 9 M M 2 P E N N I E S M U LT I -TO O L Use a 9mm wrench/socket to loosen the nut that Lift the chain and pull the cage away from the bike clamps the shifting cable to the front derailleur. This will to place a penny in between the outer cage and the disconnect the shifting cable from the front derailleur.
- Page 46 9 M M M A L L E T 2 P E N N I E S M U LT I -TO O L O R H A M M E R Untighten the clamp with a 9mm wrench/socket a quar- ter turn at a time until you are able to tap the derailleur slightly up and down without it falling completely down the seat tube.
- Page 47 9 M M M U LT I -TO O L Once the height is set, we must check the angle of the If your outer cage plate is NOT parallel to the largest cage. Lift the chain and pull the cage forward and view chainwheel, untighten the clamp a quarter turn at a the cage from above.
- Page 48 9 M M M A L L E T M U LT I -TO O L O R H A M M E R Based on the angle, tap on the back or the front of the cage after every turn until it moves slightly. Tap the cage left or right to align the cage plate and the largest chainwheel.
- Page 49 N O T E Derailleurs work off of tension, and this is 9 M M the reason that they are designed with High M U LT I -TO O L and Low Limiter screws. The High and Low Limiters essentially act as boundaries so that no matter how much tension you put into Pull the shifting cable up, align it behind the clamping or take off the shifter cable, the derailleur will...
- Page 50 L I M I T E R S C R E W S P H I L L I P S S C R E W D R I V E R Now, let’s check the H limit screw. Begin by shifting the Reference the bottom left image below to check if the derailleur to 3rd gear.
- Page 51 Now, let’s check the L limit screw. Begin by shifting the derailleur to 1st gear. While turning the pedals, shift into 1st gear. It may take more than 1 click. If the chain does not fall off the smallest chainwheel after shifting from 2nd to 1st, the L limit screw is close to proper positioning.
- Page 52 P H I L L I P S P H I L L I P S S C R E W D R I V E R S C R E W D R I V E R Reference the image below on the left, if the chain is cen- Based on the screws original position, take note of the tered in between the inner and outer cage plates, you amount of quarter turn rotations given in either direction...
- Page 53 C A B L E T E N S I O N A N D S H I F T I N G Now that you have adjusted the limiter screws, let’s Locate the barrel adjuster located on the front shifter check each gear to make sure that the derailleur is where the cable comes out of the shifter.
-
Page 54: Battery Installation
BAT TERY INS TAL L ATIO N W E S T R I V E F O R P E R F E C T, A LT H O U G H I T ’ S N OT A LWAYS P O S S I B L E , W E N E V E R L E AV E A R I D E R B E H I N D . - Page 55 To be able to use the electric motor, the battery must be mounted by sliding the fully charged battery forward into the battery holder. Follow the guides on the rear rack and battery for proper installation. H AV I N G T R O U B L E ? C A L L 3 1 0 . 9 8 2 . 2 8 7 7 O R E M A I L T H E T E A M @ S I X T H R E E Z E R O . C O M...
- Page 56 The battery automatically locks into the bike when fully The battery must be locked when riding or it may fall out. inserted in the battery holder. The locking mechanism The key does not have to be in to operate the bike. Store unlocks when the key is turned to the open position, the keys in a safe place.
- Page 57 The red on/off switch is located on the bottom of battery. After fully inserting the battery into place, turn the battery on by flipping the switch to the “|” position. Be sure to turn off the power when the bicycle is not in use or is recharging by clicking the battery switch to the off “O”...
-
Page 58: Battery Charger
BAT TERY CH ARGE R W E S T R I V E F O R P E R F E C T, A LT H O U G H I T ’ S N OT A LWAYS P O S S I B L E , W E N E V E R L E AV E A R I D E R B E H I N D . - Page 59 Included with your new sixthreezero is a lithium ion battery, along with a charger, which plugs into a standard household electric outlet. A lithium ion battery requires specially designed chargers. You should never charge your battery with a substitute charger that is not designed for this use.
- Page 60 W E S T R I V E F O R P E R F E C T, A LT H O U G H I T ’ S N OT A LWAYS P O S S I B L E , W E N E V E R L E AV E A R I D E R B E H I N D .
- Page 61 • Only use the battery/charger on sixthreezero approved products. H AV I N G T R O U B L E ? C A L L 3 1 0 . 9 8 2 . 2 8 7 7 O R E M A I L T H E T E A M @ S I X T H R E E Z E R O . C O M...
-
Page 62: Pedal Ass Is T M Ode
D IS PL AY + PEDAL ASS IS T M ODE P E D A L A S S I S T B AT T E R Y M E T E R S P E E D O M E T E R P E D A L A S S I S T C O N T R O L S W E S T R I V E F O R P E R F E C T, A LT H O U G H I T ’... - Page 63 To turn the meter on, make Overrides pedal assistance sure the battery is fully inserted into the sixthreezero and the on/off switch is in the on “|” position. F R E E R I D E...
- Page 64 H AND T HROT TL E C ONT ROL W E S T R I V E F O R P E R F E C T, A LT H O U G H I T ’ S N OT A LWAYS P O S S I B L E , W E N E V E R L E AV E A R I D E R B E H I N D .
- Page 65 When you want to slow down, you simply release the throttle and let it return to its resting position and simultaneously apply the brakes. The sixthreezero also comes with a Throttle Override function which allows the throttle to work in pedal assist modes.
- Page 66 T R O U B L E S H O OT I N G If your sixthreezero is not working, check the Quick Disconnect fittings to make sure they did not come loose or unplugged. There are 4 total colored Quick Disconnect fittings to check: W E S T R I V E F O R P E R F E C T, A LT H O U G H I T ’...
- Page 67 (310) 982-2877 theteam@sixthreezero.com H AV I N G T R O U B L E ? C A L L 3 1 0 . 9 8 2 . 2 8 7 7 O R E M A I L T H E T E A M @ S I X T H R E E Z E R O . C O M...
- Page 68 Q. How long does it take to fully charge the battery? Q. Do I need a driver’s license, insurance or registration? A. Depends on the state of discharge but around 4-5 hours if completely discharged. A. No, you don’t. According to Federal law, electric bikes that are under 750 watts are classified as bicycles.
- Page 69 Q. Can I put a child’s trailer on a Sixthreezero? Q. Can I put a Sixthreezero on a bike rack? A. Yes, you can certainly add a trailer to your Sixthreezero. A. Each bike rear rack has a specific weight limit. Our Contact us for child trailer recommendations.
- Page 70 “Products”) will be free from defects in material and or ancillary/ peripheral equipment not furnished or workmanship under normal use and service. However, approved by Sixthreezero with the Products; (f ) defects this Limited Warranty’s coverage for the Battery is limited or damage caused by assembly, testing, operation,...
- Page 71 Any replaced Battery and removed Battery components longer. Any replaced Bike and Bike components will will become the property of Sixthreezero. Except to any become the property of Sixthreezero. Except to any extent expressly required by applicable law, transfer or extent expressly required by applicable law, transfer or assignment of this Limited Warranty is prohibited.
- Page 72 Battery from the Bike and return the Bike to an To obtain service under this Limited Warranty, you authorized Sixthreezero facility, in an adequate container must submit to Sixthreezero a Limited Warranty claim for shipping, accompanied by: (i) the original sales receipt that includes the following material and information:...
- Page 73 PURPOSE, ARE LIMITED TO THE DURATION OF THIS LIMITED WARRANTY. PARTY EQUIPMENT AND SOFTWARE RESTS SOLELY WITH THE USER AND IN NO EVENT WILL SIXTHREEZERO BE LIABLE FOR DAMAGES IN EXCESS OF THE DIRECT VENDOR, OWNER OR SUPPLIER OF SUCH THIRD-PARTY THE PURCHASE PRICE OF THE PRODUCT OR FOR, WITHOUT LIMITATION, EQUIPMENT AND SOFTWARE.
- Page 74 The arbitration will be conducted before a single ALL DISPUTES WITH SIXTHREEZERO ARISING IN ANY WAY arbitrator, whose award must not exceed, in form or FROM THIS LIMITED WARRANTY OR THE SALE, VALUE, amount, the relief allowed by the applicable law.
- Page 75 If any portion of this Limited Warranty is held to be purchase of the Product, (1) sending notice by e-mail illegal or unenforceable, such partial illegality or to optout@SIXTHREEZERO.com, with the subject line: unenforceability shall not affect the enforceability of “Arbitration Opt Out. ” The opt-out email must include (a) the remainder of the Limited Warranty.
- Page 76 P L E A S E R E G I S T E R Y O U R S I X T H R E E Z E R O AT S I X T H R E E Z E R O . C O M / R E G I S T E R You must register your sixthreezero within 30 days of purchase for warranty to be valid...
- Page 77 B AT T E R Y S E R I A L LO C AT I O N Most Sixthreezero bicycles have their serial number Each Sixthreezero battery has a serial number imprinted stamped into the headtube of the bicycle. Contact us if below a barcode on a metallic sticker.
- Page 78 C O NG RAT U L ATI ONS You did it! Time to take your brand new bike for a spin. Still have questions? We’re happy to help. Want to share your journey with us? We’re happy about that, too. S I X T H R E E Z E R O T H E T E A M @ S I X T H R E E Z E R O .
- Page 80 T H E T E A M @ S I X T H R E E Z E R O . C O M S I X T H R E E Z E R O LO S A N G E L E S , C A 3 1 0 .
Need help?
Do you have a question about the EVRYJOURNEY and is the answer not in the manual?
Questions and answers