Table of Contents
Advertisement
Available languages
Available languages
Quick Links
Advertisement
Table of Contents

Related Manuals for PILOTAGE NANO-X2


Summary of Contents for PILOTAGE NANO-X2
- Page 1 МИНИ-КВАДРОКОПТЕР NANO-X2 Инструкция по эксплуатации...
-
Page 2: Table Of Contents
СОДЕРЖАНИЕ Меры предосторожности . . . . . . . . . . . . . . . . . . . . . . . . . . . . . . . . . . . . . . . . . . . . . . . . . . . . . . . . . . . . . . . . . . . . . . . . . . . . . . . . . . . . . . . . . . . . . . . . 3 Комплектация... - Page 3 CONTENTS Precautions . . . . . . . . . . . . . . . . . . . . . . . . . . . . . . . . . . . . . . . . . . . . . . . . . . . . . . . . . . . . . . . . . . . . . . . . . . . . . . . . . . . . . . . . . . . . . . . . . . . . . . . . . . . . . . . 11 Package contents .
-
Page 4: Меры Предосторожности
МЕРЫ ПРЕДОСТОРОЖНОСТИ 1 . Не оставляйте литиевую батарею во время зарядки без присмотра, никогда не превышайте рекомендованное время зарядки . 2 . Для зарядки литиевой батареи модели используйте только оригинальное зарядное устройство из комплекта этой модели . 3 . Не пытайтесь разбирать или модернизировать литиевую батарею или модель . 4 . -
Page 5: Комплектация
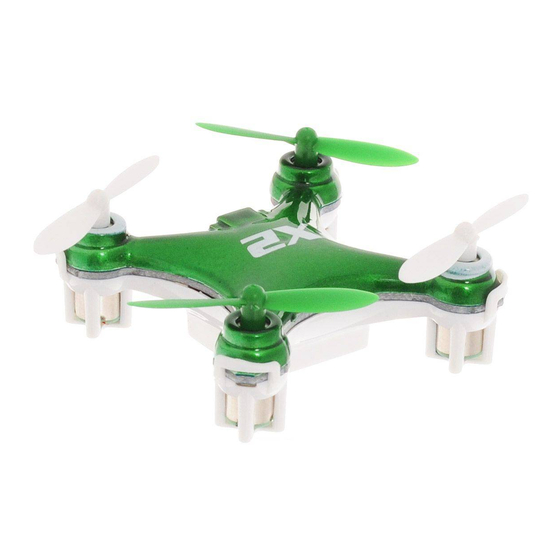
КОМПЛЕКТАЦИЯ USER`S MANUAL 1 . Радиоуправляемый квадрокоптер Nano-X2 4 . USB кабель для зарядки 2 . Передатчик 5 . Инструкция 3 . Комплект запасных пропеллеров Индикатор питания Триммер тангажа Газ/курс резкая/плавная Тангаж/ крен функция кульбит скорость реакции Триммер крена Выключатель питания... -
Page 6: Выбор Места Для Полетов
ВЫБОР МЕСТА ДЛЯ ПОЛЕТОВ Для полетов выберите просторное помещение, где нет никаких препятствий, людей и животных . ВНИМАНИЕ! • Пожалуйста, перед взлетом убедитесь, что вам достаточно места для полета . • Во время полета постоянно держите модель в поле зрения . • Дети младше 14 лет должны запускать модель только под опекой взрослых . ВАЖНО! • Дальность... -
Page 7: Перед Полетом
1 . Откройте крышку отсека батарей на задней панели передатчика . 2 . Соблюдая полярность, как показано на рисунке, установите в отсек две батарейки ААА 1,5V (в комплект не входят) . 3 . Закройте крышку отсека батарей передатчика . ЗАРЯДКА АККУМУЛЯТОРА Соблюдая полярность, соедините соответствующий разъем USB кабеля с разъе- мом... -
Page 8: Управление
УПРАВЛЕНИЕ ВНИМАНИЕ! Имейте в виду, работать ручками управления при управлении моделью следует плавно и нежно . В процессе выполнения некоторых маневров аппарат может терять высоту, поэтому будьте готовы парировать тенденцию к потере высоты небольшим увеличением оборотов при помощи ручки газа передатчика . При перемещении левой ручки передатчика от себя модель набирает высоту, при перемещении... -
Page 9: Функция Кульбит
ФУНКЦИЯ КУЛЬБИТ Все 3 режима могут быть использованы для выполнения в воздухе кульбита . Нажмите сверху вниз на правую ручку передатчика, прозвучит сигнал «ди», указывающий, что включена функция «кульбит» . ВНИМАНИЕ! Данная модель способна во время полета при отклонении ручки управления передатчика до упора выполнить кульбит на 360 C° . -
Page 10: Установка Пропеллеров
УСТАНОВКА ПРОПЕЛЛЕРОВ Обратите внимание, на корпусе квадрокоптера, над двигателями, имеются маркировочные кольца белого цвета . Белые пропеллеры необходимо устанавливать на двигатели, над которыми кольца белого цвета . Соответственно цветные про- пеллеры должны быть установлены над двигателями, которые не помечены белыми кольцами . ВНИМАНИЕ! Если... -
Page 11: Неполадки И Их Устранение
Если невозможно отрегулировать нормальный полет модели при помощи триммеров, пожалуйста, выполните калибровку акселерометра модели, как описано ниже: 1 . После инициализации модели с передатчиком, пожалуйста, установите квадрокоптер на ровную горизонтальную поверхность . 2 . Включите самую резкую скорость реакции, а затем установите ручку газа в положение до упора на себя . -
Page 12: Precautions
PRECAUTIONS 1 . It is highly forbidden to charge it for a long time under unattended condition so as to avoid the accident . 2 . Please use the original charger included for charging this product . 3 . It is highly forbidden to decompose or disassemble the battery . 4 . Batteries are forbidden to be used or kept under high temperature or heat source or near the flammable product . 5 . -
Page 13: Package Contents
PACKAGE CONTENTS USER`S MANUAL 1 . UFO 4 . USB Charging Line 2 . Remote Control 5 . Manual 3 . Set of blades Power indicator Trimmer for Ascending/Descending (Forward/Backward) Throttle/Steering/ Quick/Slow Speed control lever Ascending & Descending (Forward/Backward)/ Aileron (left or right... -
Page 14: Environment For Fly
ENVIRONMENT FOR FLY Please choose to fly in spacious indoor environment; also there is no obstacle or crowd or animal nearby . NOTE: • Please make sure the flying environment is suitable for flying before flying this aircraft . When flying, please do not let your aircraft fly beyond your eye scope . • This product should be played under the guidance of the adult when operating . -
Page 15: Begin To Take Off
1 . Please do NOT release the throttle lever when flying in the height . Otherwise it may cause the aircraft crashed abruptly and cause loss of the parts . 2 . Please do NOT fly this aircraft on the place where there is many obstacles nearby so as not to cause unnecessary loss . -
Page 16: Operation And Control
OPERATION AND CONTROL ATTENTION! Please avoid losing control . You should bear in mind that you need to operate the control lever slowly when operating the quad-rotor . During the process of controlling, the quad-rotor may lose some power . Therefore, during the course of flying practice, you need to add some extra power to keep this mini quad-rotor flying in a certain height . Throttle, control the quad–rotor to make ascending and descending . -
Page 17: Sensitivity Settings
SENSITIVITY SETTINGS This model of mini quad-rotor can realize operating in 3 modes: Junior Level — Intermediate Level — Advanced Level Gently press the throttle lever to enter into the setting mode: when hearing one sound of “di” sending out from the buzzer on the transmitter= the mini quad–rotor enters into the Junior Mode (sensitivity degree can reach 30%) . When hearing two sound of “di, di” sending out from the buzzer on the transmitter= the mini quad–rotor enters into the Intermediate Mode (Sensitivity degree can reach 50%) . - Page 18 FRONT FLIPS Press the control lever . When you hear one sound of “ di”, please push the Ascending & Descending control lever forward . BACK FLIP Press the control lever . When you hear one sound of “di”, please push the Ascending & Descending control lever backward . Forward Backward trimmer...
-
Page 19: Common Breakdown Maintenance Of The R/Cquadrocopter
4 . Push the Ascending& Descending /steering rudder to the left up corner, push the throttle/aileron control lever to the left down corner, this time the indicator of the aircraft will be flashing for 1–2 seconds, that represents the calibration is successfully finished (right-hand throttle) . NOTE: If the aircraft still keeps drifting to one direction, you can put it on a level surface . -
Page 20: Contact/ Контактная Информация
CONTACT / КОНТАКТНАЯ ИНФОРМАЦИЯ For up to date contact information and news about the Pilotage store closest to you, please go to the Pilotage website dedicated to your country . For international wholesale inquiries and English language technical support, please contact our Hong Kong office via email at info@pilotage .com . -
Page 21: Notes/ Для Заметок
NOTES / ДЛЯ ЗАМЕТОК... - Page 23 www.pilotage-rc.com...
- Page 24 www.pilotage-rc.com...
Need help?
Do you have a question about the NANO-X2 and is the answer not in the manual?
Questions and answers