Table of Contents
Advertisement
Available languages
Available languages
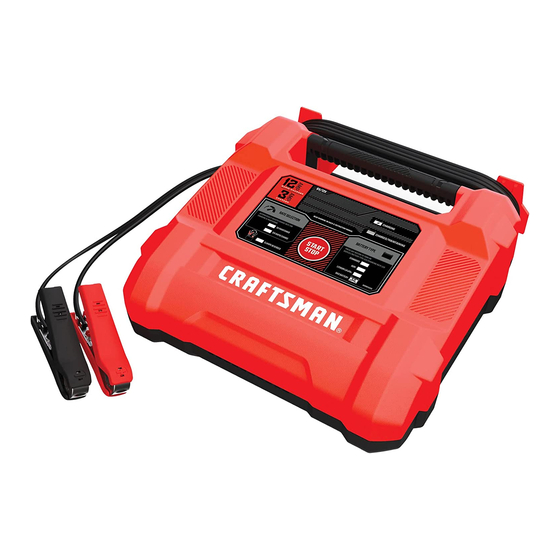
Automatic Battery Charger
Chargeur de batterie automatique
Cargador de baterías automático
IF YOU HAVE QUESTIONS OR COMMENTS, CONTACT US.
POUR TOUTE QUESTION OU TOUT COMMENTAIRE, NOUS CONTACTER.
SI TIENE DUDAS O COMENTARIOS, CONTÁCTENOS.
1-888-331-4569
INSTRUCTION MANUAL | GUIDE D'UTILISATION | MANUAL DE INSTRUCCIONES
WWW.CRAFTSMAN.COM
CMXCESM162
CMXCESM258
0099002099-03
Advertisement
Table of Contents

Related Manuals for Craftsman CMXCESM162


Summary of Contents for Craftsman CMXCESM162
- Page 1 INSTRUCTION MANUAL | GUIDE D’UTILISATION | MANUAL DE INSTRUCCIONES Automatic Battery Charger Chargeur de batterie automatique Cargador de baterías automático CMXCESM162 CMXCESM258 IF YOU HAVE QUESTIONS OR COMMENTS, CONTACT US. POUR TOUTE QUESTION OU TOUT COMMENTAIRE, NOUS CONTACTER. SI TIENE DUDAS O COMENTARIOS, CONTÁCTENOS.
-
Page 2: Automatic Battery Charger
WARNING: To reduce the risk of injury, read the instruction manual. If you have any questions or comments about this or any product, call CRAFTSMAN toll free at: 1-888-331-4569. SAFETY ALERT SYMBOLS AND WORDS This instruction manual uses the following safety alert symbols and words to alert you to hazardous situations and your risk of personal injury or property damage. -
Page 3: Personal Safety Precautions
ENGLISH IMPORTANT SAFETY INSTRUCTIONS – SAVE THESE INSTRUCTIONS WARNING: TO AVOID RISK OF INJURY, THE FOLLOWING SAFETY PRECAUTIONS MUST BE FOLLOWED: SAVE THESE INSTRUCTIONS – This manual contains important safety and operating instructions. Keep out of reach of children. Do not expose the charger to rain or snow. Use of an attachment not recommended or sold by the battery charger manufacturer may result in a risk of fire, electric shock or injury to persons. -
Page 4: Preparing To Charge
ENGLISH NEVER charge a frozen battery. NOTE: This equipment has been tested and found to comply with the limits for a Class B digital device, 2.10 pursuant to part 15 of the FCC Rules. These limits are designed to provide reasonable protection against harmful interference in a residential installation. -
Page 5: Follow These Steps When Battery Is Outside Vehicle
ENGLISH Check polarity of battery posts. POSITIVE (POS, P, +) battery post usually has larger diameter than NEGATIVE (NEG, N, –) post. Determine which post of battery is grounded (connected) to the chassis. If negative post is grounded to chassis (as in most vehicles), see (6.5). If positive post is grounded to the chassis, see (6.6). For negative-grounded vehicle, connect POSITIVE (RED) clip from battery charger to POSITIVE (POS, P, +) ungrounded post of battery. -
Page 6: Control Panel
ENGLISH 10. CONTROL PANEL START/STOP BUTTON Press to immediately begin charging your properly connected battery. If the button is not pressed, charging should begin in thirty seconds. CHARGING STATUS LED INDICATORS CHARGING (yellow/orange) LED lit: The charger is charging the battery. CHARGED (green) LED lit: The battery is fully charged and the charger is in maintain mode. -
Page 7: Battery Charging Times
ENGLISH 11. OPERATING INSTRUCTIONS WARNING: A SPARK NEAR THE BATTERY MAY CAUSE A BATTERY EXPLOSION. IMPORTANT: Do not start the vehicle with the charger connected to the AC outlet, or it could result in damage to the charger and your vehicle. NOTE: This charger is equipped with an auto-start feature. -
Page 8: Maintenance And Care
ENGLISH ABORTED CHARGE If charging cannot be completed normally, charging will abort. When charging aborts, the charger’s output is shut off and the Bad Battery (red) LED will light. The digital display will show an error code (see the Troubleshooting section for a description of the error codes). Do not continue attempting to charge this battery. -
Page 9: Troubleshooting Error Codes
ENGLISH 13. TROUBLESHOOTING/ERROR CODES Error Codes CODE DESCRIPTION REASON/SOLUTION The battery voltage is still under 10V (for a 12V The battery could be bad. Have it checked or battery) or 5V (for a 6V battery) after replaced. 2 hours of charging. The charger cannot desulfate the battery. -
Page 10: Specifications
Input Voltage ....................... 120V AC @ 60Hz, 3.6A Output Voltage ................6V or 12V, with auto voltage detection Output Current Rating: CMXCESM258 ..............2A DC @ 6V DC; 3A/12A DC @ 12V DC CMXCESM162 ..............2A DC @ 6V DC; 3A/15A DC @ 12V DC • 10 •... -
Page 11: Register Online
18. 90 DAY MONEY BACK GUARANTEE If you are not completely satisfied with the performance of your CRAFTSMAN product for any reason, you can return it within 90 days from the date of purchase with a receipt for a full refund – no questions asked. - Page 12 AVERTISSEMENT : Pour réduire le risque de blessure, lire le manuel d’instructions. En cas de questions ou de commentaires concernant ce produit ou tout autre produit, appeler CRAFTSMAN sans frais au numéro suivant : 1-888-331-4569. SYMBOLES ET NOMENCLATURE D’ALERTES LIÉES À LA SÉCURITÉ...
-
Page 13: Mesures De Sécurité Personnelle
FRANÇAIS CONSIGNES DE SÉCURITÉ IMPORTANTES – CONSERVER CES INSTRUCTIONS AVERTISSEMENT : POUR ÉVITER TOUT RISQUE DE BLESSURE, LES PRÉCAUTIONS DE SÉCURITÉ SUIVANTES DOIVENT ÊTRE RESPECTÉES : CONSERVER CES INSTRUCTIONS – Ce manuel contient des instructions importantes concernant la sécurité et le fonctionnement. Ne le laissez pas a la portée des enfants. -
Page 14: Préparation Pour Le Chargement
FRANÇAIS Soyez extra prudent pour réduire le risque de laisser tomber un outil en métal sur la batterie. Ça pourrait faire une étincelle ou produire un court-circuit à la batterie ou à d’autres parties électriques et pourrait produire une explosion. Enlevez vos objets personnels en métal comme les bagues, les bracelets, les colliers et les montres quand vous travaillez avec une batterie d’accumulateurs au plomb. -
Page 15: Emplacement Du Chargeur
FRANÇAIS EMPLACEMENT DU CHARGEUR AVERTISSEMENT : LE RISQUE D’EXPLOSION ET DE CONTACT AVEC L’ACIDE DE BATTERIE. Placez le chargeur aussi loin que possible de la batterie que les câbles CC le permettent. Ne jamais placer le chargeur directement sous la batterie à charger. les gaz ou les fluides qui s’échappent de la batterie peuvent entraîner la corrosion du chargeur ou l’endommager. -
Page 16: Panneau De Contrôle
FRANÇAIS Se placer et tenir l’extrémité libre du câble aussi loin que possible de la batterie, puis raccorder la pince NÉGATIVE (NOIRE) du chargeur à l’extrémité libre du câble. Ne pas se placer face à la batterie pour effectuer le dernier raccordement. Pour interrompre l’alimentation du chargeur, mettre les interrupteurs hors circuit, retirer le cordon C.A. - Page 17 FRANÇAIS REMARQUE : Pendant le chargement, l’affichage passera en mode d’économie d’énergie et ne va pas affiché le pourcentage de charge ou de la tension de la batterie. Pour rétablir l’affichage, appuyez sur n’importe quel bouton. Tension L’affichage numérique indique la tension aux bornes de la batterie en Volts CC, ou la tension de la batterie, selon le mode du chargeur.
-
Page 18: Consignes D'utilisation
FRANÇAIS 11. CONSIGNES D’UTILISATION AVERTISSEMENT : UNE ÉTINCELLE PRÈS DE LA BATTERIE PEUT PROVOQUER UNE EXPLOSION. IMPORTANT : Ne pas démarrer le véhicule avec le chargeur branché à la prise, ou il peut endommager le chargeur et votre véhicule. REMARQUE : Ce chargeur est équipé d’une fonction automatique. Courant ne sera pas fourni aux cosses de la batterie jusqu’à... -
Page 19: Temps De Chargement
FRANÇAIS TEMPS DE CHARGEMENT TAILLE DE LA TAILLE DE LA TEMPS DE CHARGEMENT (heures) TEMPS DE CHARGEMENT (heures) APPLICATION APPLICATION BATTERIE BATTERIE POWERSPORTS 6 Ah 32Ah AUTOMOBILE 300 CCA 1000 CCA MARINE 50 Ah 105 Ah Les temps sont basées sur une batterie déchargée à 50% et peuvent changer en fonction de l’âge et de l’état de la batterie. -
Page 20: Maintenance Et Entretien
FRANÇAIS DÉLAI DE MARCHE Si aucune touche n’est touchée dans les 30 secondes après le chargeur de batterie est mis sous tension, le chargeur passe automatiquement du testeur au chargeur si la batterie est connectée. Dans ce cas, le chargeur sera mis à la taux le plus élevé et le type de batterie au lithium. 12. -
Page 21: Dépannage
FRANÇAIS Dépannage PROBLÈME CAUSE POSSIBLE SOLUTION Les clips de batterie ne jettent Le chargeur est équipé avec Aucun problème ; c’est une pas des étincelles quand touché une caractéristique d’auto-début. condition normale. ensemble. Il ne fournira pas de courant aux clips de batterie jusqu’à ce qu’une batterie soit correctement raccordée. -
Page 22: Spécifications
Tension d’entrée ....................120V CA à 60Hz, 3,6A Tension de sortie ............6V ou 12V, avec détection automatique de tension Courant de sortie nominal: CMXCESM258 ....................2A à 6V; 3A / 12A à 12V CMXCESM162 ....................2A à 6V; 3A / 15A à 12V • 22 •... -
Page 23: Enregistrement En Ligne
AVERTISSEMENT : Pour assurer la SÉCURITÉ et la FIABILITÉ du produit, les réparations, l’entretien et l’ajustement doivent être effectués par un centre de service d’usine CRAFTSMAN ou un centre de service autorisé CRAFTSMAN. Toujours utiliser des pièces de rechange identiques. - Page 24 ADVERTENCIA: Para reducir el riesgo de lesiones, lea el manual de instrucciones. Si tiene dudas o comentarios sobre este u otro producto, comuníquese gratuitamente con CRAFTSMAN al teléfono: 1-888-331-4569. SÍMBOLOS Y PALABRAS DE ALERTA DE SEGURIDAD Este manual de instrucciones usa los siguientes símbolos y palabras de alerta de seguridad para advertirle acerca de situaciones peligrosas y su riesgo de sufrir lesiones personales o daños a la propiedad.
-
Page 25: Precauciones De Seguridad Personal
ESPAÑOL INSTRUCCIONES IMPORTANTES DE SEGURIDAD – GUARDE ESTAS INSTRUCCIONES ADVERTENCIA: PARA EVITAR EL RIESGO DE LESIONES, SE DEBEN SEGUIR LAS SIGUIENTES PRECAUCIONES DE SEGURIDAD: GUARDE ESTAS INSTRUCCIONES – Este manual contiene instrucciones operativas y de seguridad de importancia. Manténgase fuera del alcance de los niños. No exponga el cargador a la lluvia o a la nieve. -
Page 26: Preparación Para La Carga
ESPAÑOL NUNCA fume o permita la presencia de chispas o llamas en la proximidad de una batería o motor. Tenga especial cuidado para reducir el riesgo de dejar caer una herramienta de metal sobre la batería. Esto podría provocar chispas o un cortocircuito en la batería o en cualquier otra pieza eléctrica que podría provocar una explosión. -
Page 27: Ubicación Del Cargador
ESPAÑOL UBICACIÓN DEL CARGADOR ADVERTENCIA: RIESGO DE EXPLOSIÓN Y DE CONTACTO CON EL ÁCIDO DE LA BATERÍA. Ubique el cargador a la mayor distancia posible de la batería como lo permitan los cables de CC. Nunca ubique el cargador directamente por encima de la batería que se carga; los gases de la batería corroerán y dañarán el cargador. -
Page 28: Conexiones A Tierra Y Energía De Ca
ESPAÑOL Conecte el gancho POSITIVO (ROJO) del cargador al borne POSITIVO (POS, P, +) de la batería. Ubíquese junto con el extremo libre del cable que previamente sujetó al borne NEGATIVO (NEG, N, -) de la batería a la mayor distancia posible de la batería. Luego conecte el gancho NEGATIVO (NEGRO) del cargador al extremo libre del cable. -
Page 29: Pantalla Digital
ESPAÑOL PANTALLA DIGITAL La pantalla digital proporciona una indicación digital de la tensión o % de carga. La pantalla mostrará el voltaje de la batería cuando el cargador no se encuentre cargandola. Cuando se programe en el modo de carga, la carátula cambiará automáticamente a On (encendido–para mostrar que la carga ha comenzado) y después mostrará... -
Page 30: Instrucciones De Operación
ESPAÑOL 11. INSTRUCCIONES DE OPERACIÓN ADVERTENCIA: UNA CHISPA PROVOCADA CERCA DE LA BATERÍA PUEDE CAUSAR LA EXPLOSIÓN DE LA BATERÍA: IMPORTANTE: No arranque el vehículo con el cargador conectado a la toma de CA, o puede resultar en daños al cargador y su vehiculo. NOTA: Este cargador está... - Page 31 ESPAÑOL CARGA ANULADA Si no se puede completar la carga normalmente, la carga se anulará. Cuando la carga se interrumpe, la salida del cargador se apaga y la luz LED (rojo) Bad Battery se encenderá. El indicador digital mostrará un código de error (véase la sección Localización y Solución de Problemas para una descripción de los códigos de error).
-
Page 32: Mantenimiento Y Cuidado
ESPAÑOL 12. MANTENIMIENTO Y CUIDADO Con cuidados mínimos puede mantener el cargador de baterías funcionando correctamente durante años. • Limpie las pinzas cada vez que termine de usar el cargador. Limpie el fluido de la batería que podría haber estado en contacto con las pinzas para evitar la corrosión. •... - Page 33 ESPAÑOL Localización y resolución de problemas PROBLEMA POSIBLE CAUSA SOLUCIÓN Las pinzas de la batería no hacen Este cargador está equipado con un No hay problema; es una corto al juntarse una con otra. auto-rectificador. Este no permitirá condición normal. paso de corriente si las pinzas de la batería no están conectadas en forma correcta.
-
Page 34: Especificaciones
Voltaje de entrada ....................120V AC @ 60Hz, 3.6A Voltaje de salida ..............6V o 12V, con detección automática de voltaje Corriente de salida: CMXCESM258 ....................2A a 6V; 3A/12A a 12V CMXCESM162 ....................2A a 6V; 3A/15A a 12V • 34 •... -
Page 35: Registro En Línea
ADVERTENCIA: Para garantizar la SEGURIDAD y la FIABILIDAD del producto, las reparaciones, el mantenimiento y los ajustes deben realizarse en un centro de servicios de fábrica CRAFTSMAN o en un centro de servicios autorizados por CRAFTSMAN. Use siempre piezas de repuesto idénticas a las originales. - Page 36 Stanley Black & Decker, Inc., used under license. es una marca registrada de Stanley Black & Decker, Inc., utilizada bajo licencia. est une marque déposée de Stanley Black & Decker, Inc., utilisée sous licence. © 2021 CRAFTSMAN U.S. & Canada Only É.-U. et Canada seulement Made in China Fabriqué...
Need help?
Do you have a question about the CMXCESM162 and is the answer not in the manual?
Questions and answers