
Related Manuals for Bad Boy Mowers WALK-BEHIND


Summary of Contents for Bad Boy Mowers WALK-BEHIND
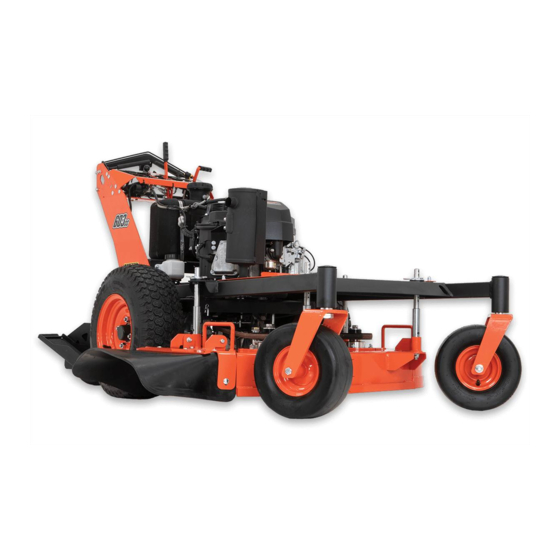
- Page 1 WALK-BEHIND MODEL ZERO-TURN MOWER OWNER’S, SERVICE & PARTS MANUAL For additional information, please see us at www.badboymowers.com Bad Boy, Inc. 102 Industrial Drive Batesville, Arkansas 72501 ©2017 12-6...
-
Page 2: Table Of Contents
TABLE OF CONTENTS Basic Information ..................... Section 1 Page 4 Bad Boy Safety Guidelines ..................Section 2 Page 5 Operation ......................... Section 3 Page 9 Maintenance ......................Section 4 Page 10 Storage and Transportation ..................Section 5 Page 10 Troubleshooting and FAQ ..................Section 6 Page 12 Controls ........................ - Page 3 063-6000-00 Spark Plug 015-8001-00 Air Filter 063-2097-00 Oil Filter 063-8017-00 10W-30 Motor Oil - Bad Boy Synthetic Blend Motor Oil Recommended. Motor Oil 085-6015-00 20W-50 Motor Oil- Bad Boy Hydrostatic Oil Recommended (Approximately 2.5 Quarts/Transaxle) Hydraulic Oil 085-6000-00 PAGE 3...
-
Page 4: Basic Information
The Warranty Registration form must be completed within 30 days to validate your warranty. As the new equipment owner, you are expected to see that the form is completed and forwarded to Bad Boy Inc. at time of delivery. Warranty is nontransferable. Warranty registration should be completed by the selling dealership using the on-line registration site. - Page 5 SECTION 2: MOWER SAFETY GUIDELINES Never allow untrained people to operate this machine. It is the owner’s responsibility to get training and see to it that anyone who has permission to use your machine receives the proper training. Do not mow around people. The factory discharge chute is designed to deflect debris downward, but it could be possible for debris to be thrown in a way that can cause damage to people or property.
- Page 6 SLOPE OPERATION Slopes are a major factor related to loss of control and tip over accidents, which can result in severe injury or death. Operation on all slopes requires extra caution. If you cannot back up the slope, or you feel uneasy on it, do not mow it.
- Page 7 TOWING 2.40 Tow only with a machine that has a hitch specifically designed for towing. Do not attach towed equipment except at the hitch point. 2.41 Follow the manufacturer’s recommendation for weight limits for towed equipment and towing on slopes. 2.42 Never allow children or others in or on towed equipment.
- Page 8 The engine should stop. If any of these tests fail to produce the results indicated and the problem cannot be identified, contact your Bad Boy Mower dealer or the support contacts in the rear of this manual ROLL OVER PROTECTION STRUCTURES (ROPS) This machine is not equipped with ROPS from the factory.
-
Page 9: Operation
The machine could lose traction on a decline or tip backwards on an incline. 3.12 Once you become comfortable with your Bad Boy Mower you will notice your overall mowing time will decrease. Avoid operating your mower on side hills of over 5 degrees, inclines of over 10 degrees, and declines of over 15 degrees. -
Page 10: Maintenance
SECTION 4: MOWER MAINTENANCE Interval Every 50 Every 100 Every First 5 Daily Hours or Hours or Section Hours Annually* Annually* Hours Maintenance Check and add engine oil Section3 Section 2 Check all belts for proper alignment (Pump) 6 ... - Page 11 MAINTENANCE LOG Date: Hours: Performed: Date: Hours: Performed: Date: Hours: Performed: Date: Hours: Performed: Date: Hours: Performed: Date: Hours: Performed: Date: Hours: Performed: Date: Hours: Performed: Date: Hours: Performed: Date: Hours: Performed: Date: Hours: Performed: Date: Hours: Performed: Date: Hours: Performed: Date: Hours:...
- Page 12 SECTION 6: TROUBLESHOOTING Q: How do I prevent an uneven cutting pattern and increase the quality of cut? A: Check tire pressure, check blade sharpness (replace blades or sharpen at least once per year or when needed), make sure blades are tightened properly, check spring and belt tension, check the underside of the deck to ensure the mower deck is free of grass build-up and debris, make sure your machine is at full throttle, and vary your mowing pattern each time you cut your grass.
-
Page 13: Controls
RPM, move lever toward operator to decrease RPM. Key Switch: Bad Boy WALK-BEHIND mowers have two position key switch: off and on. With key inserted, rotate it clockwise to on position. Your WALKBEHIND mower is now ready to be started. -
Page 14: Moving Inoperable Mower
OUTLAW WALK-BEHIND SERIES: 590 lbs. ***Weights fluctuate with the addition of accessories. As you can see by the weights of the machines, you shouldn’t ever try to push or pull a Bad Boy Mower by hand. This could cause serious bodily injury. -
Page 15: Mower Blade Maintenance
SECTION 10: MOWER BLADE MAINTENANCE 10.1 Check mower blades after each use. This is essential for maintaining well-groomed turf. Keep the blades sharp. If a dull blade is used for cutting, the grass will tear rather than cut. This could damage the grass leaving a brown frayed top on the grass within a few hours. -
Page 16: How To Choose The Right Blade
HOW TO CHOOSE THE RIGHT BLADE Essentially there are only TWO basic styles of mowing blades used or approved for use on our current products: The standard style of mowing blade is essentially designed for cutting grass and effectively discharging the clippings out from the deck to fall onto the lawn or to be captured in a grass collection system. -
Page 17: Mowing Tips
MOWING TIPS: • Mow header strips at the ends of the lawn and around flower beds first. Make them wide enough that you can turn the mower around in the already mown section. Then mow back and forth between these header strips overlapping each lap by about 1/8 the width of the mower’s deck. -
Page 18: Service Section
SERVICE SECTION SECTION 1: HYDROSTATIC SYSTEM The hydraulic fluid reservoirs are accessed by raising the seat forward. Notice the “full cold” line at the bottom of the tank. Use only 20W-50 motor oil in this tank. (Bad Boy Hydrostatic oil is recommended) CHANGING YOUR HYDRAULIC OIL AND FILTER Remove the caps from the hydraulic fluid reservoirs and get an oil drain pan. - Page 19 CHANGING YOUR HYDRAULIC OIL AND FILTER (CONTINUED) Fill with 20W-50 motor oil (Bad Boy Hydrostatic oil is recommended) through the hydraulic fluid reservoirs until it just appears at the bottom of each transaxle’s top port (approximately 2 quarts per transaxle, 4 quarts total). Install the top port plug into each transaxle as the oil level reaches this port.
- Page 20 This should be measured with a belt tension gauge. Your dealer or service center will have a belt tension gauge or you can buy one from the Bad Boy Parts Department by calling 866-622-3269 and asking for the Parts Department (Part Number 041-9999-00).
- Page 21 8 hrs. of use, and at intervals of 50 usage hours or yearly, whichever occurs first after that. The oil capacity is 2 quarts. Bad Boy 10W-30 synthetic blend engine oil is recommended for maximum protection. CHANGING YOUR ENGINE OIL AND OIL FILTER Remove oil dipstick and open oil drain.
- Page 22 KAWASAKI FS541V (CONTINUED) The fuel filter is located in the fuel line, on the left side of the engine, by the starter motor. Replace the filter yearly. Prior to the removal of the old filter, note the direction of fuel flow as indicated on the filter. Have towels readily available in order to quickly remove any fuel leakage.
- Page 23 KAWASAKI FS541V (CONTINUED) The air cleaner is the engine’s only defense against damaging foreign particles. It is very important that the air cleaner element is inspected prior to each use. Remove the element and tap its sides in order to remove debris. Do not blow the filter out using compressed air.
- Page 24 KAWASAKI FS541V (CONTINUED) CHANGING THE SPARK PLUGS AND CHECKING THE SPARK PLUG GAP Remove the wire on the spark plug and use a 13/16” socket to remove the spark plug. Check the gap on the spark plug to verify that it is 0.03 in using a feeler gauge.
- Page 25 SECTION 5: FRAME The front fork nuts require a torque of 40ft-lbs. While applying this torque, turn the fork itself to ensure no damage is done to the bearing. This operation is only necessary if a repair requires it. Torque rear wheel lugs to 65-75 ft. lbs. Re-torque at every oil change and check at every mowing.
- Page 26 SECTION 6: CUTTING DECK DECK BELT REMOVAL Use proper safety precaution when performing procedures. Raise the deck to its highest position. Remove the deck cover. While lifting up on the belt (as shown in the photograph), rotate the pulley until the belt is free of the pulley.
- Page 27 LEVELING THE DECK Make sure that each tire is at 12PSI. Remove pins from deck height adjustment rods and raise or lower deck to desired height by using the handles located on each side of the deck. Once the desired deck height is achieved, replace the pins back in the deck height adjustment rods making sure that all four pins have the same number of empty holes above...
- Page 28 Use a belt tension gauge to ensure the proper tension. Your dealer or service center will have a belt tension gauge or you can buy one from the Bad Boy Parts Department by calling 866-622-3269 and asking for the Parts Department (Part Number 041-9999-00).
- Page 29 BLADE REMOVAL To change blades, it may be easier to use a piece of wood to keep the blade from turning so that the bolt can be loosened. Use a 15/16” socket and impact Drill, or a wrench and an extension to gain more leverage. You might need to put a ¾”...
-
Page 30: Parts Section
PARTS SECTION: Front Fork Assembly Parts List Parts List ITEM PART NUMBER DESCRIPTION ITEM PART NUMBER DESCRIPTION 010-1050-00 Caster Bearing 2016 - 1641 Bearing 022-7009-00 Wheel Bearing 013-8050-00 1/2-13 Nylon Flange Nut 022-8049-00 11x6-5 front tire & wheel assembly 013-9004-00 1"... - Page 31 PARTS SECTION: Instrument Panel Parts List Parts List ITEM PART NUMBER DESCRIPTION ITEM PART NUMBER DESCRIPTION 013-5019-00 10-24 Nylon Insert Locknut Zinc Orange Nylon 055-8020-00 Throttle Lever Assembly 013-6051-00 3/8" Fine Threaded Jam Nut 056-8058-00 PTO Engager 013-8049-00 5/16" Nylon Flange Nut 077-0001-00 Brake switch 4 prong 018-5200-00...
- Page 32 PARTS SECTION: Podium PAGE 32...
- Page 33 PARTS SECTION: Podium (Cont.) Parts List Parts List ITEM PART NUMBER DESCRIPTION ITEM PART NUMBER DESCRIPTION 013-0012-00 3/8-16 Centerlock Half Nut 028-0013-00 Walk Behind Rider Presence 013-0015-00 8-32 Nylock Nut 030-0001-00 8-32 x 2 1/2 Hex Machine Screw 013-5019-00 10-24 Nylon Insert Locknut Zinc Orange Nylon 031-0021-00 2017 Drive Lever Control - Right 013-5041-00...
- Page 34 PARTS SECTION: Walk Behind Frame Parts List Parts List ITEM PART NUMBER DESCRIPTION ITEM PART NUMBER DESCRIPTION 013-0004-00 Acorn nut-pulley Cover 12.5 019-6017-00 .630 ID Plastic Washer 013-7018-00 1/2" Hex Nut 12.6 025-7036-00 1/2 x 1/2 Spacer 013-8073-00 1/4 Nylock Nut 12.7 033-6001-00 4 3/4"...
- Page 35 PARTS SECTION: TRANSAXLE Parts List Parts List ITEM PART NUMBER DESCRIPTION ITEM PART NUMBER DESCRIPTION 013-3000-00 Acorn Lug Nut 025-0016-00 2017 Transaxle Spacer-MZ 013-5041-00 3/8 Nylock Nut 025-0070-00 2017 Transaxle Spacer 013-8049-00 5/16" Nylon Flange Nut 026-3440-00 Walk Trans Skid Plate 013-8073-00 1/4 Nylock Nut 028-0070-00...
- Page 36 PARTS SECTION: 36'' Deck Assembly Parts List Parts List ITEM PART NUMBER DESCRIPTION ITEM PART NUMBER DESCRIPTION 013-5201-00 3/8" Flange Nut 019-6017-00 .630 ID x 1.122 OD x .142 THK Plastic Washer 013-5301-00 5/8" Nylock (1/2 Jam) 019-6020-00 1/2" Belleville Washer 013-6014-00 3/8"...
- Page 37 3/8" x 3/4" Hex Bolt 037-6015-50 Spindle- Aluminum -2012 ZT 018-5311-00 5/8" x 4" Hex Bolt 038-5350-00 16 1/4" Bad Boy Blade 018-6012-00 3/8 x 1.5" Bolt 039-6945-17 2017 MZ/ZT Deck Idler Assembly 018-6019-00 1/2"-20 x 1 1/2 - Grade 5 Fine Thread Bolt...
- Page 38 PARTS SECTION: Deck Sub-assemblies 037-6015-50 Parts List 039-6945-17 Parts List ITEM PART NUMBER DESCRIPTION ITEM PART NUMBER DESCRIPTION 037-6017-50 Aluminum Spindle Housing -2010 013-8050-00 1/2-13 Nylon Flange Nut 037-6023-00 Spindle Bearing, 2004 and up 018-6036-00 1/2" x 2 3/4" Hex Bolt 037-6026-00 Short Spindle Shaft w/Locking 025-5203-00...
- Page 39 PARTS SECTION: Kawasaki FS541V Parts List Parts List ITEM PART NUMBER DESCRIPTION ITEM PART NUMBER DESCRIPTION 013-5202-00 3/8" Nylock Flange Nut 039-1220-00 Warner Clutch A-R Bracket 015-0541-00 Kawasaki FS541V Pull Start Engine 041-6500-00 Pump Belt 015-0543-00 Exhaust Assembly 042-6030-00 1/4" x 1" Key 015-8001-00 Spark Plug - Kawasaki 051-5404-00...
- Page 40 PARTS SECTION: Decals 091-3601-18 36" DECK DECAL 091-0314-00 FLOORBOARD LOGO DECAL 091-0903-18 48" DECK DECAL 091-0412-18 603cc PODIUM DECAL 091-0411-18 CONTROL PANEL DECAL 091-3309-00 091-0418-00 48" DECK BELT ROUTE DECAL 36" DECK BELT ROUTE DECAL 091-0023-00 091-0024-00 091-3012-00 091-1020-00 36" DECK HEIGHT DECAL 48"...
- Page 41 PAGE 41...
Need help?
Do you have a question about the Mowers WALK-BEHIND and is the answer not in the manual?
Questions and answers