
Related Manuals for Electrolux KVBAS21WX


Summary of Contents for Electrolux KVBAS21WX
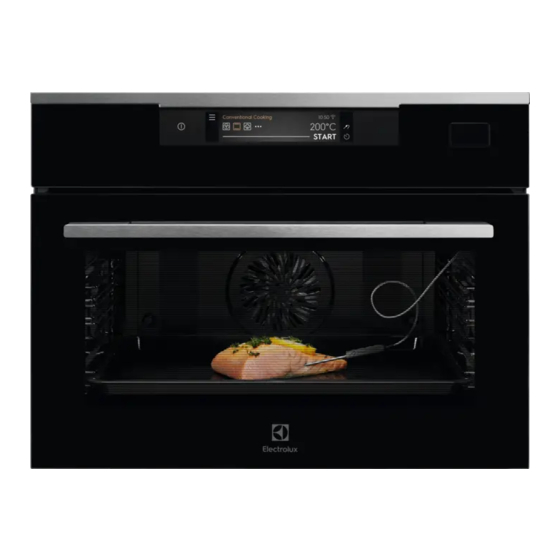
- Page 1 KVBAS21WX Steam oven User Manual Get the most out of your appliance For quick access to manuals, how-to guides, support and more through our photo registration visit electrolux.com/register...
- Page 2 WE’RE THINKING OF YOU Thank you for purchasing an Electrolux appliance. You’ve chosen a product that brings with it decades of professional experience and innovation. Ingenious and stylish, it has been designed with you in mind. So whenever you use it, you can be safe in the knowledge that you’ll get great results every time.
-
Page 3: Table Of Contents
CONTENTS 1. SAFETY INFORMATION................5 1.1 Children and vulnerable people safety............. 5 1.2 General Safety....................5 2. SAFETY INSTRUCTIONS................7 2.1 Installation......................7 2.2 Electrical connection..................8 2.3 Use........................8 2.4 Care and cleaning.....................9 2.5 Steam Cooking....................9 2.6 Internal lighting....................10 2.7 Service......................10 2.8 Disposal...................... - Page 4 CONTENTS 11. CARE AND CLEANING................33 11.1 Notes on cleaning..................33 11.2 How to remove: Shelf supports ..............33 11.3 How to use: Steam Cleaning................ 34 11.4 Cleaning Reminder..................34 11.5 How to use: Descaling.................. 35 11.6 Descaling reminder..................35 11.7 How to use: Rinsing..................36 11.8 Drying reminder....................
-
Page 5: Safety Information
SAFETY INFORMATION Before the installation and use of the appliance, carefully read the supplied instructions. The manufacturer is not responsible for any injuries or damage that are the result of incorrect installation or usage. Always keep the instructions in a safe and accessible location for future reference. - Page 6 SAFETY INFORMATION If the mains power supply cable is damaged, it must be • replaced by the manufacturer, its Authorised Service Centre or similarly qualified persons to avoid an electrical hazard. WARNING: Ensure that the appliance is switched off before •...
-
Page 7: Safety Instructions
2. SAFETY INSTRUCTIONS 2.1 Installation WARNING! Only a qualified person must install this appliance. • Remove all the packaging. • Do not install or use a damaged appliance. • Follow the installation instructions supplied with the appliance. • Always take care when moving the appliance as it is heavy. Always use safety gloves and enclosed footwear. -
Page 8: Electrical Connection
SAFETY INSTRUCTIONS 2.2 Electrical connection WARNING! Risk of fire and electric shock. • All electrical connections should be made by a qualified electrician. • The appliance must be earthed. • Make sure that the parameters on the rating plate are compatible with the electrical ratings of the mains power supply. -
Page 9: Care And Cleaning
SAFETY INSTRUCTIONS WARNING! Risk of damage to the appliance. • To prevent damage or discoloration to the enamel: – do not put ovenware or other objects in the appliance directly on the bottom. – do not put aluminium foil directly on the bottom of cavity of the appliance. –... -
Page 10: Internal Lighting
SAFETY INSTRUCTIONS 2.6 Internal lighting WARNING! Risk of electric shock. • Concerning the lamp(s) inside this product and spare part lamps sold separately: These lamps are intended to withstand extreme physical conditions in household appliances, such as temperature, vibration, humidity, or are intended to signal information about the operational status of the appliance. -
Page 11: Product Description
3. PRODUCT DESCRIPTION 3.1 General overview Control panel Display Water drawer Socket for the food sensor Heating element Lamp Descaling pipe outlet Shelf support, removable Shelf positions 3.2 Accessories Wire shelf For cookware, cake tins, roasts. Baking tray For cakes and biscuits. Grill- / Roasting pan To bake and roast or as a pan to collect fat. - Page 12 PRODUCT DESCRIPTION Steam set One unperforated and one perforated food container. The steam set drains the condensing water away from the food during steam cooking. Use it to prepare vegetables, fish, chicken breast. The set is not suitable for food that needs to soak in the water e.g.
-
Page 13: How To Turn Oven On And Off
4. HOW TO TURN OVEN ON AND OFF 4.1 Control panel ON / OFF Press and hold to turn the oven on and off. Display Shows the current settings of the oven. Press Move Press and hold Touch the surface with finger‐ Slide fingertip over the sur‐... - Page 14 HOW TO TURN OVEN ON AND OFF The display with the maximum number of func‐ B C D tions set. A. Menu / Back Conventional cooking B. Wi-Fi (selected models only) C. Time of day D. Information E. Timer H G F E F.
-
Page 15: Before First Use
5. BEFORE FIRST USE WARNING! Refer to Safety chapters. 5.1 Initial Cleaning Step 1 Step 2 Step 3 Clean the oven and the ac‐ Remove all accessories and Place the accessories and the cessories with a soft cloth, removable shelf supports from removable shelf supports in warm water and a mild deter‐... - Page 16 BEFORE FIRST USE Water hardness Test paper Calcium de‐ Calcium de‐ Water classi‐ posit (mmol/l) posit (mg/l) fication Level 0 - 7 0 - 1.3 0 - 50 soft 8 - 14 1.4 - 2.5 51 - 100 moderately hard 15 - 21 2.6 - 3.8 101 - 150...
-
Page 17: Daily Use
6. DAILY USE WARNING! Refer to Safety chapters. 6.1 How to set: Heating functions Step 1 Turn on the oven. Step 2 Select a heating function. The display shows the default heating functions. To see more heating functions press: Step 3 Press: . - Page 18 DAILY USE Step 4 Set the temperature. Type of the steam heating function depends on the set tempera‐ ture. Steam for Steaming For steaming vegetables, grains, legumes, seafood, 50 - 100 °C terrines and spoon desserts. Steam for Stewing For cooking stewed and braised meat or fish, bread 105 - 130 °C and poultry, as well as cheesecakes and casseroles.
-
Page 19: How To Set: Assisted Cooking
DAILY USE Step 10 When the water drawer runs out of water, the signal sounds. Refill the water drawer. The signal sounds at the end of the cooking time. Step 11 Turn off the oven. Step 12 Empty the water drawer after cooking ends. Refer to "Care and Cleaning"... -
Page 20: Heating Functions
DAILY USE 6.4 Heating functions STANDARD Heating function Application To grill thin pieces of food and to toast bread. Grill To roast large meat joints or poultry with bones on one shelf position. To make gratins and to brown. Turbo Grilling To bake on up to three shelf positions at the same time and to dry food. - Page 21 DAILY USE SPECIALS Heating function Application To preserve vegetables (e.g., pickles). Preserving To dry sliced fruit, vegetables and mushrooms. Dehydrating To preheat plates for serving. Plate Warming To defrost food (vegetables and fruit). The defrosting time depends on the amount and size of the frozen food. Defrost For dishes such as lasagna or potato gratin.
-
Page 22: Notes On: Moist Fan Baking
DAILY USE STEAM Heating function Application Food reheating with steam prevents surface drying. Heat is distributed in a gentle and even way, which allows to recover taste and aroma of food as just prepared. This function can be used to reheat food directly on a Steam Regenerat‐... -
Page 23: Clock Functions
7. CLOCK FUNCTIONS 7.1 Clock functions description Clock function Application Cooking time To set the length of cooking. Maximum is 23 h 59 min. Start criteria To set when the timer starts counting. End action To set what happens when the timer ends counting. Delayed start To postpone the start and / or end of cooking. - Page 24 CLOCK FUNCTIONS How to set cooking time Step 1 Choose a heating function and set the temperature. Step 2 Press: Step 3 Slide and press to set the clock. Press: Timer starts counting down immediately. Take a shortcut! How to choose cooking start / end option Step 1 Choose a heating function and set the temperature.
- Page 25 CLOCK FUNCTIONS How to delay start without setting the end of cooking Step 1 Set the heating function and the temperature. Step 2 Press: Step 3 Press: Step 4 Press: Delayed start. Step 5 Choose the value. Press: How to set extra time When 10% of cooking time is left and the food seems not to be ready, you can extend cooking time.
-
Page 26: How To Use: Accessories
8. HOW TO USE: ACCESSORIES 8.1 Inserting accessories A small indentation at the top increases safety. The indentations are also anti-tip devices. The high rim around the shelf prevents cookware from slipping of the shelf. Wire shelf: Push the shelf between the guide bars of the shelf support and make sure that the feet point down. - Page 27 HOW TO USE: ACCESSORIES For the best cooking results: Ingredients should be at Do not use it for liquid During cooking it must remain in room temperature. dishes. the dish. The oven calculates an approximate end of cooking time. It depends on the quantity of food, the set oven function and the temperature.
- Page 28 HOW TO USE: ACCESSORIES Step 6 - press to set the preferred option: • Sound alarm - when food reaches the core temperature, the signal sounds. • Sound alarm and stop cooking - when food reaches the core temperature, the sig‐ nal sounds and the oven stops.
-
Page 29: Additional Functions
9. ADDITIONAL FUNCTIONS 9.1 How to save: Favourites You can save your favourite settings, such as the heating function, the cooking time, the temperature or the cleaning function. You can save 3 favourite settings. Step 1 Turn on the oven. Step 2 Select the preferred setting. -
Page 30: Hints And Tips
10. HINTS AND TIPS 10.1 Cooking recommendations The temperature and cooking times in the tables are guidelines only. They depend on the recipes and the quality and quantity of the ingredients used. Your oven may bake or roast differently to the oven you had before. The tables below show rec‐ ommended settings for temperature, cooking time and shelf position for specific types of the food. -
Page 31: Moist Fan Baking - Recommended Accessories
HINTS AND TIPS (°C) (min) Tartlets, 8 pieces baking tray or dripping 15 - 25 Vegetables, baking tray or dripping 30 - 40 poached, 0.4 kg 10.3 Moist Fan Baking - recommended accessories Use the dark and non-reflective tins and containers. They have better heat absorption than the light colour and reflective dishes. - Page 32 HINTS AND TIPS Use the function: Full Steam. Use the second shelf position. Put the baking tray on the first shelf position. Set the temperature to 100 °C. STEAM FUNCTION Container (Gastro‐ (kg) (min) norm) Broccoli, preheat the 1 x 1/2 perforated max.
-
Page 33: Care And Cleaning
11. CARE AND CLEANING WARNING! Refer to Safety chapters. 11.1 Notes on cleaning Clean the front of the oven with a soft cloth with warm water and a mild deter‐ gent. Use a cleaning solution to clean metal surfaces. Cleaning Clean stains with a mild detergent. -
Page 34: How To Use: Steam Cleaning
CARE AND CLEANING 11.3 How to use: Steam Cleaning Before you start: Turn off the oven and wait Remove all accessories and re‐ Clean the bottom of the cavity until it is cold. movable shelf supports. and the inner door glass with a soft cloth with warm water and a mild detergent. -
Page 35: How To Use: Descaling
CARE AND CLEANING 11.5 How to use: Descaling Before you start: Turn off the oven and wait Remove all accessories. Make sure that the water drawer until it is cold. is empty. Duration of the first part: around 100 min Step 1 Place the deep pan on the first shelf position. -
Page 36: How To Use: Rinsing
CARE AND CLEANING Type Description Soft reminder Recommends you to descale the oven. Hard reminder Obligates you to descale the oven. If you do not descale the oven when the hard reminder is on, the steam functions are disabled. These reminders activate each time you turn off the oven. 11.7 How to use: Rinsing Before you start: Turn off the oven and wait until it is cold. -
Page 37: How To Use: Tank Emptying
CARE AND CLEANING 11.10 How to use: Tank emptying Use it after cooking with steam heating function to remove the residual water from the water drawer. Before you start: Turn off the oven and wait until it is cold. Remove all accessories. Step 1 Place the deep pan on the first shelf position. -
Page 38: How To Replace: Lamp
CARE AND CLEANING Step 4 Hold the door trim (B) on the top edge of the door at the two sides and push inwards to release the clip seal. Step 5 Pull the door trim to the front to remove it. Step 6 Hold the door glass panels on their top edge one by one and... - Page 39 CARE AND CLEANING Top lamp Step 1 Turn the glass cover to remove it. Step 2 Remove the metal ring and clean the glass cover. Step 3 Replace the lamp with a suitable 300 °C heat-resistant lamp. Step 4 Attach the metal ring to the glass cover and install it. 39/52...
-
Page 40: Troubleshooting
12. TROUBLESHOOTING WARNING! Refer to Safety chapters. 12.1 What to do if... The oven does not turn on or does not heat up Possible cause Remedy The oven is not connected to an electrical sup‐ Check if the oven is correctly connected to the ply or it is connected incorrectly. -
Page 41: Service Data
TROUBLESHOOTING Code and description Remedy F111 - Food sensor is not correctly inserted in‐ Fully plug Food sensor into the socket. to the socket. F240, F439 - the touch fields on the display do Clean the surface of the display. Make sure not work properly. -
Page 42: Energy Efficiency
13. ENERGY EFFICIENCY 13.1 Product Information and Product Information Sheet* Supplier's name Electrolux Model identification KVBAS21WX 944066889 Energy Efficiency Index MISSING IN PS! Energy efficiency class MISSING IN PS! Energy consumption with a standard load, conventional MISSING IN PS! kWh/cycle... - Page 43 ENERGY EFFICIENCY Cooking with fan When possible, use the cooking functions with fan to save energy. Residual heat If a programme with the Duration or End Time selection is activated and the cooking time is longer than 30 min, the heating elements automatically turn off earlier in some oven functions. The fan and lamp continue to operate.
-
Page 44: Menu Structure
14. MENU STRUCTURE 14.1 Menu Press to open Menu. Choose dish Cleaning Options Menu item Application Favourites Lists the favourite settings. Assisted Cooking Lists automatic programmes. Cleaning Lists cleaning programmes. Options To set the oven configuration. Settings Setup To set the oven configuration. Service Shows the software version and con‐... -
Page 45: Submenu For: Options
MENU STRUCTURE 14.3 Submenu for: Options Submenu Application Light Turns the lamp on and off. Lamp Icon visible Lamp icon appears on the screen. Child Lock Prevents accidental activation of the oven. When the option is on, the text "Child Lock" appears on the display when you turn on the oven. -
Page 46: Submenu For: Service
MENU STRUCTURE 14.5 Submenu for: Service Submenu Description Demo mode Activation / deactivation code: 2468 Licence Information about licenses. Software version Information about software version. Reset all settings Restores factory settings. Reset all popups Restores all pop-ups to the original settings. 46/52... -
Page 47: S Easy
15. IT'S EASY! Before the first use you have to set: Display Buzzer vol‐ Water hard‐ Wireless Language Time of day brightness ness connection Familiarize yourself with the basic icons on the control panel and the display: Menu / Wi-Fi ON / OFF Information Timer... - Page 48 IT'S EASY! Get to know how to cook quickly Use the automatic programmes to prepare a dish quickly with the default settings: Assisted Step 1 Step 2 Step 3 Step 4 Cooking Choose the Press: Press: Press: Assis‐ dish. ted Cooking. Use quick functions to set the cooking time or change the cooking function Quick timer settings Step 1...
-
Page 49: Take A Shortcut
16. TAKE A SHORTCUT! Here you can see all the useful shortcuts. You can also find them in the dedicated chapters in the user manual. How to set: Heating functions How to set: Steamify - Cooking with a steam heating function How to set: Assisted cooking How to set: Cooking time How to delay: Start and end of cooking... - Page 50 17. ENVIRONMENTAL CONCERNS Recycle materials with the symbol . Put the packaging in relevant containers to recycle it. Help protect the environment and human health by recycling waste of electrical and electronic appliances. Do not dispose of appliances marked with the symbol with the household waste.
- Page 51 51/52...
- Page 52 www.electrolux.com/shop...
Need help?
Do you have a question about the KVBAS21WX and is the answer not in the manual?
Questions and answers