Advertisement
Quick Links
MK END LADDER
SWING ASSY
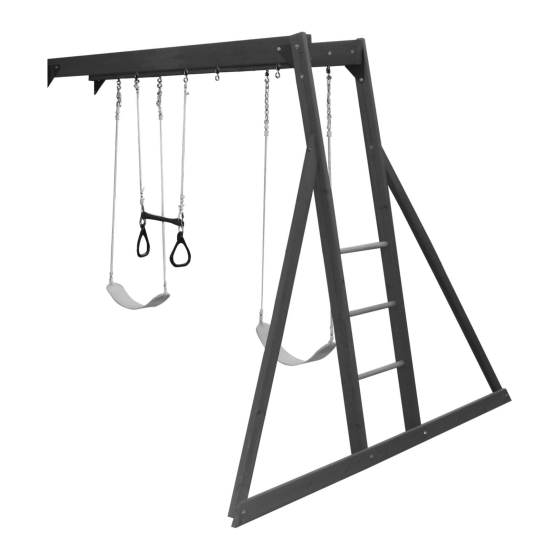
3 POSITION MONKEY LADDER SWING – A25190
2.4m
7.92m
2.78m
4.78m
1 - 2 Hrs
Two person
assembly
Europe
The Granary, Weathercock Hill
Chevington, Bury St
Edmunds, Suffolk IP29 5RG
FR: Pour obtenir la notice de montage dans votre langue, cliquez sur www.selwoodproducts.com
DE: Gehen Sie auf www.selwoodproducts.com um die Bauanleitung in thre Sprache zu bekommen.
9405190
ASSEMBLY INSTRUCTIONS
WARNING
and give them to any future owner of this play system. Manufacturer contact information provided below.
OBSTACLE FREE SAFETY ZONE - 4.78 m x 7.92 m area requires Protective Surfacing. See page 3.
MAXIMUM VERTICAL FALL HEIGHT - 1.8 M
CAPACITY - 3 Users Maximum, Ages 3 to 10; Weight Limit 110 lbs. (49.9 kg) per child.
RESIDENTIAL HOME USE ONLY. Not intended for public areas such as schools, churches, nurseries, day cares or parks.
North America
375 Sligo Road West.
P.O. Box 10 Mount Forest
Ontario, Canada N0G 2L1
www.selwoodproducts.com
To reduce the risk of serious injury or death, you must read and
follow these instructions. Keep and refer to these instructions often
Australia
Unit 6/168 - 180 Victoria Road
Marrickville, Sydney NSW 2204
Table of Contents
Warnings and Safe Play Instructions. . . . . . . . . . . . . . . pg. 2
Protective Surfacing Guidelines. . . . . . . . . . . . . . . . . . . pg. 3
Instructions for Proper Maintenance . . . . . . . . . . . . . . . pg. 4
About Our Wood – Limited Warranty . . . . . . . . . . . . . . pg. 5
Keys to Assembly Success . . . . . . . . . . . . . . . . . . . . . . pg. 6
Metric Conversion Sheets . . . . . . . . . . . . . . . . . . . . . pg. 7,8
Part ID . . . . . . . . . . . . . . . . . . . . . . . . . . . . . . . . . . . . . . . pg. 9
Rev Oct.20/2013
Advertisement

Related Manuals for SELWOOD A25190


Summary of Contents for SELWOOD A25190
- Page 1 MK END LADDER SWING ASSY 3 POSITION MONKEY LADDER SWING – A25190 ASSEMBLY INSTRUCTIONS WARNING To reduce the risk of serious injury or death, you must read and follow these instructions. Keep and refer to these instructions often and give them to any future owner of this play system. Manufacturer contact information provided below.
- Page 2 Warnings and Safe Play Instructions CONTINUOUS ADULT SUPERVISION REQUIRED. Most serious injuries and deaths on playground equipment have occurred while children were unsupervised! Our products are designed to meet mandatory and voluntary safety standards. Complying with all warnings and recommendations in these instructions will reduce the risk of serious or fatal injury to children using this play system.
- Page 3 www.selwoodproducts.com...
- Page 4 www.selwoodproducts.com...
- Page 5 Selwood Products states that the product has been designed for safety and quality. Any modifications made to the original product could damage the structural integrity of the unit leading to failure and possible injury. Modification voids any and all warranties and Selwood Products will accept no liability for any modified products or consequences resulting from failure of a modified product.
- Page 6 Square Assembly www.selwoodproducts.com...
- Page 7 www.selwoodproducts.com...
- Page 8 www.selwoodproducts.com...
- Page 9 Part Identification (Reduced Part Size) (3) #8 x 1-1/2" Wood Screw (52042512 (10) #8 x 2-1/2" Wood Screw ( 9290522) (4) 1/4" T-Nut (22) 5/16" T-Nut (9285200) (9285300) (12) #8 x 3" Wood Screw ( 9290530) (4) 1/4" Lock Washer (22) 5/16"...
- Page 10 Part Identification (Reduced Part Size) (1) MK Front Beam 2 x 6 x 94 3632014 (1) MK Back Beam 2 x 6 x 94 3632015 (1) SW Mount 2 x 4 x 38-1/8" 3641861 (1) Ground Rail 5/4 x 4 x 93 13/16" 3642018 (2) End Post 2 x 4 x 83 -1/2"...
- Page 11 If you have missing, damaged or require replacement parts DO NOT contact your retailer. Please visit www.selwoodproducts.com and select the Parts Centre. You can then complete a quick online order form or make direct contact with the Selwood Products Part Team. www.selwoodproducts.com www.selwoodproducts.com...
- Page 12 Step 1: Monkey Swing Rail Assembly Note: Pre-drill all holes using a 1/8” drill bit before installing the wood screws. A: Insert 6 (A10) 1-1/8 x 15-7/8” Dowels into (A1) MK Front Beam and (A2) MK Back Beam as shown in fig. 1.1.
- Page 13 Step 2: Monkey End Ladder Assembly Part 1 Note: Pre-drill all holes using a 1/8” drill bit before installing the wood screws. A: Insert 3 (A9) 1-1/8 x 18-5/8” Dowels into 2 (A5) End Posts as shown in fig. 2.1. B: Make sure shoulder of dowel is against each post before pre-drilling pilot holes.
- Page 14 Step 2: Monkey End Ladder Assembly Part 2 D: To bottom of the posts attach (A4) Ground Rail with 2 (G5) 5/16 x 4-1/2” Hex Bolts (with lock washer, flat washer and t-nut). Be sure to keep the bolts loose. (fig. 2.3) E: Attach 1 (A6) End Diagonal to each end of (A4) Ground Rail with 1 (G9) 5/16 x 2-1/2”...
- Page 15 Step 3: Attach Swing Hangers Fig. 3.3 Warning: For your child’s safety, orientate the swing hangers as shown to ensure your swing will have proper swing motion when installed. Failure to do so could result in premature failure of the swing hanger or swing chain.
- Page 16 Step 4: Attach Triangle Plates Part 1 A: Place Monkey Swing Rail Assembly on the ground with the Bolt-Thru. Swing Hangers facing up. (fig. 4.1) B: Attach 1 Triangle Plate to the End Ladder side of both (A1) MK Front Beam and (A2) MK Back Beam, in the places shown in fig.
- Page 17 Step 4: Attach Triangle Plates Part 2 If you have purchased a Meadowside refer to fig. 4.2. Otherwise, refer to fig. 4.3. D: Attach 1 Triangle Plate to the Fort side of both (A1) MK Front Beam and (A2) MK Back Beam using 1 (G1) 5/16 x 1-1/2”...
- Page 18 Step 5: Attach End Ladder to Swing Rail If you have purchased a Meadowside fort complete this step and proceed to Step 8M. Otherwise, continue with this step and proceed to next Step. A: Attach End Ladder Assembly to the side of the Swing Rail Assembly with the overhang (fig. 5.1 and 5.2) using 1 (G10) 5/16 x 3”...
- Page 19 Step 6: Attach Spacer A: Attach (A11) Spacer (fig. 6.1 and 6.2) using 3 (S2) #8 x 1-1/2” Wood Screws to (F13) Post making sure that (A11) Spacer is flush to outside edge of (F13) Post and tight to (F14) Wall Support. Fig.
- Page 20 Step 7: Attach SW Block to Fort Part 1 If you have purchased a 1.2M deck, remove Top Hole Plugs as shown in fig. 7.1 If you have purchased a 1.5M deck, remove Bottom Hole Plugs as shown in fig. 7.2 A: On the Swing Wall Side of the fort remove the 2 (H2) 1/4 x 2”...
- Page 21 Step 7: Attach SW Block to Fort Part 2 C: Attach (A8) SW Block to the Side Roof/Roof Side and Wall Support, through to (F13) Post using 2 (G7) 5/16 x 5-1/2” Hex Bolt (with lock washer, flat washer and t-nut). (fig. 7.3) Fig.
- Page 22 Step 8: Connect Monkey Ladder Assembly to Fort If you have purchased a 1.2M deck, use Top Bolt holes as shown in fig. 8.1 If you have purchased a 1.5M deck, use Bottom Bolt holes as shown in fig. 8.2 A: Attach the Swing Rail Assembly to the inside face of (A8) SW Block using 1 (G5) 5/16 x 4-1/2”...
- Page 23 Step 8M: Connect Monkey Ladder Assembly to Fort (Meadowside Fort Only) A: Remove previously installed hole plugs from both SW Mounts (2446, 2447), as shown in fig. 8.3. B: Attach the Swing Rail Assembly to the outside face of (2446) SW Mount using 1 (G10) 5/16 x 3” Hex Bolt (with lock washer, flat washer and t-nut) in the top hole of the Triangle Plate and 1 (G1) 5/16 x 1-1/2”...
- Page 24 Step 9: Attach Swing Ground Stakes A: Drive one (A7) Ground Stake 10-1/2” into the ground at each (A5) End Post and attach with 2 (S3) #8 x 2-1/2” Wood Screws per ground stake. (fig. 9.1 and 9.2) Warning! To prevent tipping and avoid potential injury, stakes must be driven 10-1/2”...
- Page 25 Step 10: Attach Belt Swings and Acro Swing A: Using 1 Threaded Clip per rope, join the clip to the Acro Rope and then that clip through the Acro Bar. (fig. 10.1) Attach 1 Threaded Clip to each Acro Handle and then through the first clip as shown in fig. 10.2. Make sure to close the Threaded Clips tightly using an adjustable wrench.
- Page 26 Important Instructions Prior to Play: CAUTION: To reduce risk of injury, remove swings from unit prior to child using monkey bars. Fall zone under monkey bars should be clear of all hazards while being used. www.selwoodproducts.com...
- Page 27 NOTES www.selwoodproducts.com...
-
Page 28: Register Your Product Online
Register your Product Online To register yourself as the original purchaser of this Selwood Products Swingset / Climbing Frame, please take a few moments to complete the short registration form that will be found online at: www.selwoodproducts.com/warranty-registration Rate and Review Your Product...
Need help?
Do you have a question about the A25190 and is the answer not in the manual?
Questions and answers