Advertisement
Quick Links
A L L
P U R P O S E
V I N Y L
G A R D E N
EN
OWNER'S MANUAL /
Instructions for Assembly '10.5 Ft Apex'
Size 10.5Ft x 8Ft / 3.2 m x 2.4 m
Ver: 0.0
FR
MANUEL D'INSTRUCTION/
Instructions pour l'Assemblage '10.5 Pieds Apex'
Dimension 10.5Pieds x 8Pieds / 3.2 Mètre x 2.4 Mètre
Ver: 0.0
DE
Benutzerhandbuch /
Montageanleitung'10.5 Ft Apex'
Größe: 10.5Ft x 8Ft / 3.2 m x 2.4 m
Ver: 0.0
ES
MANUAL DEL PROPIETARIO /
Instrucciones de montaje '10.5 Pies Apex'
Tamaño 10.5Pies x 8Pies / 3.2 Metros x 2.4 Metros
Ver: 0.0
PT
MANUAL DO PROPRIETARIO/
Intruções de montagem.'10.5 pés Apex'
Tamanho 10.5pés x 8pés / 3.2 Metro x 2.4 Metro
Ver: 0.0
NL
Gebruiksaanwijzing voor eigenaar/
Instructies voor bouw '10.5Voet Apex'
Maat 10.5voet x 8voet / 3.2 Meter x 2.4 Meter
Versie: 0.0
Příručka uživatele /
CS
Návod k montáži '10.5 Stopy Apex'
Velikost 10.5Stopy x 8Stopy / 3.2 Metr x 2.4 Metr
Verze : 0.0
NÁVOD PRE UŽÍVATELA /
SK
Návod na zloženie '10.5 Stopa Apex'
Velkosť 10.5Stopa x 8Stopa / 3.2 m x 2.4 m
Pozri: 0.0
PRIROČNIK ZA LASTNIKA /
SL
Navodila za montažo '10.5 Čevljev Apex'
Velikost 10.5Čevljev x 8Čevljev / 3.2 Metrov x 2.4 Metrov
Razl: 0.0
Model # 30216
TM
A Product of
S H E D S
(Approx.)
(Approx.)
(Ca.)
(Aprox.)
(Aprox.)
(Ongeveer)
(Přibližně)
(približne)
(Približno)
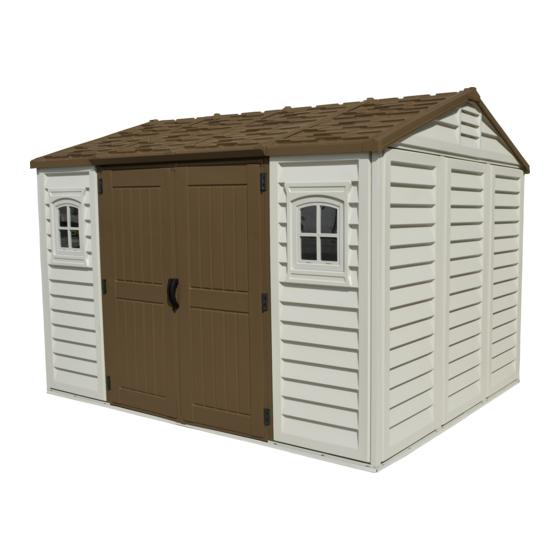
VINYL GARDEN SHED
Gazdinski Priručnik /
HR
Instrukcije za skupštine '10.5 Stopalo Apex'
Veličina 10.5Stopalo x 8Stopalo/ 3.2 Metar x 2.4 Metar
Ver: 0.0
FELHASZNÁLÓI KÉZIKÖNYV /
HU
Útmutató az összeszereléshez '10.5 Láb Apex'
10.5Láb x 8Láb / 3.2 Méter x 2.4 Méter
Verzió: 0.0
SV
ÄGARENS MANUAL/
Monteringsinstruktioner för '10.5 Fot Apex'
Storlek 10.5fot x 8fot / 3.2 m x 2.4 m
Version: 0.0
IT
MANUALE DEL PROPRIETARIO /
Istruzioni per l'assemblaggio '10.5 Piedi Apex'
Dimensione 10.5Piedi x 8Piedi / 3.2Metri x 2.4Metri
Versione 0.0
PODRĘCZNIK UŻYTKOWNIKA /
PL
Instrukcja montażu '10.5 Stopy Apex'
Wymiary 10.5Stopy x 8Stopy / 3.2 Metr x 2.4 Metr
Wersja: 0.0
MANUAL DE UTILIZARE /
RO
Instrucţiuni de asamblare '10.5 Picioare Apex'
Mărime 10.5Picioare x 8Picioare / 3.2 Metri x 2.4 Metri
Ver: 0.0
РЪКОВОДСТВО ЗА ПРИТЕЖАТЕЛЯ /
BG
Инструкции за сглобяване '10.5 Фута Apex'
Размер 10.5 Фута x 8 Фута / 3.2 Метра x 2.4 Метра
Версия: 0.0
KULLANIM KILAVUZU /
TR
Montaj Talimatları '10.5 Fit Apex'
(Yaklaşık olarak)
10.5Fit x 8Fit / 3.2 m x 2.4m
Sürüm: 0.0
(Približno)
(Hozzávetőlegesen)
(Ungefär)
(Circa)
(W przybliżeniu)
(Aprox.)
(приблизително)
Advertisement

Related Manuals for USP DURAMAX Apex 10.5 x 8


Summary of Contents for USP DURAMAX Apex 10.5 x 8
- Page 1 VINYL GARDEN SHED A Product of A L L P U R P O S E V I N Y L G A R D E N S H E D S Gazdinski Priručnik / OWNER’S MANUAL / Instructions for Assembly ‘10.5 Ft Apex’ Instrukcije za skupštine ‘10.5 Stopalo Apex’...
- Page 2 Building Dimensions : Storage Exterior Dimension Interior Dimension Approximate Door Opening Size Base Dimension Roof Edge to Edge Area Volume Wall to Wall inch inch inch inch 79 Sq. Ft 480 Cu.Ft 10.5 Ft x 8 Ft Width 326.2 125 1/2 318.7 128 3/8 123 3/8...
- Page 3 Gebouw afmeting: Opslag Binnenkant afmeting Buitenkant afmeting Benadering Deur opening Maat Gebied Muur tot muur Volume Basis afmeting Dakrand tot rand inch inch inch inch 79 Vierkante 480 Kubieke 10.5 Voet x 8 Voet voet voet Wijdte 125 1/2 326.2 123 3/8 313.3 318.7...
- Page 4 Zgrada dimenzija Približno određena Skladištenje Vanjski dimenzija Interijer dimenzija Vrata Open Područje Zidni to zidni Krov rub to rub mjera Svezak Temeljiti dimenzija inch inch inch inch 79 Četvornih 480 Kubni 10.5 Stopalo x Stopalo Stopalo 8 Stopalo 125 1/2 326.2 123 3/8 313.3...
- Page 5 Wymiary budowlane: Wymiary wewnętrzne Magazynowa Wymiary zewnętrzne Przybliżone Otwieranie drzwi Kubatura Wymiary fundamentów Dachu od krawędzi do krawędzi od ściany do ściany Powierzchnia wymiary 480 Stopy inch inch inch 10.5 Stopy 79 Stopy sześcienny x 8 Stopy Szerokość 326.2 125 1/2 318.7 128 3/8 123 3/8...
- Page 6 Tools You Will Need Alati, Trebat će Vam 1. Cordless Drill - Philips Head 6. Tape Measure 1. Bežični Svrdlo – Philips Voditelj 6. Traka Divizor 2. Screwdriver - Philips Head 7. Hand Gloves 2. Vijak Vozač - Philips Voditelj 7.
- Page 7 Parts List Seznam součásti Lista delle varie parti Liste des pièces Zoznam častí Lista części Teileliste Lista elementelor componente Seznam delov Listado de piezas Dijelovi Lists Списък на частите Lista de Peças Alkatrészlista Parça Listesi Onderdelenlijst Komponentlista 1.Check all parts prior to installation. 2.Before starting installation, please refer to Safety &...
- Page 8 VBA01 VRD02 FDCL VBA02 VRD03 FDCR VBA03 VRA12 VBA04 VRA13 VBA05 VRA23 VBA06 VRA24 VCD01 VRB11 VCB03 VRB12 VCB04 VRB13 VRB15 VRB14 VRB07 CLA1 VRB08 CLB2 VRD01 CLB3 VRB09 CLA4 VRB10 WPA1 PPGL VJA01 WPA2 VRA08 RPD1 PINL VRA09 RPD2 VRA10 RPD3 VRA11...
- Page 9 RPD1 RPD2 RPD6 RPD2 RPD5 RPD3 RPD5 RPD4 FPD2 VRB11 VRA21 VRB15 VRB13 VRB07 VRA23 VRD01 VRB10 VRB15 VJA01 VJA01 VRA08 VRB12 VRB13 FPD1 VRA12 VRB09 VRB13 VRB15 VRA14 VRB08 VRD01 VRA12 VRA09 VRA14 VRA11 VRB12 VRB13 VRB12 VRA14 VRA22 VRD01 VRB08 VRB13...
- Page 10 # 10-17 # 18 # 19-33 # 34-52 # 53-57 # 58-60...
- Page 11 Foundation Základy Fondamenta Fondation Základ Podstawa Fundament Temelj Fundaţia La cimentación Temelj Фундамент Fundação Alap Temel Fundering Grunden 1.Set the Torque limit of your Screw drill to #3 or #4 to ensure the Screws do not strip the Metal reinforcements. 2.It is important that these instructions are followed step by step.
- Page 12 1.Za omejitev vrtilnega momenta vijačnega vijaka nastavite #3 ali #4, da zagotovite, da vijaki ne ojačitijo kovinskih ojačitev. 2.Pomembno je, da sledite opisanim navodilom korak za korakom. 3.Montaže ne izvijajte, kadar piha močen veter. 4.Vsi deli so jasno označeni in pazite na pravilno uporabo. 5.Če se gradi skladišče proti steni, ga graditi 2,5 ft.
- Page 13 (EN) DuraMax must be installed on a DuraMax Foundation, level wooden platform or a level concrete foundation,that has an outside dimension of 98 1/4” x 129 3/8”(2497mm x 3287mm). (FR) DuraMax doit être installé sur une plate-forme en bois de niveau ou une fondation en béton de niveau, qui a une dimension extérieure de 98 1/4”...
- Page 14 Parts needed Potřebné součástí Parti occorrenti Pièces nécessaires Potrebné časti Niezbędne elementy Benötigte Teile Dele, ki jih boste potrebovali Elementele componente necesare Piezas necesitadas Dijelovi potreban Необходими части Peças Necessárias Szükséges részek Gerekli parçalar Onderdelen nodig Delar som behövs VFA01 VFA05 VFA02 VFA06...
- Page 15 VFA03 (x2) (x4) VFA04 (x2) VFA04 VFA03 VFA05 (x8) (x8) VFA05 VFA05...
- Page 16 VFA15 (x2) (x6) 1&2 VFA15 VFA02 VFA04 VFA03 VFA01 VFA15 VFA03 VFA15 VFA02 VFA04 VFA02 VFA04 VFA04 VFA15 VFA15 (x2) (x6) VFA03 1&2 VFA15 VFA15 VFA15 VFA02 VFA03 VFA03 VFA04 VFA15 VFA01 VFA01...
- Page 17 (x8) VFA02 VFA02 VFA05 VFA05 VFA05 VFA01 VFA05 VFA05 VFA05 VFA05 VFA01 VFA05 VFA05 VFA02 VFA05 VFA01 VFA06 (x3) (x6) VFA05 VFA06 VFA05 VFA06 VFA06 VFA05 VFA05...
- Page 18 VFA10 (x4) S1 (x8) VFA10 VFA10 VFA10 VFA10 VFA05 VFA10 VFA03 VFA10 VFA10 VFA04 VFA05...
- Page 19 Base Frame Základní kostra Cornice di Base Canaux de base Základňový rám Rama fundamentowa Bodenrahmen Osnovni okvir Rama bazei Armazón de la base Baza okvir Основна Рама Base de armação Alapváz Temel Çerçevesi Basis frame Basram Parts needed Potřebné součástí Parti occorrenti Pièces nécessaires Potrebné...
- Page 20 Walls & Columns Zdi a kolumny Pareti & Colonne Murs et colonnes Steny a stĺpy Ściany I Kolumya Wände und Säulen Stene in stebri Pereţi şi stâlpi Columnas y paredes Zidovi i Kolumne Стени & Колони Paredes e Colunas Falak és oszlopok Duvarlar &...
- Page 21 Two people needed. Trebale su dvije osobe. Deux personnes nécessaires. Deux personnes nécessaires. Zwei Leute brauchten Två personer behövde. Dos personas son necesarias para el montaje Sono necessarie due persone. Duas pessoas precisavam. Potrzebne były dwie osoby. Er waren twee mensen nodig. Două...
- Page 22 Lock the panel into the column from top to bottom. Verrouiller le panneau dans la colonne de haut en bas. Verriegeln Sie das Panel von oben nach unten in die Säule. Trabe el panel en la columna de arriba a abajo. Método de montagem de colunas e painéis Kolom en paneelmontage methode.
- Page 23 WPA2 (x1) WPA2 WPA2 WPA2 1&2 CLB2 CLB2 CLICK! WPA2 WPA2 CLB2 CLB2 WPA2 CLB2 VBA01 VBA01 3&4 VBA01 CLA1 (x1) S1 (x2) 1&2 CLA1 WPA2 WPA2 CLA1 CLA1 WPA2 CLICK! CLA1 WPA2 VBA01...
- Page 24 S2 (x1) CCF (x1) CLB2 CLB2 S1 (x2) VCD01 (x1) VCD01 CLA1 VCD01 CLA1 VCD01...
- Page 25 (x2) WPA1 (x1) CLB3 (x1) CLICK! CLICK! 1&2 WPA1 CLICK! WPA1 3&4 CLB2 CLB2 CLICK! WPA1 WPA1 WPA1 CLB3 CLB3 CLB3 CLB3 VBA02 VBA02 VCB03 (x1) S1 (x2) WPA1 1&2 CLB2 CLB3 VCB03 VCB03 VCB03 CLB2 CLB3 VCB03...
- Page 26 S1 (x3) CMF (x1) S2 (x1) WPA1 (x1) CLB3 (x1) CLB3 WPA1 VBA03 WPA1 CLB3 CLB3 VCB03 VCB03 3&4 CLB3 CLB3 WPA1 VBA03 S1 (x2) CLB2 (x1) WPA1 (x1) CLB2 WPA1 VBA03 WPA1 VBA04 CLB3 WPA1 CLB2 CLB2 WPA1 VBA04 CLB2 VBA03 2&4...
- Page 27 VCB04 (x1) S1 (x2) S2 (x1) CCF (x1) VCB04 VCB04 CLB2 CLB2 2,3&4 VCB04 CLB2 VCB04 VCB03 S1 (x2) CLB3 (x1) WPA1 (x1) WPA1 WPA1 CLB2 WPA1 CLB3 CLB3 VBA04 VBA04...
- Page 28 VCB03 (x1) S1 (x2) CLB2 1&2 VCB03 CLB3 VCB03 VCB03 CLB2 CLB3 VCB03 S1 (x3) S2 (x1) CLB3 (x1) WPA1 (x1) CMF (x1) CLB3 WPA1 WPA1 VBA04 CLB3 WPA1 CLB3 VCB03 VCB03 3&4 CLB3 CLB3 VBA04...
- Page 29 S1 (x2) CLB3 (x1) WPA1 (x1) WPA1 WPA1 CLB3 WPA1 CLB3 CLB3 WPA1 VBA05 VBA05 VCB03 (x1) S1 (x2) CLB3 VCB03 VCB03 VCB03 1&2 CLB3 CLB3 CLB3 VCB03 VCB03...
- Page 30 S1 (x2) CLB2 (x1) WPA1 (x1) CLB2 VBA05 WPA1 WPA1 VBA02 CLB3 WPA1 CLB2 CLB2 WPA1 VBA02 CLB2 2&4 S2 (x1) CCF (x1) S1 (x1) CLB2 VCB03 1,2&3 VCB03 VCB03 CLB2...
- Page 31 S1 (x2) WPA1 (x1) CLB3 (x1) WPA1 WPA1 WPA1 CLB2 CLB3 CLB3 VBA02 VBA02 CMF (x1) S1 (x2) S2 (x1) VCB04 (x1) VCB04 VCB04 1&2 CLB3 3&4 CLB3 VCB04 VCB04 CLB3 VCB04...
- Page 32 S1 (x4) VCB03 (x1) CLB3 (x1) WPA1 (x1) WPA1 VCB03 CLB3 CLB3 VBA03 WPA1 CLB3 2&3 CLB3 VCB03 VCB03 VCB03 VBA03 S1 (x2) CLB2 (x1) WPA1 (x1) CLB2 WPA1 VBA03 WPA1 VBA06 CLB3 WPA1 CLB2 CLB2 WPA1 CLB2 VBA06 2&4...
- Page 33 S1 (x1) S2 (x1) CCF (x1) CLB2 VCB03 VCB03 CLB2 1,2&3 CLB2 VCB03 S1 (x2) CLA4 (x1) WPA2 (x1) WPA1 WPA2 CLA4 WPA2 CLA4 VBA06 VBA06 WPA2 CLA4 VBA06...
- Page 34 S1 (x2) VCD01 (x1) VCD01 VCD01 1&2 VCD01 CLA4 VCD01 CLA4...
- Page 35 Roof Structures Střešni konstrukce Strutture di tetto Structure Du Toit Strešné konštrukcie Struktura dachu Dachkonstruktionen Strešne Konstrukcije Structuri de acoperiș Estructuras de techo Krovne konstrukcije Покривни конструкции Estrutura do Telhado Tetőszerkezetek Çatı yapıları Dakconstructies Takstrukturer Parts needed Potřebné součástí Parti occorrenti Pièces nécessaires Potrebné...
- Page 36 FCC (x4) S1 (x4) CLB2 1&2 CLB2 S1 (x2) FDCR (x1) FDCL (x1) FDCL FDCR FDCR CLA4 CLA1 FDCL CLA1 CLA4...
- Page 37 Roof Strcture Assembly Sklop krovne konstrukcije Assemblage De La Structure Du Toit Tetőszerkezet szerelvény Dachkonstruktion Montage Takkonstruktion Montaje de la estructura de techo Assemblea tetto della struttura Armação da Estrutura do Telhado ontaż konstrukcji dachu Dakconstructie montage kit Coinneamh Structar Deil Montážní...
- Page 38 Left and Right Roof Strcture Assembly Skupština strukture lijevog i desnog krova Assemblage de structure de toit gauche et droite Bal és jobb tetőszerkezet szerelvény Linker und rechter Dachaufbau Vänster och höger takkonstruktion Ensamblaje de estructura de techo izquierda y derecha Assemblaggio della struttura del tetto sinistro e destro Montagem de estrutura de telhado esquerda e direita Montaż...
- Page 39 S1 (x16) VRB09 (x4) VRB10 (x4) VRB09 VRB10 VRB07 VRB10 VRB09 VRB08 S1 (x4) RJ (x4) VRB07 VRB08 VRB08 VRB08 1&2...
- Page 40 FPD1 (x2) FP (x6) FPD1 FPD1 VRB08 VRB08 FP (x14) FPD2 (x2) FPD2 VRB07 FPD2 FPD1 FPD2 FPD1 VRB07 VRB08...
- Page 41 S1 (x4) VRD01 (x4) VJA01 (x2) VRD01 VRD01 VRD01 VJA01 VRD01 Back Roof Strcture Assembly Sastavni dio krovne strukture Assemblage De La Structure Arriere Du Toit Vissza Tetőszerkezet szerelvény Hintere Dachkonstruktion Montage Bakre takkonstruktion Estructura de montaje de techo trasera Assemblea Struttura posteriore del tetto Armação da Estrutura do Telhado Traseiro Monta˜...
- Page 42 S1 (x6) VRA21 (x1) VRA21 VRA08 VRA09 VRA10 (x1) S1 (x16) VRA11 (x1) VRA10 VRA21 VRA11 VRA08 VRA09...
- Page 43 Front Roof Strcture Assembly Prednja sklopa krovne konstrukcije Assemblage De La Structure Avant Du Toit Első tetőszerkezet szerelvény Vordere Dachkonstruktion Montage Frammonterad takkonstruktion Estructura de Asamblea de techo Frontal Assemblea anteriore tetto della struttura Armação da Estrutura do Telhado Frontal Monta˜...
- Page 44 VRA22 (x1) S1 (x6) VRA08 VRA09 VRA22 VRA10 (x1) S1 (x16) VRA11 (x1) VRA10 VRA08 VRA11 VRA22...
- Page 45 S7 (x24) VRA12 (x2) VRA13 (x1) VRA12 VRA13 VRA12 VRA12 VRA12 VRA13 VRA13 VRA12 VRA12 VRA12...
- Page 46 S7 (x16) VRA23 (x1) VRA24 (x1) VRA12 VRA23 VRA24 VRA23 VRA12 VRA24 VRA23 VRA12 VRA12 VRA24 VRA23 VRA12 VRA12...
- Page 47 S1 (x2) S2 (x2) FPD1 FPD1 FPD2 VRB08 FPD1 FPD1 1,2&4 S1 (x2) S2 (x2) FPD2 FPD2 FPD1 VRB07 FPD2 FPD2 1,2&4...
- Page 48 S1 (x4) VRD01 VRD01 VRD01 VRD01 1&2 VRD01 VRD01 S1 (x5) FDCL VRD01 VJA01 VRD01 FDCR...
- Page 49 S1 (x12) VRD02 (x1) VRD01 1&3 VRD01 CLA4 VRD01 VRD02 CLA1 VRD02 VRD01 2&3 VRD01 VRD02 CLA1 S7 (x2) VRD03 (x1) VRD03 VRD01 VRD03 VRD02 1&2 VRD03 VRD01 CLA1...
- Page 50 S1 (x8) VRA23 VRA12 VRA12 VRA12 1&2 VRB10 VRA12 VRB10 VRB10 VRA23 VRB11 (x2) S1 (x20) VRB12 (x2) VRB12 VRB11 VRB11 VRB12 VRB12 VRB10 VRB11 VRB11 VRB11 VRB09 VRD01...
- Page 51 S1 (x8) VRA10 VRA21 VRA08 VRA09 VRA11 VRA11 VRB09 VRA08 VRA09 VRA22 VRA10 VRA21 VRB09 S1 (x2) FPD1 FPD2 FPD2 FPD1 VRB12...
- Page 52 S7 (x24) S1 (x12) VRB13 (x6) VRB13 VRB13 VRB13 VRB13 VRB13 VRB13 VRA12 VRB13 VRB13 VRB13 VRB13 VRB13 VRD01 VRD01 VRD03 S1 (x12) VRB14 (x3) VRB14 VRB14 VRB14 VRB14...
- Page 53 S7 (x16) S1 (x8) VRB15 (x8) VRB15 VRB15 VRB15 VRB15 VRB15 VRB15 VRB15 VRD01 VRB15...
- Page 54 Roof Panels Střešní panely Pannelli del tetto Planches de Toiture Strešné panely Panele dachowe Dachplatten Strešni Paneli Panouri de acoperiș Paneles de techo Krovne ploče Покривни панели Painéis do Telhado Tetőpanelek Çatı Panelleri Dakpanelen Takpaneler Parts needed Potřebné součástí Parti occorrenti Pièces nécessaires Potrebné...
- Page 55 Insert roof plugs into Roof Panel only as indicated. Use a screwdriver to align the holes. Start from back left side roof panel going right. Insérez les bouchons de toit dans le panneau de toit uniquement comme indiqué. Utilisez un tournevis pour aligner les trous. Commencez par le panneau de toit arrière gauche en allant à...
- Page 56 PPG (x6) PIN (x6) RPD1 (x1) RPD1 PPG (x6) PPG (x6) PIN (x6) PIN (x6) RPD2 (x1) RPD2 (x1) RPD2 RPD2...
- Page 57 PPG (x8) PPG (x10) PIN (x8) RPD4 (x1) RPD3 (x1) PIN (x10) RPD4 RPD3 RPD4 VRD03 PPG (x9) PPG (x9) PPGL (x1) PPGL (x1) PIN (x9) PIN (x9) RPD5 (x1) RPD5 (x1) PINL (x1) PINL (x1) PINL PINL PPGL PPGL RPD5 RPD5...
- Page 58 PPG (x13) PPGL (x1) PIN (x13) RPD6 (x1) PINL (x1) PINL PPGL RPD6 FP (x4) EC2 (x2)
- Page 59 Door Dveře Porta Porte Dvere Drzwi Die Tür Vrata Uşa La puerta Vrata Врата Porta Ajtó Kapı De deur Dörr Parts needed Potřebné součástí Parti occorrenti Pièces nécessaires Potrebné časti Niezbędne elementy Benötigte Teile Dele, ki jih boste potrebovali Elementele componente necesare Piezas necesitadas Dijelovi potreban Необходими...
- Page 60 SBC1 (x4) (x2) DLD (x1) PW (x4) 1&2 SBC1 SBC1 (x8) PW (x8) SBC1 CLA1 1&2 CLA4 CLA1 CLA1...
- Page 61 SBC1 (x8) (x1) LH (x1) PW (x8) SBC1 CLA1 CLA1 CLA4 1&2 CLA1 SBC1 (x4) R (x1) L (x1) PW (x4) SBC1 SBC1...
- Page 62 Assembly on Concrete Platform Montáž na betonové plošině Montaggio su piattaforma in calcestruzzo Assemblage sur plate-forme en béton Montáž na betónovú plošinu Montaż na betonowej platformie Montage auf Betonplattform Montaža na betonsko ploščad Adunarea pe platforma de beton Montaje sobre la base de hormigón Montaža na betonskoj platformi Монтаж...
- Page 63 Aby ste zabezpečili, že vaša haly odolá vysokému vetru, odporúčame použiť túto podlahovú možnosť. Na vhodnú podlahovú základňu sa odporúča betónová podložka alebo veľké betónové terasové kamenné štvorce. Uistite sa, že je pevný a rovný a umožní odvodnenie z miesta. Vytvorte základový betónový základ, ktorý má vonkajší rozmer 98 1/4” x 129 3/8”(2497mm x 3287mm).pre základňu. Pre betónové...
- Page 64 (x22) (x22) 1,2&3 Floor Options Možnosti podlahy Opzioni del pavimento Option plancher Možnosti podlahové Opcje podłogowe Bedenoptionen Možnosti tal Opțiuni de podea Opción de piso Kat Mogućnosti Подови опции Opções de piso Padlóbeállítások Yer Seçenekleri Betonnen plaat Golvalternativ Plywood (Not included) Překližka (není...
- Page 65 Umiestnite vonkajšie použitie (CDX) - 3/4 "(19 mm), odolná voči poveternostným vplyvom morskej stupeň preglejky na vrchole základu. Postavite Zunanjost razred (CDX) - 3/4 "(19mm) Vreme dokaz Marine stopnje vezan na vrhu temelja. Postavite vanjsku površinu (CDX) - 3/4 "(19 mm) morsku ploču s obloženom vremenskom zaštitom na vrhu temelja. Helyezzük el a külső...
- Page 66 Concrete Floor (Not included) Betonová podlaha (není součástí balení) Pavimento in cemento (non incluso) Plancher de béton (non inclus) Betónová podlaha (nie je súčasťou balenia) Podłoga betonowa (nie wliczone) Betonboden (Nicht enthalten) Betonska tla (niso vključene) Podea din beton (nu este inclusă) Piso de concreto (No incluido) Betonski kat (nije uključen) Бетонни...
- Page 67 Apply silicone around the perimeter of the base ‘U’ channel. Seal the corners, joints and base of door column. This is optional and should be done for heavy rain areas if needed. Appliquez de la silicone sur le pourtour du canal de ‘U’ de la base. Scellez les coins, les joints et la base de la colonne de la porte.
- Page 68 For heavy rain areas, you can fix a weather strip at the bottom of the door. This is optional and the part in not included. Pour les zones de fortes pluies, vous pouvez fixer un coupe-froid au bas de la porte. Cette étape est facultative et la partie n'est pas incluse.
- Page 69 High wind area installation instructions Visoke instalacije za instalaciju vjetra Instructions pour une installation dans des zones de vent violent Magas szélterületi szerelési útmutató Starke Windbereiche Installationsanweisungen Installationsanvisningar för hög vindområde Instrucciones de instalación de la zona con fuertes vientos Istruzioni per l'installazione dell'area vento forte Instruções de Instalação para Áreas de Ventos Fortes Instrukcja instalacji w obszarze wysokiego wiatru...
- Page 70 To ensure that your shed will withstand high winds,you need to anchor on the concrete foundation.Align the shed, mark the concrete at the holes in the Foundation Profiles and drill concrete with suitable concrete bit to accept Dia 6mm wall plug. (Follow the assembly step in page 61-63).
- Page 71 Attach each side panel (WPA1 ,WPA2 ) on the bottom to the Base U-channel. Using a dia. 3mm (1/8”) drill with a power drill, make two equal distance holes on the Base U-channel through the Side Panel. Drive a self tapping screw(S4) through the Base U-channel to the Side Panel.
- Page 72 WPA1 WPA1 WPA1 WPA1 VBA05 VBA02 VBA02 VBA05...
- Page 73 Attach each Side Panel (WPA1 ,WPA2 ) on top to the Roof Structure (VRD01,VRB07,VRB08). Using a dia. 3mm (1/8”) drill with a power drill, make two equal distance holes on the Side Panel through the Roof Structure. Drive a self tapping screw (S4) through the Side Panel to the Roof Structure.
- Page 74 VRB07 VRB08 VRD01 WPA1 WPA1 VRB07 VRD01 WPA1 WPA1 VRB07 VRD01 WPA1 WPA1...
- Page 75 Important Warranty Information Važne informacije o jamstvu Informations Importantes Concernant La Garantie Fontos jótállási információk Wichtige Informationen zur Gewährleistung Viktig garantiinformation Información importante sobre la garantía Informazioni importanti sulla garanzia ImportantesInformações de Garantia Ważne informacje gwarancyjne Belangrijke Informatie over de garantie Informații importante privind garanția Důležité...
- Page 76 Szopa "DURAMAX" została przetestowana i przeszła duże obciążenia wiatrem w kontrolowanym środowisku laboratoryjnym, gdy zainstalowano ją zgodnie z wytycznymi dotyczącymi instalacji wiatrowej. Naturalne obszary o dużym natężeniu wiatru wytwarzają wiatr o nieprzewidywalnych prędkościach, które są bardzo trudne do uchwycenia dokładnie według lokalizacji.
- Page 77 ADDITIONAL ACCESSORIES AVAILABLE DODATNI PROGRAMI RASPOLOŽIV (Not included) (nije uključeno) ACCESSOIRES ADDITIONNELS DISPONIBLES TOVÁBBI MEGVÁSÁROLHATÓ TARTOZÉKOK (non inclus) (nem tartozék) WEITERES ZUBEHöR YTTERLIGARE TILLGÄNGLIGA ACCESSOARERV (Nicht enthalten) (ingår ej) ACCESORIOS ADICIONALES DISPONIBLES ACCESSORI SUPPLEMENTARI DISPONIBILI (no incluida) (non incluso) ACESSóRIOS ADICIONAIS DISPONíVEIS DOSTĘPNE DODATKOWE AKCESORIA (não incluído) (nie wliczone)
- Page 78 ANCHOR KIT (Soil) SIDRO KOMPLET (tla) KIT D'ANCRE (Sol) RÖGZÍTŐ FELSZERELÉS (Talaj) ANKER-KIT (Boden) FÖRANKRINGS-KIT (Jord) KIT DE ANCLAJE (Suelo) KIT DI ANCORAGGIO (Suolo) KIT DE APOIO (Solo) ZESTAW DO MOCOWANIA (Grunt) ANKER GEREEDSCHAP (bodem) SET DE ANCORARE (ÎN SOL) KOTEVNÍ...
- Page 79 ANCHOR KIT (Concrete) SIDRO KOMPLET (beton) KIT D'ANCRE (Béton) RÖGZÍTŐ FELSZERELÉS (Beton) Verankerungsset (Beton) FÖRANKRINGS-KIT (Betong) KIT DE ANCLAJE (hormigón) KIT DI ANCORAGGIO (cemento) KIT DE APOIO (Concreto) ZESTAW DO MOCOWANIA (Beton) ANKER GEREEDSCHAP ( Beton) SET DE ACORARE (Beton) KOTEVNÍ...
- Page 80 SHELF KIT KUPANJE KIT UN KIT D’ÉTAGÈRE MINİSÉGÉT KIT REGAL AUSSTATTUNG HYLLA KIT KIT ESTANTE KIT MENSOLA KIT DE PRATELEIRAS PÓŁKA KIT PLANK MONTAGE KIT SHELF KIT MONTÁŽNÍ SOUPRAVA POLIC КОМПЛЕКТ КОЛЕКЦИЯ DOPLNKOVÝ KIT RAF KİTİ KOMPLET POLIC Easy mounting system on the middle column. 6 inch wide reinforced PVC shelf with end caps. Facile système de montage sur la colonne du milieu.
- Page 81 U.S. Polymers, Inc. 1057 S. Vail Ave Montebello, CA 90640, w w w . d u r a m a x b p . c o m United States of America SKU# 30216 RD-0.0 13-11-2019...
Need help?
Do you have a question about the DURAMAX Apex 10.5 x 8 and is the answer not in the manual?
Questions and answers