Lenovo 100e Chromebook Gen 3 User Manual
Hide thumbs
Also See for 100e Chromebook Gen 3:
- Regulatory notice (39 pages) ,
- Hardware maintenance manual (75 pages) ,
- User manual (40 pages)
Table of Contents
Advertisement
Quick Links
Advertisement
Table of Contents

Related Manuals for Lenovo 100e Chromebook Gen 3


Summary of Contents for Lenovo 100e Chromebook Gen 3
- Page 1 Lenovo 100e/300e/500e Chromebook Gen 3 User Guide...
- Page 2 Generic Safety and Compliance Notices First Edition (January 2021) © Copyright Lenovo 2020. LIMITED AND RESTRICTED RIGHTS NOTICE: If data or software is delivered pursuant to a General Services Administration “GSA” contract, use, reproduction, or disclosure is subject to restrictions set forth in Contract No. GS-...
-
Page 3: Table Of Contents
Chromebook ....7 Call Lenovo ....Charge your Chromebook ... . 7 Before you contact Lenovo . -
Page 4: Discover Your Chromebook
Discover your Chromebook ™ Thank you for choosing a Lenovo Chromebook ! We are dedicated to delivering the best solution to you. Before starting your tour, please read the following information: • Illustrations in this documentation might look different from your product. -
Page 5: Chapter 1. Meet Your Chromebook
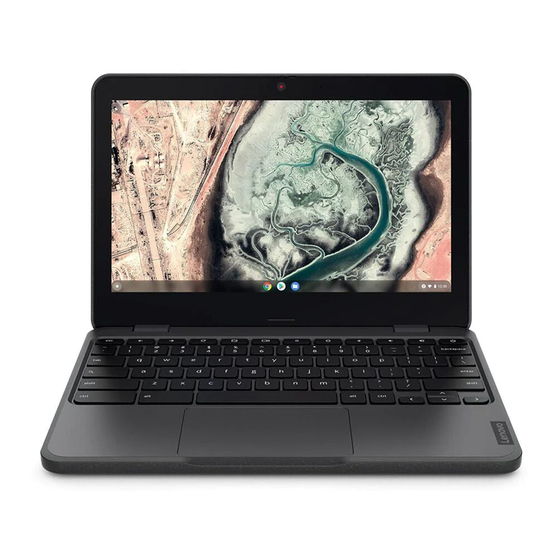
Chapter 1. Meet your Chromebook Front view Lenovo 100e Chromebook Gen 3 © Copyright Lenovo 2020... - Page 6 • “Use the camera” on page 9 • “Use the touch screen (for selected models)” on page 12 • “Get to know your Chromebook modes (for selected models)” on page 14 • “Use the touchpad” on page 12 Lenovo 100e/300e/500e Chromebook Gen 3 User Guide...
-
Page 7: Side View
Side view Lenovo 100e Chromebook Gen 3 Lenovo 300e/500e Chromebook Gen 3 ® Power connector / USB-C (3.2 Gen 1) USB 3.2 connector Gen 1 connector Audio connector microSD card slot Security-lock slot Electronic pen* Volume buttons Power button * for selected models... - Page 8 • “Use audio” on page 9 • “Use the electronic pen (for selected models)” on page 14 • “Lock your Chromebook” on page 7 • “Connect to an external display” on page 10 Lenovo 100e/300e/500e Chromebook Gen 3 User Guide...
-
Page 9: Bottom
Drain out liquid from your Chromebook if you accidentally spill liquid on the keyboard. Rear Nano-SIM-card tray* * for selected models Specifications For detailed specifications of your Chromebook, go to https://psref.lenovo.com. USB specifications Note: Depending on the model, some USB connectors might not be available on your Chromebook. Chapter 1 Meet your Chromebook... - Page 10 • Connect to an external display: – USB-C to VGA: up to 1900 x 1200 pixels, 60 Hz – USB-C to DP: up to 3840 x 2160 pixels, 60 Hz (for Lenovo 100e/ 300e Chromebook Gen 3) – USB-C to DP: up to 4096 x 2160 pixels, 60 Hz (for Lenovo 500e Chromebook Gen 3) •...
-
Page 11: Chapter 2. Explore Your Chromebook
Lock your Chromebook to a desk, table, or other fixtures through a compatible security cable lock. ® Note: The slot supports cable locks that conform to the Kensington NanoSaver lock standards using Cleat™ locking technology. You are responsible for evaluating, selecting, and implementing the locking © Copyright Lenovo 2020... -
Page 12: Navigate Your User Interface
Lenovo is not responsible for the locking device and security feature. You can purchase the cable locks at https://smartfind.lenovo.com Navigate your user interface • Type the name of your device, app, or Web page in the search box. -
Page 13: Change The Display Language
Change the display language When starting your Chromebook for the first time, you are prompted to select the display language. This setting can be changed if you need to use a different language. 1. Click the setting icon in the system tray, and then click Advanced ➙ Languages and input. 2. -
Page 14: Set The Power Plan
The following table lists the supported maximum resolution of the external display. Connect the external display to Supported resolution • Up to 3840 x 2160 pixels / 60 Hz (for Lenovo 100e/ 300e Chromebook Gen 3) USB-C (3.2 Gen 1) connector •... -
Page 15: Shut Down Your Chromebook
To reset the power plan to achieve the best balance between performance and power saving: 1. Click the setting icon in the system tray, and then click Device ➙ Power. 2. Follow the on-screen instructions to change the settings as you prefer. Shut down your Chromebook When you finish working with your Chromebook, shut it down to save power. -
Page 16: Use The Touchpad
Use the touch screen (for selected models) If your Chromebook display supports the multi-touch function, you can navigate the screen with simple touch gestures. Lenovo 100e/300e/500e Chromebook Gen 3 User Guide... - Page 17 Note: Some gestures might not be available depending on the app you use. Tap and hold to right-click Tap once to single click Drag Slide to scroll through items Zoom out Zoom in Swipe from the right: open action center Swipe from the left: view all open windows Tap with two fingers to open a shortcut menu Swipe upwards to unfold the app Launcher...
-
Page 18: Use The Electronic Pen (For Selected Models)
• Regularly calibrate the accuracy of the finger input to avoid a discrepancy. Use the electronic pen (for selected models) Selected models of Lenovo 300e/500e Chromebook Gen 3 are shipped with an electronic pen. To use the pen, slide it out of the pen slot. - Page 19 Notebook mode Stand mode Tent mode Tablet mode Warning: When operating in the tablet mode with any external device connected, the upper case (keyboard’s side) of the Chromebook may become hot. Avoid keeping your hands, lap, or any part of the body in contact with the upper case for over one minute.
- Page 20 Lenovo 100e/300e/500e Chromebook Gen 3 User Guide...
-
Page 21: Chapter 3. Cru Replacement
If you intend on installing a CRU, Lenovo will ship the CRU to you. CRU information and replacement instructions are shipped with your product and are available from Lenovo at any time upon request. You might be required to return the defective part that is replaced by the CRU. - Page 22 Note: Power supply from the built-in battery will resume after you reconnect the Chromebook to the ac power adapter. 2. Close the computer display and turn over the computer. Removal procedure Lenovo 100e/300e/500e Chromebook Gen 3 User Guide...
- Page 23 Installation procedure Chapter 3 CRU replacement...
- Page 24 Troubleshooting If the computer does not start up after you reinstall the base cover assembly, disconnect the ac power adapter and then reconnect it to the computer. Lenovo 100e/300e/500e Chromebook Gen 3 User Guide...
-
Page 25: Chapter 4. Help And Support
Chapter 4. Help and support Call Lenovo If you have tried to correct the problem yourself and still need help, you can call Lenovo Customer Support Center. Before you contact Lenovo Prepare the following before you contact Lenovo: 1. Record the problem symptoms and details: •... -
Page 26: Get Help From Google
• Lenovo hardware repair - If the problem is determined to be caused by Lenovo hardware under warranty, trained service personnel are available to provide the applicable level of service. -
Page 27: Appendix A. Accessibility And Ergonomic Information
In addition, use healthy work habits to maximize your performance and comfort when using your computer. Lenovo is committed to providing users who have hearing, vision, and mobility limitations with greater access to information and technology. Ergonomic information Good ergonomic practice is important to get the most from your personal computer and to avoid discomfort. - Page 28 Any concentrated and sustained visual activity can be tiring. If you have questions on eye fatigue or visual discomfort, consult a vision-care specialist for advice. Lenovo 100e/300e/500e Chromebook Gen 3 User Guide...
-
Page 29: Appendix B. Compliance Information
• Connect the equipment into an outlet on a circuit different from that to which the receiver is connected. • Consult an authorized dealer or service representative for help. Lenovo is not responsible for any radio or television interference caused by using other than recommended cables and connectors or by unauthorized changes or modifications to this equipment. Unauthorized changes or modifications could void the user’s authority to operate the equipment. - Page 30 Similarly, if a child notices damaged/broken parts, this should be reported to the teacher/parents/adult supervisors immediately. Damaged parts may be replaced through service provided by Lenovo. DANGER ELECTRICALLY OPERATED PRODUCT. Not recommended for children under 3 years of age (or other intended age range).
- Page 31 Operating environment Maximum altitude (without pressurization) 3048 m (10 000 ft) Temperature • Operating: 5°C to 35°C (41°F to 95°F) • Storage: 5°C to 43°C (41°F to 109°F) Note: When you charge the battery, its temperature must be no lower than 10°C (50°F). Relative humidity •...
- Page 32 Lenovo 100e/300e/500e Chromebook Gen 3 User Guide...
-
Page 33: Appendix C. Notices And Trademarks
Lenovo representative for information on the products and services currently available in your area. Any reference to a Lenovo product, program, or service is not intended to state or imply that only that Lenovo product, program, or service may be used. Any functionally equivalent product, program, or service that does not infringe any Lenovo intellectual property right may be used instead. - Page 34 Furthermore, some measurements may have been estimated through extrapolation. Actual results may vary. Users of this document should verify the applicable data for their specific environment. This document is copyrighted by Lenovo and is not covered by any open source license, including any ® Linux agreement(s) which may accompany software included with this product.
Need help?
Do you have a question about the 100e Chromebook Gen 3 and is the answer not in the manual?
Questions and answers