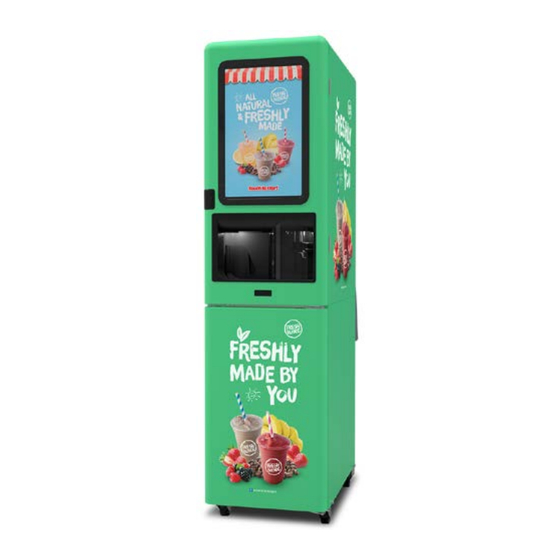
Multiplex FreshBlender Instruction Sheet
Caster brake retrofit
Hide thumbs
Also See for FreshBlender:
- Installation, operation and maintenance manual (76 pages) ,
- Faq & troubleshooting (20 pages)
Advertisement
Instruction Sheet
Two people are required to complete this Caster Brake
Retrofit.
TOOLS REQUIRED
• Clean 5-gallon bucket
• FreshBlender Door Key
• Six (6) Boards, 2" x 4" boards cut to 2' lengths (5cm x
10cm cut to 61cm lengths)
• 14mm Wrench
• 14mm Socket and Driver or Cordless Impact Drill
PARTS REQUIRED
• Blue LocTite
• 020008731 Caster Brake Retrofit Kit (kit parts listed
below)
PART NO.
020008728
Brake Hardware Set
020008727
Instructions
Brake Hardware shown below (does not include wheel fork):
BRAKE PEDAL
WAVE WASHER
BOLT
n
Never leave unit unattended during Caster Brake Retrofit.
n
Unit is heavy. Do NOT attempt to lift by hand.
,
Do NOT use a pry bar, crowbar or other sharp ended
object to leverage unit up. Sharp objects will damage unit
refrigeration system.
DESCRIPTION
NUT
BRAKE BRACKET
Warning
Warning
Caution
645 PARK EAST BLVD SUITE 5, NEW ALBANY, IN 47150
Subject: FreshBlender Caster Brake Retrofit
SCOPE: ALL MULTIPLEX FRESHBLENDER UNITS
REMOVE OLD HARDWARE
1. Pull unit 12" (31 cm) away from wall.
2. Place 5-gallon (20 liter) bucket under drain.
3. Unlock door.
4. Open lower refrigeration door.
5. Stack three (3) 2x4's (5cm x 10cm) flat on the floor
perpendicular to the right side of unit. Position these
boards 1" (2.5 cm) behind the rear of caster. These three
(3) boards will be used to support the unit.
6. Stack two (2) boards 6" (15 cm) away and parallel to
front of unit. These boards will be used as a fulcrum to
lift front of unit.
7. Slide one (1) board 3" (8 cm) under front of unit and lay
perpendicular on top of two (2) boards laying in front
of unit. This board will be used as a lever to lift front of
unit.
QTY
2
8. Make sure lower refrigeration door is open. Door must
be open to prevent damage to door and unit.
1
9. One person should carefully step on end of lever while
second person slides the three (3) board stack under
unit.
10. Verify the three (3) board stack is stable and excessive
length of boards can be seen on both sides of unit.
Document Number: 020008727 April 14, 2021
MULTIPLEX
844-724-CARE
WWW.MULTIPLEXBEVERAGE.COM
Refreshing the Experience
1 of 3
Advertisement
Table of Contents

Related Manuals for Multiplex FreshBlender


Summary of Contents for Multiplex FreshBlender
- Page 1 MULTIPLEX 645 PARK EAST BLVD SUITE 5, NEW ALBANY, IN 47150 844-724-CARE WWW.MULTIPLEXBEVERAGE.COM Refreshing the Experience Instruction Sheet Subject: FreshBlender Caster Brake Retrofit SCOPE: ALL MULTIPLEX FRESHBLENDER UNITS Two people are required to complete this Caster Brake REMOVE OLD HARDWARE Retrofit. 1. Pull unit 12” (31 cm) away from wall. 2. Place 5-gallon (20 liter) bucket under drain. TOOLS REQUIRED 3. Unlock door.
- Page 2 Subject: FreshBlender Caster Brake Retrofit 11. Gently release pressure from lever until unit rests on INSTALL NEW BRAKE three (3) board stack. Remove and set aside lever and 14. Place Wave Washer onto Bolt. fulcrum boards. Close lower refrigeration door. Place Brake Bracket over wheel fork. Verify tab on Brake 12. Test unit for stability. Bracket is inserted into slot on wheel fork. 13. Remove old hardware. A. Place wrench on caster bolt and place socket on caster nut. 15. Place Brake Pedal onto Brake Bracket. B. Turn socket to remove nut while using wrench to hold bolt. Remove bolt, nut and wheel. 16. Insert old caster wheel between forks and press bolt into assembly as shown below. 2 of 3 Document Number: 020008727 April 14, 2021...
- Page 3 Subject: FreshBlender Caster Brake Retrofit 17. Place 1-2 drops of Blue LocTite onto nut then thread nut 24. Gently lower unit and remove boards. onto bolt. 25. Test each new caster brake assembly. Adjust if necessary. 18. Place wrench on caster bolt and place socket on caster nut. Turn socket to install nut while using wrench to hold bolt. End of Bolt should be flush with end of nut. Do NOT over tighten. With Brake Pedal in OFF position, wheel should turn. 26. Close lower refrigeration door and lock unit. 27. Remove drain bucket. 28. Push unit into place. 29. Connect drain. 19. Repeat steps 13-18 for installing brake hardware for other front wheel. 20. Stack two (2) boards 6” (2.4cm) away and parallel to front of unit. These boards will be used as a fulcrum to lift front of unit. 21. Slide one (1) board 3” (1.2cm) under front of unit and lay perpendicular on top of two (2) boards laying in front of unit. This board will be used as a lever to lift front of unit. 22. Open lower refrigeration door. Door must be open to prevent damage to door and unit. 23. One person should carefully step on end of lever while second person slides the three (3) board stack out from under unit. 3 of 3 Document Number: 020008727 April 14, 2021...
Need help?
Do you have a question about the FreshBlender and is the answer not in the manual?
Questions and answers