Table of Contents
Advertisement
Advertisement
Table of Contents

Related Manuals for Maytag Commercial MHN33PD


Summary of Contents for Maytag Commercial MHN33PD
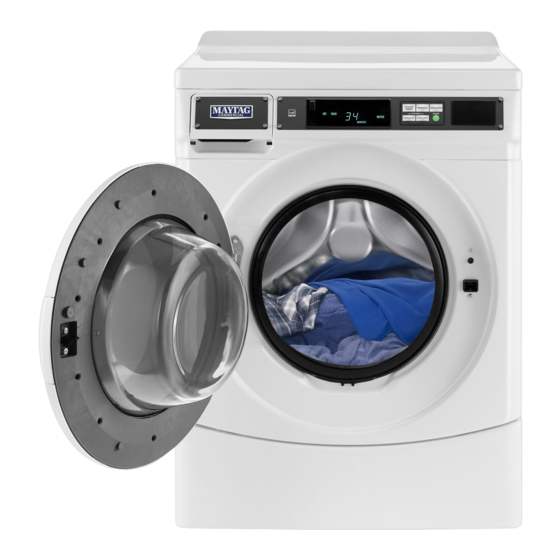
- Page 1 INSTALLATION INSTRUCTIONS ommerCial ront asher Table of Contents ..........................2 Model MHN33PD MHN33PN MHN33PR W11294918A www.maytagcommerciallaundry.com...
-
Page 2: Table Of Contents
TABLE OF CONTENTS WASHER SAFETY ..................2 WASHER DISPOSAL ................4 INSTALLATION REQUIREMENTS ............5 Tools and Parts ..................5 Options ....................5 Specifications ..................5 Location Requirements .................6 Drain System ..................6 Electrical Requirements.................7 INSTALLATION INSTRUCTIONS .............8 Remove Transport System ..............8 Connect the Inlet Hoses ................8 Connect the Drain Hose ................9 Secure the Drain Hose ................10 Level the Washer .................10... - Page 3 Read all instructions before using the the washer. This appliance is intended, but not limited, to Under certain conditions, hydrogen gas may be used in public areas. be produced in a hot water system that has This washer/dryer is not intended for use by persons not been used for 2 weeks or more.
-
Page 4: Washer Disposal
WASHER DISPOSAL This appliance is marked according to the European directive 2012/19/EU on Waste Electrical and Electronic Equipment (WEEE). By ensuring this product is disposed of correctly, you will help avoid potential negative consequences for the environment and human health, which could otherwise be caused by inappropriate waste handling of this product. The symbol on the product, or on the documents accompanying the product, indicates that this appliance may not be treated as household waste. -
Page 5: Installation Requirements
INSTALLATION REQUIREMENTS Tools and Parts If you have You will need to buy Gather the required tools and parts before starting installation. Floor drain Siphon break, Part Number The parts supplied are in the washer drum. 285834; additional drain hose, Part Number 8318155;... -
Page 6: Location Requirements
Location Requirements NOTE: This washer is intended to be used in public areas. Selecting the proper location for your washer improves performance and minimizes noise and possible washer “walk.” Your washer can be installed under a custom counter, or in a basement, laundry room, or recessed area. -
Page 7: Electrical Requirements
Electrical Requirements EARTHING INSTRUCTIONS This washer must be earthed. In the event of a malfunction or breakdown, earthing will reduce the risk of electric shock by providing a path of least resistance for electric current. This washer is equipped with a cord having an equipment-earthing conductor and an earthing plug. -
Page 8: Installation Instructions
INSTALLATION INSTRUCTIONS Remove Transport System WARNING Excessive Weight Hazard Use two or more people to move and install washer. Failure to do so can result in back or other injury. Max. packed weight: 4. Once all 4 bolts are removed, discard the bolts and spacers. Then push the plug back into the back of the washer and pull PD model: 115 kg (253.53 lb) the power cord through the left opening of the rear panel and... -
Page 9: Connect The Drain Hose
Connect the Drain Hose Clear water lines Remove drain hose from washer drum Run water through both faucets and inlet hoses, into a ■ 1. Use locking pliers, squeeze hose clamp tabs together and laundry tub, drainpipe, or bucket, to get rid of particles insert over the end of drain hose. -
Page 10: Secure The Drain Hose
To keep drain water from going back into the washer: front with a wood block and adjust the feet as necessary. To adjust feet, use a 14 mm or 9/16" open-end or adjustable Use the drain hose form, and do not force excess drain hose ■... -
Page 11: User & Setup Instructions
USER & SETUP INSTRUCTIONS Display 1. Door must be closed before cycle selection is made. After the washer has been installed and plugged in, the display 2. Press fabric setting keypad for the wash cycle desired. After will show “0 MINUTES.” Once the washer has been plugged in the cycle is started, the time will display and count down. -
Page 12: Setup Codes
3. The Quick Cycle key pad is used to select or deselect CODE EXPLANATION options. 9 00 CYCLE COUNTER OPTION Start Operating Setup This option is either SELECTED ‘ON’ or NOT NOTE: Prior to operation, a payment system or an OPL kit must SELECTED ‘OFF’. - Page 13 CODE EXPLANATION CODE EXPLANATION 7. 00 SPECIAL PRICE START HOUR C. 20 VALUE OF COIN 2 NOTE: Uses the 24-hr. clock This represents the value of coin 2 in the quantity 7. 00 This is the start hour; 0–23 hours. Select Start of 5% increments of the larger coin value.
- Page 14 CODE EXPLANATION CODE EXPLANATION h. 01 SUPER CYCLE TYPE PREWASH LENGTH A1. 00 (Skipped unless Super Cycle pricing is enabled.) A1. 00 This is the number of minutes of Prewash.Choose h. 01 This represents the Super Cycle upgrade option. 0 to disable the prewash or select between 2 and Press the BRIGHTS key pad to step through 7 minutes by pressing the BRIGHTS key pad.
-
Page 15: Washer Diagnostic Modes
Washer Diagnostic Modes SERVICE ACCESS CODE This code can be entered to access service mode without To enter the “Washer Diagnostic Mode,” first enter “Start removing the console. It only functions on washers set up for 0 Operating Setup.” Then press and hold the QUICK CYCLE key vend price without any Special Pricing setup, and the Coin/Debit pad for 1 second while in set-up code 6, anytime a diagnostic Option must be set to “J._d”. -
Page 16: Washer Care
WASHER CARE 4. To start the Clean Washer cycle, first enter “Start Cleaning Your Washer Operating Setup.” Then press and hold QUICK CYCLE for 1 second. With the entire display flashing, press Cleaning the Door Seal/Bellow STOP/PAUSE. NOTE: The door will lock and the drum will rotate; then the 1. -
Page 17: Assistance Or Service
ASSISTANCE OR SERVICE Enhance your washer with these premium accessories. For more high-quality items or to order, contact your authorized Direct all requests for service to the Maytag Commercial Laundry Maytag distributor. Distributor that sold the appliance. When calling, please know the purchase date and the complete... -
Page 18: Warranty
MAYTAG COMMERCIAL LAUNDRY LIMITED WARRANTY MHN33PD, MHN33PN, MHN33PR IF YOU NEED SERVICE: Contact your authorized Maytag Commercial Laundry distributor. To locate your authorized Maytag Commercial Laundry distributor, visit www.MaytagCommercialLaundry.com. For written correspondence: Maytag Commercial Laundry Service Department 2000 N M 63... - Page 19 NOTES...
- Page 20 ©2018 All rights reserved. W11294918A 11/18...
Need help?
Do you have a question about the MHN33PD and is the answer not in the manual?
Questions and answers