Table of Contents
Troubleshooting

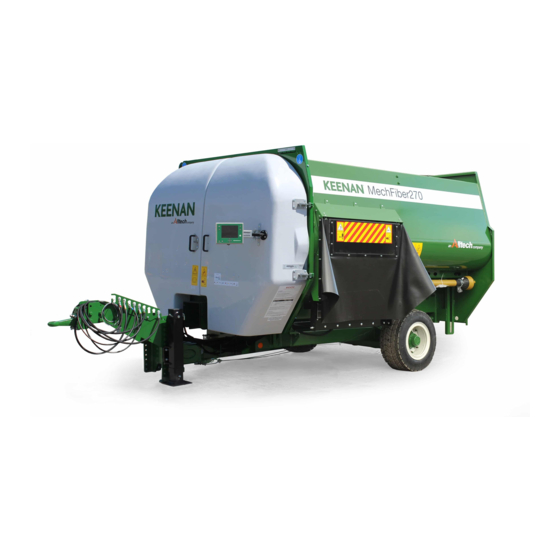
Related Manuals for Alltech KEENAN MechFiber270


Summary of Contents for Alltech KEENAN MechFiber270
- Page 1 Operator’s Manual MechFiber270 and 320 KEENAN MechFiber270 and 320 Operator’s Manual MechFiber270 and 320 Operator’s Manual Revision E01 25 February 2019 Effective from model MF27K101 and MF32J194 Revision E01 25 February 2019...
- Page 2 MechFiber270 and 320 Operator’s Manual Revision E01 25 February 2019...
-
Page 3: Table Of Contents
SECTION CONTENTS PAGE PART I (Service and Maintenance) Introduction Warning notes Warning signs Operating principles Weighing Chopping/mixing Feeding out Maintenance Safety precautions Safety Weighing system Operation Set-up Hitch height adjustment Mixer wagon capacity Loading and mixing Operating the KEENAN MechFiber mixer wagon Operating the KEENAN BaleBlend Specific instructions for BaleBlend models Washing and chopping root crops... -
Page 4: Part I (Service And Maintenance)
PART I (Service and Maintenance) 1 Introduction KEENAN MechFiber Mixer Wagon and KEENAN MechFiber BaleBlend Thank you for purchasing a KEENAN product. The KEENAN MechFiber mixer wagon is a TMR feeder with a difference. The original KEENAN mixer wagon became a market leader due to its reliability and durability, founded on simplicity, fast and efficient mixing and feed-out, and low horsepower requirements. -
Page 5: Warning Notes
2 Warning notes Please read this manual carefully before operating your new machine, paying particular attention to the warning notes, which are explained here. There are three different types of notes, as follows: WARNING: Texts with this symbol contain safety information. They warn you of serious dangers, possibly involving accident or injury. -
Page 6: Warning Signs
3 Warning signs Read the Danger of flying Stay clear of Do not open or remove Operator’s objects. Keep a safe sharp blades. safety guards while the Manual before distance from the machine is connected using the machine. machine. to the tractor. Shut off the engine and Never reach into Look out for... -
Page 7: Operating Principles
4 Operating principles The KEENAN MechFiber mixer wagon’s main operating functions are weighing, chopping/mixing and feeding out. Weighing The KEENAN MechFiber mixer wagon’s electronic weighing system allows an exact quantity of individual materials to be loaded into the mixing chamber for accurate rationing. Individual loads can be weighed, or successive loads can be accumulated to give the total weight of the feed. -
Page 8: Feeding Out
Feeding out During mixing, the mixing chamber is separated from the feed-out chamber by a variable feed control (VFC) door, thus ensuring complete mixing. The feed-out chamber contains an auger, which runs the entire length of the machine. When chopping/mixing is complete, the feed-out tray should be set to the required position and the VFC-door dropped, allowing the material to be swept up by the paddles and pushed onto the auger (see Figure 2). -
Page 9: Safety Precautions
Safety precautions KEENAN mixer wagons have been designed to reduce risk to a minimum. However, as with any machine, careful observation of safety procedures is necessary to prevent accidents. See inside for further details on each section. If you have any further questions, please contact your local KEENAN center for advice. - Page 10 The following safety points are general guidelines. Given the wide variety of possible operating conditions, other safety risks that are not listed here may exist. a) Always park the mixer wagon on level ground and apply the handbrake when not in use. b) Do not exceed 15 km/h (10 mph) when in use/transit.
- Page 11 p) Standing level with or above the machine to load manually is not permitted. Loading should only be carried out with the suitable equipment. q) Regularly inspect all chains (at least weekly), sprockets and moving parts for wear, and check all nuts and bolts for tightness.
- Page 12 8. Always maintain three points of contact while entering, exiting and moving within the mixing chamber of the machine. 9. When entering the base of the body, it is recommended that you cover the body blades in the vicinity of where the work will be carried out. 10.
-
Page 13: Weighing System
6 Weighing system The weighing system is designed to be simple to operate, accurate and robust. It consists of four load cells connected to a weigh box unit (a readout box) at the front of the machine. The system uses 12- volt DC power from the tractor, or a battery, if fitted. -
Page 14: Operation
7 Operation The simplicity of the KEENAN MechFiber mixer wagon’s design is reflected in its low power requirement. The power required does vary, depending on the mix used, the dry matter and the amount of chopping required. If a tractor is at its limit during mixing, this will translate into extra strain on moving parts, as there will be surges in power as the engine recovers during certain periods of the mix. - Page 15 Hydraulic and brake hoses Operation Colour VFC-door Red and yellow Feed-out tray Blue BaleBlend creel Green Brakes White Beetgrid Black Table 1: Hydraulic and brake hoses Note: A: The design life of hydraulic hoses is subject to the level of wear and tear/usage as well as to factors like harsh climate.
-
Page 16: Hitch Height Adjustment
7.2. Hitch height adjustment The MechFiber270 and 320 hitches have been designed to allow for various hitch height options with the same components used. Hitch height is normally selected for the application and set at the factory. However, if required, the hitch can be adjusted on-farm to level the machine. Some options are shown below in Figures 6.1, 6.2 and 6.3. -
Page 17: Mixer Wagon Capacity
Mixer wagon capacity Due to the diversity of the materials available for feeding, and to the KEENAN MechFiber’s ability to incorporate a wide range of feed types into the ration, the capacity of the machine will vary. Ensure that overloading is avoided at all times, as mix quality will be seriously affected and the machine could potentially be damaged. -
Page 18: Loading And Mixing
Loading and mixing Note: The unique tumbling action of the machine is what carries out the mixing. If the machine is overloaded or loaded in the incorrect order, or if insufficient time is allowed for proper chopping, this tumbling action will not take place correctly. Beyond reducing mix quality, this also increases the horsepower requirements and reduces the life of the machine. -
Page 19: Operating The Keenan Mechfiber Mixer Wagon
Operating the KEENAN MechFiber mixer wagon LOADING THE KEENAN MECHFIBER MIXER WAGON GENERAL • Park on level ground. • Ensure variable feed control (VFC) door is closed. • Do not start PTO when VFC-door is open. LOADING AND MIXING SEQUENCE •... -
Page 20: Operating The Keenan Baleblend
Operating the KEENAN MechFiber BaleBlend LOADING THE KEENAN BALEBLEND GENERAL • Park on level ground. • Ensure variable feed control (VFC) door is closed. • Do not start PTO when VFC-door is open. LOADING AND MIXING SEQUENCE • Set paddles running at 6-–8 RPM for all bale types. -
Page 21: Specific Instructions For Baleblend Models
Specific instructions for BaleBlend models The creel should be raised before loading bales. Round bales should always be loaded in the center of the machine to allow for the maximum agitation of the paddles. The bale should be gently lowered in the center of the machine onto the tines. -
Page 22: Washing And Chopping Root Crops
Washing and chopping root crops With the machine stopped, add the root material to be washed and chopped. Ensure that there are no stones or foreign objects hidden in the roots. Add water at approximately 300 kg (660 pounds) per ton of material to be chopped. Rotate the machine for 1-2 minutes at 6 rpm. -
Page 23: Maintenance
8 Maintenance The KEENAN MechFiber mixer wagon has been designed for optimum performance with minimal maintenance. Chains, bearings and grease points have been kept to a minimum without compromising function. All components are high-quality and provide excellent durability. Regular, routine maintenance will ensure your KEENAN MechFiber mixer wagon gives you the best results with minimal problems. - Page 24 C: The automatic chain oiler attachment (where fitted) gives a squirt of oil (approximately 15 ml) every time the VFC-door ram cycles. In this way, the machine is oiled in direct proportion to the number of cycles and adequate lubrication is assured. There is an adjustment screw on the base of the automatic oiler;...
-
Page 25: Chain Tensioning
8.1.1 Changing the oil When changing the oil on the KEENAN product, take the steps in the following procedure: 1. Since the oil filler can is higher than eye-level, a suitable stepladder should be used to raise the person above eye-level. Being above eye-level can help prevent any splash or over-fill from pouring onto the user’s head. -
Page 26: Greasing
1.75 Chain length (mm) 5,112 Chain length (inches) 201.2 Table 4: KEENAN MechFiber270 and 320 drive chains Greasing Bearings: Each week, apply grease to the eight bearings with grease fittings. The bearings are as follows: a. The main rotor bearing at the front of the KEENAN MechFiber (A, Figure 12). - Page 27 Grease point A Grease point D Grease point C Gearbox pivot bush grease point Grease point B Figure 12: Front grease points Grease point H Grease point G Figure 13: Rear grease points MechFiber270 and 320 Operator’s Manual Revision E01 25 February 2019...
- Page 28 Grease point K Grease point I Ram for VFC-door Grease point L Variable feed control (VFC) door Grease point J Figure 14: VFC-door grease points Secondary drive chain tension arm grease point Primary drive chain tension arm grease point Figure 15: Tension arm grease points MechFiber270 and 320 Operator’s Manual Revision E01 25 February 2019...
-
Page 29: Maintenance For Blades
Maintenance of blades Blade sharpening and/or replacement: It is recommended that only KEENAN- trained and/or qualified maintenance personnel should perform this task. Blades must be kept sharp, as blunt blades will increase power requirements. Sharpening must be done without taking the temper from the blades (without overheating). Blades can be sharpened many times, but when this is no longer practical, they must be replaced. -
Page 30: Shear Bolts
Cradle arms BaleBlend tines Load bumper assembly Figure 17: MechFiber machine with BaleBlend attachment Shear bolts The following is the recommended grade of shear bolt to use with the KEENAN MechFiber270 and 320: Machine type Shaft Shear bolt MechFiber270 M8 x 55 x 8.8 MechFiber320 M10 x 60 x 6.8... -
Page 31: Nuts And Bolts
Nuts and bolts After the first day, and regularly thereafter, inspect wheel nuts and tandem axle U-bolts (where fitted). After the first week, and each week thereafter, check all nuts and bolts, including bearing nuts, for tightness. General torque Stud/bolt type FT/LB Table 6.1: General torque for wheel studs U-Bolt diameter (mm) -
Page 32: Wheels
Wheels Each year, lever off the hub cap, remove the split pin and castle nut, and remove the hub. Check seals, bearings, brake shoes, springs, studs and all other internal parts. Replace worn parts, re-grease and refit. Note: When re-fitting the wheels, tighten the castle nut until resistance is felt (do not over-tighten). Release the castle nut 1/6 of a revolution. Check for movement in the hub and, if none is noted, re-fit the split pin. -
Page 33: Side And Sub Feed-Out Elevator (Where Fitted)
8.11 Side and stub feed-out elevator (where fitted) An elevator system requires regular maintenance in order to achieve optimum performance. Every week, the elevator needs to be checked to make sure that the belt is running straight and not wearing unevenly on one side. -
Page 34: Maintenance Checklist
9. Maintenance Checklist Daily Cleaning: Clean all old feed from around the body to prevent corrosion and damage to paint. VFC-door: Before using the machine, check that the door opens and shuts fully and operates smoothly. Wheel nuts: Check torque settings. Oiler: Check the oil level and replenish with SAE 10 oil as required. -
Page 35: Specifications
Yearly (end of season) Drive chains: Remove both chains. Wash off all dirt and old oil using paraffin, then dry. Soak both chains in oil overnight, or longer, if possible. Idler and auger shaft front bearing: Remove and pack with grease. Machine: Before storage, wash the complete machine, then grease or oil all weekly lubrication points as above. - Page 36 PART II (Spare Parts) MechFiber270 and 320 Operator’s Manual Revision E01 25 February 2019...
-
Page 37: Parts List
11 Parts List 11.1 Front guard parts Item: P/N: Qty: Description: FP140-038-0022 MF270/320 fiberglass front cover (right hand side) FP140-038-0026 MF270/320 front cover inner seal (1605 mm) MF270/320 front cover outer seal – right hand (2785 mm) FP140-038-0025 701363 Handles, U-shape, 160-mm hole centers for front guard FP200-037-0095 Camlock outer plate 702256... - Page 38 Item: P/N: Qty: Description: FP140-037-0064 MechFiber270/320 fiberglass front cover (left hand side) MechFiber270/320 front cover outer seal — left hand FP140-037-0066 701363 Handles, U-shape, 160 mm hole centers for front guard 706609 M6 x 40 bolt 700751 M6 flat washer FP380-037-0081 Weighbox arm mounting bracket base plate 700251...
- Page 39 Item: P/N: Qty: Description: FP200-048-0244 Camlock striker assembly 700241 M10 locknut 700729 M10 flat washer 700228 M10 x 35 bolt Door holder – female side 706127-1 700200 M6 x 25 bolt 700751 M6 flat washer FP200-017-0014 Door holder bracket 700204 M6 locknut FP200-037-0071 PTO guard...
-
Page 40: Driveline Parts
11.2 Driveline parts Item: P/N: Qty: Description: EF142-10 Rotor window plate assembly EF147-34 Sprocket, ASA140, 96 teeth, 20 mm plate 700296 M20 x 65 bolt FP160-048-0110 Chain tensioner assembly 2 700298 M20 x 10 bolt 8.8 grade EF1017-14 Front box 90-degree bearing assembly 701534 Rotor spacer, 95 mm OD, 70 mm ID, 64 mm long 701520... - Page 41 Item: P/N: Qty: Description: 702415 Secondary drive chain (Sapphire ASA 140SH) EF1014 Secondary drive chain tensioner assembly 702421 Primary drive chain (Sapphire ASA 100) EF1015 Primary drive chain tensioner assembly Primary drive chain tension spring, 6”, 3.6 mm wire, 32 mm OD 701275 Secondary drive chain tension spring, 12”, 4 mm wire, 40 mm OD 701278...
-
Page 42: Rotor Parts
11.3 Rotor parts P/N 320: Item: P/N 270: Qty: Description: 701822 701821 Rubber seal for rotor, 10 mm FP140-007-0017 FP100-007-0008 Braided rubber seal for rotor, 10 mm FP140-007-0018 FP100-007-0009 Rotor seal retainer EF107-7 EF147-7 Front rotor stub shaft assembly FP200-007-0010 FP100-007-0002 End paddle mounting flange RDTP147-3... -
Page 43: Auger Parts
11.4 Auger parts Item: P/N 270: P/N 320: Qty: Description: 700302 same as 270 M20 x 90 mm bolts 702007 same as 270 Auger stub shaft assembly, 70 mm, forged 701832 same as 270 Sprocket, 20 mm, ASA100, 54 tooth FP280-009-0070 same as 270 Auger front seal rubber... -
Page 44: Auger Chamber/Vfc-Door Parts
11.5 Auger chamber/VFC-door parts Item: P/N 270: P/N 320: Qty: Description: RD1010-44 same as 270 VFC-door lower ram bracket (front) RD1010-45 same as 270 VFC-door lower ram bracket (rear) 701591 same as 270 VFC-door bottom hydraulic cylinder pin 701973 same as 270 Front VFC-door hydraulic cylinder (small) 701972 same as 270... -
Page 45: Vfc-Door Indicator Parts
11.6 VFC-door indicator parts Item: P/N: Qty: Description: 701559 Pulley wheel, 50 mm OD, 20 mm thick, for indicator 703629 Wire rope for door indicator, 2470 mm FP140-002-0106 MF270/320 wire rope cover FP170-010-0012 VFC-door indicator upper cover FP170-010-0013 VFC-door indicator lower cover 703625 Spring, 8"... -
Page 46: Standard Feed-Out Tray Parts
11.7 Standard feed-out tray parts MechFiber270 and 320 Operator’s Manual Revision E01 25 February 2019... - Page 47 Item: P/N: Qty: Description: EF106-179 Feed-out shroud front side plate assembly EF106-180 Feed-out shroud rear side plate assembly FP100-006-0074 Feed-out door arm assembly FP100-006-0013 Feed-out tray and sub-frame assembly FP100-006-0003 Feed-out tray ram upper mounting bracket assembly 6” stroke feed-out tray ram assembly (KEEN-63) 703591 FP100-006-0080 Feed-out door shroud retainer...
- Page 48 Note: Complete standard feed-out kit P/N FP100-006-0130 Feed-out tray can be supplied with the following: • Magnet assembly P/N FP100-006-0035 • Standard and rubber extension P/N FP100-006-0036 • Magnets and rubber extension P/N FP100-006-0037 • ½ rubber P/N FP100-006-0038 Item: P/N: Qty: Description:...
- Page 49 Item: P/N: Qty: Description: FP100-006-0038 Feed-out tray ½ rubber FP100-006-0006 Feed-out tray sub-frame assembly FP140-006-0031 Feed out tray panel ½ rubber 702256 M8 x 25 mm cup-head bolt 700223 M8 nyloc nut 700736 M8 flat washer 700802 Rubber extension FP100-006-0092 Rubber retainer flat EF106-79 Rubber side retainer...
-
Page 50: Fold-Down Tray Parts (Optional Extra Option)
11.8 Fold-down tray parts (optional extra option) MechFiber270 and 320 Operator’s Manual Revision E01 25 February 2019... - Page 51 MechFiber270 and 320 Operator’s Manual Revision E01 25 February 2019...
- Page 52 Item: P/N: Qty: Description: FP140-006-0308 Feed-out shroud assembly (fold down tray) FP140-006-0321 Fold-down tray hinge bar assembly FP140-006-0328 Fold-down tray assembly 2 FP100-006-0003 Feed-out tray ram upper mounting bracket assembly FP170-006-0162 Fold-down tray inner link arm assembly FP200-006-0340 Fold-down tray outer link arm assembly 6”...
-
Page 53: Inner Body Parts
11.9 Inner body parts Item: P/N MF270: P/N MF320: Qty: Description: 701195 701196 VFC-door outer rubber seal FP100-006-0053 FP140-006-0022 VFC-door outer seal retainer 701291 701290 VFC-door lower inner seal FP100-004-0001 FP140-004-0003 VFC-door lower inner seal retainer 703955 same as MF270 18/22 Body blade 700226... -
Page 54: Rear Panel Parts
11.10 Rear panel parts Item: P/N MechFiber270: P/N MechFiber320: Qty: Description: 700246 same as 270 M12 x 25 bolt same as 270 700266 M12 locknut FP140-003-0104 same as 270 Rear channel blank (365 mm) same as 270 700297 M20 x 65 bolt same as 270 700842 70 mm flange bearing, UCF X14, cast housing... - Page 55 Item: P/N: Qty: Description: FP280-003-0274 Light pod cover FP280-003-0273 LED light pod holder 706005 Rear LED light (left-hand) 706006 Rear LED light (right-hand) 706412 LED light flat washer 706413 LED light rubber buffer FP280-003-0272 Stainless steel wear plate FP280-003-0275 Light pod locator pin 702869 M12 x 70 bolt 700731...
-
Page 56: Chassis Parts
11.11 Chassis parts Item: P/N: Qty: Description: 704441 Handbrake assembly FP160-001-0095 Hydraulic hose holder assembly 703350 Front weigh bar, 4.6-m cable 700732 M16 washer 703148 M16 x 40 bolt EF101-9 Weigh bar bracket assembly 703351 Rear weigh bar, 9.2 m cable 702105 Hydraulic hose, 20-foot, brake hose assembly 700283... -
Page 57: Baleblend Parts
11.12 BaleBlend parts Series I BaleBlend Item: P/N MechFiber270: P/N MechFiber320: Qty: Description: FP100-045-0002 FP160-045-0083 BaleBlend creel curved plate assembly FP280-045-017 same as 270 BaleBlend creel guide arm FP160-045-0088 same as 270 Creel end cover plate FP160-045-0003 same as 270 BaleBlend end creel assembly (rear) 700733 same as 270... - Page 58 Series III BaleBlend Item: P/N MechFiber270: P/N MechFiber320: Qty: Description: FP100-045-0002 FP160-045-0083 Curved creel panel assembly complete FP140-045-0096 same as 270 Tine bracket assembly (weld on) FP140-045-0005 same as 270 Apron rail and stud assembly Rubber buffer, 75 mm OD. M12 x 13 mm deep 703943 same as 270 thread...
- Page 59 Item: P/N MechFiber270: P/N MechFiber320: Qty: Description: FP100-050-007 FP300-050-0001 Load bumper assembly 2-inch rubber 701129 same as 270 Grease nipple 1/8 BSP Retainer strip, 5 mm, for rubber apron, 675 mm FP140-045-0004 same as 270 long Retainer strip, 5 mm, for rubber apron, 1725 mm FP200-045-0004 same as 270 long...
- Page 60 Series III BaleBlend creel kicker Item: P/N: Qty: Description: FP160-045-0071 BaleBlend creel kicker arm assembly 1 FP160-045-0136 BaleBlend creel kicker spring kit FP100-006-0021 Feed-out tray mechanical adjuster roller pivot bush 700262 M12 x 75 bolt 700730 M12 washer 700266 M12 locknut FP280-045-010 Nylon guide wheel 700283...
- Page 61 Tine bracket and tine arm assemblies P/N MF320: Item: P/N MF270: Qty: Description: See BaleBlend parts list for same as 270 BaleBlend tine assembly specific tine reference same as 270 705947 16/18 Delrin bush same as 270 703943 Rubber buffer 75-mm O.D. same as 270 701129 1/8 BSP grease nipple...
-
Page 62: Axles
11.13 Axles 11.13.1 Axle options Figure 21: Typical axle (exploded view) Axle types Axle application MechFiber270 and 320 No. studs 10 (MF320 only) Axle type Straight Cranked Straight/ D/cranked cranked Axle width (mm) 1830, 1930 2130 1950 2130 Brake 309E, 300 x 309E, 300 x Unbraked Unbraked... - Page 63 11.13.2 Axle maintenance Tightening and retightening wheel nuts The following steps should be taken to tighten and retighten wheel nuts: 1. Impact wrenches should not be used, as the impact torque maybe excessive. 2. Wheel nuts should be tightened diagonally every time in conjunction with a torque wrench. 3.
-
Page 64: Ancillary Parts
11.14 Ancillary parts PTO shaft P/N: Qty: Description: PTO, T60 shaft, 1-3/8” Z6 x 1-3/8” Z6. M10 x 6.8 shear bolt (standard) 700616 PTO, T60 shaft, 1-3/8” Z6 x 1-3/8” Z6. M10 x 6.8 shear bolt (long option) 704368 PTO, T50 shaft, 1-3/8” Z6 x 1-3/8” Z6. M8 x 4.6 shear bolt (planetary gearbox) 700644 PTO, V60 shaft, 1-3/8”... -
Page 65: Troubleshooting
12 Troubleshooting 12.1 General troubleshooting PROBLEM: SOLUTION: 1. Weighing display won’t work properly Check section 12.2 on weighing. 2. VFC-door does not move Check hydraulic hoses and ensure that valves are open. Check tractor hydraulic oil level. Check ram condition and ensure that pins are secure. 3. - Page 66 9. Horsepower requirement is too high Check body blade and top knife sharpness. Machine overloaded. BaleBlend tines may be set too low. 10. Machine is not chopping Blades blunt. Not enough material in body, or material is not heavy enough. Try adding more material, or, in the case of hay/straw, add water or a fork of silage to weigh it down.
- Page 67 17: Blockage at top knife On non-BaleBlend models, load smaller sections of material into machine. On BaleBlend models, check tine height settings. Ensure all feed materials are free from foreign objects before loading into machine. In the unlikely event of a large blockage preventing the machine from restarting using the tractor, it may be necessary to enter the mixing chamber to manually clear the blockage.
-
Page 68: Weighing Troubleshooting
12.2 Weighing troubleshooting KEENAN troubleshooting tips on weighing If you experience problems in the operation of the weighing system, read through this troubleshooting section before contacting a KEENAN service representative. Reading drifting If the reading on the weigh box is drifting or does not stay steady, the most likely cause of the problem is dampness or moisture in or around the weigh box or cables. -
Page 69: Warranty
13 Warranty 13.1 KEENAN warranty policy Alltech Farming Solutions Limited, trading as “KEENAN” (the “Company”), shall undertake to correct by repair or replacement, only at the Company’s option, any defect of material or workmanship occurring in any of its products as listed herein within the following warranty period. This Warranty is for the benefit of the initial owner as notified to the Company. -
Page 70: Ec Declaration Of Conformity/Ce Certification
Irish Courts. 13.2 Product changes and improvements Due to our policy of continuous improvement, Alltech Farming Solutions Ltd reserves the right to make changes in design, add improvements to or otherwise modify any of its products without incurring any obligation on products previously supplied. -
Page 71: Contact Details
3031 Catnip Hill Road, Nicholasville, KY 40356, United States of America Tel: 859-885-9613 Website: keenansystem.com Email: keenaninfo@alltech.com Alltech Farming Solutions (UK) Limited KEENAN Ryhall Road, Stamford, Lincolnshire, United Kingdom, PE9 1TZ Tel. Administration: 0800 587 3296 24-Hour Service: 0800 587 3296 Fax:... - Page 72 MechFiber270 and 320 Operator’s Manual Revision E01 25 February 2019...
Need help?
Do you have a question about the KEENAN MechFiber270 and is the answer not in the manual?
Questions and answers