Advertisement
Quick Links
U P
ASME A112.18.1 / CSA B125.1
ACC / ANSI A117.1
Models/Modelos/Modèles
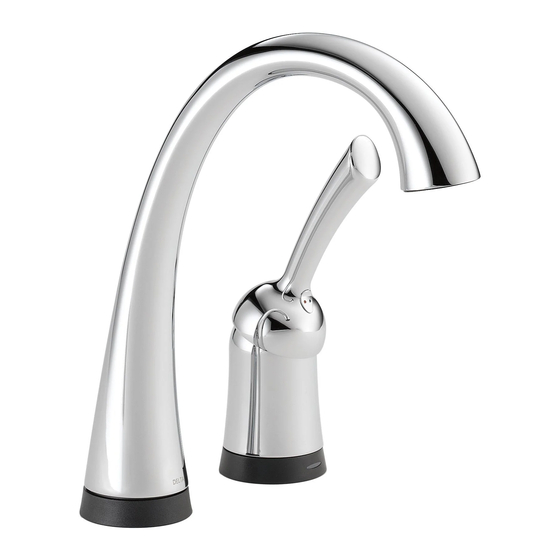
4380T-DST & 1980T-DST
Series/Series/Seria
Write purchased model number here.
Escriba aquí el número del modelo comprado.
Inscrivez le numéro de modèle ici.
WARNING: THIS FAUCET IS NOT TO BE USED WITH PORTABLE
DISHWASHERS! / ADVERTENCIA: ¡SESTA LLAVE NO SE DEBE UTILIZAR
CON MAQUINAS LAVAPLATOS PORTATILES! / AVERTISSEMENT: ON NE
DOIT PAS BRANCHER UN LAVE-VAISSELE PORTATIF SUR CE ROBINET!
MEETS OR EXCEEDS — ASME A112.18.1 / CSA B125.1
ALCANZA O EXCEDE LAS SIGIENTES NORMAS —
ASME A112.18.1 / CSA B125.1
LE ROBINET EST CONFORME OU SUPèRIEUR AUX EXIGENCES DES
NORMES SUIVANTES: ASME A112.18.1 / CSA B125.1
For easy installation of your Delta
faucet you will need:
• To READ ALL the instructions completely
before beginning.
• To READ ALL warnings, care, and maintenance
information.
Para instalación fácil de su llave Delta
usted necesitará:
• LEER TODAS las instrucciones completamente
antes de empezar.
• LEER TODOS los avisos, cuidados, e
información de mantenimiento.
Pour installer votre robinet Delta
facilement, vous devez:
• LIRE TOUTES les instructions avant de débuter;
• LIRE TOUS les avertissements ainsi que toutes
les instructions de nettoyage et d'entretien.
63585
C
®
SINGLE LEVER TOUCH KITCHEN FAUCETS
LLAVES DE AGUA MONOMANDO / UNA
MANIJA DE ACTIVACIÓN AL TACTO
ROBINETS À UNE MANETTE COMMANDÉS
AU TOUCHER POUR ÉVIERS DE CUISINE
You may need/Usted puede necesitar/
Articles dont vous pouvez avoir besoin:
63585
1
T E FLO N
T E FLO N
11/10/10
Rev. C
Advertisement

Related Manuals for Delta 4380T-DST


Summary of Contents for Delta 4380T-DST
- Page 1 • To READ ALL the instructions completely before beginning. • To READ ALL warnings, care, and maintenance information. Para instalación fácil de su llave Delta usted necesitará: • LEER TODAS las instrucciones completamente antes de empezar. • LEER TODOS los avisos, cuidados, e información de mantenimiento.
- Page 2 IS THE EXCLUSIVE WARRANTY BY DELTA FAUCET COMPANY, WHICH DOES NOT be free from defects in material & workmanship for a period of 5 years. Delta Faucet Company MAKE ANY OTHER WARRANTY OF ANY KIND, INCLUDING THE IMPLIED WARRANTY recommends using a professional plumber for all installation &...
- Page 3 RP40650 RP53214s Set Screw Handle w/Button & Tornillo de Ajuste Set Screw Vis de calage Manija con botón y tornillo de presión RP50786s Poignée avec bouton Red/Blue Button et vis de calage Botón rojo/azul Bouton rouge/bleu RP53215s Sleeve RP60615s RP53998 Manja Kitchen Spout Assembly Manchon...
- Page 4 RP50787s Support Assembly Ensamble del Soporte Support RP10345 O-Rings (3) Anillos O (3) Joints torique (3) RP53880s Spray & Hose Assembly Ensamble del Rociador y la mangueraDouchette Douchette et tuyau souple RP50781s Soap Dispenser (Purchased Separately) Dispensador de jabón. (Compre por separado) Distributeur de savon (Article vendu spéparément) Other useful accessories that may be purchased separately.
- Page 5 Top Mount Sinks / Instalación por Encima / Bâti supérieur 1 1/4" Min. From Center Line To Sink Bowl. Determine if your sink is installed from the top of the counter or from the SHUT OFF WATER SUPPLIES. Place gasket (1) into groove of spout base (2). bottom.
- Page 6 Under Mount Sinks / Instalación por Debajo / Sous le bâti 1 1/4" Min. From Center Line To Sink Bowl. Determine if your sink is installed from the top of the counter or from the bottom. If your sink is installed from the bottom use this page for your spout installation. SHUT OFF WATER SUPPLIES.
- Page 7 From underneath the sink, slide the solenoid assembly (1) up For this step, use the bag marked “2” plus the other part(s) shown above. on to the valve outlet tube (2). Make sure that the assembly is fully engaged; then, slide the metal retaining clip (3) through Slide the gasket (1) up over tubes, mounting stud and wires of valve assembly, then install the thin slots (4) on top of the solenoid inlet.
- Page 8 Slide hose assembly (1) onto the solenoid nipple (2). Install clip (3) over hose Push outlet tube nipple (4), on the other end of the hose, into the diverter (1) and nipple (2) to secure connection. Pull down moderately to ensure the port (5).
- Page 9 For Models With A Side Spray - Pull on clip (1) until disengaged. Pull For this step, use the bag marked “3” plus the other part(s) shown above. down on diverter plug (2) to remove. Caution: Do not remove tube Note: Bag 3 contents vary by model.
- Page 10 Connect battery cable (1) to battery box (2). Load 6 “AA” For this step, use the parts in the bag Briefly touch the cold stop or other ground to dissipate any static marked “4”. batteries (3) into the battery box (2). Important: DO charge.
- Page 11 Delta is not responsible for tubing that is cut l Tubing is cut too short: buy a coupling union and a Ensure all fittings and end connections are free of...
- Page 12 Correct method Incorrect Installation Instalación Incorrecta Método Correcto Installation Incorrecte Bonne méthode Do not install sleeve Ensure cut is straight. upside down. No instale la manga Asegúrese que el corte boca abajo. esté recto. Custom Fit Connections - Plastic Sleeve Installation Instructions 1.
- Page 13 Soap Dispenser Installation (Accessory order only) Remove aerator (1) using supplied wrench (2) and move faucet handle (3) to the full on mixed position. Turn on hot and cold water supplies (4) and flush water lines for one minute. IMPORTANT: Remove nut (1).
- Page 14 Optional Opcional Facultatif Manual Bypass of Electronic Features Remove the battery pack (1)from the Pilar battery cable (2). Disconnect the two spade contacts (1) black wire“-” and (2) red wire “+”from the solenoid body (3) Setting The Handle Limit Stop (Optional) Momentarily connect the “+”...
-
Page 15: Maintenance
Nota: Si la luz roja (8) está destellando durante 2 segundos cuando está prendido y 2 segundos cuando está apagado, llame al departamento de Servicio al Consumidor al 1-800-345-DELTA. Note : Si le voyant rouge (8) clignote pendant 2 secondes, puis demeure éteint pendant 2 secondes, appelez le service à... - Page 16 Solenoid Troubleshooting a. Check to make sure the spout connector, RP53233 is attached to the spout and the wire from the solenoid / electronics kit. If it is disconnected, or loose (see step 6A), reattach and check for proper operation. 1.
Need help?
Do you have a question about the 4380T-DST and is the answer not in the manual?
Questions and answers