Table of Contents
Advertisement
Quick Links
Advertisement
Table of Contents

Related Manuals for Infratek 106A


Summary of Contents for Infratek 106A
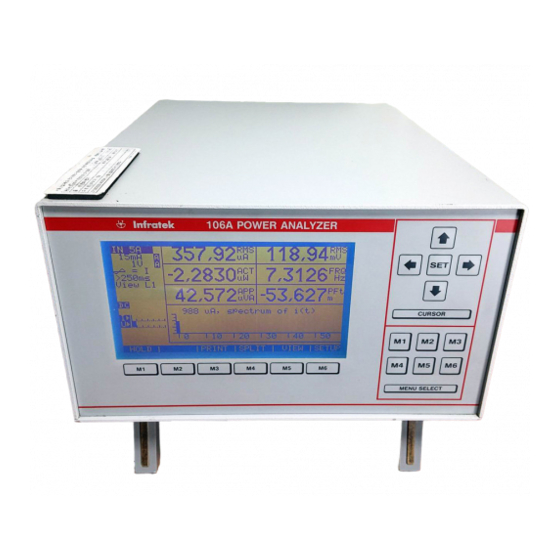
- Page 1 SERVICE MANUAL 106A SINGLE- AND THREE PHASE POWER ANALYZER Copyright 2007 by Infratek AG Infratek AG Weingartenstrasse 6 CH-8707 Uetikon am See Phone: +41-(0)44-920 50 05 Fax: +41-(0)44-920 60 34 www.infratek-ag.com E-Mail: info@infratek-ag.com Infratek...
-
Page 2: Table Of Contents
ONTENTS Calibration Procedure page 8-1 8.1. Calibration Cycle 8.2. Equipment needed 8.3. Preparing for Calibration 8.4. Offset Adjustment and Calibration 8.4.1. Voltage Amplifier Calibration 8.4.2 Current Amplifier offset Adjustment 8.4.3 Current Amplifier Calibration 8.4.4 Shunt Input Calibration 8.4.5 Power Calibration Maintenance Modular Concept Functional Description of the Assembly Units... -
Page 3: Calibration Procedure
CALIBRATION PROCEDURE Power Analyzer Rear Panel CALIBRATION CYCLE Phase 1 Phase 2 Phase 3 current amplifier at bottom We recommend verifying calibration once a year. The user must be aware that occasional overloads (voltage and current) will degrade accuracy. In such cases, calibration should be checked more frequently. -
Page 4: Current Amplifier Offset Adjustment
8.4.2 CURRENT AMPLIFIER OFFSET ADJUSTMENT Leave the current inputs open. Select 5A input and 15mA current range. Adjust Idc to obtain a minimal reading for the current average value (AVG mA). The reading is typically 20uA. 8.4.3 CURRENT AMPLIFIER CALIBRATION You can connect all three current inputs of a three phase model in series with your calibrator if your calibrator is capable of driving the 3x0.05Ohm burden of the 5A inputs. -
Page 5: Maintenance
MAINTENANCE WARNING These service instructions are for use by qualified personnel only. To avoid electric shock, do not perform any procedures in this section unless you are qualified to do so. Starting January 2007 Power Analyzers are equipped with new current amplifiers and new voltage amplifiers. -
Page 6: Current Amplifier Assembly
9.2.1. CURRENT AMPLIFIER ASSEMBLY The current amplifiers for phase 1, 2, and 3 have identical functions. The voltage drop on the 0.2 (5A input) and 4.7m (30A input) power resistors are amplified to a voltage level suitable for analog to digital convection. The gain of the amplifiers is controlled over the current bus. -
Page 7: Main Supply Assembly
9.2.5. MAIN SUPPLY ASSEMBLY 9.3.2. REMOVING THE FRONT PANEL This switched power supply converts power line voltages 90V-250V AC to 5V/+12V/-12V DC. The 2AF/250V line fuse is installed on this assembly located near the line power input. (To exchange the fuse you best unscrew the right hand side panel). The front panel contains the display - and keyboard assembly. -
Page 9: Amplifiers Phase 2 And Phase 3 Removal
Action: The fault lies on the display itself or on the Processor Assembly. The simplest 9.3.5. AMPLIFIERS PHASE 2 AND PHASE 3 REMOVAL action would be to exchange the display monitor to determine the faulty assembly. CAUTION: Before removing an amplifier put a tag on it such as I Ph2, U Ph2, I ph3, or U Ph3 and make sure to reinstall it at its original Fault 3: The instrument runs normal. -
Page 10: Supply Voltage Checks
Step 3: Check signals on amplifier connectors J1 through J6. 9.5. SUPPLY VOLTAGE CHECKS Separator is on ground potential pin 3 : 5MHz square wave 3Vptp Figure 9.3. shows the location where the supply voltages can be measured. Amplifier Assembly pin 4 : 5MHz square wave 4Vptp J43 is the high voltage connector to the display FL lamp (non polarized). - Page 11 9-10...
-
Page 12: Amplifier Input Repair
Main Supply Voltages +5V, +12V, -12V: Turn instrument off. Unplug J42 the supply to Option Assembly, and J41 the supply to Processor Assembly. Turn instrument on. Measure voltages on J42 (DC/DC Converter Assembly). pin 5 New Amplifier 5V 0.2V (case is pin 1, 2: ground) Voltages at... - Page 13 LISTS OF REPLACEABLE PARTS FOR VOLTAGE AMPLIFIER INPUT Reference Description U1a, U1b Amplifier OP77GS U1, U2 Amplifier OP249GS Switch ADG412BR not installed Regulator LM79L12 Regulator LM78L05 Regulator LM78L05 D8, D10 Diode LL4148 High voltage input (red wire) Low voltage input $(black wire) DC/DC input + 10.5V (brown wire) DC/DC common (white wire) DC/DC input -15.5V (green wire)
- Page 14 C40, C41, C25 Chip Capacitor 100nF, 50V Resistor Melf 100k Chip Capacitor 33pF, 50V Resistor Melf 10M C19, C18, C10, C11, C16 Chip Capacitor 100uF, 50V Resistor Melf 11k Chip Capacitor 47pF, 50V Resistor Melf 4.3k Chip Capacitor 4.7pF, 50V Resistor Melf 33k Chip Capacitor 10pF Resistor Melf 3k...
- Page 15 New Amplifier LISTS OF REPLACEABLE PARTS FOR VOLTAGE AMPLIFIER The schematic below shows the circuit of the amplifier input section. The component placement you find in the following drawing. Reference Description R2, R4, R5 Resistor MBB 0207-15, 348k, 0.25 % ALL other Rx Ristor MMA0204, 1206, 0.25W, 1 % D1, D2, D3, D4...
-
Page 16: Installing A Replacement Amplifier
9.6.1. INSTALLING A REPLACEMENT AMPLIFIER When you receive a replacement amplifier you must first code it for phase 1, phase 2 or New Amplifier: phase 3 which ever is needed for your case. This is done by soldering a short between two SMD-pads as shown below. -
Page 17: List Of Replaceable Assemblies
9.7. LIST OF REPLACEABLE ASSEMBLIES Name Part No. Current Amplifier 106-CA Voltage Amplifier 106-VA Processor Assembly 106-PA Option Assembly 106-OPA DC/DC-Converter, 1 phase 106-DCA-1 DC/DC-Converter, 3 phase 106-DCA-3 Main Supply 106-MSA Keyboard 106-KB FL-lamp 106-FL FL-Driver E1116 Power Line Filter, Switch 106-SN Rear Panel Input Plug Red 106-PLUG-RED...
Need help?
Do you have a question about the 106A and is the answer not in the manual?
Questions and answers