
Related Manuals for Perel SMART1001


Summary of Contents for Perel SMART1001
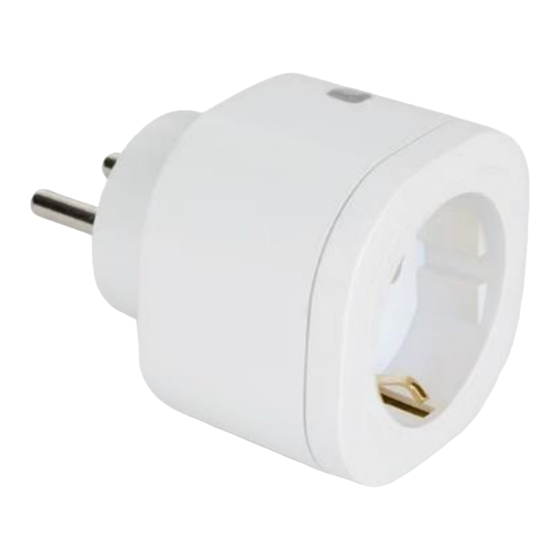
- Page 1 SMART1001/SMART1003 SMART1001 SMART1003 USER MANUAL HANDLEIDING MODE D'EMPLOI MANUAL DEL USUARIO BEDIENUNGSANLEITUNG INSTRUKCJA OBSŁUGI MANUAL DO UTILIZADOR...
-
Page 2: Safety Instructions
If in doubt, contact your local waste disposal authorities. Thank you for choosing Perel! Please read the manual thoroughly before bringing this device into service. If the device was damaged in transit, do not install or use it and contact your dealer. -
Page 3: Operation
SMART1001/SMART1003 Operation General Operation 1. Plug the smart socket into an appropriate electrical outlet. 2. Plug your appliance into the smart socket. Using the Tuya App 1. Enable the Bluetooth function on your mobile device. Download the Tuya app from your app store. - Page 4 SMART1001/SMART1003 3. Press + to add the smart socket. 4. Click on All Devices. Click on the device you want to add. Click on the smart socket. 5. Plug the smart socket into an electrical outlet. Keep the Learn button pressed until the LED blinks blue, meaning the smart socket has entered the pairing mode.
-
Page 5: Care And Maintenance
SMART1001/SMART1003 7. Check whether the connect Wi-Fi name and password are correct. Click Confirm. The smart socket will automatically connect to the network indicating that the device is added successfully. Modify the device name and select in which room the smart socket is being used. -
Page 6: Technical Specifications
IP rating ........................- dimensions ........................- weight ........................... - Hereby, Velleman NV declares that the radio equipment type SMART1001/SMART1003 is in compliance with Directive 2014/53/EU. The full text of the EU declaration of conformity is available at the following internet address: www.velleman.eu. -
Page 7: Algemene Richtlijnen
SMART1001/SMART1003 HANDLEIDING Inleiding Aan alle ingezetenen van de Europese Unie Belangrijke milieu-informatie betreffende dit product Dit symbool op het toestel of de verpakking geeft aan dat, als het na zijn levenscyclus wordt weggeworpen, dit toestel schade kan toebrengen aan het milieu. Gooi dit toestel (en eventuele batterijen) niet bij het gewone huishoudelijke afval;... - Page 8 SMART1001/SMART1003 Gebruik Algemeen 1. Steek de slimme stekker in een geschikt stopcontact. 2. Sluit uw toestel aan op de slimme stekker. De Tuya-app gebruiken 1. Schakel de Bluetooth-functie op uw mobiel toestel in. Download de Tuya-app in uw app store.
- Page 9 SMART1001/SMART1003 3. Druk op + om de slimme stekker toe te voegen. 4. Klik op Alle Apparaten. Klik op het toestel dat u wilt toevoegen. Klik op de slimme stekker. 5. Steek de slimme stekker in een stopcontact. Houd de pairingknop ingedrukt tot de led blauw begint te knipperen, om aan te geven dat de slimme stekker in koppelmodus is.
-
Page 10: Reiniging En Onderhoud
SMART1001/SMART1003 7. Controleer of de naam en het wachtwoord van de wifi-verbinding correct zijn. Klik op Bevestigen. De slimme stekker maakt automatisch verbinding met het netwerk, wat betekent dat het apparaat met succes is toegevoegd. Geef het apparaat een andere naam en kies in welke ruimte de slimme stekker wordt gebruikt. -
Page 11: Technische Specificaties
IP-norm ......................... - afmetingen ........................- gewicht ......................... - Hierbij verklaart Velleman nv, dat dit type radioapparatuur SMART1001/SMART1003 conform is met richtlijn 2014/53/EU. Raadpleeg de volgende website voor de volledige tekst van de EU- conformiteitsverklaring: www.velleman.eu. Gebruik dit toestel enkel met originele accessoires. Velleman nv is niet aansprakelijk voor schade of kwetsuren bij (verkeerd) gebruik van dit toestel. -
Page 12: Consignes De Sécurité
SMART1001/SMART1003 MODE D'EMPLOI Introduction Aux résidents de l'Union européenne Informations environnementales importantes concernant ce produit Ce symbole sur l'appareil ou l'emballage indique que l’élimination d’un appareil en fin de vie peut polluer l'environnement. Ne pas jeter un appareil électrique ou électronique (et des piles éventuelles) parmi les déchets municipaux non-sujets au tri sélectif ;... - Page 13 SMART1001/SMART1003 Emploi Général 1. Brancher la prise intelligente sur une prise électrique appropriée. 2. Brancher votre appareil sur la prise intelligente. Utiliser l'application Tuya 1. Activer la fonction Bluetooth sur votre appareil mobile. Télécharger l'application Tuya depuis l'App Store. 2. S'enregistrer sur le cloud avec votre adresse électronique et votre mot de passe. Login.
- Page 14 SMART1001/SMART1003 3. Appuyer sur + pour ajouter la prise intelligente. 4. Cliquer sur Tous mes appareils. Sélectionner l'appareil que vous souhaitez ajouter. Cliquer sur la prise intelligente. 5. Brancher la prise intelligente sur une prise électrique appropriée. Maintenir enfoncé le bouton d'appairage jusqu'à...
-
Page 15: Entretien
SMART1001/SMART1003 7. Vérifier si le nom et le mot de passe de la connexion pour le wifi sont correct. Cliquer sur Confirmer. La prise intelligente se connecte automatiquement au réseau, ce qui signifie que l'appareil a été ajouté avec succès. Changer le nom de l'appareil et sélectionner la pièce dans laquelle la prise intelligente est utilisée. -
Page 16: Spécifications Techniques
..........................- Par la présente, Velleman SA, déclare que le type d'équipement radioélectrique SMART1001/SMART1003 est conforme à la norme 2014/53/EU. Le texte complet de la déclaration de conformité est disponible sur la page web suivante : www.velleman.eu. N'employer cet appareil qu’avec des accessoires d’origine. Velleman SA ne peut, dans la mesure conforme au droit applicable être tenue responsable des dommages ou... -
Page 17: Manual Del Usuario
Si tiene dudas, contacte con las autoridades locales para residuos. ¡Gracias por elegir Perel! Lea atentamente las instrucciones del manual antes de usar el aparato. Si ha sufrido algún daño en el transporte no lo instale y póngase en contacto con su distribuidor. -
Page 18: Funcionamiento General
SMART1001/SMART1003 Funcionamiento Funcionamiento general 1. Conecte el enchufe inteligente a una toma eléctrica adecuada. 2. Conecte el aparato deseado al enchufe inteligente. Usar la aplicación Tuya 1. Active la función Bluetooth en el dispositivo móvil. Descargue la aplicación Tuya en App Store o en Google Play. - Page 19 SMART1001/SMART1003 3. Pulse + para añadir el enchufe inteligente. 4. Haga clic en "All Devices". Haga clic en el aparato que quiere añadir. Haga clic en el enchufe inteligente. 5. Conecte el enchufe inteligente a una toma eléctrica. Mantenga pulsado el botón de emparejamiento hasta que el LED parpadee en azul, señal de que puede emparejar el...
-
Page 20: Cuidado Y Mantenimiento
SMART1001/SMART1003 7. Compruebe que el nombre de wifi y la contraseña estén correctos. Haga clic en "Confirm". El enchufe inteligente se conectará automáticamente a la red indicando que el aparato está añadido. Asígnelo un nombre y seleccione la habitación deseada. -
Page 21: Especificaciones
........................- peso..........................- Por la presente, Velleman nv declara que el tipo de equipo radioeléctrico SMART1001/SMART1003 es conforme con la Directiva 2014/53/EU. El texto completo de la declaración UE de conformidad está disponible en la dirección Internet siguiente: www.velleman.eu. -
Page 22: Allgemeine Richtlinien
Falls Zweifel bestehen, wenden Sie sich für Entsorgungsrichtlinien an Ihre örtliche Behörde. Vielen Dank, dass Sie sich für Perel entschieden haben! Lesen Sie diese Bedienungsanleitung vor Inbetriebnahme sorgfältig durch. Überprüfen Sie, ob Transportschäden vorliegen. Sollte dies der Fall sein, verwenden Sie das Gerät nicht und wenden Sie sich an Ihren Händler. -
Page 23: Betrieb
SMART1001/SMART1003 Betrieb Allgemeine Bedienung 1. Stecken Sie die Wi-Fi-Steckdose in eine ordnungsgemäße Steckdose. 2. Stecken Sie das gewünschte Gerät in die Wi-Fi-Steckdose. Tuya-App verwenden 1. Aktivieren Sie bitte die Bluetooth-Funktion an Ihrem Mobilgerät. Laden Sie die Tuya-App vom Apple Store oder Google Play Store herunter. - Page 24 SMART1001/SMART1003 3. Drücken Sie +, um zum Hinzufügen der Wi-Fi-Steckdose. 4. Klicken Sie auf "All Devices". ● Klicken Sie auf das Gerät, das Sie hinzufügen wollen. Klicken Sie auf die Wi-fi-Steckdose. 5. Stecken Sie die Wi-Fi-Steckdose in eine Steckdose. Halten Sie die Lern-Taste gedrückt bis die LED blau blinkt.
-
Page 25: Pflege Und Wartung
SMART1001/SMART1003 7. Überprüfen Sie den Wi-Fi-Namen und das Kennwort. Klicken Sie auf "Confirm". Die intelligente Steckdose wird automatisch mit dem Netz verbunden. Dies bedeutet, dass das Gerät hinzugefügt wurde. Ändern Sie den Namen und wählen Sie den gewünschten Raum aus. -
Page 26: Technische Daten
IP-Schutzart ........................- Abmessungen ........................ - Gewicht ......................... - Hiermit erklärt Velleman nv, dass der Funkanlagentyp SMART1001/SMART1003 der Richtlinie 2014/53/EU entspricht. Der vollständige Text der EU-Konformitätserklärung ist unter der folgenden Internetadresse verfügbar: www.velleman.eu. Verwenden Sie dieses Gerät nur mit originellen Zubehörteilen. Velleman NV übernimmt keine Haftung für Schaden oder Verletzungen bei (falscher) Anwendung... -
Page 27: Instrukcja Obsługi
W razie wątpliwości należy skontaktować się z lokalnym organem odpowiedzialnym za utylizację odpadów. Dziękujemy za wybór produktu firmy Perel! Prosimy o dokładne zapoznanie się z instrukcją obsługi przed użyciem urządzenia. Nie montować ani nie używać urządzenia, jeśli zostało uszkodzone podczas transportu - należy skontaktować się ze sprzedawcą. - Page 28 SMART1001/SMART1003 Obsługa Ogólne zasady obsługi 1. Podłączyć inteligentne gniazdo do odpowiedniego gniazdka elektrycznego. 2. Podłączyć urządzenie do inteligentnego gniazdka. Korzystanie z aplikacji Tuya App 1. Uruchom funkcja Bluetooth na urządzenie mobilne. Pobierz aplikację Tuya z App Store. 2. Zarejestruj się w chmurze, podając swój adres e-mail i hasło. Zaloguj się...
- Page 29 SMART1001/SMART1003 3. Naciśnij +, aby dodać inteligentne gniazdo. 4. Kliknij All Devices. Kliknij urządzenie, które chcesz dodać. Kliknij inteligentne gniazdo. 5. Podłącz inteligentne gniazdo do gniazdka elektrycznego. Przytrzymaj wciśnięty przycisk Learn, aż dioda LED zacznie migać na niebieski, co oznacza, że inteligentne gniazdo przeszło w tryb parowania.
-
Page 30: Utrzymanie I Konserwacja
SMART1001/SMART1003 7. Sprawdź, czy nazwa i hasło połączenia Wi-Fi są poprawne. Kliknij Confirm. Inteligentne gniazdo połączy się automatycznie z siecią, co oznacza, że urządzenie zostało pomyślnie dodane. Zmień nazwę urządzenia i wybierz, w którym pomieszczeniu jest używane inteligentne gniazdo. 8. Możesz już sterować inteligentnym gniazdem za pośrednictwem urządzenia mobilnego. -
Page 31: Specyfikacja Techniczna
IP ......................... - wymiary ........................- waga ..........................- Velleman NV niniejszym oświadcza, że urządzenie radiowe typu SMART1001/SMART1003 jest zgodne z Dyrektywą 2014/53/EU. Pełna treść deklaracji zgodności UE jest dostępna pod adresem internetowym: www.velleman.eu. Należy używać wyłącznie oryginalnych akcesoriów. Firma Velleman nv nie ponosi odpowiedzialności za uszkodzenia lub urazy wynikające z (niewłaściwego) -
Page 32: Manual Do Utilizador
Em caso de dúvidas, contacte com as autoridades locais para os resíduos. Agradecemos o facto de ter escolhido a Perel! Leia atentamente as instruções do manual antes de usar o aparelho. Caso o aparelho tenha sofrido algum dano durante o transporte não o instale e entre em contacto com o seu distribuidor. -
Page 33: Funcionamento Geral
SMART1001/SMART1003 Utilização Funcionamento Geral 1. Introduza a ficha inteligente numa tomada de corrente elétrica adequada. 2. Ligue o seu dispositivo à ficha inteligente. Usar a Aplicação Tuya 1. Ativa a função Bluetooth no dispositivo móvel. Descarregue a aplicação Tuya a partir da sua app store. - Page 34 SMART1001/SMART1003 3. Pressione + para adicionar a ficha inteligente. 4. Clique em All Devices (Todos os Dispositivos) Clique no dispositivo que quer adicionar. Clique na ficha inteligente. 5. Ligue a ficha inteligente a uma tomada de corrente elétrica. Mantenha o botão Learn pressionado até...
-
Page 35: Cuidados E Manutenção
SMART1001/SMART1003 7. Verifique se o nome da rede Wi-Fi e a palavra-passe estão corretas. Clique em Confirmar. A ficha inteligente é ligada automaticamente à rede indicando que o dispositivo foi adicionado com sucesso. Altere o nome do dispositivo e selecione qual a divisão em que a ficha inteligente vai ser utilizada. - Page 36 IP ......................- dimensões ........................- peso..........................- A Velleman NV declara que o equipamento de rádio do tipo SMART1001/SMART1003 está em conformidade com a Diretiva 2014/53/EU. O texto completo da declaração UE de conformidade está disponível no seguinte endereço: www.velleman.eu.
- Page 37 gebruik of gebruik van het toestel strijdig met de voorschriften van de fabrikant. Velleman® Service and Quality Warranty - schade ten gevolge van een commercieel, professioneel of collectief Since its foundation in 1972, Velleman® acquired extensive gebruik van het apparaat (bij professioneel gebruik wordt de experience in the electronics world and currently distributes its garantieperiode herleid tot 6 maand).
- Page 38 improbable de que surgieran problemas a pesar de todas las - Schäden infolge einer kommerziellen, professionellen oder precauciones, es posible recurrir a nuestra garantía (véase las kollektiven Anwendung des Gerätes (bei gewerblicher Anwendung condiciones de garantía). wird die Garantieperiode auf 6 Monate zurückgeführt). - Schäden verursacht durch eine unsachgemäße Verpackung und Condiciones generales referentes a la garantía sobre unsachgemäßen Transport des Gerätes.
- Page 39 Powyższe postanowienia mogą podlegać modyfikacji w zależności od wyrobu (patrz art obsługi). Made in PRC Imported for PEREL by Velleman nv Legen Heirweg 33, 9890 Gavere, Belgium www.perel.eu...
Need help?
Do you have a question about the SMART1001 and is the answer not in the manual?
Questions and answers