
Related Manuals for Next C6


Summary of Contents for Next C6
- Page 1 USER MANUAL MANUAL DO UTILIZADOR 100V Ceiling Speaker Coluna de Teto 100V www.nextaudiocom.com v202009...
- Page 2 CONTENTS INTRODUCTION GENERAL DESCRIPTION UNPACKING PACKAGING CONTENTS SAFETY FIRST WARNINGS GETTING STARTED CONNECTIONS 100V DISTRIBUTED LINES 100V LINE INSTALL REQUIREMENTS 100V POWER AMPLIFIER REQUIREMENTS 100V LINE SPEAKER CABLE REQUIREMENTS HANDS-ON INSTALLATION GENERAL CONSIDERATIONS PREPARATION NSTALLATION INSTRUCTIONS PROJECT/SERVICE RECOMMENDED CEILING SPEAKERS SPACING TROUBLESHOOTING WARRANTY POLICY CORRECT DISPOSAL...
- Page 3 ÍNDICE INTRODUÇÃO DESCRIÇÃO GERAL DESEMBALANDO CONTEÚDOS DA EMBALAGEM SEGURANÇA EM PRIMEIRO LUGAR AVISOS PRIMEIROS PASSOS LIGAÇÕES LINHA DE 100V REQUISITOS DE INSTALAÇÃO 100V REQUISITOS DE AMPLIFICAÇÃO LINHA 100V REQUISITOS DE CABLAGEM LINHA 100V MÃOS À OBRA INSTALAÇÃO CONSIDERAÇÕES GERAIS PREPARAÇÃO INSTRUÇÕES DE INSTALAÇÃO PROJETO/MANUTENÇÃO ESPAÇAMENTO RECOMENDADO ENTRE COLUNAS DE TETO...
-
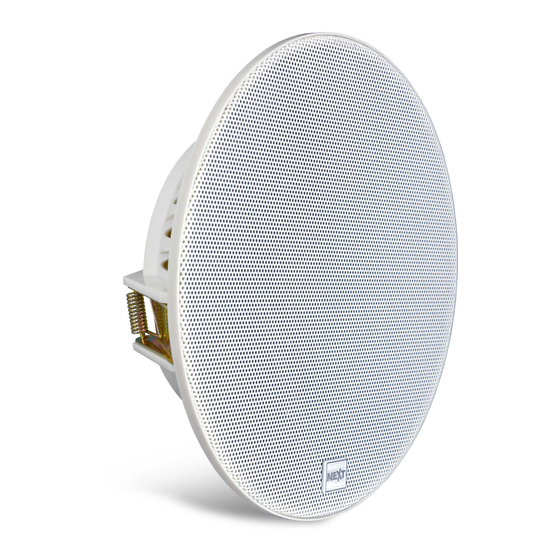
Page 4: General Description
• Do not use or install the equipment near water or exposed to rain The NEXT Audiocom C6 is a frameless in-wall speaker, in • If the equipment is not functioning properly or has been compliance with IEC268-5 standard, designed for installation damaged in any way, switch it o immediately in walls and ceilings. -
Page 5: Getting Started
See below for a detailed explanation. Make sure you have a powerful enough amplifier for your setup of C6 loudspeakers. It must have at least the total sum of 100V DISTRIBUTED LINES power values chosen on your C6 as power tap. Applying the 20% headroom rule, in this case, is the ideal scenario. -
Page 6: General Considerations
30cm surplus wire to facilitate connection and work in general. This will also prevent pulling the wires in case there is need to take the C6 out for repair or other purposes. The cutout hole must have 80mm free space in depth. -
Page 7: Troubleshooting
During the warranty period NEXT Audiocom will, at its own discretion, either repair or replace a product which prove to When making a project for C6, as a rule of thumb, you can use be defective provided that the product is returned in its... -
Page 8: Descrição Geral
• Utilize o equipamento apenas para o fim a que se destina, conforme instruído neste manual • Ao instalar, respeite as normas de segurança aplicáveis para Obrigado por ter comprado a coluna C6 da NEXT Audiocom. o seu país Este manual do utilizador irá fornecer-lhe informações úteis e •... -
Page 9: Primeiros Passos
Certi que-se de ter um ampli cador potente o su ciente para ligações. o seu conjunto de colunas C6. Deve ter pelo menos a soma total dos valores de potência escolhidas nas suas C6. Aplicar a regra geral de 20% acima, neste caso, é o cenário ideal. Se usar LINHA DE 100V 15 unidades da C6 con gurados para 6W cada, você... -
Page 10: Considerações Gerais
Verifique que a C6 está segura e não cai. INSTRUÇÕES DE INSTALAÇÃO Coloque a grelha no C6. NOTA: O logótipo pode ser removido Marque o local desejado e faça um recorte com a serra de da grelha, sem dani car, se necessário. - Page 11 Durante o período de garantia, a NEXT Audiocom reparará ou substituirá um Ao fazer um projeto para a C6, como regra geral, pode usar a produto que se revele defeituoso desde que o produto seja tabela a seguir para descobrir o espaçamento entre...
Need help?
Do you have a question about the C6 and is the answer not in the manual?
Questions and answers