Table of Contents
Advertisement
Quick Links
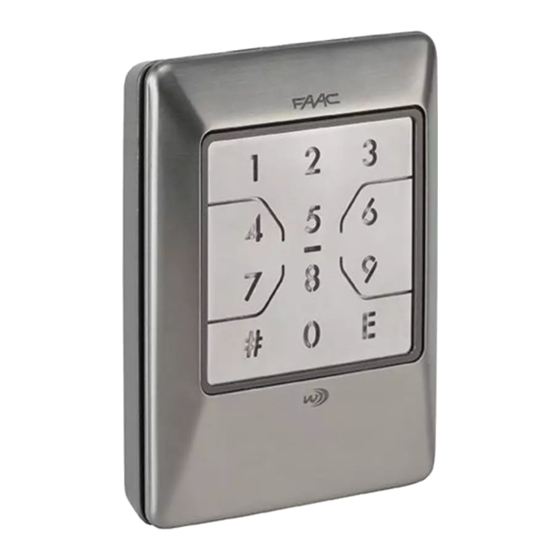
XKP Wireless Keypad
The FAAC XKP W keypad is a wireless keypad compatible with the FAAC range of SLH
transmitters & receivers. The keypad can be programmed in Easy Operation or
Advanced Operation. The XKP W has 4 radio channels (Ch 1, Ch 2, Ch 3, Ch 4) A direct
radio channel can be programmed that is not code protected, which can be activated
using button E.
Easy Operation – The following instructions refer to the Easy Operation Mode Only.
The XKP W is factory set to Easy Operation mode. This mode allows one 4 digit code
to be entered to activate one radio channel.
The keypad has 12 programming functions. Below is a list of functions that can be
selected when programming. These instructions will only cover functions 1, 4, 8, 9
For all other instructions please refer to the full manual.
4. Change the password
6. Direct radio channel Button E
7. Not used
Teach the radio code
8.
9. Learn the radio code
10. Set the XKP W Slave
11. Randomising the radio codes
12. Easy or Advanced Operation
pg. 1
(this allows you to teach the radio code to another device)
(this allows you to learn the radio code from a working device)
Advertisement
Table of Contents

Subscribe to Our Youtube Channel
Related Manuals for FAAC CENTSYS XKP


Summary of Contents for FAAC CENTSYS XKP
- Page 1 XKP Wireless Keypad The FAAC XKP W keypad is a wireless keypad compatible with the FAAC range of SLH transmitters & receivers. The keypad can be programmed in Easy Operation or Advanced Operation. The XKP W has 4 radio channels (Ch 1, Ch 2, Ch 3, Ch 4) A direct radio channel can be programmed that is not code protected, which can be activated using button E.
- Page 2 Programming – The programming function is password (PWD) protected. To select one of the 12 programming functions, you will need to enter the PWD before selecting a function. The factory set PWD for the keypad is 1 2 3 4 The procedure to enter programming mode is # PWD # ( # 1234 # ) Store A User Code (1) –...
- Page 3 TEACH A WORKING KEYPAD TO A NEW KEYPAD 1. First you will need to put the working keypad in “Teaching” mode. (# 1234 # 8 # 1) 2. Place the NEW keypad into “Learning” mode. (# 1234 # 9 # 1) 3.
- Page 4 TEACH A WORKING REMOTE TO A NEW KEYPAD 1. First you will need to put the NEW keypad in “Learning” mode. (# 1234 # 9 # 1) 2. Place the working remote into “Programming” mode and then press and HOLD the working button to start transmitting the code.
Need help?
Do you have a question about the CENTSYS XKP and is the answer not in the manual?
Questions and answers