Table of Contents
Advertisement
Quick Links
Advertisement
Table of Contents

Related Manuals for JOHNY VAC JVC56BTN


Summary of Contents for JOHNY VAC JVC56BTN
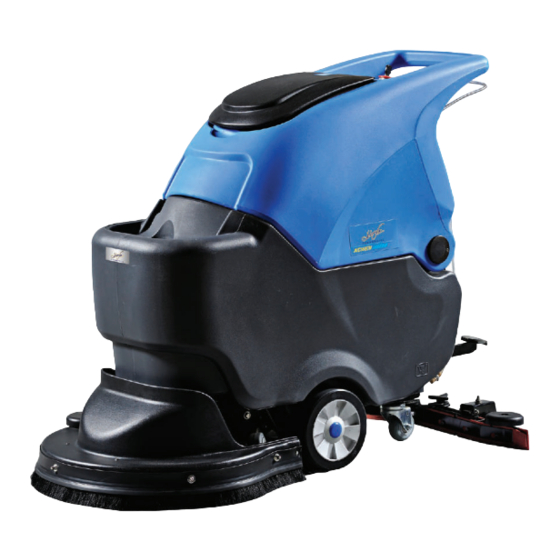
- Page 1 U S E R G U I D E JVC56BTN 22" Autoscrubber with traction...
- Page 2 This guide offers you excellent information that allows you to : • To emphasize and recognize the specificities of the JVC56BTN. • Use the device safely and in the best possible conditions. • Periodically maintain the unit for maximized performance.
-
Page 3: Table Of Contents
Timer ............20 Drain the Tanks......... 20 Drain Recovery Tank ........21 Drain Solution Tank ........21 Battery Charge......... 22 Specifications for Charger ......22 Use of Charger..........22 Precautions for Battery Installation and Use............23 Intelligent Charger LED Indicator ....24 JVC56BTN - 3 - User Guide... -
Page 4: Safety Precautions
- Do not charge the batteries with damaged cables. Any modification of the plug is not allowed. In case the charge cable is damaged or broken, to avoid risks, it must be replaced by its manufacturer, the servicing agents or similar qualified personnel. JVC56BTN - 4 - User Guide... - Page 5 - Wear safety gloves and eye protective devices before working on the batteries or battery connection. - Do not power spray or hose off the machine. Electrical malfunction may occur. - Use the parts provided or approved by JohnnyVac. - Maintenance must be carried out by qualified maintenance staff. - 5 - JVC56BTN User Guide...
- Page 6 - Remove the batteries before loading the machine. - Carry the machine with the assistance of other qualified personnel. - Turn off the machine. - Lower the brush motor. - Securely attach the unit to the transport truck box. - 6 - JVC56BTN User Guide...
-
Page 7: Safety Labels
See instruction manual Loading plug : On the back of the unit, directly on the recovery tank. Brush protection hood Warning: Revolving brush working, do not touch. Switch off the machine before repairing. - 7 - JVC56BTN User Guide... -
Page 8: Machine Components
11. Squeegee Lifting Handle 12. Charge Couple 13. Vacuum Hose 14. Pedal for Lifting or Lowering the Cleaning Head 15. Squeegee Assembly 16. Solution Tank Water Outlet 17. Wastewater Tank Drain 18. Clean Water Filter - 8 - JVC56BTN User Guide... - Page 9 25. Vacuum Motor 26. Control Panel 27. Gel Batteries (2 x 12 V) 28. Water Injection Filter 29. Battery Connection Cables 30. Battery Anode Line (Red) 31. Battery Connection Diagram 32. Battery Cathode Line (Black) JVC56BTN - 9 - User Guide...
-
Page 10: Machine Installation
3. Remove the steel fixed block before unpacking the machine. Unload the machine off the rack carefully with the assistance of other qualified personnel. NOTE : Do not push the machine directly without using the cargo handling apron in case of damages. JVC56BTN - 10 - User Guide... -
Page 11: Battery Installation
3. Fix the batteries into the compartment of battery cabin with care, and lay battery connecting posts following the diagram below (Figure 2). 4. Connect battery cables to battery posts with red cable to the anode post (+) and black cable to cathode post (–). Figure 2 JVC56BTN - 11 - User Guide... -
Page 12: Cleaning Method
Waste water is collected by the squeegee and the vacuum cleaner for easy and quick drying. CLEANING BRUSH Use appropriate brush for optimal cleaning effect. Specifications of recommended brush for JVC56BTN are as follows : • 22" spare brush is sold at Johnny Vac (JVC50BR). • Pad holder (JVCPD). -
Page 13: Installation And Connection Of The Squeegee
Do not over tighten. Figure 5 4. Connect vacuum hose to the squeegee assembly as shown in Figure 5 below. 5. Check squeegee blade and make proper adjustment. JVC56BTN - 13 - User Guide... -
Page 14: Installation And Setting Of The Brush
NOTE : To remove the brush or pads, do the opposite as above or do it manually. Figure 6 Figure 7 Figure 8 JVC56BTN - 14 - User Guide... -
Page 15: Filling The Solution Tank
(such as washing powder) will void the manufacturer's warranty. Do not use inflammable liquids in case of fire or explosion. FOR SAFETY: Follow the mixing and handling instructions on chemical containers. JVC56BTN - 15 - User Guide... -
Page 16: Machine Operation
START THE MACHINE 1. Turn the starter key. 2. Press the On/Off brush switch (see Figure 10). 3. Lower the squeegee lever to engage the suction motor (see Figure 11). Figure 10 Figure 11 JVC56BTN - 16 - User Guide... - Page 17 5. Adjust the speed knob to the desired power (see Figure 13). Figure 13 6. Raise the motor switch handle to open the water flow and start the traction motor that allows the machine to advance automatically for increased performance (see Figure 14). Figure 14 JVC56BTN - 17 - User Guide...
-
Page 18: During Operation
4. Do not use on a slope exceeding 2%. NOTE : Avoid getting foam through the filter and damaging the engine. Use an anti-foam additive in the wastewater collection tank. JVC56BTN - 18 - User Guide... -
Page 19: Battery Electricity Meter
If the gage is red, there is too much pressure. Never have the gage in red light. It cant affect the motor and the brushes (see Figure 17). Figure 17 JVC56BTN - 19 - User Guide... -
Page 20: Timer
1. Carry the machine to a place for drainage and turn the power off. 2. Hold the drain pipe upward, remove its cap and lower the hose down for drainage (see Figure 19). Figure 19 JVC56BTN - 20 - User Guide... -
Page 21: Drain Recovery Tank
3. Remove the wastewater filter inside the recovery tank (see Figure 20) and clean it gently. Allow it to dry completely before reinstalling it. Figure 20 DRAIN SOLUTION TANK Simply unscrew the drain plug from the clean water tank as shown in Figure 21. Figure 21 JVC56BTN - 21 - User Guide... -
Page 22: Battery Charge
3. Open the cover of the recovery tank to ventilate the unit while charging the batteries. 4. Plug the smart charger into a grounded electrical outlet and plug the charger cable into the charging socket on the back of the unit (see Figure 22). Figure 22 JVC56BTN - 22 - User Guide... -
Page 23: Precautions For Battery Installation And Use
11. Notice battery temperature when charging in case of danger and damages to the batteries caused by exces- sive heat. 12. Do not use batteries at insufficient voltage. Charge the batteries to full capacity before using. 13. Do not charge batteries too often or daily. It could damage the batteries. JVC56BTN - 23 - User Guide... -
Page 24: Intelligent Charger Led Indicator
LED1 GOES OUT + LED2 LED1 / LED2 CHARGE COMPLETED TURNS GREEN + FAN STOPS NOTE : 1. Load short-circuits SITUATIONS WHEN 2. Reversed connection LED2 TURNS RED 3. Battery cable short-circuit 4. Over-heat : LED2 turns Orange JVC56BTN - 24 - User Guide... -
Page 25: Machine Maintenance
1. Detach the discharge hose from the recovery tank (Figure 23) and rinse it with a hose (Figure 24). Figure 23 Figure 24 2. Remove the wastewater filter and clean it (Figure 25). Figure 25 JVC56BTN - 25 - User Guide... - Page 26 (Figure 28). Use a rubber blade that is compatible with the device for better performance. The recommended specifications for the JVC56BTN are : • 34’’ spare squeegee blade sold by Johnny Vac : Front blade : JVCSQ50N; Rear blade : JVCSQ50-RN...
-
Page 27: Monthly Maintenance
1. Make sure that the clean water tank is empty by simply unscrewing the drain plug from the clean water tank (Figure 30). 2. Remove the filter from the clean water tank (Figure 31) and clean it (Figure 32). Figure 31 Figure 30 Figure 32 JVC56BTN - 27 - User Guide... -
Page 28: Every 6 Months Maintenance
100 days after the Brush motor first 500 hours of use. 500 H Checks on this engine every 100 days after the Brush motor first 500 hours of use. Check damage or abrasion Duty caster JVC56BTN - 28 - User Guide... -
Page 29: Squeegee Blade Replacement
2. Remove the screws holding the blades and remove the blades (see Figure 35). Figure 35 3. Rotate and reassemble the rubber blades on the squeegee making sure the blades are in the correct position (see Figure 36). Figure 36 JVC56BTN - 29 - User Guide... -
Page 30: Squeegee Blade Adjustment
Figure 39 JVC56BTN - 30 - User Guide... - Page 31 Figure 40 JVC56BTN - 31 - User Guide...
-
Page 32: Transporting The Machine
(RV) to the freshwater tank without diluting the product. FOR YOUR SAFETY : When doing this, please wear protective gloves and goggles. CAUTION : Before using the appliance next time, rinse the tub with clean water to remove all traces of antifreeze. JVC56BTN - 32 - User Guide... -
Page 33: Troubleshooting
Damaged engine Replace the engine Tank full Empty the tank Lack of Blocked tank filter Clean the filter cleaning Damaged water valve Replace the valve solution Damaged solenoid valve Replace the solenoid valve JVC56BTN - 33 - User Guide... - Page 34 Insufficient battery voltage Recharge the batteries Battery failure Replace the batteries Time of use too short Batteries need maintenance Refer to the « Battery » section Battery charger failure Repair or replace the charger JVC56BTN - 34 - User Guide...
-
Page 35: Fault Codes Of The Charger
2. If the voltage is < 22 V the charger will not work Notes 3. If the voltage is < 22 V an alarm will be activated 4. Battery recharge is limited 5. In case of a drop of voltage an alarm will be activated JVC56BTN - 35 - User Guide... -
Page 36: Technical Specifications
20 990 sq. ft (1 950 m ) per hour Battery (gel) and charger Working autonomy 3,5 h Net weight 330 lb (150 kg) Dimensions 48½" x 20¾" x 38½" (123 cm x 53 cm x 98 cm) Warranty 2-year JVC56BTN - 36 - User Guide... -
Page 37: Machine Dimensions
T E C H N I C A L S P E C I F I C AT I O N S MACHINE DIMENSIONS 123 cm 98 cm 53 cm JVC56BTN - 37 - User Guide... - Page 38 N O T E S...
- Page 40 Residential and commercial vacuum cleaner specialist PARTS, ACCESSORIES & VACUUM BAGS VISIT OUR WEBSITE AT WWW.JOHNNYVAC.COM CONGRATULATIONS & THANK YOU for having chosen one of our product. ATTENTION Do not return the unit to the retailer before having spoken with us. Our most precious wish is that you really love your vacuum cleaner! In case of problems, contact our experts at 1 800 361-2043...
Need help?
Do you have a question about the JVC56BTN and is the answer not in the manual?
Questions and answers