
Related Manuals for JOHNY VAC JVC70RIDER


Summary of Contents for JOHNY VAC JVC70RIDER
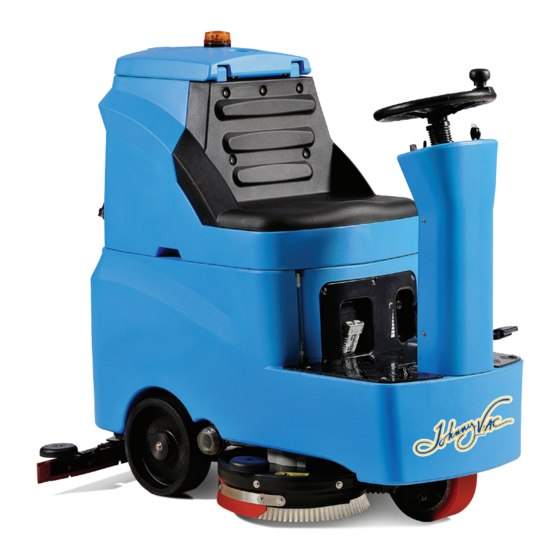
- Page 1 Floor Scrubber JVC70RIDER OPERATOR MANUAL Please read this manual before operating the machine.
-
Page 3: Table Of Contents
CONTENT Contents ......................1 Identifying the machine .................. 2 General information ..................4 3.1. Scope of the manual ..................4 Technical informaiton ..................5 4.1. General description ..................5 4.2. Danger zones ....................5 Safety information ..................6 5.1. Safety regulations ..................6 Handling and installation ................ -
Page 4: Contents
Battery maintenance and charging ............... 14 Maintenance instructions ................14 1 0.1. Maintenance-general rules ................15 10.2. Routine maintenace ..................15 1 0.2.1. Suction motor air filter and float: cleaning ........... 15 1 0.2.2. Detergent solution filter: cleaning ..............15 1 0.2.3. -
Page 5: Identifying The Machine
1. IDENTIFYING THE MACHINE 1. Recovery tank 2. Solution tank 3. Seat 4. Steering wheel 5. Operated console 6. Driving wheel 7. Brush 8. Waterproof skirt 9. Big wheel 10. Squeegee assy Fig. 1 1. Key switch: open it, press foot pedal 2. - Page 6 1. Recharger connector: convenient machine recharging 2. Water knob: make sure the moderation of water volume Fig. 4 58 dB lower noise suitable for hospitals, schools, hotels etc. Fig. 5 1. Drain tube 2. Water inlet Fig. 6 1. Squeegee knob 2.
-
Page 7: General Information
3. GENERAL INFORMATION Read this manual carefully before carrying out any work on the machine 3.1. SCOPE OF THE MANUAL This manual has been written by the Manufacturer and is an integral part of the machine. It defines the purpose for which the machine has been designed and constructed and contains all the information required by operators. -
Page 8: Technical Informaiton
4. TECHNICAL INFORMATION 4.1. GENERAL DESCRIPTION This machine is a scrubber drier for sweeping, washing and drying flat, horizontal, smooth or moderately rough, even and obstacle free floors in civil and industrial premises. The scrubber drier spreads a solution of water and detergent in the correct concentration on the floor and then scrubs it to remove the dirt. -
Page 9: Safety Information
5. SAFETY INFORMATION IMPORTANT!!! I. Rigorously respect all instructions in the Manual (in patitlcular those relatlng to danger and important information) and on the safety plates fitted to the machine. The Manufacturer declines all liability for damage to people or things resulting from failure to observe the instructions. A- The appliance must be used exclusively by persons trained in its use and/or who have demonstrated their ability and have been expressly instructed to use the appliance. - Page 10 III. Make sure the electrical characteristics of the machine (voltage, frequency, absorbed power) given on the rating plate (fig. I) are the same as those of the mains electricity supply. A- It is indispensable to respect the battery manufacturer’s instructions and current legislation. The batteries should always be kept clean and dry to avoid surface leakage current.
-
Page 11: Handling And Installation
6. HANDLING AND INSTALLATION 6.1. LIFTING AND TRANSPORTATION ••• IMPORTANT ••• During all lifting operations, make sure the packaged machine is firmly anchored to avoid it tipping up or being accidentally dropped. Always load/unload lorries in adequately lit areas. The machine, packaged on a wooden pallet by the Manufacturer, must be loaded using suitable equipment onto the transporting vehicle. -
Page 12: Upacking
6.4.1. Batteries preparation DANGER ! While installing or performing maintenance on the batteries, the operator must be provided with the necessary personal protection devices (gloves, goggles, overalls, etc) to limit the risk of accident. Keep away from naked flames, avoid short circuiting the battery poles, avoid sparks and do not smoke. -
Page 13: Lifting And Transporting The Machine
6.5. BATTERY CHARGER(BATTERY MODELS) ••• IMPORTANT ••• Never allow the batteries to become excessively flat as this could damage them irreparably. 6.5.1. Choosing the battery charger Make sure the battery charger is compatible with the batteries to be charged: - tubular lead batteries: a 24 V- 20 A automatic charger is recommended. Consult the battery charger manufacturer and manual to confirm the choice. -
Page 14: The Machine Moving Without Operation
The squeegee blades scrape the film of water and detergent from the floor and prepare the way for perfect drying. With time, tbe constant rubbing makes the edge of the blade in contact with the floor rounded and cracked, reducing the drying efficiency and requiring it to be replaced. The state of wear should be checked frequenlly. -
Page 15: Adjusting The Riding Position
INFORMATION ? lf you are using the machine for the first time, we recommend trying it on a large obstacle-free surface first to acquire the necessary familiarity. Always empty the dirty water drum before filling the detergent tank again. For effective cleanmg and to extend the working life of the machine, follow a few simple rules: A- prepare the work area by removing all possible obstacles;... -
Page 16: Useful Cleaning Tips
7.8. USEFUL CLEANING TIPS In the event of particularly stubborn dirt on the floor, washing and drying can be performed in two separate operations. 7. 8.1. Prewasfling 1) place the tap lever; 2) place the brush switch; 3) lower the head: 4) operate the drive level to rotate the brushes;... -
Page 17: Periods Of Inactivity
8. PERIODS OF INACTIVITY lf the machine is not used for some time, remove the squeegee and brushes (or drive disks), wash them and put them away in a dry place (preferably in a bag or wrapped in plastic film) away from dust. -
Page 18: Routine Maintenace
10.2. ROUNTINE MAINTENANCE 10.2.1 Suction motor air filter and float switch cleaning 1) unscrew and remove the tank cap from the dirty water tank; 2) make sure the dirty water tank is empty; 3) clean the float switch at the back of the dirty water tank, taking care not to direct the water jet directly against the float switch;... -
Page 19: 0.2.4. Fuses: Replacing
• To replace the fuses: a. make sure the dirty water drum is empty and empty it if necessary; b. raise the dirty water tank; c. raise the fuse holder cover and remove the fuse by unscrewing the fixing screws; d. -
Page 20: How To Resolve Possible Problems
11. TROUBLESHOOTING AND ERROR CODES 11.1 How to resolve possible problems B – Machine fonctionne à batterie / C – Machine fonctionne à l’électricité Problème Cause Solution Les batteries sont débran- Brancher les batteries. chées. La machine ne fonctionne Les batteries sont à plat. Rechargez les batteries. - Page 21 Le rebord de la lame du Remplacez la lame du racloir en contact avec le racloir. sol est usé. Le racloir est endommagé Dégagez l’obstruction, ou le boyau est obstrué. réparez le bris. L’interrupteur à flotteur Videz le réservoir de ré- s’est déclenché...
- Page 22 La batterie est neuve et La batterie nécessite un ne performe pas encore à rodage de charge et dé- 100%. charge d’environ 20 à 30 fois avant d’atteindre sa pleine capacité. La batterie se décharge La machine doit fonction- Si possible, utilisez des trop rapidement pendant ner à...
-
Page 23: Main Technical Specifications
12. MAIN TECHNICAL SPECIFICATIONS Caractéristics English measures Metric measures Power : 24 V DC – self-propelled Traction motor : 0,54 HP / 400 W Dimensions : 48,4’’ x 31’’ x 47’’ 123 cm x 80 cm x 120 cm Weight with battery : 684 lb 310 kg Tank construction :...
Need help?
Do you have a question about the JVC70RIDER and is the answer not in the manual?
Questions and answers