Table of Contents
Advertisement
Quick Links
Advertisement
Table of Contents

Related Manuals for Elcomponent PowerPro

Summary of Contents for Elcomponent PowerPro
- Page 1 PowerPro PowerFlow Firmware with 8 Channel Power Quality Datalogger User's Guide...
- Page 2 All Rights Reserved. The information in this document is subject to change without notice. Elcomponent Ltd has made every effort to ensure the accuracy of this manual. However, Elcomponent Ltd makes no warranties with respect to this documentation and disclaims any implied warranties of merchantability and fitness for a particular purpose.
-
Page 3: Table Of Contents
Table of contents Table of contents ................i,ii Introduction ..................1 Safety....................2 Quick Start ..................3 Hookup Configurations ...............5 Hookup Diagnostic Warnings .............7 Power Flow Firmware Features............10 RMS Data Storage ..............10 Harmonics and Waveform Storage ..........10 Power Calculations ..............10 Total Harmonic Distortion (THD)..........10 Frequency ..................10 Event Capture ................11 Flicker (Optional) ................11... - Page 4 Logger ID ................21 Time and Date Setting............21 Calibration................22 Display ..................23 Measured Data ............... 23 Voltage, Current and Frequency ........23 Neutral Voltage and Current..........24 Real Power and Apparent Power ........24 Reactive Power and Power Factor ........24 Total Power ...............
-
Page 5: Introduction
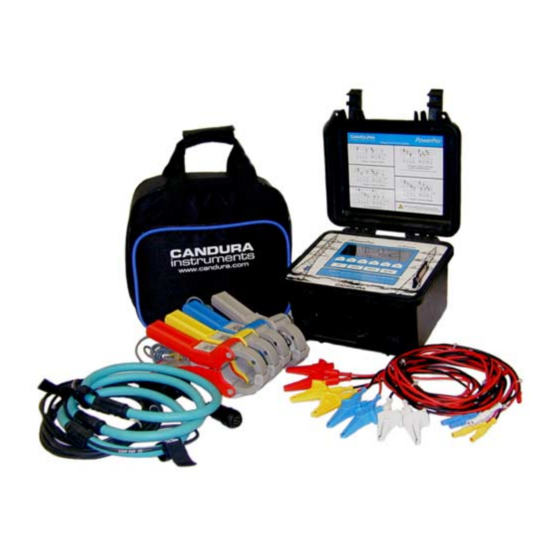
• Flicker (IEC 868 / IEC 61000-4-15) - Optional The PowerPro is an 8 channel power quality data logger. It can monitor 3 phases of voltage and current as well as a neutral voltage and current. Measured parameters are updated every ½ cycle to ensure that nothing is missed. -
Page 6: Safety
Please read and UNDERSTAND the following information before operating this instrument • The PowerPro uses a membrane keypad that could be damaged if a sharp object is brought into contact with it. This may expose the operator to potentially hazardous voltages. -
Page 7: Quick Start
PowerPro with PowerFlow Firmware Quick Start Connecting the PowerPro to the circuit to be measured is a straightforward process. 1. Connect the voltage leads for each phase to be measured. For proper operation V1 must always be used. Three phase circuits can be connected in either a ‘wye’... - Page 8 PowerPro with PowerFlow Firmware Quick Start continued 8. To stop logging press the ‘RECORD’ key and then F4 followed by F1 to confirm the stop command. Note: Static discharges may occur when connecting leads, communication cable or memory card, depending on environmental conditions.
-
Page 9: Hookup Configurations
PowerPro with PowerFlow Firmware Hookup Configurations The PowerPro can be used to monitor all of the most common power distribution systems. Following are descriptions of the five most common field setups: Continued…. - Page 10 PowerPro with PowerFlow Firmware Hookup Configuration continued...
-
Page 11: Hookup Diagnostic Warnings
PowerPro with PowerFlow Firmware Hookup Diagnostic Warnings Before the logger starts recording it does a number of checks on the connected signals, if it detects a potential problem a message is displayed and the operator must select either ‘Retry’ or ‘Ignore’ – if the operator presses ‘ESC’, ‘SETUP’, ‘DISPLAY’... - Page 12 PowerPro with PowerFlow Firmware Hookup Diagnostic Warnings continued ‘V3 Inverted’ -Voltage leads on channel three are reversed. ‘-ve Power Check CT#1’ ‘-ve Power Check CT#2’ ‘-ve Power Check CT#3’ -This usually means that the relevant CT has been connected in reverse. To fix the problem remove the CT, rotate it 180 degrees, reconnect it and then press ‘Retry’.
- Page 13 PowerPro with PowerFlow Firmware Hookup Diagnostic Warnings continued ‘Volt Event Triggered’ -This indicates that an under/over voltage condition is active. This may indicate that the trigger levels are not set up properly (to view them press ‘SETUP’ and ‘F2’).
-
Page 14: Power Flow Firmware Features
Power Flow Firmware Features RMS Data Storage The PowerPro stores RMS data at set intervals which can be adjusted from 1 to 30 seconds or 1 to 30 minutes. The minimum, maximum and average values are stored at the end of each storage interval. The averaged values are calculated from the sum of the RMS values (updated every ½... -
Page 15: Event Capture
PowerPro with PowerFlow Firmware Power Flow Firmware Features Event Capture Under/over voltage events and under/over frequency events are stored when they occur. The trigger levels are set from the Setup menu under ‘TRIGGER LEVELS’. The duration of the events are recorded with a ½... -
Page 16: Side Panel
PowerPro with PowerFlow Firmware Side Panel The voltage and current connections are colour coded according to phase and polarity (for voltage). Phase 1 or Phase A Phase 2 or Phase B Yellow Phase 3 or Phase C Blue Neutral Current... -
Page 17: Front Panel
PowerPro with PowerFlow Firmware Front Panel The front panel of the PowerPro has a graphics display, a 10 button keypad, an RS-232 communications port and a memory card interface. The graphics display is 240x64 pixels with an LED backlight. Text on... -
Page 18: Logger Operation
PowerPro with PowerFlow Firmware Logger Operation Turning On and Off The PowePro should be put into low power (or sleep) mode when not in use. In low power mode only the real time clock and keypad interface are active. Current consumption from the battery is reduced to less than 100 microamps. - Page 19 PowerPro with PowerFlow Firmware Logger Operation (Memory Card) When the logger detects a card being removed it changes the screen to the initial screen if the logger was not recording. If the logger was recording when the memory card is removed it displays an error message: ‘RAM Card Error Please Re-Insert RAM Card...
-
Page 20: Setup
PowerPro with PowerFlow Firmware Logger Operation Setup Pressing the ‘SETUP’ button calls up the main setup screen. From the main setup screen you can select ‘LOGGING SETUP’, ‘TRIGGER LEVELS’, ‘FLICKER SETUP’, ‘SCALE FACTOR’, ‘SYSTEM SETUP’ or ‘COMM SETUP’. If a computer is connected to the serial port, then run PowerView software and select 'Logger' and 'Configure' to check and modify any of the setup parameters. -
Page 21: Connection Type (1P2W, 1P3W, 3P3W, 3P4W And 2.5E)17
PowerPro with PowerFlow Firmware Logger Operation (Setup - Logging setup) Connection Type (1P2W, 1P3W, 3P3W, 3P4W and 2.5E) This allows the logger to be configured for the five most common configuration types: 1P2W 1 Phase 2 Wire 1P3W 1 Phase 3 Wire (Edison circuit) -
Page 22: Line Frequency
PowerPro with PowerFlow Firmware Logger Operation (Setup - Trigger Setup) continued Line Frequency This allows the operator to set the nominal line frequency (50 or 60 hertz). The under/over frequency levels are automatically adjusted as a fixed offset from this value. For example, if the nominal line frequency is 60 Hz with an over frequency setting of 60.50 Hz and the... -
Page 23: Over Frequency
–0.10 Hz, -0.25Hz, -0.50 Hz and -1.00 Flicker Setup Flicker firmware is optional. If the PowerPro does not have Flicker firmware installed this menu will not appear. Setting up the flicker parameters involves setting the short term flicker calculation interval (PST), the long term flicker calculation interval (PLT) and the nominal line voltage. -
Page 24: Line Voltage
Ext PT To measure voltages greater than 750V external PT's must be used. The ratio of the external PT is entered here so that the PowerPro can display primary side values. The maximum ratio that can be entered is 200:1. If this is not sufficient the PowerView software can change this ratio after the data is transferred to the computer. -
Page 25: Neutral Ct
Setup Lock The operator must enter the lock code to enable or disable the setup lock. This code is the same for all PowerPro loggers and is not user changeable. The code is ‘4123’. Turning the lock on inhibits any changes to the setup parameters. -
Page 26: Calibration
PowerPro with PowerFlow Firmware Logger Operation (Setup – System Setup) continued Calibration Voltage, current, power and frequency readings can be calibrated. Before accessing this menu a 6 digit calibration lock password must be entered. Once this password is entered it will stay in effect until the logger is turned off (ie. -
Page 27: Display
PowerPro with PowerFlow Firmware Logger Operation (Setup - System Setup - Calibration) Power Calibration The power calibration compensates for phase shift errors in the CT. This calibration should be done at the same time as the current calibration. To perform this calibration a stable voltage/current supply capable of supply current with about a 0.7 power factor (either lead or... -
Page 28: Neutral Voltage And Current
PowerPro with PowerFlow Firmware Logger Operation (Display – Measured Data) continued Neutral Voltage and Current The first and third harmonics of neutral voltage and current are displayed. Real Power and Apparent Power Three phases of real power (kW) and apparent power (kVA) are displayed. -
Page 29: Voltage Statistics
PowerPro with PowerFlow Firmware Logger Operation (Display – Data Statistics) Voltage Statistics Pressing ‘F1’ from the Data Statistics submenu brings up another submenu that enables selection of instantaneous voltage statistics (‘INST MN/MX’), average voltage statistics (‘AVERAG MN/MX’) and voltage THD statistics (‘THD MN/MX’). -
Page 30: Power Statistics
PowerPro with PowerFlow Firmware Logger Operation (Display - Data Statistics - Current Statistics) continued Instantaneous Current Statistics This is automatically displayed when current statistics are first selected. The instantaneous minimum and maximum values (updated every ½ cycle) are displayed along with a time stamp. Channel 1 current is displayed first, if more than one channel is being measured then the other channels can be viewed by pressing ‘F6’... -
Page 31: Neutral Voltage Current Statistics
PowerPro with PowerFlow Firmware Logger Operation (Display - Data Statistics - Power Statistics) Apparent Power Statistics Pressing ‘F2’ selects the apparent power statistics. The average apparent power minimum and maximum values (updated every storage interval) are displayed along with a time stamp. Channel 1 apparent power is displayed first, if more than one channel is being measured then the other channels can be viewed by pressing ‘F6’... -
Page 32: Waveform Display
PowerPro with PowerFlow Firmware Logger Operation (Display - Data Statistics – Flicker statistics) continued Short Term Flicker This is automatically selected when flicker statistics are first selected. The PST minimum and maximum values (updated every PST interval) are displayed along with a time stamp. -
Page 33: Logger Operation
PowerPro with PowerFlow Firmware Logger Operation Record Pressing the ‘RECORD’ button calls up the recording screen. From this screen you can start recording, stop recording and turn the logger off (SLEEP). Start Recording Pressing ‘F2’ will initiate recording start. If there is data in the logger from a previous survey the operator must first reset the memory. -
Page 34: Downloading
PowerPro with PowerFlow Firmware Downloading Recorded data is transferred from the PowerPro to a computer using the memory card. Data is transferred to a computer using the memory card. When logging has been stopped the memory card can be removed from the logger. -
Page 35: Serial Communications
PowerPro with PowerFlow Firmware Serial Communications CANDURA Instruments PowerView software is used to communicate with the PowerPro. The software can receive real time readings (Status) and logger configuration. It can read to the PowerPro updated configuration values and new firmware (either firmware... -
Page 36: Notes
PowerPro with PowerFlow Firmware Notes...
Need help?
Do you have a question about the PowerPro and is the answer not in the manual?
Questions and answers