Advertisement
Quick Links
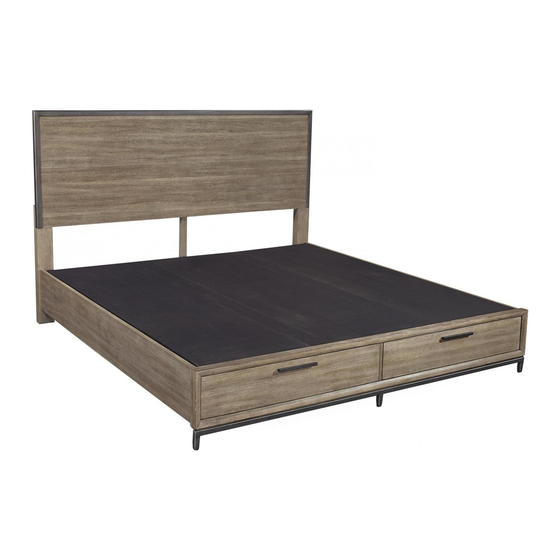
aspenhome
ah
ITEM NO: I287-412
I287-402
I287-403
Thank you for purchasing this quality product. Be sure to check all packing material carefully for
small parts that may come loose inside the carton during shipment.
I287-412
I287-402
HARDWARE LIST: I287-412
Description
No.
Bolt Ø5/16" x 1-3/4"
A
Lock Washer Ø5/16"
B
Flat Washer Ø5/16" x 3/4"
C
D
Allen Wrench 5mm
HARDWARE LIST: I287-402
Description
No.
Hanger Bolt Ø5/16" x 3-1/2"
E
Half Moon Washer Ø5/16"
F
Lock Washer Ø5/16"
G
Hex Nut Ø5/16"
H
I
Hex Wrench 12mm
Wood Screw #8 x 1-1/4"
J
BEFORE USING THIS PRODUCT PLEASE READ, UNDERSTAND, AND FOLLOW THESE INSTRUCTIONS.
Save these instructions for future reference.
Page 1/4
Queen Panel HB
Queen Rails
Queen Low Profile FB
UNIT SHOULD BE INSTALLED BY 2 OR MORE PERSONS.
I287-403
Quantity
Sketch
12 PCS
12 PCS
12 PCS
1 PC
Quantity
Sketch
8 PCS
8 PCS
8 PCS
8 PCS
1 PC
8 PCS
FOR INDOOR USE ONLY
MADE IN VIETNAM
ASSEMBLY INSTRUCTIONS
R
All Beds need to be set up in the exact final
location so that after full assembly it will not
need to be moved. Moving the bed will cause
the support legs to move out of perpendicular
(90 degree), weaken the support system, and
may allow the bed to collapse.
TOOLS REQUIRED (NOT PROVIDED)
PHILLIPS SCREWDRIVER
COMPONENTS LIST: I287-412
Description
No.
1
Headboard
Left Leg
2
3
Right Leg
4
Wood Stretcher
Center Support Leg
5
COMPONENTS LIST: I287-402
Description
No.
1
Bed rail
2
Slat
COMPONENTS LIST: I287-403
Description
No.
1
Footboard
Support Leg (for slat)
2
Quantity
Sketch
1 PC
1 PC
1 PC
1 PC
1 PC
Quantity
Sketch
2 PCS
4 PCS
Quantity
Sketch
1 PC
4 PCS
08-05-2020
Advertisement

Subscribe to Our Youtube Channel
Related Manuals for aspenhome I287-412


Summary of Contents for aspenhome I287-412
- Page 1 ASSEMBLY INSTRUCTIONS ITEM NO: I287-412 Queen Panel HB I287-402 Queen Rails I287-403 Queen Low Profile FB Thank you for purchasing this quality product. Be sure to check all packing material carefully for small parts that may come loose inside the carton during shipment.
- Page 2 ASSEMBLY INSTRUCTIONS ITEM NO: I287-412 Queen Panel HB I287-402 Queen Rails I287-403 Queen Low Profile FB STEP 1: Lay the headboard face down on a soft surface. Attach the left leg and right leg to headboard by using 8 bolts(A), lock washers(B) and flat washers(C).
- Page 3 ASSEMBLY INSTRUCTIONS ITEM NO: I287-412 Queen Panel HB I287-402 Queen Rails I287-403 Queen Low Profile FB STEP 4: The slat bearers have been attached in position (b) side approximately 2" from the top of the rails for use with a storage footboard. The slat bearers must be moved into position (a) based on this bed configuration.
- Page 4 ASSEMBLY INSTRUCTIONS ITEM NO: I287-412 Queen Panel HB I287-402 Queen Rails I287-403 Queen Low Profile FB STEP 7: Arrange the slats on the slat bearers equally and attach to the slat bearers with wood screws (J). FUNCTIONALITY INSTRUCTION I287-412...
- Page 5 ASSEMBLY INSTRUCTIONS ITEM NO: I287-412 Queen Panel HB I287-402 Queen Rails I287-403D Queen Storage FB Thank you for purchasing this quality product. Be sure to check all packing material carefully for small parts that may come loose inside the carton during shipment.
- Page 6 ASSEMBLY INSTRUCTIONS ITEM NO: I287-412 Queen Panel HB I287-402 Queen Rails I287-403D Queen Storage FB STEP 1: Lay the headboard face down on a soft surface. Attach the left leg and right leg to headboard by using 8 bolts(A), lock washers(B) and flat washers(C).
- Page 7 ASSEMBLY INSTRUCTIONS ITEM NO: I287-412 Queen Panel HB I287-402 Queen Rails I287-403D Queen Storage FB STEP 4: Put the footboard upside down on a padded, clean surface. Attach the support legs(for footboard) and the metal base to footboard by using 4 bolts(L), lock washers(M) and flat washers(N).
- Page 8 ASSEMBLY INSTRUCTIONS ITEM NO: I287-412 Queen Panel HB I287-402 Queen Rails I287-403D Queen Storage FB STEP 6: Attach center rail to the footboard and center support leg of headboard using 4 bolts(K), lock washers(M) and flat washers(N). Center rail...
- Page 9 ASSEMBLY INSTRUCTIONS ITEM NO: I287-412 Queen Panel HB I287-402 Queen Rails I287-403D Queen Storage FB STEP 9: Put the deckings over the slats, secure deckings to the slats with wood screws (P) through the pre-drilled holes in the deckings as shown below.
- Page 10 ASSEMBLY INSTRUCTIONS ITEM NO: I287-415 King Panel HB I287-406 King Rails I287-410 Cal King Rails I287-407 King Low Profile FB Thank you for purchasing this quality product. Be sure to check all packing material carefully for small parts that may come loose inside the carton during shipment.
- Page 11 ASSEMBLY INSTRUCTIONS ITEM NO: I287-415 King Panel HB I287-406 King Rails I287-410 Cal King Rails I287-407 King Low Profile FB STEP 1: Lay the headboard face down on a soft surface. Attach the left leg and right leg to headboard by using 8 bolts(A), lock washers(B) and flat washers(C).
- Page 12 ASSEMBLY INSTRUCTIONS ITEM NO: I287-415 King Panel HB I287-406 King Rails I287-410 Cal King Rails I287-407 King Low Profile FB STEP 4: The slat bearers have been attached in position (b) side approximately 2" from the top of the rails for use with a storage footboard.
- Page 13 ASSEMBLY INSTRUCTIONS ITEM NO: I287-415 King Panel HB I287-406 King Rails I287-410 Cal King Rails I287-407 King Low Profile FB STEP 7: Arrange the slats on the slat bearers equally and attach to the slat bearers with wood screws (J).
- Page 14 ASSEMBLY INSTRUCTIONS ITEM NO: I287-415 King Panel HB I287-406 King Rails I287-410 Cal King Rails I287-407D King Storage FB Thank you for purchasing this quality product. Be sure to check all packing material carefully for small parts that may come loose inside the carton during shipment.
- Page 15 ASSEMBLY INSTRUCTIONS ITEM NO: I287-415 King Panel HB I287-406 King Rails I287-410 Cal King Rails I287-407D King Storage FB STEP 1: Lay the headboard face down on a soft surface. Attach the left leg and right leg to headboard by using 8 bolts(A), lock washers(B) and flat washers(C).
- Page 16 ASSEMBLY INSTRUCTIONS ITEM NO: I287-415 King Panel HB I287-406 King Rails I287-410 Cal King Rails I287-407D King Storage FB STEP 4: Put the footboard upside down on a padded, clean surface. Attach the support legs(for footboard) and the metal base to footboard by using 6 bolts(M), lock washers(N) and flat washers(O).
- Page 17 ASSEMBLY INSTRUCTIONS ITEM NO: I287-415 King Panel HB I287-406 King Rails I287-410 Cal King Rails I287-407D King Storage FB STEP 6: The standard king center rail(short) is in the Storage Footboard carton, and the Cal king center rail (long) is in the Cal King side rail carton. Attach the appropriate center rail to the footboard and center support leg of headboard using 4 bolts(L), lock washers(N) and flat washers(O).
- Page 18 ASSEMBLY INSTRUCTIONS ITEM NO: I287-415 King Panel HB I287-406 King Rails I287-410 Cal King Rails I287-407D King Storage FB STEP 9: For the Cal King bed, both filer boards are notched. Using a utility knife only cut off the small piece at the notch on one of the filler boards. This cut off filler board will be placed at the foot of the bed going from left to right as shown on the right side below in STEP 10.
- Page 19 ASSEMBLY INSTRUCTIONS ITEM NO: I287-415 King Panel HB I287-406 King Rails I287-410 Cal King Rails I287-407D King Storage FB FUNCTIONALITY INSTRUCTION I287-415 Single Powered USB Port for Charging on both sides I287-406 Cedar-lined Storage Drawers I287-407D I287-415 Single Powered USB...
Need help?
Do you have a question about the I287-412 and is the answer not in the manual?
Questions and answers