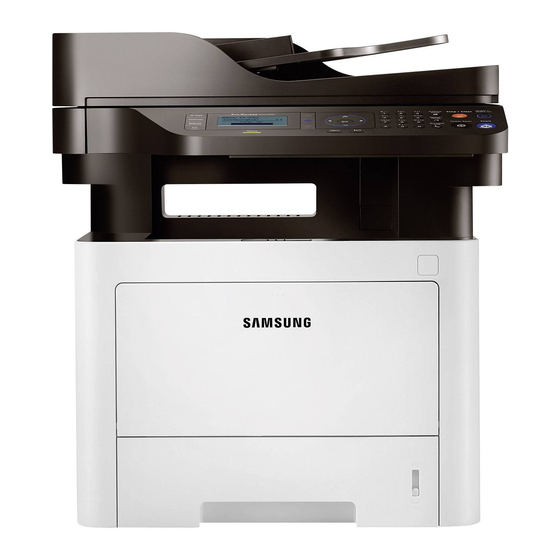
Samsung ProXpress M337 Series User Manual
Hide thumbs
Also See for ProXpress M337 Series:
- User manual (384 pages) ,
- Quick installation manual (2 pages) ,
- Manual del usuario (410 pages)
Table of Contents
Advertisement
Quick Links
User's Guide
User's Guide
BASIC
BASIC
This guide provides information concerning installation, basic operation and
troubleshooting on windows.
ADVANCED
This guide provides information about installation, advanced configuration, operation and
troubleshooting on various OS environments.
Some features may not be available depending on models or countries.
Advertisement
Table of Contents

Related Manuals for Samsung ProXpress M337 Series


Summary of Contents for Samsung ProXpress M337 Series
- Page 1 User’s Guide User’s Guide BASIC BASIC This guide provides information concerning installation, basic operation and troubleshooting on windows. ADVANCED This guide provides information about installation, advanced configuration, operation and troubleshooting on various OS environments. Some features may not be available depending on models or countries.
-
Page 2: Table Of Contents
BASIC Using USB memory device 1. Introduction 3. Maintenance Key benefits Features by models Ordering supplies and accessories Useful to know Available consumables About this user’s guide Available accessories Safety information Available maintenance parts Machine overview Storing the toner cartridge Control panel overview Redistributing toner Turning on the machine... - Page 3 BASIC Understanding the status LED Understanding display messages 5. Appendix Specifications Regulatory information Copyright...
-
Page 4: Introduction
1. Introduction This chapter provides information you need to know before using the machine. • Key benefits • Features by models • Useful to know • About this user’s guide • Safety information • Machine overview • Control panel overview •... -
Page 5: Key Benefits
Key benefits Environmentally friendly Fast high resolution printing • To save toner and paper, this machine supports Eco feature (see "Eco • You can print with a resolution of up to 1,200 x 1,200 dpi effective output printing" on page 57). (1,200 x 600 x 2 bit). - Page 6 Key benefits • Samsung Easy Printer Manager and Printing Status is a program that • You can print in various operating systems (see "System requirements" on monitors and informs you of the machine’s status and allows you to page 136).
-
Page 7: Features By Models
M407x series SPL printer driver PCL printer driver PS printer driver XPS printer driver Direct Printing Utility Samsung Easy Scan to PC settings Printer Manager Fax to PC settings Device Settings Samsung Printer Status Samsung AnyWeb Print Samsung Easy Document Creator... - Page 8 Twain scan driver WIA scan driver a. Download the software from the Samsung website and install it: (http://www.samsung.com > find your product > Support or Downloads). Before installing, check whether your computer’s OS support the software. ( : Included, Blank: Not available)
- Page 9 Features by models Variety feature Features M337x series M387x series M407x series Hi-Speed USB 2.0 Network Interface Ethernet 10/100 Base TX wired LAN Network Interface Ethernet 10/100/1000 Base TX wired LAN IEEE 1284B parallel connector Network Interface 802.11b/g/n wireless LAN (M387xFW only) Google Cloud Print™...
- Page 10 Features by models Features M337x series M387x series M407x series Multi-send Delay send Priority send Duplex send (M387xFW only) Secure receive Duplex print Send/ Receive forward - fax Send/ Receive forward - email Send/ Receive forward - server Scan Scanning to email Scanning to SMB server Scanning to FTP server Duplex scan...
- Page 11 If you use the parallel port, you cannot use the USB cable. b. Depending on your country, wireless LAN card may not be available. For some countries, only 802.11 b/g can be applied. Contact your local Samsung dealer or the retailer where you bought your machine.
-
Page 12: Useful To Know
• The toner level might be low or uneven. Shake the toner cartridge (see "Redistributing toner" on page 83). • Try a different print resolution setting (see "Opening printing • Inquire at a Samsung distributor or your retailer. preferences" on page 55). • Visit www.samsung.com/supplies. Select your country/region •... -
Page 13: About This User's Guide
About this user’s guide This user's guide provides information for your basic understanding of the General icons machine as well as detailed steps to explain machine usage. • Read the safety information before using the machine. • If you have a problem using the machine, refer to the troubleshooting Icon Text Description... -
Page 14: Safety Information
Safety information These warnings and precautions are included to prevent injury to you and Operating environment others, and to prevent any potential damage to your machine. Be sure to read and understand all of these instructions before using the machine. After reading this section, keep it in a safe place for future reference. - Page 15 Safety information Caution Operating method During an electrical storm or for a period of non-operation, Caution remove the power plug from the electrical outlet. This could result in electric shock or fire. Be careful, the paper output area is hot. Do not forcefully pull the paper out during printing.
- Page 16 Safety information Do not block or push objects into the ventilation opening. Caution This could result in elevated component temperatures which can cause damage or fire. Before moving the machine, turn the power off and disconnect all Use of controls or adjustments or performance of procedures other cords.
- Page 17 Safety information Do not place the machine on an unstable surface. Maintenance / Checking The machine could fall, causing injury or machine damage. Use only No.26 AWG or larger, telephone line cord, if necessary. Caution Otherwise, it can cause damage to the machine. Make sure you plug the power cord into a grounded electrical outlet.
- Page 18 For consumables that contain toner dust (toner cartridge, waste • The machine should only be repaired by a Samsung service toner bottle, imaging unit, etc.) follow the instructions below. technician. • When disposing of the consumables, follow the instructions for disposal.
-
Page 19: Machine Overview
Machine overview Components Machine Power cord Quick installation guide Software CD Handset Misc. accessories a. The software CD contains the print drivers, user’s guide, and software applications. b. Handset model only (see "Variety feature" on page 9). c. Miscellaneous accessories included with your machine may vary by country of purchase and specific model. 1. - Page 20 Machine overview 13 USB memory port Front view Document feeder cover Document feeder width guide 14 Output support tray Document feeder input tray 15 Output tray • This illustration may differ from your machine depending on your model. There are various types of machine. Document feeder support tray 16 Scanner glass •...
- Page 21 Machine overview Network port Telephone line socket (LINE) Rear view USB port Extension telephone socket (EXT.) 5V output port for IEEE 1284B Rear cover handle parallel connector • This illustration may differ from your machine depending on your model. There are various types of machine. Power-switch Rear cover •...
-
Page 22: Control Panel Overview
Control panel overview • This control panel may differ from your machine depending on its model. There are various types of control panels. • Some features and optional goods may not be available depending on model or country (see "Features by models" on page 7). •... - Page 23 Control panel overview 9 Address Book Allows you to store frequently used fax numbers or search for stored fax numbers (see "Storing email address" on page 241 or "Setting up the Address Book" on page 245). Redials the recently sent fax number or received caller ID in ready mode, or inserts a pause(-) into a fax number in edit mode (see "Redialing Redial/Pause the fax number"...
-
Page 24: Turning On The Machine
Turning on the machine Illustrations on this user’s guide may differ from your machine depending on its options or models. Check your machine type (see "Front view" on page 20). Connect the machine to the electricity supply first. Turn the power switch on. 1. -
Page 25: Installing The Driver Locally
Installing the driver locally A locally connected machine is a machine directly attached to your computer using the cable. If your machine is attached to a network, skip the following steps below and go on to installing a network connected machine’s driver (see "Installing driver over the network"... - Page 26 • For Windows 8, • Samsung Printer Experience app can only be used in the Start screen If the installation window does not appear, from Charms, select when V4 driver is installed. The V4 driver is automatically downloaded Search > Apps and search for Run. Type in X:\Setup.exe, replacing from the Windows Update if your computer is connected to the Internet.
- Page 27 >find your product > Support or downloads. • If you want to install Samsung’s printer management tools, you need to install them using the supplied software CD . Make sure that your computer is connected to the Internet and powered Make sure that the machine is powered on.
-
Page 28: Reinstalling The Driver
5 Follow the instructions in the window. Follow the instructions in the installation window. • If you cannot find a Samsung Printer Software tile, unintstall from the desktop screen mode. • If you want to uninstall Samsung’s printer management tools, from the Start screen, right-click the app >... -
Page 29: Menu Overview And Basic Setup
2. Menu Overview and Basic Setup This chapter provides information about the overall menu structure and the basic setup options. • Menu overview • Machine’s basic settings • Media and tray • Basic printing • Basic copying • Basic scanning •... -
Page 30: Menu Overview
Menu overview The control panel provides access to various menus to set up the machine or use the machine’s functions. • An checked (√) appears next to the currently selected menu. • Some menus may not appear on the display depending on options or models. If so, it is not applicable to your machine. •... - Page 31 Menu overview Copy Feature Copy Setup Fax Feature (see "Copy feature" on page 213) (see "Copy Setup" on page 216) (see "Fax Feature" on page 217) Original Size Photo Stamp Change Default Original Type Darkness Multi Send Reduce/Enlarge Collation Item Original Size Text Light+5- Light+1...
- Page 32 Menu overview Fax Setup Print Setup Scan Feature Scan Setup (see "Sending setup" on page 218, (see "Scan feature" on page 222) (see "Scan setup" on page 223) (see "Print" on page 212) "Receiving setup" on page 219) Sending Ring to Answer USB Feature FTP Feature Shared Folder...
- Page 33 Menu overview System Setup (see "System setup" on page 226) Machine Setup PDF Type Paper Setup Report Maintenance Machine ID Stamp Paper Size Configuration CLR Empty Msg. Fax Number Import Setting Tray 1 Demo Page Supplies Life Date & Time Export Setting Network Tray 2...
- Page 34 Menu overview Network Job Management (see "Network setup" on page 234) (see "Job management" on page 236) TCP/IP (IPv4) Protocol Management Active Job DHCP HTTP Secured Job BOOTP WINS Stored Job Static SNMPv1/v2 Shared Folder TCP/IP (IPv6) SNTP IPv6 Protocol UPnP(SSDP) DHCPv6 Config mDNS...
-
Page 35: Machine's Basic Settings
"Keypad letters and numbers" on page 243). • For Windows and Mac users, see "Device Settings" on page 298. • Month = 01 to 12 - For Windows and Mac users, you set from Samsung Easy Printer • Day = 01 to 31 Manager >... - Page 36 Machine’s basic settings Press (Stop/Clear) button to return to ready mode. Refer to below links to set other settings useful for using the machine. • See "Entering various characters" on page 243. • See "Keypad letters and numbers" on page 243. •...
-
Page 37: Media And Tray
To change the size, you need to adjust the paper guides. • Using print media that does not meet these specifications may cause problems or require repairs. Such repairs are not covered by Samsung’s warranty or service agreements. • Make sure not to use the inkjet photo paper with this machine. It could cause damage to the machine. - Page 38 Media and tray The duplex unit is preset to Letter/LGL or A4 size, depending on your country. To change the paper size, adjust the guide as shown below. Paper quantity indicator shows the amount of paper in the tray. 1 Full 2 Empty If you do not adjust the guide, it may cause paper registration, image skew, or jamming of the paper.
- Page 39 Media and tray Squeeze and the paper width guide and paper length lever to locate Loading paper in the tray them in the correct paper size slot marked at the bottom of the tray to adjust to the size (see "Tray overview" on page 37). Illustrations on this user’s guide may differ from your machine depending on its options or models.
- Page 40 Media and tray After inserting paper into the tray, squeeze the paper width guides and Insert the tray back into the machine. paper length guide. When you print a document, set the paper type and size for tray (see • Do not push the paper width guide too far causing the media to warp. "Setting the paper size and type"...
- Page 41 Media and tray d Select Auto Select in paper source, then press OK. Press the push-release of multi-purpose (or manual feeder) tray and it e Start printing in application. down to open. • M337x series Multi-purpose (or manual feeder) tray Illustrations on this user’s guide may differ from your machine depending on its options or models.
- Page 42 Media and tray Load the paper. • When printing the special media, you must follow the loading guideline (See "Printing on special media" on page 43). • When papers overlap when printing using multi-purpose (or manual feeder) tray, open tray 1 and remove overlapping papers then try printing again.
- Page 43 Media and tray Multi-purpose (or Types Tray 1 Printing on special media Optional tray manual feeder) tray Thin The table below shows the special media usable in tray. Bond The media is also shown in the Printing Preferences. To get the highest Color printing quality, select the proper media type from the Printing preferences window >...
- Page 44 Media and tray To print an envelope, place it as shown in the following figure. Pressure lever • When selecting envelopes, consider the following factors: Weight: should not exceed 90 g/m otherwise; jams may occur. If envelopes are printed out with wrinkles, creases, or black bold lines, open the Construction: should lie flat with less than 6 mm curl and should not rear cover and pull down the pressure lever on the right side about 90 degrees contain air.
- Page 45 Media and tray Transparency • Be sure the seam at both ends of the envelope extends all the way to the corner of the envelope. To avoid damaging the machine, use only transparencies designed for use in laser printers. Acceptable Unacceptable •...
- Page 46 Media and tray • To prevent transparencies from sticking to each other, do not let the printed Arrangement: Only use labels with no exposed backing between them. sheets stack up as they are being printed out. Labels can peel off sheets that have spaces between the labels, causing serious jams.
- Page 47 Media and tray Card stock/ Custom-sized paper Preprinted paper When loading preprinted paper, the printed side should be facing up with an uncurled edge at the front. If you experience problems with paper feeding, turn the paper around. Note that print quality is not guaranteed. •...
- Page 48 • If you want to use special-sized paper such as billing paper, select the Manager program. Paper tab > Size > Edit... and set Custom Paper Size Settings in the - For Windows and Mac users, you set from Samsung Easy Printer Printing Preferences (see "Opening printing preferences" on page 55). Manager >...
- Page 49 Media and tray Using the output support Preparing originals • Do not load paper smaller than 142 x 148 mm (5.6 x 5.8 inches) or larger than The surface of the output tray may become hot if you print a large number 216 x 356 mm (8.5 x 14 inches).
- Page 50 Media and tray Lift and open the scanner lid. Loading originals You can use the scanner glass or the document feeder to load an original for copying, scanning, and sending a fax. Illustrations on this user’s guide may differ from your machine depending on its options or models.
- Page 51 Media and tray Close the scanner lid. Flex or fan the edge of the paper stack to separate the pages before loading originals. • Leaving the scanner lid open while copying may affect copy quality and toner consumption. • Dust on the scanner glass may cause black spots on the printout. Always keep it clean (see "Cleaning the machine"...
- Page 52 Media and tray Adjust the document feeder width guides to the paper size. Dust on the document feeder glass may cause black lines on the printout. Always keep the glass clean (see "Cleaning the machine" on page 96). 2. Menu Overview and Basic Setup...
-
Page 53: Basic Printing
Basic printing Select your machine from the Select Printer list. For special printing features, refer to the Advanced Guide (see "Using advanced print features" on page 250). Printing • If you are a Mac, Linux or UNIX operating systems user, refer to the Advanced Guide (see "Software Installation"... - Page 54 Basic printing Canceling a print job If the print job is waiting in the print queue or print spooler, cancel the job as follows: • You can access this window by simply double-clicking the machine icon ) in the Windows task bar. •...
- Page 55 Eco features to save paper and toner before printing (see "Easy Eco Driver" on page 291). • You can check the machine’s current status pressing the Printer Status button (see "Using Samsung Printer Status" on page 299). 2. Menu Overview and Basic Setup...
Need help?
Do you have a question about the ProXpress M337 Series and is the answer not in the manual?
Questions and answers
connect the printer
To connect the Samsung ProXpress M337 Series printer, follow these steps:
1. For a Local Connection (via USB Cable):
- Connect the printer to your computer using a USB cable.
- Install the printer driver locally on your computer.
- Use Samsung Easy Printer Manager to configure settings if needed.
2. For a Network Connection:
- Connect the printer to the network using an Ethernet cable or set up Wi-Fi Direct.
- To set up Wi-Fi Direct:
- Open Samsung Easy Printer Manager.
- Go to Device Settings > Network.
- Enable Wi-Fi Direct.
- Set the Device Name (printer name).
- Install the printer driver over the network.
3. To Access Printer via Web Interface:
- Enter the printer’s IP address in a web browser.
- Click "Login" on the SyncThru™ Web Service page to manage settings.
4. For Google Cloud Print™ (if supported):
- Register your Google account with the printer.
- Use the printer from web-connected devices.
This answer is automatically generated