Table of Contents
Advertisement
Quick Links
Advertisement
Table of Contents

Related Manuals for Status Pro Belt Tension Pro


Summary of Contents for Status Pro Belt Tension Pro
- Page 1 PERATING INSTRUCTIONS ENSION EASUREMENT YSTEM ERSION...
-
Page 2: Table Of Contents
Calling up stored measurements ..........15 Procedure: ................. 15 Switching off the instrument............15 PC-Software belt database (optional) ..........16 Belt Tension Pro PC-Software (optional) ......... 17 Appendix ................. 18 Specifications................. 18 Menu structure ............... 19 Manufacturer data ..............20... -
Page 3: Introduction
We wish you great success in using your new measurement system AFETY GUIDELINES The Belt Tension Pro uses an extra bright, red LED (660 nm). For this reason, it is not necessary to take measures to protect your eyes. However, do not look directly into the bright measurement beam at close range. -
Page 4: Notes On Batteries/Rechargeable Batteries
Notes on batteries/rechargeable batteries If the instrument is not to be used for a long period of time, then the battery /rechargeable battery must be removed. Otherwise, there is a risk of discharging or ruining the battery/rechargeable battery, and consequently damaging the instrument. -
Page 5: Instructions On Caring For The Instrument
ISCLAIMER Status Pro GmbH is not liable for damages that arise as a result of improper use. Knowledge of this handbook is also part of proper use. For this reason, strictly follow the instructions in this handbook and in the technical documents for the sensors. -
Page 6: Intended Use
Status Pro GmbH assumes no liability. ELIVERED ITEMS This Belt Tension Pro measurement instrument is delivered in a durable plastic case. A measurement probe and a 9 V battery are also supplied. RODUCT ADVANTAGES •... -
Page 7: Preparation Measures
REPARATION MEASURES ONNECTING THE MEASUREMENT PROBE Remove the measurement probe from its case, insert the measurement probe connector into the socket on the Belt Tension Pro. Secure the connector by tightening both screws. Measurement probe Caution Do not over tighten the two screws. -
Page 8: Operational Elements
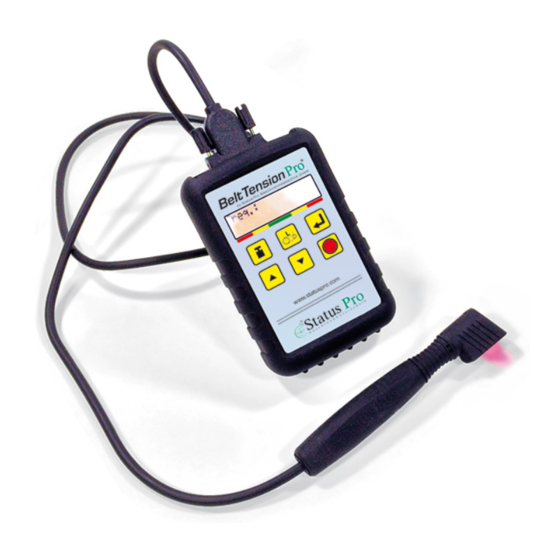
The measurement probe “3” registers the characteristic frequency of the tensioned, free belt by using pulsed light or the rotary speed, and communicates the measurement values to the Belt Tension Pro. Belt Tension Pro Overview 1. Operating buttons 2. -
Page 9: Operating Buttons
PERATING BUTTONS The operating buttons control various functions. 5, 6 1. ON/OFF switch or storage of measurements 2. ENTER 3. Strand length 4. Belt mass or belt type selection; in the storage mode, readout of measurement results 5. Arrow : Change values - increase 6. -
Page 10: Operation
PERATION Operating the Belt Tension Pro is simple and straight forward. " “ ENERAL INFORMATION ON BELT TENSION Measuring the belt span tension To calculate the belt span tension or trum force, the measured values of the belt tension, the belt mass and the belt length are input. The calculated trum force is compared with the nominal value that is defined during the design of the drive. -
Page 11: Measuring The Belt Tension
EASURING THE BELT TENSION The belt tension can only be measured when the drive is switched off and stopped. Caution Before making measurements, ensure that the machine is switched off (master switch) and secured against unintentional restarting. The installed and tensioned drive belt is set into natural oscillation with a short impulse or by striking it lightly. -
Page 12: Measurement Procedure
HECKING THE MEASUREMENT PROBE REQUENCY TEST Built into the Belt Tension Pro software is an important and useful additional function for checking the measurement probe, for example, before making a measurement, see p. 18. During this "self-test", the Belt Tension Pro outputs a nominal frequency of 25 Hz over the display. -
Page 13: Notes On Positioning The Measurement Probe
EASUREMENT STEP Switch on the Belt Tension Pro using the ON/OFF 1 button. The instrument is ready for taking measurements. Input the belt strand length and belt mass, see "Menu structure" p. 19. -
Page 14: Measurement Evaluation, Green-Yellow-Red
GREEN YELLOW When using the Belt Tension Pro, you will only be provided with a raw measurement result, for example, the force in "Newtons". You can evaluate the measurement results directly by using the indicator bar as well as the... -
Page 15: Storing Measurements
For documentation purposes, you may store the measurements that have been made in the instrument. The instrument has internal storage for up to 255 measurements. Using the optional Belt Tension Pro PC-Software, convenient options are available for producing measurement data reports. -
Page 16: Pc-Software Belt Database (Optional)
Note Please consult the continually updated belt database at www.statuspro.de. Switch on the Belt Tension Pro. Press button 4 to input the mass of the belt, see Overview p. 9 as well as "Menu structure" p.19“. Press button 4 again; now, using the buttons, select the belt data from the implemented PC-Software belt database. -
Page 17: Belt Tension Pro Pc-Software (Optional)
See the accompanying documentation entitled "Belt Tension Pro PC- Software“. Caution For connecting the Belt Tension Pro to a PC, only use a special BG 810000 cable. If a regular RS232 cable is used, the instrument can be damaged. -
Page 18: Appendix
PPENDIX PECIFICATIONS SP BELT-PRO: Measurement range 1 - 500 Hz Modulation 5 kHz Sensor test 25 Hz with OK message Readout error +/- 0.3 Hz Resolution +/- 0.1 Hz Operation -20°...+85°C; -68°...+185° F Storage -40°...+105°C; -40°...+221°F Humidity 20 .. 95 % Housing plastic (PVC);... -
Page 19: Menu Structure
Set frequency test ON/OFF using arrow Frequency test buttons UP/DOWN and press ENTER Overview Version System status Battery capacity Temperature At the lower left in the display of the Belt Tension Pro, each active function key appears superimposed on the corresponding menu item. -
Page 20: Manufacturer Data
De-44866 Bochum All rights reserved. This handbook or parts thereof may not be copied or reproduced in any other manner without the prior consent of Status Pro GmbH. The technical accuracy and completeness remain reserved and can be changed without notification. Comments on any errors in this handbook are welcome at any time.
Need help?
Do you have a question about the Belt Tension Pro and is the answer not in the manual?
Questions and answers