Table of Contents
Advertisement
Available languages
Available languages
Quick Links
QUESTIONS? 1-866-206-0888
Notre personnel du service à la clientèle est
disponible pour vous aider.
Pour obtenir de l'aide pour le montage de
votre produit, pour signaler des pièces
endommagées ou manquantes, ou pour
toute autre information, veuillez composer
notre numéro sans frais: 1-866-206-0888.
Vous aurez besoin de ce guide pour les instructions de sécurité, les procédures
d'utilisation et la garantie. Conservez-le avec la facture d'origine dans un endroit sûr et
You will need this manual for safety instructions, operating procedures, and warranty.
Put it and the original sales invoice in a safe, dry place for future reference.
Banc de scie 10 po
Our Customer service staff is available to help
you.
For help with product assembly, to report
damaged or missing parts, or for any other
information, please call our toll-free number:
1-866-206-0888.
CONSERVEZ CE GUIDE
sec pour référence future.
SAVE THIS MANUAL
Modèle / Model:
Manuel de l'utilisateur (p. 2)
10" Table Saw
Operator's Manual (p. 30)
5969003
JF72553B
1
Advertisement
Chapters
Table of Contents

Related Manuals for PRO-PULSE JF72553B


Summary of Contents for PRO-PULSE JF72553B
- Page 1 5969003 JF72553B Modèle / Model: Banc de scie 10 po Manuel de l’utilisateur (p. 2) 10" Table Saw Operator’s Manual (p. 30) QUESTIONS? 1-866-206-0888 Notre personnel du service à la clientèle est Our Customer service staff is available to help disponible pour vous aider.
-
Page 2: Table Of Contents
AVERTISSEMENT : Indique un danger potentiel qui, s‘il n‘est pas évité, AVERTISSEMENT pourrait entraîner la mort ou de graves blessures. ATTENTION : Indique un danger potentiel qui, s’il n’est pas évité, peut ATTENTION entraîner des blessures légères ou modérées. JF72553B... -
Page 3: Consignes De Sécurité Pour Les Outils
SYMBOLES DE SÉCURITÉ PRUDENCE : Utilisé sans le symbole d'avertissement de sécurité, PRUDENCE cela indique un danger potentiel qui, s’il n’est pas évité, peut entraîner des dommages à la propriété. CONSIGNES DE SÉCURITÉ POUR LES OUTILS AVERTISSEMENT La sécurité est une combinaison de bon sens, de vigilance et d’utilisation adéquate du banc de scie. -
Page 4: Consignes De Sécurité Pour Le Banc De Scie
à scier. Toujours utiliser le guide de refente ou le guide à onglets pour positionner et guider la pièce. AVERTISSEMENT : LA COUPE À MAIN LEVÉE EST LA PRINCIPALE CAUSE DE RECUL ET D’AMPUTATIONS DE DOIGTS ET DE MAINS. JF72553B... -
Page 5: Exigences Électriques Et Sécurité
CONSIGNES DE SÉCURITÉ POUR LE BANC DE SCIE NE JAMAIS SE TENIR en face de la lame de la scie ou avoir une partie du corps en face de la lame de la scie. Ne pas garder les mains dans l’alignement de la lame de scie. 6. - Page 6 Cet outil est conçu pour une utilisation à l‘intérieur seulement. Ne AVERTISSEMENT l‘exposez pas à la pluie ou aux environnements humides. Cet outil doit être relié à la terre de réduire le risque de choc électrique. JF72553B...
-
Page 7: Accessoires
ACCESSOIRES ACCESSOIRES RECOMMANDÉS Pour éviter tout risque de blessure AVERTISSEMENT Ne pas utiliser de lame à rainurer de type réglable (désaxée) ni de lame à rainurer à pointes au carbure sur cette scie. Utiliser uniquement des lames à rainurer empilables avec cette scie. La largeur maximum des rainures est de 13/16 po (5 mm). -
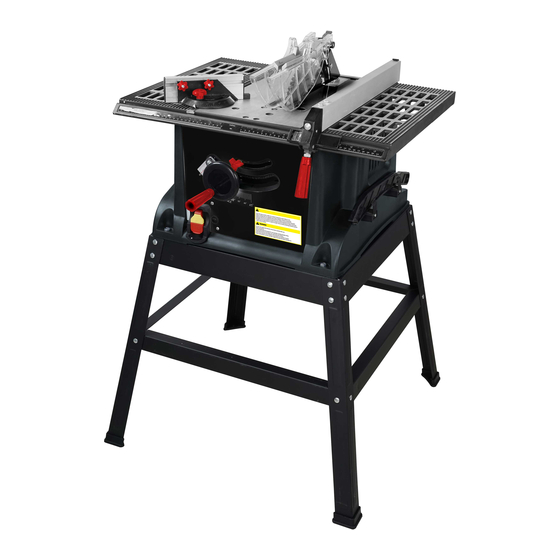
Page 8: Description Fonctionnelle
DESCRIPTION FONCTIONELLE JF72553B... - Page 9 DESCRIPTION FONCTIONELLE...
-
Page 10: Contenu De La Boîte
NOTE : Pour faciliter l’assemblage, ne pas disperser le contenu de la boîte. Appliquer une couche de cire pour automobile sur la table. Essuyer soigneusement toutes les pièces avec un chiffon sec et propre. Cela réduira la résistance au frottement lorsqu’on poussera la pièce. JF72553B... - Page 11 ASSEMBLAGE ET RÉGLAGES ASSEMBLAGE DU SUPPORT Déballer toutes les pièces et les regrouper par type et dimension. Voir la liste des pièces pour connaître les quantités. chaque pièce par rapport à l’illustration à la page suivante et au « Tableau des pièces détachées » pour s’assurer que toutes les pièces sont présentes avant de jeter le matériel d’emballage.
- Page 12 AVERTISSEMENT ! Avant d’assembler ou de réparer le banc de scie, assurez-vous qu’elle n’est pas branchée. MONTAGE DE LA FIXATION DU BÂTON POUSSOIR (N) Vissez les 2 des vis Phillips scie MONTAGE DE LA FIXATION DE LA FICHE ÉLECTRIQUE Vissez vis Phillips scie JF72553B...
- Page 13 ASSEMBLAGE ET RÉGLAGES INSTALLATION DE LA SCIE Avec cadre du support Alignez la scie sur le support et au moyen des 4 vis à tête Veillez à ce que les 4 pieds en caoutchouc fournis soient sous la scie INSTALLATION DE LA SCIE Sans cadre du support sous la scie Si on n’utilise pas le...
- Page 14 à la position courant. Porter des gants lors du montage et du démontage de la lame de scie. 1. Enlevez la plaque amovible (Fig. 1) afin de changer la lame de scie (Q). JF72553B...
- Page 15 ASSEMBLAGE ET RÉGLAGES 2. Faites tourner la lame de scie vers le plus haut possible, à l‘aide du volant de réglage (T). La lame de scie (Q) est par la moteur 3. Desserrez la vi la lame de scie (2) dans le sens contraire. Pour ce faire, utilisez clés AVERTISSEMENT L’écrou à...
- Page 16 (2) ne correspond pas à l’échelle d’angle (1), desserrez la vis à empreinte cruciforme de de l’échelle (2) et déplacez-le exactement à 0 sur l’échelle d’angle la coupe d’angle précise au moyen d’une pièce d’essai et ajustez en cas de besoin. JF72553B...
- Page 17 ASSEMBLAGE ET RÉGLAGES LAME PARALLÈLE À LA RAINURE DU GUIDE À ONGLETS AVERTISSEMENT ! Ce réglage a été effectué en usine et devrait AVERTISSEMENT Pour éviter toute blessure : Toujours débrancher l’outil de la prise de courant lorsqu’on procè- de à un réglage. Ce réglage doit être correct, sinon il pourrait se produire un effet de recul entraînant des blessures graves et empêchant de faire des coupes précises.
- Page 18 Une surchauffe peut être causée par des pièces mal alignées ou par une lame émoussée. S’assurer que la scie est bien réglée avant de la réutiliser. JF72553B...
-
Page 19: Utilisation
UTILISATION AVERTISSEMENT Avant d’utiliser la scie, chaque fois les points suivants : 1. La lame est bien serrée sur l’arbre. 2. Le bouton de blocage d’angle en biseau est serré. 3. Pour la coupe en long, le bouton du guide de refente est serré et le guide est parallèle aux rainures du guide à... - Page 20 à empreinte cruciforme (5) et positionnez sur 0, resserrer la vis à empreinte cruciforme Sur une pièce d’essai, testez la précision des coupes et réajustez en cas de besoin. Lors de travaux avec la butée d’angle, vous devez toujours utiliser le bâton poussoir (N). JF72553B...
- Page 21 UTILISATION FABRICATION D’UN POUSSOIR massif de bonne qualité. 20 mm). largeur du matériau à scier. Percer un trou qui permet de suspendre le poussoir Prévoir une encoche pour empêcher la main de glisser Tailler ici pour pousser des Tailler ici pour pousser des 90°...
-
Page 22: Entretien
Sur toutes les pièces mécaniques de scie à table où il y a un pivot ou une tige avec du graphite ou du silicone. Ces secs ne retiendront pas la sciure comme le feraient l’huile ou la graisse. JF72553B... - Page 23 GUIDE DE DÉPANNAGE Pour éviter toute blessure causée par une mise en marche accidentelle, régler l’interrupteur à ARRÊT et toujours débrancher la che de la prise de courant avant de procéder à tout réglage. PROBLÈME La scie ne démarre 1. La scie est débranchée. 1.
-
Page 24: Garantie
à 45° et 90°. GARANTIE Merci d'avoir acheté cet outil PRO-PULSE. Ces outils ont été conçus pour répondre à des normes de qualité et sont garantis pour usage domestique contre tout défaut de fabrication pour 12 mois suivant la date d’achat.Cette garantie n'affecte pas vos droits légaux. - Page 25 LISTE DE PIÈCES LISTE DE PIÈCES DU BANC DE SCIE 10 PO AVERTISSEMENT Toute tentative de réparation ou de remplacement de pièces électriques ce banc de scie peut créer un RISQUE à moins que la réparation ne soit effectuée par un technicien d’entretien réparations peuvent être effectuées au Centre de AVERTISSEMENT Toujours commander les pièces par le numéro...
- Page 26 137 Composants du couvercle transparent 105 Capsule de protection pour la plaque 138 Corps de boulon à tête hexagonale de recul M6*10 106 Fermeture du couvercle 139 Coulisseau de chargement 107 Vis cruciforme à tête fraisée M4x10 140 Tricoise (première) JF72553B...
- Page 27 LISTE DE PIÈCES 141 Tricoise (deuxième) 142 Pied 143 Dressage latéral 144 Vis partiellement coudées à tête en demi-cercle M6*12 145 Corps de boulon à tête hexagonale M8*35 146 Vis cruciforme à tête fraisée M5x15 147 Chapeau de palier 148 Palier6003 149 Anneau élastiqueØ35 150 Arbre de sortie 151 Clavette plate 5*5x12...
- Page 28 BANC DE SCIE 10 PO MODÈLE N° 5969003 Schéma JF72553B...
- Page 29 BANC DE SCIE 10 PO MODÈLE N° 5969003...
-
Page 30: Safety Symbols
WARNING: indicates a potentially hazardous situation which, if not avoided, WARNING could result in death or serious injury. CAUTION: indicates a potentially hazardous situation which, if not avoided, may CAUTION result in minor or moderate injury. JF72553B... -
Page 31: Power Tool Safety
SAFETY SYMBOLS CAUTION: used without the safety alert symbol indicates a potentially hazardous CAUTION situation which, if not avoided, may result in property damage. POWER TOOL SAFETY WARNING Safety is a combination of common sense, staying alert and knowing how to use your power tool. - Page 32 9. FEED WORK INTO THE BLADE against the direction of rotation only. 10. NEVER use the rip fence as a cut-off gauge when crosscutting. 11. NEVER ATTEMPT TO FREE A STALLED SAW BLADE without turning the saw OFF. Turn power switch OFF immediately to prevent motor damage. JF72553B...
-
Page 33: Electrical Requirements And Safety
TABLE SAW SAFETY 12. PROVIDE ADEQUATE SUPPORT to the rear and the sides of the saw table for long or wide workpieces. 13. AVOID KICKBACKS (work thrown back towards you) by keeping the blade sharp, the rip fence parallel to the saw blade and by keeping the splitter, anti-kickback pawls and guards in place, aligned and functioning. - Page 34 This tool must be grounded while in use to protect the operator from electric shock. MINIMUM GAUGE FOR EXTENSION CORDS (AWG) (When using 120 volts only) Ampere Rating Total of cord length More Than Not More Than 25ft. 50ft. 100ft. 150ft. Not recommended JF72553B...
-
Page 35: Accessories And Attachments
ACCESSORIES AND ATTACHMENTS RECOMMENDED ACCESSORIES WARNING To avoid the risk of personal injury: Do not use adjustable (wobble) type dadoes or carbide tipped dado blades. Use only stackable dado blades. Maximum dado width is 13/16” (5 mm). Do not use a dado with a diameter larger than 6” (152 mm). Do not use a molding head set with this saw. -
Page 36: Functional Description
FUNCTIONAL DESCRIPTION JF72553B... - Page 37 FUNCTIONAL DESCRIPTION...
-
Page 38: Carton Contents
Open-ended spanner Allen key NOTE: To make assembly easier, keep box of contents together. Apply a coat of automobile wax to the table. Wipe all parts thoroughly with a clean dry cloth. This will reduce friction when pushing the workpiece. JF72553B... -
Page 39: Assembly Instructions
ASSEMBLY AND ADJUSTMENTS ASSEMBLING THE STAND Separate all parts from packing materials. Check each part with the illustration on the next page and the “Table of Loose Parts” to make certain all items are accounted for before discarding any packing material. - Page 40 Secure the two brackets (O) to the right-hand side of the saw using the Philips screws supplied (Fig. 1). INSTALL THE BRACKET FOR THE MAINS PLUG Secure the bracket (P) to the left-hand side of the saw using the Philips screw supplied (Fig. 2). JF72553B...
- Page 41 ASSEMBLY AND ADJUSTMENTS SAW ALIGNMENT With base frame Align the saw on the base frame and secure it using the 4 hexagonal screws M8x34, washers and hexagonal nuts (W) (Fig. 1). Ensure that the four rubber feet supplied are under the saw (Fig. 2). SAW ALIGNMENT Without base frame Ensure that the four rubber feet supplied are...
- Page 42 WARNING! To avoid injury from an accidental start, make sure the switch is in the OFF position and the plug is disconnected from the power source outlet. Wear gloves when installing and removing the saw blade. 1. To change the saw blade (Q), remove the table insert (Fig. 1). JF72553B...
- Page 43 ASSEMBLY AND ADJUSTMENTS ASSEMBLY AND ADJUSTMENTS 2. Turn the saw blade up as far as possible using the height adjust- ment wheel (T). The saw blade (Q) is secured by the saw table (2) and the hexagonal nut (1) on the motor shaft (Fig. 2). 3.
- Page 44 (1), undo the Philips screw on the scale pointer (2) and push it to precisely 0 on the angle scale (1) (Fig. 3). Check the precise angle cut on a test piece and adjust it if neces- sary. JF72553B...
- Page 45 ASSEMBLY AND ADJUSTMENTS BLADE PARALLEL TO THE MITRE GAUGE SLOT WARNING: This adjustment was carried out at the factory and WARNING To avoid any injury: Always unplug the tool when carrying out any adjustments. This adjustment must be precise, if not it can cause recoil leading to serious injuries and preventing accurate cutting.
- Page 46 The ON/OFF switch must be OFF and the saw must be unplugged while the motor cools in order to avoid starting it accidentally by pressing the reset button. Overheating can be caused by badly aligned parts or by a blunt blade. Ensure that the saw is correctly adjusted before reuse. JF72553B...
-
Page 47: Operation
OPERATION WARNING Before using the saw each time, check the following: 1. The blade is tightened to the arbour. 2. The bevel angle lock knob is tightened. 3. If ripping, make sure the fence is locked into position and is parallel to the mitre gauge groove. - Page 48 OPERATION ANGLE STOP (C) The saw has an angle stop (C). This is in one of the two grooves on the saw table. he sawing ADJUST ANGLE STOP Then tighten the angle stop. JF72553B...
- Page 49 OPERATION PUSH STICK CONSTRUCTION Use good quality plywood or solid wood Use 1/2’’ or 3/4’’ (12 or 20 mm) thick material Push stick MUST be thinner than the width of material being cut Drill Hole For Hanging Notch To Prevent Hand From Slipping Cut Here To Push 1/2’’...
-
Page 50: Maintenance
All motor bearings are permanently lubricated at the factory and require no additional lubrication. On all mechanical parts of your table saw where a pivot or threaded rod are present, lubricate using graphite or silicone. These dry lubricants will not hold sawdust as would oil or grease. JF72553B... -
Page 51: Troubleshooting Guide
TROUBLESHOOTING GUIDE To avoid injury from an accidental start, turn the switch OFF and always remove the plug from the power source before making any adjustments. PROBLEM Saw will not start. 1. Saw is not plugged in. 1. Plug in saw. 2. -
Page 52: Warranty
WARRANTY Thank you for investing in a PRO-PULSE tool. These products have been made to quality standards and are guaranteed for domestic use against manufacturing faults for a period of 12 months from the date of purchase. This guarantee does not affect your statutory rights. In case of any malfunction of your tool (failure, missing part, etc.), please contact... -
Page 53: Parts List
PARTS LIST 10’’ TABLE SAW WARNING Any attempt to repair or replace electrical parts on this Table Saw may create a HAZARD unless repair is done by a service technician. Repair service is available at your nearest Service Centre. Switch 36 Ø12 spring washer Panel 37 M6 net... - Page 54 105 Guard cap for keeping back plate 145 M8×35 hexagon-headed bolt 106 Lid lock 146 M5×15 Cross countersunk screw 107 M4×10 Cross countersunk screw 147 Bearing cap 108 Washer for kerf board(left) 148 6003bearing 109 Washer for kerf board(right) 149 Ø35circlip 110 Lock handle JF72553B...
- Page 55 PARTS LIST 150 Output shaft 151 Flat key5×5×12 152 Gear 153 Ø16 circlip 154 HK1210Needle roller bearding 155 M5×30Cross head screw 156 Middle cover 157 6202 bearing 158 Rimq ring 159 Connecting line 3X1mm 160 Brush cover 161 electric brush 162 Brush holder 163 Cross recessed pan head tapping screws ST4.8×65...
- Page 56 10’’ TABLE SAW MODEL NO. 5969003 SCHEMATIC JF72553B...
- Page 57 10’’ TABLE SAW MODEL NO. 5969003...
Need help?
Do you have a question about the JF72553B and is the answer not in the manual?
Questions and answers