Table of Contents
Advertisement
Quick Links
Advertisement
Chapters
Table of Contents

Related Manuals for Buick 1993 Roadmaster


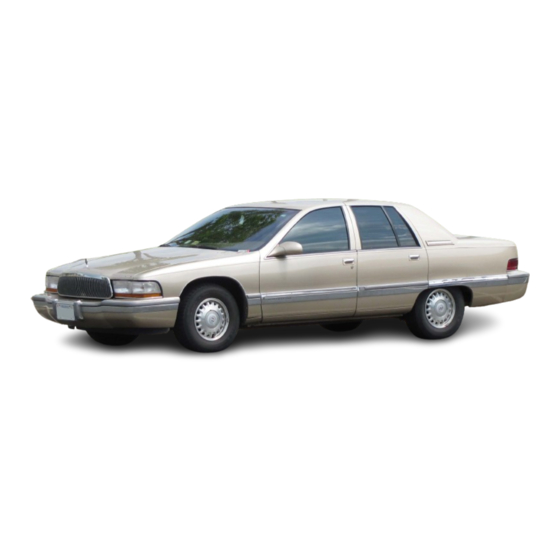
Summary of Contents for Buick 1993 Roadmaster
- Page 2 - . .
- Page 3 @Copyright General Motors Corporation 1992' Litho in U.S.A. All Rights' Reserved Part No; 25603823 B First Edition...
- Page 9 Motor Trend magazine named the 1962 Buick Special. I962 BuickSpecial Built inside the walls ofthe old buildings in Buick's former Flint complex, which formed the cornerstone' General Motors, Buick City is a state-of-the-art assembly facility with more than 200 robots and other high-tech equipment.
- Page 10 I923'Buick Sport Roadster...
-
Page 12: Safety Warnings And Symbols
..help. you learn. about ,the €eatures and controls for - : w i l l your vehicle. In this manual, you’ll find that pictures and words work together to explain Safety Warnings and Symbols -You will find a number of safety cautions in this book. W e use yellow and the word CAUTION to tell .about things that could hurt you if you, w-ee to ignore the warninq. - Page 13 Vehicle Damage Warnings Also, in this book you will find these blue notices: In the blue notice area, we tell you about something tha can damage your vehicle. Many times, this damage would not be covered by your warranty, and it could be the same colors, and the words,CAUTION or NOTICE.
- Page 14 Vehicle Symbols mcese some the,symbols you will find on . o f For example, These symbols these symbols are important for you.and. used on an original battery: your passengers whenever your vehicle-is- CAUTION driven: POSSIBLE: INJURY DOOR LOCK,' UNLOCK PR~TECT EYES BY SHIELDING SEAT,...
- Page 19 S . h g in a .m.when your ve in motion can be dangerous. Even if you buckle up, your safety belts can’t do their job CAUTION: (Continued) TCAUTION: (Conti.nued) ‘The shoulder belt can’t do its job because won’t be against your body. Instead, it will be in front of you.
-
Page 20: Head Restraints
Head Restraints Slide the head restraint up or down so restraint is closest to the top of your ears. This position reduces the chance of a neck injury in a crash. On some models, the head restraints tilt forward 'and rearward also. - Page 21 Push the seatback fully down to lock it. Then pull the filler panel into place. To raise the seat, push down on the edge and lift the edge of the filler panel. Lift the seatback until it locks. in the up position. Push and pull on the. seatback to make sure it's locked into place.
- Page 22 CAUTION: Don't let anyone'ride where they c safety belt properly. If you are in a you're not wearing a safety belt, your injuries can be much'worse. You can- hit things inside the vehicle or be ejected from it. You can b c seriously injured or killed.
- Page 23 facts :aie After 25 years of safety belts in vehicles, the In most crashes buckling up does clear. matter lot! , . '...
-
Page 24: Why,Safety Belts Work
Why,Safety Belts Work When you ride in or on anything,' goes. For example, if the bike is going 10. mph (1 is the child. you go as fast When the bike hits the block, it stops. But the child keeps going! 6 km/h), so... - Page 25 Take the simplest “car.” Suppose it’s Just a seat on Put someone on it. wheels. >...
- Page 27 or the instrument-panel or the safety belts! With safety belts, you'slow down the vehicle does. You get more time to stop. You stop over distance, more and your strongest bones take the forces. That's safety belts make such good sense.
-
Page 28: Here Are Questions Many People Ask About Safety Belts - And The Answers
Here Are Questions Many People Ask About Safety Belts and the Answers... -
Page 29: Safety Belt Reminder Light
Safety Belt Reminder Light When, the .key is turned to “Run” or “Start,” a light will come on for .about eight seconds- fasten their safety belts. Unles’s the, driver’s safety belt is buckled, a tone will also sound. How To Wear Safety Belts Properly Adults This section is only for people of adult size. - Page 30 Ipi'" , . : The driver has a lap-shoulder belt. Here's how tu wear it properly. 1. Close arrd lock the door. 2. ,Adjust the seat (to. see how, .see "Seats'' in ,the Index) you.' can sit up straight.
- Page 31 3. Pick up the latch plate and pull the belt across you. the ,belt, stops before it .reaches the buckle, tilt. ’ Don’t let it get twisted. latch plate and keep pulling-until you buckle the belt. 4. Push the latch plate into .the buckle until it clicks.
- Page 33 What’s wrong with this? The shoulder belt-is too loose. It won’t give nearly as much protection this way. CA ITION: You can be seriously hurt if your shoulder belt is too loose. a crash you would move forward too much, which could increase injury. The llder f--It s’...
- Page 34 belt is buckled in the wrong place: You can be seriously injured if your belt buckled in the wrong place like this. In a crasl the belt would go up over your abdomen:T' belt forces would be there, not at the pelvic bones.
- Page 35 &: What-’s .wrong with this? The shoulder belt is worn under the arm. It should be worn over the shoulder at all times. CAUTION: You can be seriously injured if you wear the shoulder belt under your arm. In a crash, your body would move too far forward, which woul increase the chance of head and neck injury.
- Page 36 Q.‘ What’s wrong with-this? The belt is twisted the .body. ~ C T O S S CAUTION: You can be seriously injured by a twisted belt. In a crash, you wouldn’t have the full width c the belt to take impact forces. If a belt is twisted, make it straight work proper1 or ask your dealer to fix it.
-
Page 37: Supplemental Inflatable Restraint System (Air Bag)
To unlatch the belt, just push the button on the buckle. The belt should back out of the way. Before you, close the door, be sure the belt is out of the way. If you slam the door on it, you can damage both the belt and your vehicle. - Page 38 CAUTION: Air bags inflate with great force, faster than the blink of an eye. If you’re too clo~se to air bag, it could seriously injure you. §afety belts help keep you in position for an air bag inflation in a crash. Always wear your safety belt, even with an air bag, and sit as far back as you’cat rhile stil- laintaining cc -rol vehicle...
-
Page 39: How The Air Bag System Works
How The Air Bag System Works Where is the air bag? The driver’s air bag is in the middle of the steering wheel. When is an air bag expected to inflate? The air bag is designed to inflate frontal or near-fontal crashes. The air bag will only inflate if the velocity of the impact is above the designed threshold level. - Page 40 What will you see after an -air bag inflation?
- Page 41 CAUTION: Servicing Your Buick with the Air Bag System Please tell or remind anyone who works on your Buick that it has the air bag system. There are parts of the air bag system in several places around your vehicle.
-
Page 42: Safety Belt Use During Pregnancy
Avoid wires wrapped with yellow tape, or yellow connectors. They are probably part Bystem. But if the ignition has .to be on for electrical work, the steering column is to be disassembled, the air bag s-ystem must be disconnected. To do this: T u r n off the ignition. -
Page 43: Ce,Nter .Passenger Position And Any Station Wagon Third Seat Passenger Position
The best way to protect the fetus is to protect the mother. When a safety belt is wornproperly, it’s hurt in a crash. For likely that the fetus won’t be pregnant women, as for anyone, tliekey to makihg safety belts effective’ is wearing them properly. Right Front Passenger Position The right front passenger’s safety belt works the same way as the driver’s safety belt. - Page 44 When .sit in center seating position, or in a station wagon third seat, you have a lap safety belt, .which has part no retractor. To make the belt longer, tilt the latch plate see “Safety Belt Extender” at the end and pull- it along the belt.
-
Page 45: Rear Seat Passengers
Rear Seat Passengers It’s very important for rear seat passengers to buckle up! Accident statistics show that unbelted people in seat are hurt more -0ften’in crashes than those who are wearing safety belts. Rear passengers who aren’t safety belted can out of the vehicle in a crash. - Page 46 Push the latch plate into the bucklo If the belt is not long enough, see "Safety Belt Extender" at the end this section. aces reieasc;.but=tun on the buckle outwadso would be a b k ever h.ad to. 3. To make the lap part tight, pull down on the buckle end of the belt .as you pull up on the shoulder part.
- Page 47 Children a vehicle needs protection! That includes all children smalle? than adult size. In fact, the law every state and Canadian province says children up to some age must be restrained while in a To unlatch the -button o;n%he belt, just push the buGI.de.
-
Page 48: Smaller Children And Babies
Smaller Children and Babies CAUTION: Never hold a baby in your arm3 flhile riding in a vehicle. A baby doesn't weigh much crash. During a crash a baby will become so heavy you can't hold it. For example, in a crai at only 25 mph (40 km/h), a 12-pound (5.5 kg) baby will suddenly become a 240-pound force on your arms. -
Page 49: Child Restraints
CAUTION: Child Restraints Be sure to follow instructions restraint. may find these instructions on the restraint itself or in a booklet, or both. These restraints use the belt-system in also y-our vehicle, but the child has to be secured within the restraint to help reduce the chance The instructions that come with the infant -or child restraint will show you how to do that. -
Page 50: Top Strap
If your child restraint has a top strap, it should be anchored. If you need to have an anchor installed, you can your Buick dealer to put it in for you:If you want to install an anchor yourself, your dealer can tell you how to do it. - Page 51 Securing a Child Restraint in a Rear Outside. Position -You'll be using the lap-shoulder belt. See the earlier section about tlxe top strap if the child restraint has one.
- Page 52 Pull out the vehicle’s safety belt-and run the through around the restraint. instructions will show you how. See if the shoulder belt would go in front of the child’s face or neck. If so,.put,it behind the child restraint. 4. Buckle the belt. Make sure the release button faces upward or outward, so you’ll be able to unbuckle it quickly.
- Page 53 6. Push and pull the child restfaint in different directions b.e sure it is secure. To remove the child restraint, just unbuckle the vehicle's safety belt and remove the-locking clip. Let the safety belt go back all the way. The d e t y belt will move freely again and be ready to work for an adult or larger child passenger.
- Page 54 See th-e earlier section about the restraint has one. 1. Make the belt -as long as possible by tilting the latch plate and pulling. it along the belt. 2. Put the restraint on the seat. Follow the instructions for the child restraint. 3.
- Page 55 7 . Push and pull the child restraint in different directions to be sure it is secure, If the child restraint isn’t secure, turn the latch plate over and buckle it again. Then see if it is secure. If it isn’t, secure the restraint in a different place in the vehicle and contact the child restraint maker for their advice.
- Page 56 4. Buckle the belt. Make sure the release button faces upward outward, you’ll be able to unbuckle it quickly if you ever need to. To tighten the belt, pull up on the.shoulder belt while you push down on the child restraint. 6.
-
Page 57: Larger Children
Larger Children Children who have outgrown child restraints should wear the vehicle’s safety belts.. If you have the choice, a child should window so the child can wear lap-shoulder belt and get the additional restraint a shoulder belt can provide. Accident statistics are restrained in the rear seat. - Page 58 Here two children are wearing the same The belt can’t properly spread the impact forces. In a crash, the two children can be crushed together and seriously injured. A belt must be used by only one person at a bell time.
-
Page 59: Safety Belt Extender
Here a child is sitting in a seat that has lap-shoulder belt, but the shoulder pari behind the child. the child wears the belt in this way, in a crash the child might slide under the belt. The belt's force then be applied W O U ' ~ right on the child's abdom-... -
Page 60: Checking Your Restraint Systems
Checking Your Restraint Systems Now and then, make sure all your belts, buckles, latch plates, retractors, anchorages and reminder systems working properly. Look for any loose parts or damage. If you sei anything that might keep a restraint system from doing its job, have it repaired. Replacing Safety Belts After a Crash If you've had a crash, do you need new belts? After a very minor collision,'nothing may be necessary. - Page 61 What's wrong with this? LAUTION Torn or frayed belts not protect you in miry crash. They can rip apart under impact forc@sJRgd Lrn. , a belt is torn or '-dyed, new one right belt is torn.
- Page 62 1931 Buick Model 90...
-
Page 63: Table Of Contents
Part 2 Feat.ures and Controls Here you can learn about the many standard and optional features on your Buick, and infom.ation on starting. shifting Also explained are the instrument panel and the warning systems that tell you if everything is working... - Page 64 GAUTION: Leaving young children in v e h l t : w i h ignition key is dangerous for many reasons. A child or others could be badP ‘njured or even killed. They could operate power windows controls or even make the vehicle move. Don’t leave the keys in a vehicle with young childr LIIC other...
-
Page 65: Door Locks
When a new Roadmaster is delivered, the dealer removes the plugs from the keys, and gives them to the first owner. Each plug has a code on it that tells your dealer or a qualified locksmith how to make exBa keys. Keep ‘the plugs in a safe place. -
Page 67: Leaving Your Vehicle
Leaving Your Vehicle If you are leaving. the vehicle, open your-door and set the locks from inside. Then get out and close Remote Trunk Release The security switch in the glove box must be “ON” for the “TRUNK’ release button.-.to. work. The “TRUNK”... - Page 69 Lower the tailgate all the. .way down.
- Page 70 .CAUTION- It can be 'dangerous drive with the rear mrindaw, and/or tailgate open. Carbmimonoxide (CO) ,gas can come into your vehicle. You can't smell -use unconsciousness and even death. you must driv- 'he r e r ---'xiow and/c ---'*,- tailgate open: Make sure Turn the fan on your heating or coolin! system to its highest speed with the...
- Page 71 Check the distance. You may be too far from your vehicle. This product has a maximum range. Check the location.. Other vehicles or objects may be blockiGg!$he signal. See your Buick dealer or a qualified technician service. cim loc$andanlbck\ Changes or modifications to this system by other than an u.p to...
- Page 74 Theft Vehicle theft is big business, especially in some cities. Although your Buick has a number of the€t deterrent features, we know that nothing we put on impossible to steal. However, there are ways help. Kev in t~he ignition: If you walk away from your vehicle with the keys inside, it's an easy'target for joy%..
- Page 76 . . .
-
Page 78: Driving Through Deep Standing Water
Driving Through Deep, Standing Water... - Page 79 Engine Block Heater (Canada Only) In very cold weather, '0 18 C) or colder,. the engine block heater can help. You'll get easier starting and better. fuel economy during engine warm-up. use the block heater: 1. Turn off the engine. 2.
- Page 81 maintain brake application. Then move the shift lever into the gear you wish. See “Shifting Out of ‘P’ (Park)” in this section. (Reverse) Use this .gear to back up;...
- Page 82 35 mph (-5.6 Going,about km/h) accelerator all the way do.wn. You’ll shift,down to the next gear and have more power. D.(Third Gear) This is like but you never.go into-Overdrive. Here ’ue some tirnes kowmight dboose - When driving on hilly, winding roads - When towing a- trailer, so there is less shifting between gears.
-
Page 83: Limited-Slip Rear Axle
Limited-Slip Rear Axle If you have this feature, your rear axle can give you snow,, mud, ice, sand or gravel. It additional traction on works like a standard axle most of the. time; but when one of the rear wheels has no traction and the other does, the limited-slip feature will allow the wheel with traction to move the vehicle. -
Page 84: Shifting Into P (Park)
To release the brake: Hold the regular brake pedal down. Pull the brake release lever. .on a hill: See “Parking on Hills” That section shows how to yoax t u r n ’ If you are towinp a trailer and are.parking’on any hin: ‘See a Trailer”... - Page 85 2. Move the shift lever into “P” (Park) position like this: Move the lever up as far as it will go.. 3. Move the ignition key to “Lock.” 4. Remove the key and take it with you. If you can Pull the lever toward you.
- Page 86 Shifting Out of (Park) ‘T” Your Buick has a brake-transmission shift interlock. have to fully apply your regular brake before you can shift from (Park) when tbe ignition ‘T“ position. See “Automatic Transmission” in the Index. If you cannot shift out of “P”.(Park), ease pressure on tW$hift lever -push the shift lever all the way inta.-...
-
Page 87: Parking Over Things That Burn
Parking Over Things That Burn ' ! \ CAUTIO1 Things that can burn could touch hot exhaust parts under your vehicle and ignite. Don't park over papers, leaves, dry grass or other thing Enghe Exhaust CAUTION us an Engine ex t contains the gas carbon monoxide (CO), which you can't see or smell. -
Page 89: Windows
Power Windows Your power contmls~ are on the armrest. W ~ ~ ~ Q W S The switch for %he driver's window has an express-down feature. Pull the switch back all the way. Onee engaged, release it.and the window will lower all the way. To Stop the window from lowering, push the switch forward. - Page 91 The lever on the left side of the steering column includes your: T u r n Signal and Lane Change Indicator Headlight High-Low Beam & Passing Signal Windshield Wipers Windshield Washer Cruise Control (Option) Turn Signal Lane Change Indicator The turn signal has two upward (for Right) and two downward (for Left) positions.
-
Page 92: Headlight High-Low Beam Changer
As you signal a turn or a lane change, flash but just stay on, a signal bulb may be burned out and other drivers won't see your turn signal. If a bulb burned out, replace it to help avoid an accident. - Page 93 You Control the windshield wipers by t u d n g the bmd- marked “WEER.” For a single wxping cycle, turn the band to “MIST.”...
- Page 95 The rear window washer/wiper' switch i . at...
-
Page 96: Cruise Control (Option)
Cruise Control (Option) With Cruise Control, you can maintain a speed of about 25 mph (40 km/h) or more without keeping your foot accelerator. trips. long really Cruise This help Control switch Control does not work at speeds below about 25 mph k-yn/h). - Page 97 you leave your Cruise Control you’re not using Cruise, you. might hit a button and go into Cruise when you don’t want to.. Yoe could be startled and even lose control. Keel the Cruise Control switch “OFF’’ until you want to use it.
- Page 98 You'll go right back up to your chosen speed and stay there. To Increase Speed While Using Crui-se Control There are first: 1. Use th two ways to go to higher speed. Here's the. e .accelerator pedal. to get to the higher speed. 2 .
-
Page 99: Cruise Control
Here’s the second way to go to a higher speed: 2. To increase your speed in very small amounts, move the switchdo ‘‘Resu~e/Accel~~ate” second and then release it. Each time you do this, your vehicle will g,o about 1 mph (1.6 km/h) faster. To Reduce Speed While Using Cruise Control 2. - Page 100 Using LruIse Control on Hills well your Cruise Control will work on hills depends upon your speed, load, and the steepness hills. When going up steep hills, you may have to step on the accelerator pedal to maintain: your speed. When going downhill, you may have to brake or shift to a lower gear to keep your speed duwn.
-
Page 101: Instrument Panel
Lights Headlights Taillights Parking Lights License Lights Sidemarker Lights Instrument Panel Lights Interior Courtesy Lights By rotating the switch marked MAX and make the instrument panel lights bright the courtesy lights on or off. Headlight C60n?' Warning These switches control when the following li-ght systems:... -
Page 104: Inside Mirror
Wagon Rear Lompartment Light and Assist Handles There are courtesy lights and assist handles in the rear compartment located on each side of the tailgate window. Mirrors Inside Mirror When you are sitting in a comfortable driving position, adjust the mirror so: you can see clearly behind your car. The day-night adjustment allows you to adjust the mirror to avoid glare from the lights behind you.:... -
Page 105: Time Delay
Automatic (Option) Mirror Your Buick may have the automatic inside mirror. The automatic mirror adjusts for the glare of headlights behind you. It detects changes in light, and then adjusts for day or night operation. During the day the mirror reflects all the light from behind your car. -
Page 106: Outside Mirrors
Power (Option) Heated Outside Rearview Mirror (Option) The left outside mirror is. heated when you activate the rear window defogger. your -Buick has the optional power mirrors, the mirror control is located on the driver's door. .Rotate. the control to the left or right to choose the mirror you want 'to:.%dj,wst. -
Page 107: Convex Outside Mirror
Convex Outside Mirror Your right side mirror is convex. A convex mirror’s surface is curved so you can see more from the driver’s seat. CAUTION: If you aren’t used to a cor.. hit another vehicle. A convex mirror can ma things (like other vehicles) look farther away than they really are. - Page 108 The net can be hooked as. shown so that-it lies flat against the load floor or stands up and down. I'he net is nor for larger, heavier loads. Store such loads mder the load floor, or on the load floor as far forward you can.
- Page 109 Convenience Net (Sedan) Your car has a convenience net. You'll the back wall of the trunk. Put-small loads, like grocery bags, behind the net. It can help keep them from falling over during sharp turns or quick starts and stops. The net isn't for larger, heavier loads.
- Page 110 CAUTION: An improperly stored cargo cover could be thrown about the vehicle during a collision sudden maneuver. You or others could be injured. If you remove the cover, always store it properly secured. When you put it back, a h be sure that it is secure attached.
- Page 111 W i l l aon’t.exceed,the m a i m m , v & i & capacity when loading your. Buick e q a d t y arid loading, see. Index -under Vehicle.” To prevent damage check-now and then and cargo are still securely fastened.
- Page 112 Light Visor Vanity Mirror (Option) . I . The lighted visor vanity mirror lights up when the mirror cover is opened. Closing the mirror cover turns off the lights. Ashtrays The front center ashtray may be lifted out for cleaning.
-
Page 113: Cigarette Lighter
Cigarette Lighter To remove the rear ashtray for cleming, press .down It's near the ashtray. To use the cigarette lighter, push on the gtuffer as you.pull in all the way and let go..When it's ready, it will pop- the ashtray down and out. back by itself. -
Page 116: Speedometer And Odometer
Speedometer and Odometer you See Your speedometer lets your speed in both miles per hour (mph) and kilometers per hour (km/h). odometer shows how far your vehicle has been in either miles (used in the U.S.) or klometers (usedbj:l::.r Canad,a). Buicli hasa "tamper7&ist.mt-odometer."... - Page 117 Fuel Gage Your fuel gage shows how much fue works when the engine is on. When the indicator only nears “E”, you still have a little fuel left. You need to get more right away. Here are four concerns some owners havexhad about the fuel gage.
- Page 119 3. If you make a hard stop, the light may come on for a moment. But, when this light comes and stays, on, it meansoil isn't going through your engine properly. You could be low on oil, or yoimight have some other oil prGblem. You can.
- Page 120 If a light-stays on, you need service, and you should take your Buick to the dealer at once. To save your battery until you get there, turn off ‘“OFF.”...
- Page 121 The normal range is 11 to 15 volts. If the gage reading staysin either red range, have your Buick dealer check the electrical system. Tachometer The tachometer tells you.how fast the displays engine speed in revolutions per minute engine is going.
-
Page 122: Brake System Warning Light
Brake System Warning Light Your Buick’s hydraulic brake system is divided two parts..If Qne-part isn’t working, the other part’ can stil1,work:aT;lCl stop you. For g,ood. braking, though, you. need ‘both parts working, well. the. warning light goes an, there -cbuld be a brake problem. -
Page 123: Anti-Lock Brake System Warning Light
,with If the anti-lock brake system warning light stays you replace the compact spare with a full-size tire, or if it comes on again when you’re driving, your Buick so. That’s needs service. so it a problem. -
Page 124: Engine Coolant Temperature Gage
Engine Coolant Temperature Warning: Light This light tells you that your engine coolant has ovetheated. If you have been operating your vehicle under normal driving .conditions, you should pull off the road, stop your vehicle and turn the engine -off as soon as possible. HOT COOLANT CAN BURN YOU-BADLY! “Problems on the Road,”... - Page 126 'a &t&A&- -w&gon:has wariiirib.light. It should comb:'ori when the tailgate is dpe;neis as .a door. It will stay on until the tailgate has been fully closed. It does noi.come on when tailgate has been opem%i as a gate.
- Page 127 Part 3 Comfort Controls and Audio Systems...
- Page 128 ..
- Page 129 Buick has the Electronic Climate control option, it looks like this: The following information tells you how it works: Mode When you press the MODE button, it allows you to select the outlets you want heated or air conditioned air...
- Page 131 When the system is off; the Auto When the system is set for automatic, aitwill come from the instrument panel outlets or both. Fan speed will vary (unless a blower LO or HI bukon has been pushed) as the system gets m,aintaigs the temperature .setting'you have .selected: The display will show the selected,temperature and...
- Page 132 Howev~r, 'il you want the blower fan run at a low& speed, pukh you. want' to raise the push bloWer"spt%d, You can use this when you don't need to cool outside-air. The system will work as in the AUTO mode without cooling.
- Page 133 Defrost This setting will direct most of the air flow toward the windshield. Use this when there is fog or ice on the windshield. Defrost will work better if any ice and snow is cleared from the hood and the air inlet area between the hood and the windshield.
- Page 134 'Your Buick may have this Comfort Your Bui&'s flow-through ventilation system supplies outside air info the vehicle when it is,moving. When the heater air c.onditioning fan is running, outside .air will also enter the-vehicle. Fan Speeds: The fan- control is used to select blbwer to contrdl the:&...
- Page 135 the sun may adequately warm your upper body, but your lower body may not be warm enough. The Bi-level settbg directs outside air.into your vehicle in two ways.-Cool air is directed 'toward your upper body through the front instrument panel outlets, ,while slightly warmed air is directed through the heater outlet at your feet.
- Page 136 Rear Window Defogger (Option) The lines you see rear window warm the glass to remove fog and ice. Turn' the control on' to start warming your window. After a few minutes; it will turn off automatically. Audio Sysxems Your Delco@ audio system has been designed to uperate easily and give years -of listening pleasure.
- Page 137 AM Stereo This means the Delco@ system can receive C-QUAM@ stereo broadcasts. Many AM stations around the country use C-QUAM@ to produce stereo, though some do not. (C-QUAM@ is a registered trademark of Motorola, Inc.) If your Delco@ system can get C-QUAM@, your “STEREO”...
- Page 138 How To, Operate Y0u.r' Audio System To Play This Radio' The Uppei Knob The upper .knob does these things: It tums the system on and off. It controls the volume. The volume knob increases volume when rotated clockwise. will display the time, when pushed. : .
- Page 139 Tune in the desired station. Press the SET pushbutton. (SET appears in the display) Within seconds, push one to.store the- station. Whenever you press that button again, the preset station will return. In addition to the 4 stations set as above, up to three additional stations may be preset on each band by pressing two adjoining buttons at the same time.
- Page 141 u p to three additional stations on each band may be preset, by pressing two adj.oining pushbuttons at the sitme time. TREBLE Slide the.TREBLE lever up to increase the trewe response. If the station is weak or noisy, slide the TREBLE lever down to reduce the noise.
- Page 142 To.advance the tape, press. and. the tape will advance; STOP-EJECT rapidly until you press the reverse the tape, press and the tape will reverse. until: you press .the :STOP-EJECT button lightly. Rnidly To go from one side of the tape to $he other, prms'thef- upper knob (RCL-FROG).
- Page 143 The Upper Knob The upper knob does these things: It controls the volume. The volume increases and decretises when the knob is held slightly rotated against the spring load. It allows you to.mute the radio or the tape player. Press to mute; press:again to listen. During mute; only volume up will work: The coiltrol behind the upper h 0 .
- Page 145 To reverse the tape, press and the tape will rapidly reverse to the beginning of the tape or until you press button lightly. To advance the tape, press FWD and the tape will rapidly go forward to the end of the tape or until you press the FWD button lightly.
-
Page 147: To Play A Compact Disc
Within 5 seconds, push one of the five pushbuttons. SET will disappear from the display when the station is set. Whenever you press that button, the preset station will only. return. Clock To set the clock: Press SET pushbutton. Within seconds, press and .hold SCAN until the correct hour appears on the display. - Page 148 Press :RCL to see what-track is playing. Press it again within seconds ,to see how long 'the CD has been playing,. The track number also appears when you change the volume or when a new track starts to play. COMP Pressing the COMP button makes soft and loud passages nearly equal in volume.
-
Page 149: Anti-Theft Feature
Anti-Theft Feature Delco-Loc I1 is a security feature for the compact disc player. It can be used or ignored. If ignored, the system plays normally. it is used, your player won’t be usable if it’s ever stolen, because it won’t turn on. The instructions below tell you how personal secret code into the system. - Page 150 AM-FM Step 4. Press the button. The radio will display “000”. Step Enter the second three digits of the code. The display shows the numbers as entered. Step 6. Press the AM-FM button. If the display shows -”, the disabling sequence was successful. (The “- numbers .matched the user-selected code or the factory back-up code) and the unit is in the UNSECURED.
-
Page 151: Care Of Your Compact Discs
cassette has no improvement s.ound quality, clean the tape player. Clean your tape player with a wiping-action, non-abrasive cleaning cassette, and follow the directions provided with it. Cassettes are subject to wear and the sound quality may degrade over time. Always make sure that the cassette tape is in good condition before you have your tape player serviced. - Page 152 yoUr replace rieqler for. a replacement kit easily and, follow the instructions in the kit.
- Page 153 Part 4 Your Driving and the Road P a r t 4 includes: RoadSigns DefensiveDriving DrunkenDriving ControlofaVehicle BrakingTips SteeririgTips Steering in Emergencies Passing Loss of Control ..............DrivingatNight DrivingintheRain Driving in Fog, Mist and Haze...
- Page 154 The road signs you see everywhere are coded by color, shape and symbols. It’s a good idea to -codes that you can quickly grasp the basic meaning 5 . 0 or intent of the sign even before you have a chance to read it.
- Page 155 RAILROAD ADVANCE CROSSING YELLOW indicates a general warning. Slow down and be careful when you see a yellow sign. It may signal railroad crossing ahead, a no passing. zone, or somi other potentially dangefous situation. Likewise, a yellow .solid line painted on the road means “Don’t Cross.” NARROW AHEAD FLAGGER...
- Page 156 4 4 9 GREEN is used to guide the driver. Green signs may indicate ,upcoming freeway exits or show the direction you should turn to reach particular place. HOSPITAL BLUE signs with white letters show motorists' services..CANOEING SWIMMING BROWN signs point out recreation areas or points...
- Page 157 Shape of Road Signs The shape the sign will tell you something, too. An OCTAGONAL (eight-sided) sign-means STOP. It is always red with white letters. A DIAMOND-shaped sign is a warning of something ahead example, a curve, steep hill, soft shoulder, or a narrow bridge.
- Page 158 TRIANGULAR sign also is roads PASSING ZONE. This s i p &de LEFT KEEP RIOHT THROUGH (square .or oblong) signs show :speed RECTANGULAR limits, parking regtllaticjnfi, give directions, and .such information as distances- to cities. Symbols on .Road Signs used two-lane: indicate a NO will...
- Page 160 REVERSl8lE LANE ON MULTI- LANE ROADWAY d a n y .city roads and. expressways, and even bridges, reversible-lane traffic control during rush hours. light above a liane means no driving in that iane at that time. A green arrow means you may drive in that lane. Look for the signs posted to warn drivers what hours days these systems are in effe Pavement Markings...
-
Page 161: Your Own Signals
The best advice anyone can give about driving is: Drive defensively. Please start with a very important safety device in you Buick: Buckle up. (See “Safety Belts” in the Index.) Defensive driving really means “be ready for anything.” On city streets, rural roads, or freeways, it means “always expect the unexpected.”... -
Page 162: Drunken Driving
D,runken Driving Death and injury associated with drinking and,driving is a national tragedy. It’s the number one contributor to the highway death toll, claiming thousands of victims every year. Alcohol takes away. three ,things that anyone needs to drive a vehicle: Judgment Muscular Coordination Vision... - Page 163 Just how much alcohol is too much if a person plans to drive? Ideally, one should drink alcohol and then drive. But if one does, then what’s “too much”? It; can be a lot less than many might think. Although it depends on each person and situation, here is some general information on the problem.
- Page 164 It’s the arnount.of alcahd that counts. For example, if the same person drank three double martinis, 90 ml of liquor each) within BAC would be close to 0.12 percent. A person who consumes fwd just before or during drinking will. have a slightlyi’lower BA@ level’.
-
Page 165: Control Of A Vehicle
might not be able to react quickly enough to avoid the collision. There’s something else about drinking and driving that many people don’t know. Medical research shows that alcohol in a person’s system can make crash injuries worse. That’s especially true for brain, spinal cord and heart injuries. - Page 166 Braking Braking action- involves perceDtion time and reaction ’time. First, you have to decide to push on the brake pedal. That’s perception time. Then -you have to bring foot and do it. That’s reaction-time. Average reaction time is about 314 ‘of a second. But that’s only -an average.
- Page 167 Riding” your brake overheat to the point that they won’t work well, You might not be able to stop your vehicle time to avoid an accident. If you “ride” your brakes, they will get so hot they will require a 1st of pedal force to slow you down.
- Page 170 CAUTION: CAUTION: The brake wear warn sooner or later your brakes won’t work well That could lead to an accident. When you hear the brake wear warning vehicle serviced. Some driving conditions or climates may cause squeal when the brakes are first applied or lightly applied.
-
Page 171: Braking In Emergencies
If your brake pedal goes down farther man normal, your rear drum brakes may need adjustment. Adjust them by backing up and firmly applying the brakes a few times. Braking in Emergencies Use your anti-lock braking sysKem when you need to. With anti-lock, you can steer and brake at the same time. -
Page 172: Steering In Emergencies
But sometimes you can’t; there isn’t room. That’s the time for evasive action - steering around the problem. Your Buick can perform very well these. First apply your brakes. It is better to remove as much speed as you can from possible collision. - Page 173 An emergency like this requires close attention and a quick decision. you are holding the steering wheel at the recommended 9 and 3 o'clock positions, you can turn it a full 180 degrees very quickly without removing either hand. But you have to act fast, steer quickly, and just as quickly straighten the wheel once you have avoided the object.
-
Page 177: Driving At Night
vehicle is skidding. Learn to recognize warning clues such as enough water, ice or packed snow on the road to make a “mirrored surface’’ and slow .down when you .have any doubt. Remember: Any anti-lock braking system (ABS) helps avoid only the braking skid. Steer the way you want to Driving at Night Night driving is more dangerous than day driving. -
Page 178: Night Vision
Night Vision 'No one can see as we11 at night as in the daytime. But as we get older these differences increase. A 50-year-old driver may require .at least twice as much light same thing at night as a 20-year-old. What you do in the daytime can also affect your night vision. -
Page 179: Driving In The Rain
Driving in the Rain... - Page 180 The heavier the rain, the harder it windshield wiper blades are in good shape, a heavy rain ,can make it harder to see road signs and traffid. signals, pavement markings, the edge of the road, and even people walking. Road spray can often be worse vision than rain, especially if it comes frum a dirty road.
-
Page 181: Some Other Rainy Weather Tips
Hydroplaning Hydroplaning is dangerous. So much water can build up under your tires that they can actually ride This can happen if the road is wet enough and you’re going fast enough. When your vehicle’ it has little or no contact with the road. You might not be aware of hydroplaning. -
Page 182: Driving In Fog, Mist And Haze
Driving in Fog, Mist and Haze Fog can occur with high humidity or heavy frost. It can be so mild that- you can see through it for several hundred feet (meters). Or-it might he so thick .that you can see only few feet (meters) ahead. - Page 183 Tips on Driving in Fog If you get caught in fog, turn your headlights on low beam, even in daytime. You’ll see better. If visibility is near zero and you must stop but are unsuTe whether you are away from lights on, start your hazard warning flasher, and sound your Born at intervals or when you hear approaching traffic.
-
Page 184: Freeway Driving
Free-way Driving Mile €or mile, freeways (also called thruways, parkways, expressways, turnpikes, or superhighways) are the safest of all roads. But they have their own special rules. The most important -advice on freeway dJiving is: Keep up with traffic and keep to the right. Drive at thesame. speed most of the other drivers are driving. - Page 187 Wear good sunglasses bright light. Glare can. cause drowsiness. But don’t wear sunglasses at night. They will drastically reduce your overall vision at the very time you need all the seeing powe you have. If you get sleepy, pull off the road into a’rest, service, or parking area and take a nap, get some exercise, both.
- Page 188 Driving on steep hills or mountains is different from driving in or rolling terrain. flat If you drive regularly steep country, planning-to visit there, here are some tips that can make your trips safer and more enjoyable. CAUTION: you don't shift down, your brakes could get o hot that they wouldn't work well.
- Page 189 1 87...
- Page 190 PBrkiBg Hi&$ You can turn your front wheels to keep your vehicle from rolling downhill or out into traffic. Here’s how: Parking Downhill Turn your wheels to the right. You don’t have to jam your tires against the curb, if there is a curb.
- Page 191 Parking Uphill Ifthere is a curb, turn your wheels to the left if the curb the right side of your vehicle. you're going uphill on a one-way street and you're parking on the left side, your wheels should point right.
-
Page 193: Winter Driving
Winter Driving Here are some tips for winter driving: Have your Buick in good shape for winter. Be sure your engine coolant mix is co-rrect. Snow tires. can help in loose snow, but they may give you less traction ice than regular tires. If you do... -
Page 194: Driving On Snow Or Ice
D.riving on Snow or Ice What’s the worst time for this? “Wet ice.” Very cold snow or ice c.an be slick and hard to drive ice can be even more’trouble because leait traction all. You can get “wet ice” when’ it’s about freezing (3ZoF..O0C) and freezing rain begins to fail. - Page 195 If you are stopped by .heavy snow, you could be-.in a seirious. situation. You should probably stay with'your vehicle'unless you. know for sure that..you are near .help and yau can hikethrough the snow. Here are some things' to do to summon help and keep yourself and your passengers safe: Turn on your hazard-flashers.
- Page 196 blanket around you. you have no make body clothing, insulators. from newspapers, burlap math bags, rags, floor anything you can wrap around yourself tuck under your clothing to keep warm. Yon can run the engine to keep warm, but. be careful. CAUTION: Snow can trap exhaust gases under your cause...
-
Page 197: Towing A Trailer
Run your engine only as long as you must. This saves fuel. When you run the engine, make it go a little faster than just idle. That is, push the accelerator slightly. This: uses less fuel for the heat that you get and it keeps the battery charged. -
Page 199: Weight Of The Trailer Tongue
‘are .all important. And, it can also depen‘d on any special equipment that you have on your vehicle. You can ask your dealer for our traiIering information or advice, or you can write us at Buick Motor Division, Customer Assistance .Center; 902 E. Hamilton Avenue, Flint, M.148550. -
Page 200: Total Weight On Your Vehicle's Tires
Total Weight on Your Vehicle’s Tires Be sure your vehicle’s tires are inflated to the limit for cold tires. You’ll find these numbers on the Certification label at the rear edge the driver’s doqr (or see “Tire Loading” in the Index). Then be sure you don’t go over the GVW limit for your vehicle. -
Page 201: Driving With A Trailer
Driving with a Trailer Towing a trailer requires a certain amount of experience. Before setting out for the open road, you’ll want to get to know your rig. Acquaint yourself with the handling and braking. with the added weight trailer. And always keep in mind that the vehicle you driving is now a good deal longer and not nearly so responsive as your vehicle is by itself. - Page 203 tight..,...
-
Page 205: Part 5 Problems On The Road
Part 5 Problems on the Road Here you’ll find what to do about some problems that can occur on the road Part 5 includes: ............Hazard Warning Flashers . -
Page 207: Otherwarningdevices
Press the button in to. make your front and, rear turn s$gnal .lights' flash on and off. Your hazard warning -flashers work position your key in, and even if the key isn't in. wnat no' matter Other Warning Devices If you carry reflective triangles; you can set one up at the side of the road about 300 feet (100 m) behind your vehicle. -
Page 208: Jump"Starting
If they are, it could cause a ground connection you don’t want. You wouldn’t be able to start your Buick, and the bad grounding. could damage the electrical systems. - Page 209 !s roll (Park) Turn ofr all could Your Buick has two remote positive. starting terminals. The terminals are in the red box the. same side’of the engine compartment battery.You should always use one, .positive terminal on your battery. To open the remote positive the tab and open the cover.
- Page 211 . . , Connect the red positive cable to the positive terminal of the vehicle with the dead battery. Use a remote positive terminal if the vehicle has one.. 7. Don't let the other end touch metal. Connect it to the positive terminal of the good Use.
- Page 212 8. Now connect the black negative the good battery's negative Don't let the other end touch anything until the next step. The other the negative cable doesn't go end of the deadbattery. It goes to a heavy unpainted metal part on the engine of the vehicle with the dead battery.
- Page 213 11. Try to start the vehicle with the dead battery. If it won’t start after a few tries, it probably needs service. 12. Remove the cables in reverse order to prevent electrical shorting. Take care that they don’t touch each other or any other metal.
-
Page 214: Towing Your Car
Towing Your Try to have a dealer or a professional towing service tow your Buick. The usual towing equipment is a sling-type (A) or a wheel-lift truck. If your vehicle has been changed or modified since it was factory-new by adding aftermarket items like fog... - Page 216 Front TomGng Hook-Ups Attach behind the the side of the frame rails ,on both,’sides. “T” hook chains front wheels &to Position the sling crossbar just behind the rear edge of the front fascia. A 4” x 4” wood beam is .NOT needed.
- Page 217 Attach a separate safety chain around the outboard end of ,each lower contrbl Rear Towing Hook-Ups Attach “T” hook chains to slots in the frame rails just ’ .ahead both sides. rear wheels on Position the I-owes sling crossbar directly under the rear fascia.
-
Page 219: If No Steam Is Coming From Your Engine
If :No .Steam Is Coming From Your Engine: If you get the overheat warning but see or hear no steam, the problem may not be too serious. Sometimes the engine can get a little too hot when you: Climb a long hill on a.hot day. Stop :after high speed driving. - Page 220 safe to When you decide it’s lift the hood, here’s what you’ll see: Coolant recovery tank Radiator pressure cap...
- Page 221 parts, can be very hot. Don’t do, you can be burned. Don’t run the engine if ther the engine, could lose coolant. That could cause an engine Pire, and you could be burned. Get any leak fixed before you drive the vehicle. If there seems to be no leaK, start tne engine again to see if the fan runs when the engine does.
- Page 222 CAUTIOP You can be bu 3d if spill engine parts. Coolant contains ethylene burn if the engine parts are hot it will enough. Don’t spill coolant on a hot engine. When the Luolant in the coolant recovery above “FULL COLD,” start your vehicle. If the overheat warning continues, there’s one more thing you can try.
-
Page 224: How To Add Coolant To The Radiator
How to Add Coolant to the Radiator -" -..- 1. You can remove the radiator pressure cap when the cooling system, including the radiator pressure cap and upper radiator hose, is no longer hot. Turn the pressure cap slowly to the left until it first stops. (Don't press down while turning the pressure cap.) If you hear a hiss, wait for that to stop. - Page 225 4. Then fill the coolant recovery tank to “FULL COLD.” Put the cap back on the coolant recovery tank, but leave the radiator pressure cap off. 6. Start the engine and let it run until you can feel the upper radiator hose getting hot.
-
Page 226: Ifatiregoesflat
Tire Goes Flat Flat Tire Changing CAUTIO1 jack and roll over you or othe- can slip off the people. You and they could be badly injured. Find a level place to change your prevent the vehicle from moving: Set the parking brake firmly. 2. - Page 227 The followin,g steps will tell you,ho.w.to use ihe jack afid change a tire. The equipment you’ll need is in the trunk. .”: . , . _,,,/ ..,LL...
- Page 228 the equipment for the wagon is in the rear storage O r , compartment. To access the equipmentin your wagon, turn the slotted the rear,edge of release button located Rempve the covef by pulliing, it away and then sliding it toward the rear, Ming it up and out of thelower track.
- Page 229 pull the tire out of the storage To remove the spare tire, unscrew and remove the wing Using the tire lift strap, nut from the retaining bolt. well. To remove the jack, unscrew the wing -bolt from the jack retainer. Remove the jack by sliding it forward.
- Page 230 Your Buick has a wheel. cover that access the wheel nuts; Refer the picture for the correct wheel cover removal. I f your vehicle 'has .either of -the:.two following wheel. covers, they :must be removed &-carefully prying outside ,edg@.with the 'of @e wheel wrench.
- Page 231 Remove, this wheel cover by carefully prying off the If your vehicle has wire wheel covers, .remove the center center -of the cover with the flat end of the wheel of the wheel cover by using the wire wheel key wrench. wrench.
- Page 234 Position theijack under the vekcle. ,Your .Buick,has:.m' indentat&n,on the .fi-ame near each 'of the wheels. Raise the jack the,jack head into-the indentation nearest fits the wheel with the flat tire. vehicle Getting er a when dangerous. If the vehicle slips off the could be badly injured or kilied.
- Page 236 CAUTIO Rust or dirt on the wheel, which it is fastened, can make the wheel nu become loose after a time. The wheel come off and cause an accident. When you change a wheel, remove any rust or dirt fro1 the places where the wheel attaches vehicle.
- Page 237 Lower the vehicle by rotating the wheel wrench counterclockwise. Lower the jack completely. Tighten the wheel nuts firmly in a criss-cross sequence as shown. lncorrect wheel nuts or improperly tightened wheel nuts can cause the wheel to become loose and even come off. This could lead to an accident.
- Page 239 CAUTION: Storing a jack; a tire or other equipment in the .passenger compartment of the vehicle could cause injury. In a sudden stop or.collision, loose equipment could strike someone. Store all these in the proper place..
-
Page 240: Compactsparetire
Compact Spare T,ire Although the compact spare was fully inflated when your vehicle -was new, it can lose air after a time. Check the inflation pressure regularly. It should be 60 psi (420 P a ) . The compact spare is made to (50,OO so you can finish your trip and have. - Page 241 CAUTION: If you let your tires spin at high explode and or others could be injured. And, the transmission or other parts of the vehicle can overheat. That could cause an engine compartment fire other damage. you’re When stuck, spin the wheels as little as possible.
- Page 242 1954 Buick Model 56C...
-
Page 243: Part 6 Se'rvice & Appearance Care
Part 6 Se'rvice & Appearance Care... - Page 244 Service Doing Your Own Service. Work perform. see “Maintenance Record” in the Index.
- Page 246 What about gasoline with blending materials that contain oxygen, such as MTBE or alcohol? MTBE is “methyl tertiary-butyl ether.” Fuel that is, more than 15% MTBE is fine for your vehicle. Ethanol is ethyl or .grain alcohol. Properly-blended fuel that is no more than 10% ethanol is fine for your vehicle.
-
Page 247: Filling Your Tank
Filling Your Tank The cap, on the wagon, iis behind a hinged door on the left side 'of your vehicle. 1' : I . , : ,',. j . . - Page 248 the sedan, the cap is behind the rear license plate. m - - CAUTION: din rapor p l y tlammawe. violently, and that can cause very bad injuries. Don't smoke if you're near gasoline or refueling your vehicle. Keep sparks, flames, and smoking materials away from gasoline.
- Page 251 Engine OiI If the "LOW OIL" light on the instrument panel comes on, it means .you need to check your engine oil level right away. You should check your engine oil level regularly; the light is an added reminder. It's a good idea to check your engine oil every time you get fuel.
- Page 253 thickness. DO not we other visco,sity-oils such ;as SAE low-40 SAE 2OW-50.
- Page 254 It’s below freezing outside and most trips are less: than 10 miles (16 km). The engine is -at low .speed most door door delivery, or in stop-and-go traffic). You tow a trailer often. Most trips are through dusty places. If -any one of these is true for your vehicle, then you need-to change your oil.and filter every 3,000 miles k m ) (5 000...
-
Page 255: Air Cleaner
Air Cleaner cleaner is located behind the engine fan. To access the filter, lift up on the latches and let the cover down. Replace the filter and snap the latches. Refer to the Maintenance Schedule to determine when to replace-the air filter and the PCV filter. See “Scheduled .Maintenance Services”... -
Page 256: Automatic Transmission Fluid
Index. How to Check: Because this operation can be a little difficult, you may choose to have this done at a Buick,dealership Service Department. If you do it yourself, be sure to follow all the instructions here, or you could get a false reading dipstick. - Page 257 To check the fluid hot or cold: Park your vehicle on a level place. Place the shift.lever in “P” (Park) with the parking brake applied. With your foot on the brake pedal, move the shift lever through each gear range, pausing for about seconds in each range.
- Page 258 How to Add Fluid: Refer to the Maintenance Schedule to determine what kind of transmission fluid to use. See “Recommended Fluids and.lLubricants” in the Index. If the fluid level is low, add only enough fluid to bring the level up to the COLD area for a cold check or the HOT area fora hot check.
- Page 259 er to your cooling system can be dangerous. Plain water, or some other liquid like alcohol, can boil before the proper coolant mix will. Your vehicle’s coolant warning system is set for the proper coolant mix. Wi’th plain water or the wrong mix, your engine could hot but you wouldn’t get the overheat warning.
-
Page 260: Adding Coolant
Adding Coolant . : , . ro Add Coolant: If you need more coolant, add the. tar&. oronP.1: mix at the coolant recovery The coolant recovery tank .is located at the left of the engine compartment, directly behind the'battery. .To Ch.eck.Coolant: When your engine is cold, the co;olant,level sl~oultj be .at "FULL COLD,'' or a little level should'ke:... -
Page 261: Radiator Pressure Cap
Add coolant mix at the recovery tank, but be careful not to spill it. You can be burned if you spill coolant on hot engine parts. Coolant: contains ethylene glycol, and it will burn if the engine parts are ho - - - ~ h . - Page 262 How To Check Power Steering Fluid: Unscrew the cap and wipe the dipstick with a clean rag. ’ Replace the cap and completely tighten the cap again and look at the fluid level on the dipstick. When the engine compartment is hot, the level should “HOT”...
-
Page 263: Windshield Washer Fluid
Windshield Washer Fluid To Add: The windshield washer reservoir is located at the left of the engine compartment. Open. the cap labeled “WASHER FLUID ONLY.” Add washer fluid until the bottle is full. -
Page 266: Replacing Brake System Parts
Vehicles we design and test have top-quality GM brake parts in them, as your: Buick, does when it is new. When you replace parts of your braking system example, when.your brake linings wear down and... -
Page 267: Headlamp Bulb Replacement
Halagen bulbs have pressurized gas inside and you drop or scratch the bulb. You or can burst could others be injured. Take special care when handling and displssina of halogen bulbs. Headlamp Bulb Replacement T u r n each of the access cover retainers 1/4 lift the cover off. - Page 268 4. .Remove wjre connector from bulb by lifiingthe lock" tab and pulling it away .from the plastic base.
- Page 269 Install the bulb by putting sriJall tab- small notch in the lamb (E). PGt the 'retainer: on and. turn t u n clockwise (to the.right).'to lock it h t o into place. Remove-the two Phillips For .the right-side taillight, remove covers the spare tire'.
- Page 270 Unskrew .tht$wingnut. From outside the vehicle,, carefully pull the taillight assembly away Press the bulb housing release lever and turn the housing from 1/4.turn counter-clockwise (to the left) to remove it.. the body. To remove the bulb, push counterclockwise(to the left). Reverse all the steps to reassemble the taillight housing.
- Page 271 Center High Mounted Stop Light Replacement Lift up the tailgate window. Unscrew the two screws. Bring down the bulb assembly. Pull a bulb out retainer and replace. Reverse the,steps to reassemble. Loading Your Vehi.cIe TIRE-LOADING INF0,RMATlON V:EHICLE CAP, WT. OCCUPAN'TS FRT..
- Page 272 Never exceed the GVWR for.your vehicle, or the"Gross Axle Weight Rating (GAWR) for ,either the front 'or rear. axle.. And, if you do have a heavy load, you-should spread it out. Don't 'carry more than.2'03 pounds (92 kilograms) in the sedan or 300 pounds (136 kilograms-) in the wagon in your trunk rear area.
- Page 273 We, don’t make tires. Your new vehicle comes with high quality tires made by a leading tire,manufacturer. These tires are warranted.:by the tire manufacturers warranties are delivixed with every new Buick. spare ti& is a different brand than will have a tire warranty folder fi-om eaGh of these manufacturers.
-
Page 274: Tire Pressure
)orly maintained and improper1 dangerous. Overloading 3ur tires can caus overheating as a result too much friction:You could have an air-out ant serisws accident. See -“Loading Your Vehicle” in the Inde: Underinflated tires pose the same dangc as overloaded tires. The resulting accident’could cause serious injury. -
Page 275: Tire Inspection And Rotation
When to Check: Check your tires once .a month or more. Don’t forget your compact spare-tire (if should be at 60 psi (420 P a ) . How to Check: Use a good quality pocket-type gage to check tire pressure. Simply looking at the tires will not tell you the pressure, especially if you have radial tires which may look properly inflated even if they’re underinflated. - Page 276 After the tires have beers rotated, adjust the front and r e a inflation pressure shown Information label. Make certain that all wheel nuts ax9 properly tightened. See “Wheel Nut Torque” in the Index. CAUTION: Rust or diir wheel, or on the parts to which is fastened, can make wheel nuts become loose after a time.
-
Page 277: Buying New Tires
The tire has a puncture, cut, or other damage that can’t be repaired well because of the size or location of the damage. Buying New Tires .To find out what kind and size of tires you need; look at the Tire-Loading Information label. The tires installed on your vehicle when it a Tire Performance Criteria Specification (TPC Spec) -number on each tire’s sidewall. - Page 278 0...
-
Page 279: Wheel Alignment And Tire Balance
If you need to replace-any or wheel nuts, replace them only with new GM original equipment parts. This way, you will be sure to have the right wheel, wheel bolts, and wheel nuts for your Buick model. Using the wrong replacement wheels, wheel bolts, or wheel nuts on your vehicle can be dangerous. -
Page 280: Tire Chains
Tire Chains Putting a used wheel on your vehicle is dangerous. You can't know how it's been used or how many miles it's been driven. could fail suddenly and cause an accident. If you have to replace a wheel u equipment wheel. -
Page 282: Cleaning The Inside Of Your Buick
Use a vacuum cleaner often to get rid of dust and loose 'dirt. Wipe vinyl with a clean, damp cloth. Your Buick dealer has two GM cleaners - a solvent-type spot lifter and a foam-type,powdered 'cleaner. They will clean normal spots and stains very well. - Page 283 Using Solvent-Type Cleaner on Fabric First, see if you have to use solvent-type cleaner at all. Some sp-ots and stains will clean off better with just water and mild soap. If you need to use it, then: Gently scrape excess soil from the trim material with a clean, dull knife or scraper.
-
Page 284: Cleaning The Top Of The Instrument Panel
Finally, if needed, clean lightly with solvent-type cleaner. Combination Stains: Like candy, ice cream, mayonnaise, chili sauce and unknown stains. Carefully scrape off excess stain, then clean with cool water and allow to dry. a stain remains, clean it with solvent-type cleaner. Cleaning Vinyl .or Leather Just use warm water and a clean cloth. -
Page 285: Cleaning The Outside Of The Windshield And Wiper Blades
High pressure car washes may cause water to enter you vehicle. Finish Care Occasional waxing or mild polishing of your Buick may be necessary to remove residue from the paint finish. You can get GM approved cleaning products from your dealer. -
Page 286: Aluminum Wheels
Aluminum Wheels If your Buick has these, don’t use chrome polish on them. Use wax after you clean them. Also, don’t use abrasive cleaners or cleaning brushps on them - you could damaee the proutive caating. Your Buick dealer has a GM White Sidewall Tire Cleaner. -
Page 287: Finish Damage
Although no defect in the paint job causes this, Buick will repair, at no chaKge to the owner, the surfaces of new vehicles damaged by this fallout condition within 12 months or 12,000 miles.(20 000... - Page 288 1052870 (0.473L) Not recommended for pigskin suede leather. See Your General Motors Dealers for These Product See Your Maintenance Schedule for Other Products. Care and Maintenance Materials :an get these from your Buick dealer. DESCRIPTION lgic Mirror Creme Weather Spray-A-Squeak...
-
Page 289: Vehicle Identification Number (Vin)
\ASSEMBLY CODE MODEL YEAR This is the legal identifier for your Buick. a plate in the front corner of the instrument p,anel, on the driver’s side. You can see it if you 1,ook through the windshield from outside your vehicle,. The appears on the Vehicle Certification and Service Parts labels and the certificates of title.and registration. -
Page 290: Fuses And Circuit Breakers
Fuses and Circuit Breakers The wiring circuits in your car are protected from short circuits by a combination of fuses, circuit breakers, and fusible thermal links in the wiring itself. This greatly reduces the chance. of fires caused by electrical problems. - Page 291 ,-..
- Page 293 The fuse chart, below, shows how to tell a blown fuse from a good fuse. GOOD FUSE GM PARTNO.. RATING 3 AMP 12004003 I2004005 7.5 AMP 12004006 12004007 12004008 12004009 12004010 25 AMP 1200401 1 Headlights The headlight wiring is protected by a circuit breaker in the light switch.
- Page 294 OVERALL: Length ......Width Height Wheelbase Front Tread Rear Tread INTERIOR FRONT Leg Room Head Room Shoulder Room HipRoom...
- Page 295 Roadmaster Sedan Dimensions OVERALL: Length Width ....Height Wheelbase Front Tread Rear Trexd INTERIOR FRONT ......LegRoom Head Room Shoulder Room...
- Page 296 Application EXTERIOR Cornering Headlight ....Park/Turn Side Marker Underhood REAR Backup High Mounted Stop (Sedan) ... . . High Mounted Stop (Wagon) License .
-
Page 297: Capacities And Specifications
Air Conditioning Refrigerant Not all air conditioning refrigerants are the same. If the air conditioning system in your vehicle needs refrigerant, be- sure the proper refiigerant is used. I f you’re not sure ask your Buick dealer; Cap.acities and, Specifications CRANKCASE CAPACITY (With Filter) quarts/4.7 liters... - Page 298 1957 Buick Super...
-
Page 299: Part 7 Main.tenance Schedule
Part 7 Main.tenance Schedule dependability and emission control performance. Part 7 includes: ..............Introduction A Word About Maintenance Your Vehicle and the Environment... -
Page 300: A Word About Maintenance
If you have any questions on how to keep your vehicle in good condition, see your Buick dealer, the place many GM owners thoose to have their maintenance work done. Your dealer can be relied upon to use proper parts and practices. - Page 302 &.checked whenever explains what ’you can easily do to heip keep your vehicle good condition. ,“Section C: Periodic Maintenance Inspections” explains important inspections that your Buick dealer’s service department or ;another qualified service center should perform. what stop-for fuel. It also...
-
Page 303: Section A: Scheduled Maintenance Services
This section tells you the maintenance services you should have done and when you should schedule them. Your Buick dealer knows your vehicle best and wants you to be happy with it. If you go to your dealer for your service needs, you’ll know that GM-trained and... - Page 304 Scheduled Maintenance Services Schedule I Follow Schedule'I if your is MAINLY driven under one or more of the following conditions: When most trips are less than 4 miles (6 kilometers). -When most trips are' less than 10 miles (16 kilometers) and outside temperatures remain below freezing. .e When mosttrips include extended idling and/oi- frequent low-speed operation as in stop-and-go traffic.
- Page 305 TO BE SERVICED WHEN (See Explanation of Miles (kilometers) or Scheduled Maintenance Months, Whiche'ver Services Following: Schedules and 11y Item No. 7. Front Wheel bearing See Explanation of Scheduled Repack Maintenance Service ,Following Schedules I and I1 9. Spark Plug Replacement* Inspection*? 11.
- Page 306 Sched.uled Maintenante Services Schedule I1 Follow Schedule. I1 ONLY if none of the driving conditions specified in Schedule TO BE SERVICED (See Explanation of Scheduled Maintenance Services Following Schedules I and Item No. I. Engine Oil Change" O i l Filter Change"...
- Page 307 TO BE ,SERVICED (See explanation of Scheduled Maintenance Services Following Schedules I'and 11) Item No. 8. Transmission Service 9. Spark Plug Replacement" 10. Spark Plug. Wire.Inspection*T 11. EGR System Inspection*? 12. Air Cleaner Filter Replacement" 13. ~ i r cleaner Inspection*? 14.
- Page 309 To help ensure-proper operation, we recommena a pressure test of both’the cooling system and the pressure cap. Front Wheel Bearing Repack vehicle is used in such service taxi or in door-to-door delivery, clean and front wheel bearings at each brake relining or miles (25 000 km), whichever comes first.
- Page 310 An Emission Control Service. ‘ X : TheU.S. Ehyironmental Protection Agency has determined that the failure to perfo- this maintenance itein will not nullify the emission warranty or limit recall liability prior thecompletion of vel&cle. useful Iife. Geneial Motors, however,.urges that all recommended maintenance services be performed.at the indicated intervals and the maintenance be recorded in “Section E:Maintenance Record”. ’...
- Page 311 At Each Fuel Fill. (It is important for you ‘or a service station. attendant to perform these underhood .ch~ecks ,,at each fuel fill.) CHECK OR WHAT TO DO SERVICE Engine Oil Check the engine oil level and add oil. if necessary. See Level the.
- Page 314 INSPECTION WHAT SHOULD BE DONE OR SERVICE Steering and Inipect the front and re? suspension Suspension and steering. system for, damaged, Inspection loose missing parts,.signs of wear, or lack of lubrication. Inspect the power steering lines and. hoses for proper hookup, binding, leaks, cracks, chafing, etc.
- Page 315 INSPECTION WHAT SHOULD BE DONE SERVICE Rear. Axle Check the gear lubricant.leve1 Service rear axle and add “Rear Axle” in the loss in this system may indicate problem. Check repair it if needed. used- to pull a trailer, have the rear ,axle gear .lubricant changed every 7,500 mile$ INSPECTION...
-
Page 316: Section D: Recommended Fluids And Lubricants
Section D: Recommended Fluids and Lubricants NOTE: Fluids and lubricants identified below by name, part number or specification may be obtained dealer.: FLUID/LUBRICANT USAGE GM Goodwrench Motor Oil or Engine .Oil equivalent for Energy Conserving proper viscosity. designation may be shown alone or in combination with others, such as ~‘SGfCC,”... - Page 317 FLUID/LUBRICANT USAGE Chassis meeting lubricant Chassis Lubrication requirements of NLGI Grade Category LB. or GC-LB (GM Part 1052497 Front Wheel Wheel bearing lubricant meeting Bearings requirements of NLGI Grade Category GC or GC-LB (GM Part No. 1051344 or equivalent). Rear Axle Axle Lubricant (Standard 1052271)
-
Page 318: Maintenance Record
Maintenance Performed column, insert the, numbers Maintenance Record ODOMETER READING.. SERVICED BY MAINTENANCE PERFORMED DATE... - Page 320 Maint.enance Record ODOMETER SERVICED. BY READING- DATE MAINTENANCE PERFORMED...
-
Page 321: Part 8 Customer Assistance Information
Your satisfaction and goodwill are important to your dealer and Buick. Normally, any problems with the sales dealership management. Complaints can often transaction or the operation of your vehicle will be quickly resolved at that level. If the matter has resolved by your dealer’s Sales or Service Departments. -
Page 322: Customer Assistance For The Hearing Or Speech Impaired
Buick Motor Division,, Customer Assistance Center 902 E. Hamiltou Avenue Flint, MI 48550. A listing 'of all Buick Zone Offices and offices,outside the U.S. which can assist you can also be found in the warranty booklet. When contacting Buick, please remember that your problem will likely be resolved in the dealership, using the dealership's facilities, equipment and personnel. - Page 323 NHTS.A, U S . Department of. Transportation Washington, .D.C. 20590 You can a1s.o obtain other information about motor vehicle ,safety from the Hotline.
-
Page 324: Service Publications
You can subscribe to all Buick bulletins. This way you’ll get them as they come out. You can wait a while and get an index to the bulletins. You can also get individual bulletins. - Page 325 What You’ll Find in the Index: + A list of all PSP’s published b.y Buick in a model year (1989 or later). PSP’s covering all models of Buick cars are listed in the same index.
- Page 328 3 ;26...
- Page 329 Part 9 Index A c c (Ignition Key Position) Adding ........Brake Fluid Coolant Electrical Equipment...
- Page 333 ........Gasoline .
- Page 337 Starting Your Car if the Battery is"Dead" Steam From Hot (Overheated) Engine ........Steering Steering in Emergencies Steering Tips...
Need help?
Do you have a question about the 1993 Roadmaster and is the answer not in the manual?
Questions and answers