
Related Manuals for Pro-Cut KDS-10


Summary of Contents for Pro-Cut KDS-10
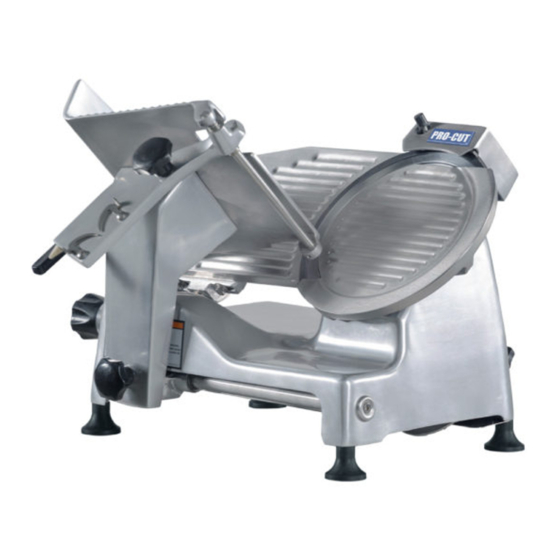
- Page 1 OWNER´S MANUAL DELI SLICER OPERATION INSTRUCTIONS MODELS KDS-10 & KDS-12 READ THIS MANUAL BEFORE USING THE EQUIPMENT FOR THE FIRST TIME. 507134-A...
- Page 2 KDS-10 & KDS-12 DELI SLICER INSTRUCTIONS FOR OPERATION, SERVICE AND MAINTENANCE OF THIS EQUIPMENT CONTENTS: PAGE INTRODUCTION UNPACKING III. INSTALLATION OPERATION KEY ELEMENTS IN GRINDING QUALITY PRODUCT CLEANING VII. MAINTENANCE VIII. EQUIPMENT SPECIFICATIONS I.- INTRODUCTION: Congratulations you have acquired a Deli slicer, which is made of high quality long lasting materials that should give you years of trouble free operation and durable service.
- Page 3 KDS-10 & KDS-12 DELI SLICER II.- UNPACKING While unpacking the machine take special care in removing these components to be assembled later. Make sure that all are accounted for *. The grinding unit includes: Also: Sharpener Bpx Assembly: 1 Knife (5)
- Page 4 KDS-10 & KDS-12 DELI SLICER III.- INSTALLATION: Before connecting to the power source follow this easy assembly and preparation steps (Fig. 2). 1.- Assemble the carriage assembly on the slicer base (1): A.- Remove carriage knob (19) and washer. B.- Place carriage assembly onto the support of the carriage bearing(20) .
- Page 5 KDS-10 & KDS-12 DELI SLICER 5.- Turn on the machine using the On/Off switch (14), the pilot safety light switch gives warning that the slicer is running. 6.- Locate in the correct working position (See Fig. 6), and now you can start to slice the product; this machine has been designed with a 45º...
- Page 6 KDS-10 & KDS-12 DELI SLICER B. SLICE DEFLECTOR (See Fig. 8). 1.- Turn off and unplug the slicer. 2.- Remove the slice deflector by loosening the screw knobs (Counter clockwise). 3.- Sink the part with warm water and a mild detergent solution. Clean and dry completely.
- Page 7 KDS-10 & KDS-12 DELI SLICER After sanitizing, be sure all components are totally dried and clean, reattach again following the previous steps in reverse order. Note: Before using the slicer, be sure the knife sharpener is in place and secure.
- Page 8 KDS-10 & KDS-12 DELI SLICER VII.- MAINTENANCE: 1.- Slide rods: you must lubricate the slicer with light oil at least every 100 hours or 3 days of service. The points to lubricate are upper and bottom sides of round (20) and square sliding rods.
- Page 9 KDS-10 & KDS-12 DELI SLICER REVIEW OF PARTS FREQUENCY COMMENTS (SUPPLIES) VERIFICATION Required immediately change switch membrane break if failure to Membrane (on-off) Daily prevent post on or off the introduction of moisture or other waste. Keep free of waste (powder, food, etc.) Bars also keep moving thin oil...
- Page 10 KDS-10 & KDS-12 DELI SLICER B) ELECTRICAL SPECIFICATIONS (Depends on your model. See ID plate) MEAT SLICER 250 (MM) MODEL 300 (MM) MODEL Capacity 1/3 HP 1/3 HP Frecuency 60 Hz 50 or 60 Hz 60 Hz 50 or 60 Hz...
- Page 11 KDS-10 & KDS-12 DELI SLICER MEAT SLICER DIAGRAM FOR COMPONENTS (SEE CENTRAL PAGES) ITEM DESCRIPTION SLICER BASE FRAME CARRIAGE SUPPORT CARRIAGE KNIFE GUARD PLATE SLICER KNIFE THICKNESS GAUGE PLATE SLICER ADJUSTING KNOB SHARPENER BOX GRIP GRIP KNOB GRINDING STONE TRUING STONE...
- Page 12 THANKS FOR READING THIS MANUAL. IF YOU HAVE ANY DOUBT REGARDING THE OPERATION OF THIS MEAT SAW, PLEASE CONTACT TO YOUR PRO CUT AUTHORIZED DEALER.
Need help?
Do you have a question about the KDS-10 and is the answer not in the manual?
Questions and answers