Advertisement
Available languages
Available languages
Quick Links
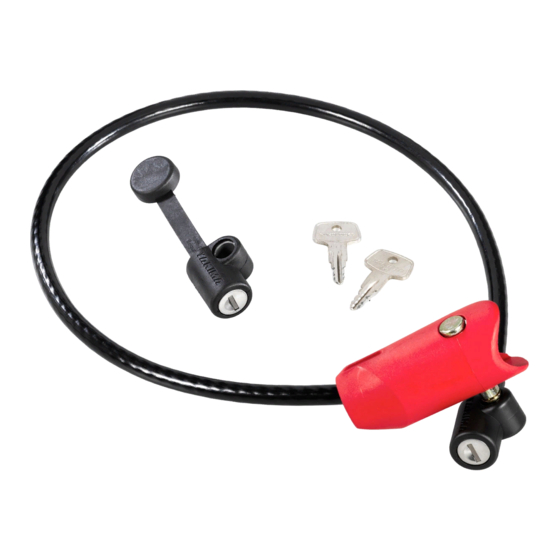
Install locking end cap.
Align the holes.
• Wrap cable around
• Attach lock to pin.
LOCK THE CARRIER TO THE VEHCILE.
• Remove
hitch pin.
• Attach
hitch lock.
1033264D-1/4
DeadLock
Holding the cap, insert the cable
end completely into the arm.
last bike's frame.
Remove the RIGHT SIDE
end-cap with a Phillips
LOCK THE
LOCK.
screwdriver.
1
2
Stow lock when
Insert the key and
LOCK THE LOCK.
Close the
lock cap.
Part #1033264 Rev.D
• Hold the cap
in place and
insert the pin.
• Attach the
"E" clip.
not in use.
Advertisement

Related Manuals for Yakima DeadLock


Summary of Contents for Yakima DeadLock
- Page 1 DeadLock Remove the RIGHT SIDE end-cap with a Phillips screwdriver. Holding the cap, insert the cable Install locking end cap. • Hold the cap end completely into the arm. in place and Align the holes. insert the pin. • Attach the "E"...
- Page 2 DeadLock Enlever le capuchon d’origine (à la droite) avec un tournevis Phillips. Enfiler le nouveau • Tenir le En tenant le capuchon, enfiler le capuchon. capuchon et câble dans le bras. enfiler la broche. Aligner les trous. • Mettre en place la bague élastique.
- Page 3 DeadLock Quite el capuchón de extremo (a la derecha) con un destornillador Phillips. Instale el capuchón de Sosteniendo el capuchón, inserte • Sostenga el extremo de cierre. completamente el extremo del capuchón en su cable en el brazo. lugar e inserte el Haga coincidir los perno.
- Page 4 7:00 am to 5:00 pm PST This product is covered by YAKIMA’s “Love It Till You Leave It” Limited Lifetime Warranty To obtain a copy of this warranty, go online to www.yakima.com or email us at yakwarranty@yakima.com or call (888) 925-4621...
Need help?
Do you have a question about the DeadLock and is the answer not in the manual?
Questions and answers