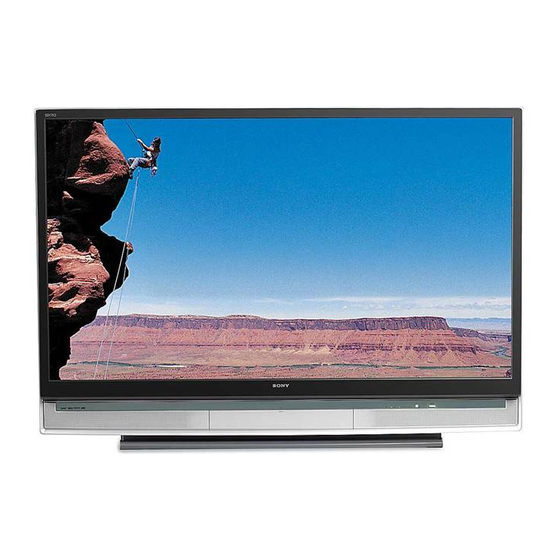
Sony KDS-50A2000 Training Manual
Hide thumbs
Also See for KDS-50A2000:
- Service manual (214 pages) ,
- Quick setup manual (2 pages) ,
- Specifications (2 pages)

Related Manuals for Sony KDS-50A2000


Summary of Contents for Sony KDS-50A2000
- Page 1 Training Manual KDS-60A2000 2006 SXRD-A Chassis Models: KDS-50A2000 KDS-55A2000 KDS-60A2000 Diagnostics, Troubleshooting, and Disassembly Course: TVP-23R2...
-
Page 2: Table Of Contents
Table of Contents Introduction ................1 Audio Outputs ..............19 Technology ..............1 Variable/Fixed Audio Tutput ..........19 Optical Audio Output (Digital) ..........19 Silicon Crystal Reflective Display (SXRD) ......1 Features ................3 Chapter 2 - PCB & Component Locations and Descrip- Advanced Iris ............... - Page 3 Table of Contents Audio Output Error (7X) ..........56 Chapter 4 - Power Supply System ........29 6.5V OVP Error (8X) ............ 57 Overall System Description ........... 31 Data Communications Error (9X) ......... 57 Troubleshooting Flowchart ..........33 Power-On ................33 Chapter 6 - Video Processing System ......
- Page 4 Table of Contents Lamp Ballast & Fan Assembly Removal ......84 Optical Block Removal ..........87 Screen Frame Removal ..........89 Appendix ................91 Service Mode Options ........... 91 Navigating in Service Mode ........... 92 Service Mode On-Screen-Displays & Test Patterns ..93 TV Service Mode ............
-
Page 5: Introduction
Silicon Crystal Reflective Display (SXRD) the SXRD panels and is reflected back out of the panels SXRD is Sony’s adaptation of Liquid Crystal on Silicon (LCoS) micro- display technology. The SXRD technology is similar to the LCD POLARIZERS LCD PANEL... - Page 6 Introduction Backlight Source NOTE: Full potential applied means no LCD twist, and complete blockage of light by the front filter EFFECT OF A POTENTIAL ON LCD PANEL VOLTAGE EFFECT ON LCD LIQUID CRYSTALS • SXRD Technology o Is a reflective device – light is directed into the panel from the front, the light passes through the liquid crystal SXRD OPTICS BLOCK material, and is then reflected back out through the same...
-
Page 7: Features
Introduction Advanced Iris Backlight Source Full Open Full Closed 500 cd/m2 White NOTE: Full potential applied means full 250 cd/m2 SXRD LCD twist, White and complete passage of light by the front filter EFFECT OF A POTENTIAL ON SXRD PANEL VOLTAGE EFFECT ON SXRD LIQUID CRYSTALS Black 0.05 cd/m2... -
Page 8: Pc Input
Introduction PC Input Specifications for 2006 SXRD-A Models The 2006 SXRD-A models (KDS-50A2000, KDS-55A2000 and KDS- Models 60A2000) have a Personal Computer Input (PC-IN), which connects KDS-50A2000 directly to the PC 15 pin DIM connector (HD15 connector). Once connected the TV functions as a video monitor and audio output (separate KDS-55A2000 Stereo Mini Plug) for the PC. -
Page 9: Lamp
Introduction Lamp Ultra High Pressure Lamp, 120W, XL-5200 Recommended Lamp Replacement: after Approx. 8000 hours of use Speaker Output 12W + 12W Power Requirements 120V AC, 60Hz Power Comsumption In Use - 210W In Standby - Less than 0.5W TVP-23... -
Page 10: Technical Triage & Troubleshooting Information
Technical Triage & Troubleshooting Information 2006 SXRD-A Initial Contact Analysis Flowchart A Start NOTE: Reference Chapter 1, Pages 34 - 36 for Initial Analysis detailed flowchart step descriptions GO TO Does GO TO Power-ON Green “Power” Video Missing Individual Video Input Troubleshooting or Distorted on Troubleshooting... -
Page 11: Triage Summary Chart
Triage & Troubleshooting Information Triage Summary Chart Sony KDS50/55/60A2000 - SXRD Technical Triage Summary Sheet Before you make the service call… 1. Confirm the symptom from the customer. 2. Select that symptom from the chart. 3. Select the model from the chart. - Page 12 Triage & Troubleshooting Information 2006 SXRD-A Power-ON Troubleshooting Flowchart B NOTE: Reference Chapter 4, Pages 44 - 45 for detailed flowchart step descriptions Check STBY 5V at G-Board Primary Failure Component CN6005/pin 1 Ref. Figure 4-5 Unit will Not NOTE: Confirm all Power-ON connections between circuit boards before...
- Page 13 Shutdown X-2109-529-1 Replace LAMP for 1.5 mins. then 2X Replace Lamp Part Number Optical Block KDS-50A2000 – XL-5200 A-1203-196-A (50") KDS-55A2000 – XL-5200 Check A-1203-195-A (55") Clear unit ventilation areas KDS-60A2000 – XL-5200 T- Board Lamp-Door Switch A-1203-194-A (60")
- Page 14 Triage & Troubleshooting Information NOTES: 2006 SXRD-A Protection Mode 1) Except for the Lamp LED all flash patterns will occur on the Front Panel Troubleshooting Flowchart C 2 Red “Power” LED 2) All voltage are measured prior to unit shutdown 3) Reference Chapter 5, Pages 59 - 61 for NOTE: Confirm all detailed flowchart step descriptions...
- Page 15 C6936 G-Board Check Is voltage *Before Shutdown* Supply Voltage Lamp 0.6V Lamp Part Number Driver Block Present? KDS-50A2000 – XL-5200 X1 Connector KDS-55A2000 – XL-5200 *Before Shutdown* Replace KDS-60A2000 – XL-5200 G-Board Is voltage Replace A-1186-654-A Reference Figure 3-4 G-Board...
- Page 16 Triage & Troubleshooting Information 2006 SXRD-A Protection Mode Troubleshooting Flowchart C4 NOTES: 1) Except for the Lamp LED all flash patterns will occur on the Front Panel Red “Power” LED NOTE: Confirm all 2) All voltage are measured prior to unit shutdown connections between Unit Shuts OFF 3) Reference Chapter 5, Pages 64 –...
- Page 17 Triage & Troubleshooting Information 2006 SXRD-A Protection Mode Troubleshooting Flowchart C5 NOTES: 1) Except for the Lamp LED all flash patterns will occur on the Front Panel Replace Red “Power” LED S1 & S2 Boards 2) All voltage are measured prior to unit shutdown S1 A-1123-098-A Unit Shuts OFF 3) Reference Chapter 5, Pages 65 - 66 for detailed...
- Page 18 Triage & Troubleshooting Information 2006 SXRD-A Missing or Distorted Video NOTE: Confirm all Troubleshooting Flowchart D connections between circuit boards before replacing Missing or NOTE: Reference Chapter 6, Pages 75 – 77 for detailed Distorted Video flowchart step descriptions All Inputs: Video 1,2,3 (Composite &...
- Page 19 Triage & Troubleshooting Information 2006 SXRD-A Individual Input Troubleshooting Flowchart E Primary Failure Component NOTE: Reference Chapter 6, Page 80 for detailed All Inputs: flowchart step descriptions Video 1,2,3 (Composite & S-Video ) Video 4, 5 (Component Video ) NOTE: Confirm all Video 6, 7 (HDMI) connections between Individual Inputs...
- Page 20 Triage & Troubleshooting Information 2006 SXRD-A Optical Block Troubleshooting Flowchart F NOTE: Reference Chapter 6, Pages 81 for detailed flowchart step descriptions NOTE: Confirm all connections between Optical Block circuit boards before Troubleshooting replacing Turn ON Use “JUMP” button on “Panel”...
- Page 21 Triage & Troubleshooting Information 2006 SXRD-A Missing or Distorted Audio Troubleshooting Flowchart G NOTE: Reference Chapter 7, Missing or Distorted Audio Pages 85 - 86 for detailed flowchart Check (Speaker Outputs ) step descriptions TV OK External Devices Repair External All Inputs : Connections Devices or...
-
Page 22: Chapter 1 - Input & Output Locations And Descriptions
Chapter 1 - Input & Output Locations and Descriptions Rear View Front View Flip-Down Door Video 2 Composite & S-Video Component Component Digital Composite Audio NOTE: A DVI to HDMI adapter must be used to input a DVI video signal. The separate analog audio input must be used to input the DVI... -
Page 23: Video Inputs
PC Video Input Video 8 The 2006 SXRD-A models (KDS-50A2000, KDS-55A2000 and KDS- 60A2000) have a Personal Computer Input (PC-IN), which connects directly to the PC 15 pin DIM connector (HD15 connector). -
Page 24: Chapter 2 - Pcb & Component Locations And Descriptions
Chapter 2 - PCB & Component Locations and Descriptions PCB Locations View: From the rear of the TV with the main & sub-plastic rear covers removed B1-Board A1-Board G-Board View: With PCB chassis pulled out Boards Unshield Fan 1 Lamp Ballast Fan 2 Boards Unshield View: From... - Page 25 2. PCB & Component Locations and Descriptions Fan 3 PCB Chassis C-Board & Optical Block behind plastic cover G-Board PCB & FAN LOCATIONS FIGURE 2-2 TVP-23...
- Page 26 2. PCB & Component Locations and Descriptions Front View Flip-Down Door H3-Board H1-Board H2-Board Timer Lamp Power IR Sensor Power Button LEDs PCB LOCATIONS FIGURE 2-3 NOTE: H1, H2, and H3-Boards are all located and attached to the TV’s front Bezel TVP-23...
- Page 27 2. PCB & Component Locations and Descriptions QT-Board QM-Board Antenna Tuner RF ATSC Video (Digital ) ATI Micro Switch ATSC / NTSC NTSC Tuner B1-Board A1-Board Control Data Bus H1-Board WE Micro (part of Control Front Panel Switches IFP) Optical Block IFP Video...
-
Page 28: Pcb And Component Descriptions
2. PCB & Component Locations and Descriptions PCB and Component Descriptions A1-Board (Audio/Video Switching, System Control, & Audio Processing) Reference Figure 2-4 The ASU-Board performs all the analog video and audio switching G-Board Power Supply) functions. The following video and audio inputs are switched on this board. -
Page 29: B1-Board (Video Processing)
2. PCB & Component Locations and Descriptions B1-Board (Video Processing) C-Board The circuits located on the B1-Board perform all video processing The C-Board circuits perform the following primary functions. functions. It is the WEGA engine. The following circuits are included on •... -
Page 30: Chapter 3 - Initial Contact Analysis
Chapter 3 - Initial Contact Analysis 2006 SXRD-A Initial Contact Analysis Flowchart A Start NOTE: Reference Chapter 1, Pages 34 - 36 for Initial Analysis detailed flowchart step descriptions GO TO Does GO TO Power-ON Green “Power” Video Missing Individual Video Input Troubleshooting or Distorted on Troubleshooting... -
Page 31: Detail Description Of The Steps In The Initial Contact Flowchart
3. Initial Contact Analysis Detail description of the steps in the Initial LED, as was the case on previous models. The Red Power/Standby LED was a good indicator of a properly functioning Standby 5V power supply. Contact Flowchart The Standby 5V is active as long as the unit is plugged into the AC outlet, and the Red Power/Standby LED glow. - Page 32 3. Initial Contact Analysis Is RED LED Video Missing Flashing? or Distorted on Individual Inputs? Is the Video Missing ir Distorted on Individual Inputs? If video is Is the Red Power LED Flashing? In some cases the Green Power LED present, however, it is distorted;...
-
Page 33: Chapter 4 - Power Supply System
Chapter 4 - Power Supply System G-Board CN6501 CN6005 AC Ground Lamp Driver 380V PH6300 C6932 CN6902 Feedback Audio A1-Brd Stdby 5V Standby 5V Supply A1-Brd IC6300 C6312 D6000 10.5V A1-Brd QM-Brd Feedback C6936 PH6200 B1-Brd Switch R6500 Circuit REC-ON (From A1-Brd) PH6400 IC6202 A1-Brd... - Page 34 4. Power Supply System A1 Board QM-Board CN8803 10.5V CN7306 ATSC Q8801 10.5V Processing 10.5V G-Board 10.5V Reg CN8801 D5V TP B1-Board To Antenna Switch To DE Micro CN6902 CN8805 CN4000 CN8304 Video IC8801 Processing 5V Reg Main Supply IC6100 6.5V 6.5V To DE Micro...
-
Page 35: Overall System Description
4. Power Supply System Overall System Description power supply circuits look like a purely resistive load to the external AC power network (current and voltage are in-phase). In reality the internal switch-mode power supply circuit is a highly inductive load (current and Reference Figures 4-1 &... - Page 36 4. Power Supply System Power-ON Sequence The AC power cord is plugged into the AC outlet and the AC voltage AC Power Applied passes through the Main Fuse and is applied to the G -Board . Standby 5V – ON “AC-RELAY”...
-
Page 37: Troubleshooting Flowchart
4. Power Supply System Troubleshooting Flowchart 2006 SXRD-A Power-ON Troubleshooting Power-On Flowchart B NOTE: Reference Chapter 4, Pages 44 - 45 for detailed flowchart step descriptions Check STBY 5V at G-Board Primary Failure Component CN6005/pin 1 Ref. Figure 4-5 Unit will Not NOTE: Confirm all Power-ON connections between... - Page 38 4. Power Supply System CN6005 Pins 1 & 2 PH6402 Pin 3 Thermo Fuse PFC Detect 0V STBY 5V at Pins 1 & 3 ref. Ground CN6901 0 ohms across Pins 1 & 3 (Power Off) PH6402 16.5V 6.5V PH6401 Pin 1 Pins 4,5,6 PH6401 Pin 4...
- Page 39 4. Power Supply System CN8001 Pin 3 STBY 3.3V CN8801 Pin 7 CN7306 Pin 1,2 10.5V QM-Board Remove QM & QT Shield QT-Board QM & QT Shield CN3150 Pin 1 D3.3V A1-BOARD TEST POINTS FIGURE 4-6 TVP-23...
-
Page 40: Troubleshooting Flowchart Step Descriptions
Unfortunately, there is no red standby LED on the 2006 SXRD models microprocessor is functioning properly. (KDS-50A2000, KDS-55A2000, and KDS-R60XBR1). Therefore, the only way to visually check if the Standby 5V circuit is functioning is to If the Red Power LED begins flashing then the DE or TV microprocessor... - Page 41 4. Power Supply System The next step is to confirm application of the AC voltage to the G-Board through the Main Fuse. Check for 110V AC at CN6001 on the G-Board to confirm AC supply voltage. If the answer to the question diamond is No (AC is not present at CN6001) then check all connections between AC power cord and the G-board for loose connections or damage.
-
Page 42: Chapter 5 - Protection Circuits
Chapter 5 - Protection Circuits Overall Block Diagram A1 Board S1-Board CN8003 CN8000 IC3150 Communications T-Board Lamp Door (3X) Outside Temp. Sensor Error (9X) LAMP_COVER 4-Wire White Lamp Door Switch S2-Board Connector 2-Wire CN8000 Black Connector IC3200 Temp (2X) Lamp Temp. Sensor I2C Bus 3.2V IC8505... - Page 43 5. Protection Circuits G-Board Vsens CN6902 R6002 R6009 To A1-Board Main RY6003 Power RY6004 D6206 Inrush- Supply AC-Relay Relay IC6100 6.5V To A1-Board 11V OVP Vsens from IC6100 16V From STBY PH6000 STBY 5V Inrush Relay Supply PH6401 Prot. Vsens OVP STBY F6001 D6402...
- Page 44 5. Protection Circuits S2-Board Lamp Housing (Fan #2 Assembly Removed) 4-Pin Wire Harness to S2-Brd is needed for troubleshooting to confirm a defective S 2-Brd through substitution. CN3200 (S2-Brd). The connecting wire harness to the A 1-Brd is not needed, only the wire connected to the S 2-Brd (indicated by arrows).
- Page 45 5. Protection Circuits Lamp Driver Board 380V Gray Lamp Power 2.6V Gray Lamp,ON 1V Gray D3.3V White Protect 1V Pin 1 LAMP DRIVER BOARD TEST POINTS FIGURE 5-4 TVP-23...
-
Page 46: Overall System Description
90 degrees Celsius, and is located on the C-board troubleshooting procedures to identify the exact area of the failure. atop the Optical Block. The C-board and Optical Block come from Sony Parts Dept. as an assembly. -
Page 47: Lamp Cover Error (3X Power Red Led Flash Pattern)
5. Protection Circuits 380V supply fails (Main Power Supply defective) the TV will shutdown threshold the TV will shutdown and a 2X flash pattern on the Red Power and a 5X flash pattern on the Red Power LED will occur. LED will occur. -
Page 48: Troubleshooting Flowcharts
Shutdown X-2109-529-1 Replace LAMP for 1.5 mins. then 2X Replace Lamp Part Number Optical Block KDS-50A2000 – XL-5200 A-1203-196-A (50") KDS-55A2000 – XL-5200 Check A-1203-195-A (55") Clear unit ventilation areas KDS-60A2000 – XL-5200 T- Board Lamp-Door Switch A-1203-194-A (60") - Page 49 5. Protection Circuits NOTES: 2006 SXRD-A Protection Mode 1) Except for the Lamp LED all flash patterns will occur on the Front Panel Troubleshooting Flowchart C 2 Red “Power” LED 2) All voltage are measured prior to unit shutdown 3) Reference Chapter 5, Pages 59 - 61 for NOTE: Confirm all detailed flowchart step descriptions connections between...
- Page 50 C6936 G-Board Check Is voltage *Before Shutdown* Supply Voltage Lamp 0.6V Lamp Part Number Driver Block Present? KDS-50A2000 – XL-5200 X1 Connector KDS-55A2000 – XL-5200 *Before Shutdown* Replace KDS-60A2000 – XL-5200 G-Board Is voltage Replace A-1186-654-A Reference Figure 3-4 G-Board...
- Page 51 5. Protection Circuits 2006 SXRD-A Protection Mode Troubleshooting Flowchart C4 NOTES: 1) Except for the Lamp LED all flash patterns will occur on the Front Panel Red “Power” LED NOTE: Confirm all 2) All voltage are measured prior to unit shutdown connections between Unit Shuts OFF 3) Reference Chapter 5, Pages 64 –...
- Page 52 5. Protection Circuits 2006 SXRD-A Protection Mode Troubleshooting Flowchart C5 NOTES: 1) Except for the Lamp LED all flash patterns will occur on the Front Panel Replace Red “Power” LED S1 & S2 Boards 2) All voltage are measured prior to unit shutdown S1 A-1123-098-A Unit Shuts OFF 3) Reference Chapter 5, Pages 65 - 66 for detailed...
-
Page 53: Troubleshooting Flowchart Step Descriptions
5. Protection Circuits Troubleshooting Flowchart Step Descriptions Lamp Error (Lamp LED) Reference Figure 5-5 LAMP LED Flashing In most cases a flashing Lamp LED indicates a defective Lamp, and the Lamp must be replaced. However, an open circuit in the high-voltage cabling (Red wires between the Lamp Driver board and the Lamp) to the lamp will also case this failure indication. -
Page 54: Lamp Door Error (3X)
5. Protection Circuits to ensure adequate ventilation. Does unit Shut-Down Check the vented areas on the lower rear back cover and the Immediately after • Power ON two rear exhaust fan’s are clear of all dust and debris. If all ventilation areas and fans are clear and the TV still shuts down (2X) then the next step is to determine if one of the LM75 temperature detection IC’s on the S1, S2, or C boards have failed. -
Page 55: Fan Error (4X)
5. Protection Circuits Fan Error (4X) Check that Lamp Door is securely seated & Fan Part Numbers 4X Flash undamaged Chassis Fan #1…….1-787-333-11 Pattern Lamp Fan #2………..8-835-860-31 (Fan Rotation) LCD Panel Fan #3….8-835-873-11 Replace Lamp Door Lamp Door Physically (Reference Figure 5-6) The main objective when this error occurs is X-2109-529-1 to determine which of the three fans have stopped rotating. - Page 56 5. Protection Circuits In some cases the fan will be rotating, however, the feedback circuit on Visually check rear Fans #(1 & 2 ) the fan may be defective. Therefore, it is best to first confirm the feedback for rotation *Before Shutdown* voltage level before replacing any components.
-
Page 57: Lamp Drive Error ( 5X)
5. Protection Circuits troubleshooting this error is to isolate to one of three areas. Check Fan #3 Drive (DR) and Feedback (FB) Replace Drive (DV) voltages Voltage Levels A1-Board Non-rotating 1) The Main Power Supply (G-Board) 8V & 6V Reference Test Point Diagram Figure 3-3 *Before Shutdown* 2) The Lamp Driver Board... -
Page 58: Low B+ Error (6X)
5. Protection Circuits TV power ON. This will possible provide clues for quick defect isolation. Check Lamp Lamp-ON Voltage Driver Block JS1/pin 4 *Before Shutdown* 0, 1, or 2 Relay clicks Heard before Shutdown Replace Does A1-Board voltage go low A-1205-146-A (50") 2.2V to A-1205-145-A (55") - Page 59 5. Protection Circuits should switch to 0.6V immediately after the power on button is pressed. This turns on Q6402 and a ground is placed on one side of the AC-Relay, 0, 1, or 2 Relay clicks turning it ON. If 0.6V is present then the TV microprocessor is sending Heard before the voltage and the defect is on the G-board.
-
Page 60: Audio Output Error (7X)
5. Protection Circuits Audio Output Error (7X) If no audio is heard before shutdown then the speakers and/or speaker connections may be defective or damage. The speakers sure measure 8 ohms. Check all connectors and wiring for damage. Replaced and repair 7X Flash where needed. -
Page 61: Ovp Error (8X)
5. Protection Circuits connections before replacing any boards. Data Communications Error (9X) 6.5V OVP Error (8X) Reference Figure 5-9 9X Flash Pattern Reference Figure 5-8 Microprocessor I 2C Communications error 8X Flash Pattern (OVP 6.5V) This error is somewhat deceiving because you mat here it called Panel Error. - Page 62 5. Protection Circuits Check D3.3V Voltage Supply Check 6.5V to S1 & S2 boards Voltage Supplies to CN3150/pin 1 (S1) C-Board G-Board Ref. Figure 3-3 (S2) CN6901/pins 4-6 “Before Shutdown” “Before Shutdown” Replace Is voltage voltage Replace S1 & S2 Boards 3.3V 6.5V G-Board...
-
Page 63: Chapter 6 - Video Processing System
Chapter 6 - Video Processing System Overall Block Diagram 1080 p A1-Board B1-Board Digital Video CN4500 (LVDS) CN8001 CN4501 H3-Board Composite 2 (CV & Y/C) HDMI Video 6 IC4506 Optical Block 1080p Video 2 HDMI HDMI Video 7 Receiver TB8300 C-Board Composite 1 (CV &... - Page 64 6. Video Processing System To C-Board From G-Board CN6901 NOTE: C-Board is mounted DC Power Connector on the Optical Block and is included as part of the Optical Block Assembly C-BOARD CONNECTOR DIAGRAM To C-Board FIGURE 6-2 From B 1-Board CN4001 Control Signals Connector To C-Board From B 1-Board CN5900...
-
Page 65: Overall System Description
6. Video Processing System Overall System Description • Video 8 Video 8 connects directly to a Personal Computer or PC monitor Video Input Descriptions output source using a HD15 or SVGA cable. The input accepts VGA, SVGA, XGA, WXGA, and SXGA resolution signals from the PC. A Reference Figure 6-1 separate Stereo Mini Plug transports the audio for the PC input. -
Page 66: Video Circuits Functional Description
6. Video Processing System Video Circuits Functional Description The properly scaled IFP output signal (1080p) on the B1-Board is sent to the C-board and the ROOK & SXRD Panel Drivers IC’s. The ROOK IC2300 performs gamma control, and white balance control signal Reference Figure 6-1 processing. -
Page 67: Troubleshooting Flowcharts
6. Video Processing System Troubleshooting Flowcharts Troubleshooting Flowchart Step Descriptions When a video problem occurs you will experience one of the two following symptoms. • Missing Video on All or Individual Inputs Distorted Video on All or Individual Inputs • The main objective when troubleshooting one of the previously listed symptoms is to determine if the defective exists in the Optical Block, B1-Board, or Power Supply System. -
Page 68: Missing Or Distorted Video
6. Video Processing System Missing or Distorted Video 2006 SXRD-A Missing or Distorted Video NOTE: Confirm all Troubleshooting Flowchart D connections between circuit boards before replacing Missing or NOTE: Reference Chapter 6, Pages 75 – 77 for detailed Distorted Video flowchart step descriptions All Inputs: Video 1,2,3 (Composite &... -
Page 69: Individual Video Input Troubleshooting
6. Video Processing System Individual Video Input Troubleshooting 2006 SXRD-A Individual Input Troubleshooting Flowchart E Primary Failure Component NOTE: Reference Chapter 6, Page 80 for detailed All Inputs: flowchart step descriptions Video 1,2,3 (Composite & S-Video ) Video 4, 5 (Component Video ) NOTE: Confirm all Video 6, 7 (HDMI) connections between... -
Page 70: Optical Block Troubleshooting
6. Video Processing System Optical Block Troubleshooting 2006 SXRD-A Optical Block Troubleshooting Flowchart F NOTE: Reference Chapter 6, Pages 81 for detailed flowchart step descriptions NOTE: Confirm all connections between Optical Block circuit boards before Troubleshooting replacing Turn ON Use “JUMP” button on “Panel”... - Page 71 6. Video Processing System If the Red Power LED is not flashing the next step is to define the video Missing or as completely missing or distorted. Distorted Video Distorted The first step when a “Missing or Distorted Video” defect occurs is to Video Missing or Distorted determine if video is missing or distorted on all video input sources, or if...
- Page 72 6. Video Processing System Distorted Video Missing or Distorted Distortion Replace Present in B1-Board “Panel” Service A-1205-147-A Mode Patterns Missing Replace User Menu be B1-Board Replace Displayed Distorted Video Missing A-1205-147-A Single Pixels Optical Block or Distorted or Complete Line A-1203-196-A (50") of Pixels A-1203-195-A (55")
- Page 73 6. Video Processing System missing pixels will have sharp edges and stationary characteristics. This type of distortion is caused by a faulty SXRD panel. Therefore, to resolve this issue the Optical Block assembly must be replaced. To quickly confirm that the Optical Block is indeed defective display the Panel Service Mode (ROOK IC) test patterns.
- Page 74 6. Video Processing System Panel Service Mode WE Service Mode ATI Test Patterns B1-Board C-Board ROOK LVDS Micro Display Cable QM-Board ROOK Test Patterns LVDS Cable Micro Switch A1-Board ATI Service Mode Micro Micro TV Service Mode On-Screen Display Sources Figure 6-6 TVP-23...
- Page 75 6. Video Processing System PC Display User Menu Interface B1-Board C-Board ROOK LVDS Micro Display Cable QM-Board LVDS Cable Micro Switch A1-Board Micro Micro ON-SCREEN DISPLAY SOURCES FIGURE 6-7 TVP-23...
-
Page 76: Individual Video Inputs
6. Video Processing System Individual Video Inputs The rationale behind this troubleshooting method is that each of these video input takes an altogether or somewhat different path through the video processing system. This fact enables you to determine the defect, Individual Inputs in some cases, down to the component level, and in almost all cases, down to at least the board level. -
Page 77: Optical Block
6. Video Processing System Optical Block normal display mode. If the raster is dark, then this indicates no drive to the SXRD panels and indicates a defective Optical Block assembly. Optical Block Troubleshooting In this case there is LCD Bright Raster is Does drive, however, no video. -
Page 78: Chapter 7 - Audio Processing System
Chapter 7 - Audio Processing System Overall Block Diagram A1-Board CN8001 H3-Board CN9800 Audio 2 IC9804 IC9304 IC9802 TB8300 Audio Output Audio 1 Amplifier Audio 3 IC9602 J6401 Audio 4 Audio (Analog ) TB8301 Audio 5 IC9308 Switch J8570 Audio Output PC Audio Var/Fix Digital Audio... -
Page 79: Overall System Description
ATSC and SPDIF). These two signals pass through the B1-Board before being applied to the A1-Board. The Main ATSC signal is for all digital broadcasts and the SPDIF (Sony/Phillips Digital Interface) is only present at the Optical Output when a High-Definition (HD) broadcast is being... -
Page 80: Troubleshooting Flowchart
7. Audio Processing System Troubleshooting Flowchart 2006 SXRD-A Missing or Distorted Audio Troubleshooting Flowchart G NOTE: Reference Chapter 7, Missing or Distorted Audio Pages 85 - 86 for detailed flowchart Check (Speaker Outputs ) step descriptions TV OK External Devices Repair External All Inputs : Connections... -
Page 81: Troubleshooting Flowchart Step Descriptions
7. Audio Processing System Troubleshooting Flowchart Step Descriptions device or cables are causing the problem. Obviously, you must replace the device or cabling if found to be defective (or Bad). However, if the external device and cables are OK, then the next step is to replace the Reference Figures 7-1 &... - Page 82 7. Audio Processing System resistance directly on the speaker terminals. Confirm all speaker Check connections to the A1-Board are secure and undamaged. Replace or Audio Output repair the system if necessary. Var/Fix If the speaker system checks OK, then the problem exists on A1-Board. If there is no audio present at the Audio Output Var/Fix jack then the Replace the A1-Board.
-
Page 83: Disassembly Procedures
Disassembly Procedures Lamp Removal TVP-23... -
Page 84: Rear & Sub Plastic Cover Removal
Disassembly Procedures Rear & Sub Plastic Cover Removal TVP-23... - Page 85 Disassembly Procedures TVP-23...
-
Page 86: Pcb Chassis Assembly Removal
Disassembly Procedures PCB Chassis Assembly Removal TVP-23... - Page 87 Disassembly Procedures TVP-23...
-
Page 88: Lamp Ballast & Fan Assembly Removal
Disassembly Procedures Lamp Ballast & Fan Assembly Removal NOTE Lamp Ballast The Main PCB Chassis assembly does not have to be remove on order to remove the Fan assembly . NOTE Fan Assembly Remove Lamp before Removing Lamp Ballast /Fan Assembly Release Wire Locks Partially Pull Out Fan Assembly... - Page 89 Disassembly Procedures Thermal fuse mounted S2-Board (Temperature Sensor) under the S2 heat sink and the Thermistor fuse assembly are located on top of the Lamp Important chamber, and secured with 1 self If the Thermistor fuse is replaced or the taping screw.
- Page 90 Disassembly Procedures TVP-23...
-
Page 91: Optical Block Removal
Disassembly Procedures Optical Block Removal Remove 5 Large Black Self-Tapping Screws into Plastic Optical Block behind gray plastic cover Lift Tabs 1 Screw behind Fan assembly TVP-23... - Page 92 Disassembly Procedures Two front screws for optical block removal Remove 2 Large Black Self-Tapping Screws into Plastic Remove Upper CENTER screw ONLY Do Not Touch two upper side screws Remove label cover to access screws. Use small screwdriver to release tabs TVP-23...
-
Page 93: Screen Frame Removal
Disassembly Procedures Screen Frame Removal TVP-23... - Page 94 Disassembly Procedures Screen Frame Installation Left Side Bracket Right Side Bracket All screws go to holes labeled with an “L” All screws go to holes labeled with an “R” Note: Bracket Screw Placement On re-assembly make sure to place screws for the left -side bracket in the holes labeled with an “L”, and the screws for the right-side bracket in the holes labeled with an “R”.
-
Page 95: Appendix
Appendix Service Mode Options Service Mode Options There are 4 Service mode options for the KDS- 50/55/60A2000 controlled by each Micro. Each Micro generates it’s own service OSD. TV Micro: Use to display Software and NVM version information. ... -
Page 96: Navigating In Service Mode
Appendix Navigating in Service Mode Service Mode Navigation Service Mode [Display > 5 > Vol+ > Power] Item Device 1 Scoll Data Item Items Change TV Micro Device N Scoll Devices QM Micro Jump Scoll Service Modes WE Micro DE Micro TVP-23... -
Page 97: Service Mode On-Screen-Displays & Test Patterns
Appendix Service Mode On-Screen-Displays & Test Patterns Panel Service Mode WE Service Mode ATI Test Patterns B1-Board C-Board ROOK LVDS Micro Display Cable QM-Board ROOK Test Patterns LVDS Cable Micro Switch A1-Board ATI Service Mode Micro Micro TV Service Mode TVP-23... -
Page 98: Tv Service Mode
Appendix TV Service Mode Verifying Micro Version To verify micro version: Enter service mode [Display] + [5] + [Vol. +] + [Power]. The first service item is VERSION . Toggle the data from 0 to 1 with the ... -
Page 99: Qm Service Mode
Appendix QM Service Mode QM Test Patterns The QM is capable of displaying 2 sets of test patterns. Service item “PATN” displays test patterns that take the same path as the main video from the QM-Brd. Service item “GTPN” displays test patterns that take ... - Page 100 Appendix QM Test Patterns The available “PATN” test patterns for the DMB are listed below: Cross-hatch 1080i Color Bar + Color Ramp Window Color Bar White White/Blue Stair Step Horizontal Burst Horizontal Burst (Color) Horizontal Ramp Overscan Cross-hatch (thick) Diamond Dots White 480i 480i...
-
Page 101: Panel Service Mode
Appendix Panel Service Mode C-Board Test Patterns The Rook IC on the C-board is capable of displaying test patterns. These are very important in determining if a video defect is related to the Optical Block or prior video processing stage (e.g. B1-Board) To display the C-board test patterns take ... - Page 102 Appendix C-Board Test Pattern Options To display flat color fields scroll to item 1 “IPT_RGB” under Device 5 TEST_PAT with the [1] button. By default the data value will be 7 which displays an all white screen. Press the [6] button to change data values and display the individual color fields.
-
Page 103: Picture Horizontal & Vertical Position Adjustment
Appendix Picture Horizontal & Vertical Position Adjustment Electrical H/V Center Adjustment H/V center adjustment may be necessary if the optical block is replaced. Unlike previous GW models H/V center is adjusted by the Rook ICs on the C board. Since the adjustment takes place at the ... - Page 104 Appendix H/V Center Adjustment Procedure Check H/V center with a Service monoscope pattern with Mode wide mode set to Full. (QM Cross hair test pattern #11 can be used if no other source is available) To adjust H/V center take ...
-
Page 105: Self Check (Error History Display)
Appendix Self Check (Error History Display) Self Check (Error History) Display To access the Error History Display take the following steps: Enter Service mode [Display] + [5] + [Vol. -] + [Power] The complete Error history for the TV is immediately display. -
Page 106: Lamp Timer & Reset And Operation Timer
Appendix Lamp Timer & Reset and Operation Timer Lamp Timer & Reset and Operation Timer To check the Lamp Timer take the following steps : Enter Service mode [Display] + [5] + [Vol. +] + [Power]. Press the [JUMP] button three times to arrive at PANEL service mode . -
Page 107: User Menu Graphics Horizontal & Vertical Position Adjustment
Appendix User Menu Graphics Horizontal & Vertical Position Adjustment User Menu H/V Adjustment To adjust the user graphics position: Enter service mode [Display] + [5] + [Vol. +] + [Power]. Press the [JUMP] button one time to arrive at DM service mode. - Page 108 Sony Electronics 2005 Sony Electornics, Inc. EMCSA - A Service Company 1 Sony Drive Park Ridge, New Jersey 07656 TVP230906 03/15/07 Reproduction in whole or part without written permission is prohibited. All rights reserved...
Need help?
Do you have a question about the KDS-50A2000 and is the answer not in the manual?
Questions and answers