Table of Contents
Advertisement
Available languages
Available languages
Quick Links
Installation Instructions
Thank you for purchasing this quality Lucci product. To ensure correct function and safety, please read and follow all
instructions carefully before assembly, installation and use of the product. Please keep the instructions for future
reference.
Warranty
•
This product is covered by a 12 month warranty. Please retain proof of purchase.
•
Warranty will be void if there is any damage due to improper usage or modification to the product.
•
Failure to comply with the instructions in this manual may increase the risk of damage or injury and will void
warranty.
•
IN EUROPE – If you are a European customer please contact the retail outlet where the light kit was purchased
for warranty service.
Installation requirements
•
NOTE: This light kit must only be installed onto the Lucci Climate III Fan – SKU# 210640, 210641,
210642. It must NOT be used for any other purpose.
•
Must be installed by a licensed electrician.
•
All wiring and installation of the light fitting must adhere to local and national wiring rules.
eg. AS/NZS 3000 Electrical installations in Australia.
•
Do not exceed the maximum wattage rating.
•
Select a suitable location for installation;
This product is suitable for indoor use only.
-
Ensure the fitting is not installed next to any air vents and is not in any moist or damp areas.
-
•
Take care not to pull any electrical wires during unpacking as this may damage the connection.
•
Lay out all the components on a smooth surface and make sure there are no components missing before
assembling. If parts are missing, return the complete product to the place of purchase for inspection or
replacement.
•
Check whether the luminaire has been damaged during transport. Do not operate/install any product which
appears damaged in any way. Return the complete product to the place of purchase for inspection, repair or
replacement.
•
Ensure power to the circuit you are working on has been switched OFF before commencing any electrical work.
Installation directions
Remove all packaging material from the product and be careful not to throw away accessories that may be
hidden within the packaging material.
1. Remove the bottom cover of the fan by turning anti-clockwise. (Fig. 1)
2. Connect the wires of the light kit to the motor via the quick connector. (Fig. 2)
3. Install the light kit on the fan motor part then secure it by turning clockwise. (Fig. 2)
Install the GX53 lamp (not included) to the light kit. Do not exceed the maximum power rating. (Fig. 3)
4.
1 | P a g e
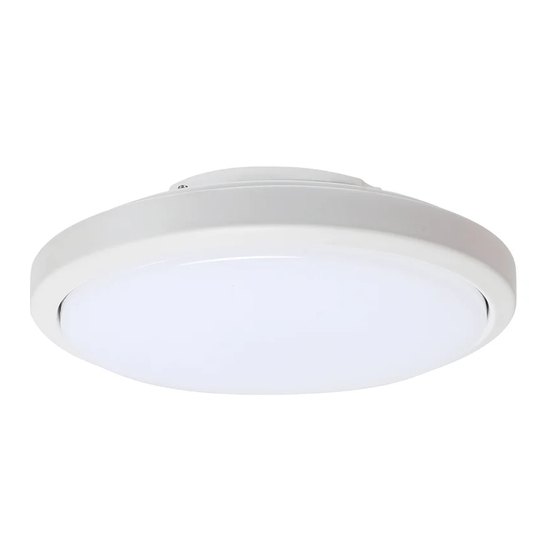
LUCCI CLIMATE III FAN LIGHT KIT
SKU# 210643, 210644, 210645
Rated Voltage 220-240V~ 50Hz
V 1 . 0 p u b l i c a t i o n o n 0 9 . 2 0 1 9 ( A U & E U )
Advertisement
Table of Contents

Related Manuals for Lucci fini CLIMATE III


Summary of Contents for Lucci fini CLIMATE III
- Page 1 Installation requirements • NOTE: This light kit must only be installed onto the Lucci Climate III Fan – SKU# 210640, 210641, 210642. It must NOT be used for any other purpose. • Must be installed by a licensed electrician.
-
Page 2: Safety Tips
Installation Instructions Fig. 1 Fig. 2 Fig. 3 Safety tips • Always ensure the power is OFF and the luminaire has cooled down before performing any maintenance, cleaning, or making any adjustment to the luminaire. • To avoid injury or damage to the luminaire, ensure that power leads and screws are secure before connecting the power. -
Page 3: Garantie
Lampenset gekauft wurde, um Garantieleistungen in Anspruch zu nehmen. Installationsanforderungen • HINWEIS: Dieser Beleuchtungssatz darf nur am Lucci Climate III Ventilator – Artikelnummer 210640, 210641, 210642 – installiert werden. Er darf NICHT für andere Zwecke verwendet werden. • Das Produkt muss von einem lizenzierten Elektriker installiert werden. -
Page 4: Installation Instructions
Installation Instructions 1. Entfernen Sie die untere Abdeckung entgegen dem Uhrzeigersinn vom Ventilator. (Abb. 1) 2. Schließen Sie die Kabel des Beleuchtungssatzes über den Schnellanschluss an den Motor an. (Abb. 2) 3. Montieren Sie den Beleuchtungssatz auf dem Teil des Lüftermotors und sichern Sie ihn durch Drehen im Uhrzeigersinn. - Page 5 Installation Instructions Gewicht 0,3 kg Maße H: 45 mm Durchmesser: 175 mm 5 | P a g e V 1 . 0 p u b l i c a t i o n o n 0 9 . 2 0 1 9 ( A U & E U )
-
Page 6: Exigences D'installation
Exigences d’installation • REMARQUE : Ce kit d’éclairage ne doit être installé que sur un ventilateur Lucci Climate III – N 210640, 210641, 210642. Il ne doit pas être utilisé à d’autres fins. •... -
Page 7: Conseils De Sécurité
Installation Instructions 1. Retirez le couvercle inférieur du ventilateur en tournant dans le sens inverse des aiguilles d’une montre. (Fig. 1) 2. Branchez les fils du kit d’éclairage au moteur via le connecteur rapide. (Fig. 2) 3. Installez le kit d’éclairage de la partie moteur du ventilateur, puis fixez-le en le tournant dans le sens des aiguilles d’une montre. - Page 8 Installation Instructions Support GX53 d’ampoule Poids 0,3 kg Dimensions H : 45 mm Dia : 175 mm 8 | P a g e V 1 . 0 p u b l i c a t i o n o n 0 9 . 2 0 1 9 ( A U & E U )
-
Page 9: Requisitos De Instalación
Requisitos de instalación • NOTA: Este kit de iluminación solo debe instalarse en el ventilador Lucci Climate III – SKU# 210640, 210641, 210642. NO se debe usar para ningún otro propósito. • Debe ser instalada por un electricista acreditado. -
Page 10: Especificaciones
Installation Instructions Instale la lámpara GX53 (no incluida) al kit de iluminación. No exceda la potencia nominal máxima. (Imagen 3) Lámpara GX53 Cubierta inferior iluminación Imagen Imagen Imagen 3 Consejos sobre seguridad • Asegúrese siempre de que la luminaria esté apagada y se haya enfriado antes de realizar tareas de mantenimiento o limpieza, o al llevar a cabo algún ajuste de la luminaria. -
Page 11: Garanzia
Requisiti di installazione • NOTA: Questo kit luce deve essere installato unicamente sul ventilatore Lucci Climate III – SKU# 210640, 210641, 210642. NON deve essere utilizzato per nessun altro scopo. • Il prodotto deve essere installato da un elettricista professionista. -
Page 12: Norme Di Sicurezza
Installation Instructions 3. Installare il kit luce sul motore del ventilatore, quindi fissarlo girando in senso orario. (Fig. 2) Installare la lampada GX53 (non inclusa) sul kit luce. Non superare la potenza nominale massima. (Fig. 3) Lampada GX53 Kit luce Copertura inferiore Fig. -
Page 13: Installatie-Instructies
Installatie-eisen • OPMERKING: Deze lichtset mag alleen worden geïnstalleerd op de Lucci Climate III ventilator - SKU# 210640, 210641, 210642. Het mag NIET voor andere doeleinden worden gebruikt. • De set moet worden gemonteerd door een erkend elektricien. - Page 14 Installation Instructions 2. Sluit de draden van de lichtset via de snelkoppeling aan op het motorgedeelte. (afb. 2) 3. Bevestig de lichtset op het motorgedeelte en zet deze vervolgens vast door deze met de klok mee te draaien. (afb. 2) Installeer de GX53-lamp (niet meegeleverd) in de lichtset.
- Page 15 Installation Instructions vermogen Lamphouder GX53 Gewicht 0,3kg Afmetingen H:45 mm Dia:175 mm 15 | P a g e V 1 . 0 p u b l i c a t i o n o n 0 9 . 2 0 1 9 ( A U & E U )
-
Page 16: Απαιτήσεις Εγκατάστασης
Απαιτήσεις εγκατάστασης • ΣΗΜΕΙΩΣΗ: Το παρόν σετ φωτισμού πρέπει να εγκαθίσταται μόνο επάνω στον ανεμιστήρα Lucci Climate III – Αρ. SKU 210640, 210641, 210642. ΔΕΝ πρέπει να χρησιμοποιείται για άλλους σκοπούς. • Η εγκατάσταση πρέπει να πραγματοποιηθεί από πιστοποιημένο ηλεκτρολόγο. - Page 17 Installation Instructions 2. Συνδέστε τα καλώδια του σετ φωτισμού στο μοτέρ μέσω του ταχυσυνδέσμου. (Εικ. 2) 3. Εγκαταστήστε το σετ φωτισμού επάνω στο τμήμα μοτέρ ανεμιστήρα, στη συνέχεια ασφαλίστε το περιστρέφοντας δεξιόστροφα. (Εικ. 2) Εγκαταστήστε τη λυχνία GX53 (δεν περιλαμβάνεται) στο κιτ φωτισμού. Δεν επιτρέπεται να υπερβαίνεται η μέγιστη...
- Page 18 Installation Instructions Υποδοχή GX53 λάμπας Βάρος 0,3 κιλά Διαστάσεις Υ: 45 χιλ., Διάμ.: 175 χιλ. 18 | P a g e V 1 . 0 p u b l i c a t i o n o n 0 9 . 2 0 1 9 ( A U & E U )
Need help?
Do you have a question about the CLIMATE III and is the answer not in the manual?
Questions and answers