Advertisement
Quick Links
Manitowoc Cranes, Inc.
Manitowoc, Wisconsin 54220 U.S.A.
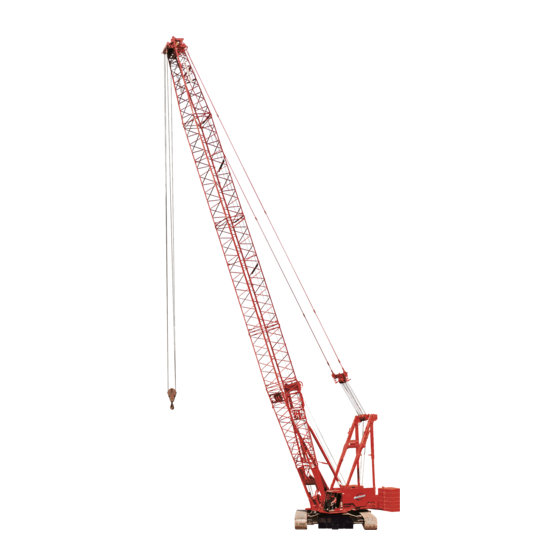
Luffing Jib Raising Procedure
Fixed Jib No. 140 On Luffing Jib No. 133 or No. 133A On
Boom No. 44 With Heavy Lift Top
2250 SERIES 2 must be equipped with 209,200 Lb. (94 890 kg) crane counterweight and 60,000 Lb. (27 220 kg) carbody
counterweight and 2250 SERIES 3 must be equipped with 249,200 Lb. (113 040 kg) crane counterweight and 120,000 Lb.
(54 430 kg) carbody counterweight for raising and lowering various boom, luffing jib and fixed jib combinations. Refer to fixed jib
assembly No. 192320 or No. 193022 and luffing jib rigging assembly No. 192086 for boom, luffing jib and fixed jib make-up of
inserts, straps, pendants, backstays and miscellaneous parts, etc. Refer to Jib Rigging Guide for No. 140 fixed jib in Operators
Manual for detailed raising and lowering instructions.
Two methods may be used to raise and lower boom, luffing jib and fixed jib combinations.
A. Layout Jack-Knife Method With Fixed Jib Attached
Raising:
Boom, luffing jib and fixed jib are assembled in layout, end to end, position. Raise fixed jib strut and attach pendants and
backstays. Attach fixed jib stop to fixed jib butt and temporarily tie off to fixed jib strut. Boom, luffing jib and fixed jib
must be inline over front of blocked crawlers prior to raising boom and luffing jib. Slowly raise boom until luffing jib
stop strut is just clear of ground. Attach luffing jib stop pendants and unpin luffing jib stop inner strut from retracted
position. Slowly raise boom until luffing jib stop strut is fully extended and pins engaged (approximately 168 degree
boom to luffing jib angle). Boom is then raised while luffing jib point and fixed jib point wheels are allowed to roll on
ground. Tension should be applied to luffing jib hoist to keep luffing jib strut off luffing jib during boom raising. Boom
up until boom to luffing jib angle reaches value specified in table. Tighten luffing jib suspension with luffing jib hoist.
Boom and luffing jib are then raised together using boom hoist while fixed jib point wheels roll on ground. Continue
raising until fixed jib suspension tightens. Attach fixed jib stop to luffing jib top. Boom, luffing jib and fixed jib are then
raised together using boom hoist until boom reaches 83 degree angle. Raise luffing jib to radius within capacity chart.
Several combinations do not allow fixed jib to leave ground when boom reaches 83 degrees. When this occurs, fixed jib
stop must be attached as suspension tightens after luffing jib is raised using luffing jib hoist. Then continue raising
luffing jib to radius within capacity chart. Fixed jib radius must be within capacity chart before swinging over side of
machine.
Lowering:
Position boom at 83 degrees with boom and luffing jib and fixed jib inline over front of blocked crawlers prior to
lowering luffing jib. Lower luffing jib until boom to luffing jib angle reaches value specified in table. If fixed jib point
wheels contact ground prior to luffing jib reaching angle specified in table, remove fixed jib stop from luffing jib top and
temporarily tie off to fixed jib strut at this time, and then continue to lower luffing jib until boom to luffing jib angle
specified in table is reached. If fixed jib point wheels have not contacted ground, lower boom until fixed jib point wheels
contact ground. Remove fixed jib stop from luffing jib top and temporarily tie off to fixed jib strut. Lower boom as fixed
jib point wheels roll on ground. Lower boom until luffing jib point wheels contact ground. Continue to lower boom
while luffing jib and fixed jib roll along ground. Keep enough tension on luffing jib hoist to keep luffing jib strut off
luffing jib. Stop lowering boom when luffing jib stop pendants start to go into tension (approximately 168 degree boom
to luffing jib angle). Disengage luffing jib stop strut pins and lower boom to retract luffing jib stop inner strut. Pin strut
in retracted position and unpin luffing jib stop pendants. Rotate luffing jib stop struts forward and lower boom and
luffing jib to ground.
2250 SERIES 2
2250 SERIES 3
8048-B, 2011-10-25/GA
Page 1 of 3
Advertisement

Related Manuals for Manitowoc 2250 2 Series


Summary of Contents for Manitowoc 2250 2 Series
- Page 1 Manitowoc Cranes, Inc. Manitowoc, Wisconsin 54220 U.S.A. Luffing Jib Raising Procedure 2250 SERIES 2 Fixed Jib No. 140 On Luffing Jib No. 133 or No. 133A On 2250 SERIES 3 Boom No. 44 With Heavy Lift Top 2250 SERIES 2 must be equipped with 209,200 Lb. (94 890 kg) crane counterweight and 60,000 Lb. (27 220 kg) carbody counterweight and 2250 SERIES 3 must be equipped with 249,200 Lb.
- Page 2 Manitowoc Cranes, Inc. Manitowoc, Wisconsin 54220 U.S.A. Luffing Jib Raising Procedure 2250 SERIES 2 Fixed Jib No. 140 On Luffing Jib No. 133 or No. 133A On 2250 SERIES 3 Boom No. 44 With Heavy Lift Top B. Layout Jack-Knife Method With Fixed Jib Attached Before Luffing Jib Lift-Off Raising: Boom and luffing jib are assembled in layout, end to end, position.
- Page 3 Manitowoc Cranes, Inc. Manitowoc, Wisconsin 54220 U.S.A. Luffing Jib Raising Procedure 2250 SERIES 2 Fixed Jib No. 140 On Luffing Jib No. 133 or No. 133A On 2250 SERIES 3 Boom No. 44 With Heavy Lift Top Boom, luffing jib and fixed jib combinations in table require layout jack knifing to a specified boom to luffing jib angle for raising and lowering.