Table of Contents

Related Manuals for Dynascan SF22


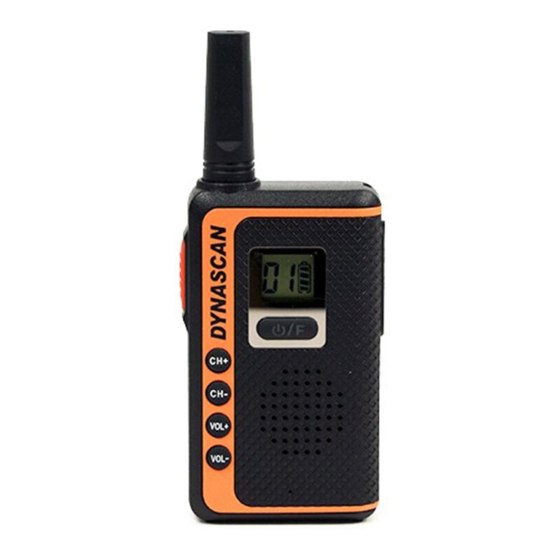
Summary of Contents for Dynascan SF22
- Page 1 TRANSCEPTOR PORTATIL PMR-446 MANUAL INSTRUCCIONES ¡Este equipo es de uso libre, no necesita autorización administrativa o licencia para su uso!
-
Page 2: Table Of Contents
INDICE Página SIMBOLOS Y DEFINICIONES INTRODUCCION INFORMACION DE SEGURIDAD ARTICULOS SUMINISTRADOS INSTALAR Y RETIRAR LA BATERIA CARGA DE LA BATERIA FAMILIARIZARSE CON EL TRANSCEPTOR FUNCIONAMIENTO 8.1.- ENCENDER Y APAGAR EL TRANSCEPTOR 8.2.- LED INDICADOR DE ESTADO 8.3.- SELECCIONAR UN CANAL 8.4.- AJUSTE DEL VOLUMEN 8.5.- TRANSMITIR Y RECIBIR AJUSTES... -
Page 3: Simbolos Y Definiciones
1.- SIMBOLOS Y DEFINICIONES: Este equipo es de uso libre, no es necesario obtener una autorización administrativa o licencia para su uso y está destinado para poder utilizarse en los siguientes estados miembros de la Unión Europea: Este aparato es conforme con la Directiva 2012/19/UE sobre residuos de aparatos eléctricos y electrónicos (RAEE). -
Page 4: Introduccion
2.- INTRODUCCION: PIHERNZ COMUNICACIONES, S.A. le agradece la compra de este Transceptor PMR-446. Este equipo le permite comunicarse con tantos usuarios y tantas veces como desee, sin necesidad de una licencia, suscripción o pago de tasas. Es muy fácil de utilizar por parte de cualquier usuario. Lea atentamente este manual para conocer las funciones de las que dispone el equipo. -
Page 5: Carga De La Bateria
6.- CARGA DE LA BATERIA: 1.- Conecte el cargador de baterías a un enchufe cercano y de fácil acceso de 230 Vca. 2.- Coloque el transceptor con su batería en el receptáculo del cargador de baterías de sobremesa, realice la carga de la batería con el transceptor apagado. El led indicador del cargador de baterías se ilumina en rojo durante el proceso de carga de la batería y se iluminará... -
Page 6: Funcionamiento
8.- FUNCIONAMIENTO: 8.1.- ENCENDER Y APAGAR EL TRANSCEPTOR: Mantenga pulsada la tecla [ON/OFF/F] para encender el transceptor. Con el transceptor encendido, mantenga pulsada la tecla [ON/OFF/F] para apagar el transceptor. 8.2.- LED INDICADOR DE ESTADO: Se ilumina en rojo cuando se transmite y se ilumina en verde cuando se recibe una señal. 8.3.- SELECCIONAR UN CANAL: Con la función de bloqueo del teclado desactivada, pulse la tecla [CH+] para aumentar de canal y pulse la tecla [CH-] para bajar de canal. -
Page 7: Bloqueo De Canal Ocupado (Bcl)
segundos más. Si durante este tiempo, se vuelve a recibir una señal, el transceptor continuará en el canal. Procedimiento de escaneado: Durante el escaneado, pulse la tecla [CH+] para realizar el escaneado en sentido creciente, pulse la tecla [CH-] para escanear en sentido decreciente. Cuando se detecta una señal válida, el transceptor detiene el escaneado y el led indicador de estado se ilumina en verde. -
Page 8: Ahorro De Bateria
9.8.- AHORRO DE BATERIA: Programe esta función para reducir el consumo de la batería. Para más información, consulte con su vendedor. 9.9.- AVISO DE BATERIA BAJA: El transceptor funciona cuando la tensión es mayor de 3.3 V. El transceptor recibirá pero no transmitirá cuando la tensión de la batería es inferior 3.3 V y escuchará... -
Page 9: Declaracion De Conformidad
11.- DECLARACION DE CONFORMIDAD: Español - 9 -... -
Page 10: 12- Garantia
12.- GARANTIA: CERTIFICADO DE GARANTIA Marca del aparato: Modelo: Nº serie: Fecha de compra: Sello del establecimiento vendedor: ADVERTENCIA: La garantía es válida siempre y cuando esté total y debidamente cumplimentada de forma legible y clara, presente el sello del establecimiento vendedor y tenga adjuntado el ticket o factura de compra del aparato. - Page 11 PMR-446 HANDPORTABLE TRANSCEIVER USER´S MANUAL Licence-free PMR-446 two-way radio for instant free communication...
- Page 12 INDEX Page no. DEFINITIONS INTRODUCTION SAFETY INFORMATION SUPPLIED ARTICLES INSTALLING AND REMOVING THE BATTERY PACK BATTERY CHARGING GETTING STARTED OPERATION 8.1.- POWER ON/OFF 8.2.- STATUS LED INDICATOR 8.3.- CHANNEL SETTING 8.4.- VOLUME SETTING 8.5.- TRANSMITTING / RECEIVING SETTINGS 9.1.- KEYPAD LOCK 9.2.- SQUELCH 9.3.- SCAN MODE 9.4.- BUSY CHANNEL LOCKOUT (BCL)
- Page 13 1.- DEFINITIONS: This transceiver is designed for free communication, so it is not necessary to purchase administrative authorization or licences in order to use it and it is intended for use in the following member states of the European Union: This equipment complies whit Directive 2012/19/EU on waste electrical and electronic equipment (WEEE).
- Page 14 2.- INTRODUCTION: • PIHERNZ COMUNICACIONES, S.A. he thanks him for the trust deposited in this PMR-446 Handportable Transceiver. This equipment let’s you talk to as many people you wish, as often as you like, with no need for a license, subscription or tax payment. It is very easy to use by any user. Please read through this manual carefully for many features of this transceiver.
- Page 15 6.- BATTERY CHARGING: - Connect the battery charger into a nearby and easily accessible 230 VAC wall outlet - Insert the transceiver with their battery into the charging slot of the desktop battery charger, charge the battery pack with the transceiver turned OFF. The led indicator of the battery charger lights up red during the battery charging process and will light green when the charging is complete.
- Page 16 8.- OPERATION: 8.1.- POWER ON/OFF: Press and hold the [ON/OFF/F] key about 1 second to power ON the transceiver. While power ON, press and hold the [ON/OFF/F] key about 1.5 seconds to turn the power OFF. 8.2.- STATUS LED INDICATOR: The led indicator lights red when transmitting and lights green when a signal is received.
- Page 17 The transceiver will remain in the channel where the signal has been received until the signal disappears. After the signal disappears, the transceiver will remain in the channel for an additional 5 seconds. If a signal is received again during this time, the transceiver will continue in the channel. Scan procedure: In to scan mode, press the [CH+] key to increase, press the [CH-] key to decrease.
- Page 18 9.9.- LOW BATTERY ALERT: The transceiver operates when the battery voltage is higher than 3.3 VDC. The transceiver will receive but will not transmit when the battery voltage is lower 3.3 VDC and you will hear a low battery beep every 20 seconds. 10.- TECHNICAL SPECIFICATIONS: Frequency range: 446.00625 MHz to 446.09375 MHz (TX/RX).
- Page 19 11.- DECLARATION OF CONFORMITY: English - 9 -...
- Page 20 12.- GUARANTEE: WARRANTY CERTIFICATE Brand name: Model: Serial number: Date of purchase: Stamp of the sale store: WARNING: The warranty is valid provided it is total and properly executed in a readable and clear way, presents the stamp of the establishment sales and has attached the ticket of purchase of the equipment.
Need help?
Do you have a question about the SF22 and is the answer not in the manual?
Questions and answers