DuraVent DURAPLUS CANADA 2 Installation And Operating Instructions Manual
Factory-built 650 c chimney 6” & 7” dia
Hide thumbs
Also See for DURAPLUS CANADA 2:
Advertisement
Quick Links
DURAPLUS CANADA 2
DPC2
Factory-built 650°C
Chimney 6" & 7" dia.
CONTENTS
WARNING................................................2
INSTALLATION
KEEP YOUR CHIMNEY CLEAN, SIZING CHART.........3
AND
GENERAL INSTALLATION NOTES......................4-5
INTERIOR STRAIGHT INSTALLATION ..................6
OPERATION
EXTERIOR INSTALLATION ...........................7-9
REPLACEMENT PARTS ............................10-11
INSTRUCTIONS
WARRANTY .............................................13
WARNING
A MAJOR CAUSE OF CHIMNEY-RELATED FIRES IS FAILURE TO
MAINTAIN REQUIRED CLEARANCES (AIR SPACES) TO COM-
BUSTIBLE MATERIALS. IT IS OF UTMOST IMPORTANCE THAT
THIS CHIMNEY BE INSTALLED ONLY IN
ACCORDANCE WITH THESE INSTRUCTIONS.
These instructions must be followed in their entirety. Failure to do so
may result in hazardous installation. Read these instructions and keep
them for future reference.
Standard: ULC S629-M87
2125 Monterey St. • Laval, QC, Canada • H7L 3T6
1-833-DuraVent; www.DuraVentRetail.com
PI DPC2 REV.0 08/2020
1
Advertisement

Related Manuals for DuraVent DURAPLUS CANADA 2

Summary of Contents for DuraVent DURAPLUS CANADA 2
-
Page 1: Table Of Contents
DURAPLUS CANADA 2 DPC2 Factory-built 650°C Chimney 6” & 7” dia. CONTENTS WARNING…………………………………………2 INSTALLATION KEEP YOUR CHIMNEY CLEAN, SIZING CHART………3 GENERAL INSTALLATION NOTES………………….4-5 INTERIOR STRAIGHT INSTALLATION .……….…….6 OPERATION EXTERIOR INSTALLATION ………………………7-9 REPLACEMENT PARTS .………………………10-11 INSTRUCTIONS WARRANTY .……………………….………….…13 WARNING A MAJOR CAUSE OF CHIMNEY-RELATED FIRES IS FAILURE TO MAINTAIN REQUIRED CLEARANCES (AIR SPACES) TO COM- BUSTIBLE MATERIALS. -
Page 2: Warning
RECOMMENDATIONS WOOD AND COAL STOVES Clearance We recommend: The clearances stated in this guide are minimum re- 1. Choose a stove that bears the label of a test- quirements: if more space is available, use it. Min- ing laboratory (such as ULC, CSA, WH, UL, or imum clearances mean leaving unobstructed air ICBO). - Page 3 has accumulated, it should be removed to reduce isk of chimney fire. e your chimney cleaned by a qualified chimney ep. If you want to clean your chimney yourself: clean chimney using plastic, wood or stainless steel KEEP YOUR CHIMNEY CLEAN SIZING CHART hes.
-
Page 4: General Installation Notes
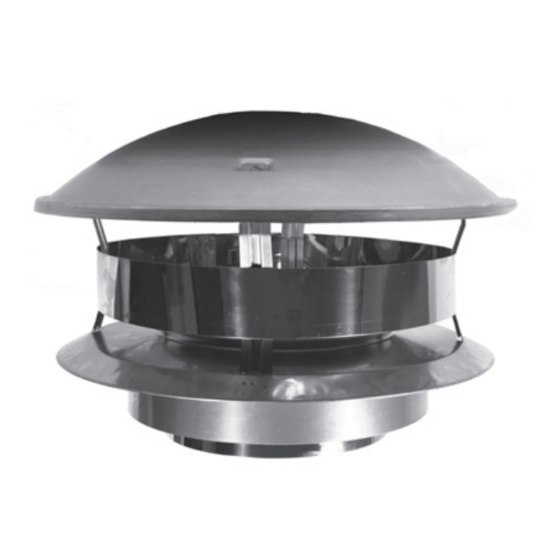
2. The maximum height of chimney supported by the may be affected if the combination of these parts various DuraVent supports are outlined on page is not used in actual building construction. 3. The supports described in this booklet should only be used with 6”... - Page 5 GENERAL INSTALLATION NOTES (CONT’D) CAP REMOVAL FOR MAINTENANCE RAIN CAP To remove cap, unscrew the collar screw to untighten the collar. Pull on the cap to remove it from the chimney. To put the cap back in place, slide it over the 2 ft chimney and then tighten the collar using the col- MIN.
-
Page 6: Interior Straight Installation
INTERIOR STRAIGHT INSTALLATION Step 1: Locate the chimney in a convenient place as CEILING SUPPORT (SFC) near as possible to the appliance outlet. NAILS OR SCREWS Step 2: Cut and frame the openings in the ceiling and roof where the chimney will pass. NOTE: It is important to follow the framing dimensions for the floor openings prescribed in this manual. -
Page 7: Exterior Installation
EXTERIOR INSTALLATION INSTALLATION NOTES Wall Support This chimney will provide optimum performance when installed within the heated space of a build- ing. The consequences of installing the chimney outdoors, up the exterior wall of a building could result in: -Back-drafting during cold weather when the con- nected appliance is not operating. - Page 8 EXTERIOR INSTALLATION (CONT’D) Step 2. Wood walls: Place the exterior half of the Step 3. The minimum length of insulated chimney Wall Thimble in the opening from the outside. required to pass through the wall will be wall Fasten in place using (4) 2” nails or 1” screws. thickness plus 7".
- Page 9 EXTERIOR INSTALLATION (CONT’D) Step 10: If the chimney passes through the roof, cut Step 12: Attach the Rain Cap to the top of the chim- ney. (see Figure 3). a hole large enough to provide 2” clearance between the chimney and the roof. Step 11: Put the Roof Flashing in place.
-
Page 10: Replacement Parts
REPLACEMENT PARTS LENGTHS & FITTINGS ØDPC2-12 LENGTH Ø" X 12" ØDPC2-24 LENGTH Ø" X 24" ØDPC2-36 LENGTH Ø" X 36" ØDPC2-T TEE WITH TEE CAP (TWIST LOCK) ØDPC2-TCI INSULATED TEE CAP (TWIST LOCK) SUPPORTS ØDPC2-CA FLUE EXTENSION ØDPC2-SFC CEILING SUPPORT W/COUPLER DPC2-URES WALL SUPPORT BRACES &... - Page 11 WALL SUPPORT KIT (INCLUDES: 1 OF EACH ØDPC2-TCI, ØDPC2-WTI, ØDPC2-T, ØDPC2-WSK ØDPC2-CA, ØDPC2-DVL, DPC2-AWBU, ØDPC2-URES, ØDPC2-VC) INTERIOR KIT ØDPC2-IK (INCLUDES: 1 OF EACH ØDPC2-SFC, ØDPC2-ARS, ØDPC2-VC) To order a replacement part, please reach out to your nearest dealer or to 1-833-DuraVent; www.DuraVentRetail.com...
- Page 13 CSIA Certified Chimney Sweeps, NFI DuraVent products are fully warranted if installed only by a Certified Specialists, or WETT Certified Professionals. professional installer. This Warranty is transferable from the original homeowner to the buyer of the home.
-
Page 14: Warranty
Visit us at www.DuraVentRetail.com 2125 Monterey St. • Laval, QC, Canada • H7L 3T6 1-833-DuraVent; www.DuraVentRetail.com DuraVent reserves the right to make changes at any time, without notice, in design, materials, specifications, prices. Consult your local distributor for chimney system code information.
Need help?
Do you have a question about the DURAPLUS CANADA 2 and is the answer not in the manual?
Questions and answers