Table of Contents
Advertisement
Available languages
Available languages
Quick Links
Advertisement
Chapters
Table of Contents

Related Manuals for Haier A3FE737CPJM


Summary of Contents for Haier A3FE737CPJM
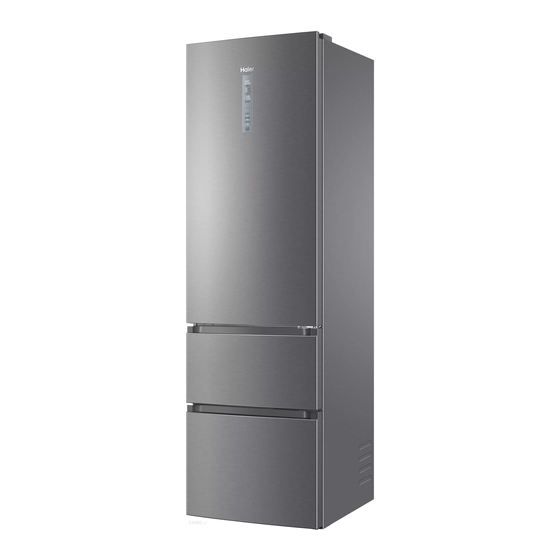
- Page 1 User Manual Refrigerator-Freezer A3FE737CPJM...
- Page 2 Thank You Thank you for purchasing a Haier Product. Please read these instructions carefully before using this appliance. The instructions con- tain important information which will help you get the best out of the appliance and ensure safe and proper installation, use and maintenance.
-
Page 3: Table Of Contents
Content 1- Safety information ........................4 2- Intended use ..........................8 3- Product description ........................9 4- Control panel ..........................10 5- Use ..............................11 6- Energy saving tips ........................19 7- Equipment ..........................20 8- Care and Cleaning........................24 9- Troubleshooting ........................26 10- Installation ..........................29 11- Technical Data .........................33 12- Customer Service ........................35... -
Page 4: 1- Safety Information
1- Safety information Before switching on the appliance for the first time read the follow- ing safety hints!: WARNING! Before first use ▶ Make sure there is no transport damage. ▶ Remove all packaging and keep out of children´s reach. ▶... - Page 5 1- Safety information ▶ Only for UK: The appliance’s power cable is fitted with 3-cord (grounding) plug that fits a standard 3-cord (grounded) socket. Never cut off or dismount the third pin (grounding). After the ap- pliance is installed, the plug should be accessible. ▶...
- Page 6 1- Safety information ▶ Do not store or use inflammable, explosive or corrosive materials in the appliance or in the vicinity. ▶ Do not store medicines, bacteria or chemical agents in the ap- pliance. This appliance is a household appliance. It is not recom- mended to store materials that require strict temperatures.
- Page 7 1- Safety information ▶ Do not use mechanical devices or other means to accelerate the defrosting process, other than those recommended by the man- ufacturer. ▶ If the supply cord is damaged, it must be replaced by the manu- facturer, its service agent or similarly qualified persons in order to avoid a hazard.
-
Page 8: 2- Intended Use
2- Intended use 2.1 Intended use This appliance is intended for cooling and freezing food. It has been designed exclusively for use in dry-interior house-holds. It is not intended for commercial or industrial use. Changes or modifications to the device are not allowed. Unintended use may cause haz- ards and loss of warranty claims. -
Page 9: 3- Product Description
3- Product description Notice: Differences Due to technical changes and different models, some of the illustrations in this manual may differ from your model. Pictures of appliances (Fig. 3) A: Refrigerator compartment: 1. Refrigerator LED lamp 2. Air duct and sensor (behind panel) 3. -
Page 10: 4- Control Panel
4- Control panel Control panel (Fig. 4) Keys: A Fridge temperature setting B MyZone setting C Freezer temperature setting D Fuzzy mode and Holiday function on/off E Super-Cool function on/off Chiller F Super-Freeze function on/off G Panel lock/unlock Indicators: a Temperature fridge compartment b My Zone function c Temperature freezer compartment d1 Fuzzy mode... -
Page 11: 5- Use
5- Use 5.1 Before first use Remove all packaging materials, keep them out of children`s reach and dispose ▶ them in an environmentally friendly manner. Clean the inside and outside of the appliance as well as the interior and accessories ▶... - Page 12 5- Use 5.6 Door opening alarm When the refrigerator door is opened for more than 3 minutes, the door opening alarm will sound (Fig. 5.6). The alarm can be silenced by closing the door. If the door is left open for more than 7 minutes, the light in- side the refrigerator and control panel illumination will automatically switch off.
- Page 13 5- Use 4. Touch any key except “A“ (Fridge) to confirm, or the setting confirms automatically after 5 seconds. Displayed temperature stops flashing. 5.7.2.2 Adjust the temperature for freezer 5.7.2-3 5.7.2-4 1. Unlock the panel by touching key “G” if it is locked (Fig.
- Page 14 5- Use 5.9 Super-Freeze function Fresh food should be frozen as quickly as possible to 5.9-2 5.9-1 the core. This preserved the best nutritional value, ap- pearance and taste. The Super-Freeze function ac- Super-Frz. Super-Frz. celerates the freezing of fresh food and protects the goods already stored from undesirable warming.
- Page 15 5- Use 5.11.1 Chiller This function sets the temperature in the MyZone box to 0 °C. Suitable to store of fresh food such as meat or instant products. Most foods stay fresh at 0 ° C, but not frozen. Notice: Chiller ▶...
- Page 16 5- Use 5.12 Tips on storing fresh food To avoid contamination of food, please respect the following instructions: - Opening the door for long periods can cause a significant increase of the temperature in the compartments of the appliance. - Store raw meat and fish in suitable containers in the refrigerator, so that it is not in con- tact with or drip onto other food.
- Page 17 5- Use 5.12.1 1 Butter, cheese, eggs, spices, etc. 7 Wine, champagne, etc. 2 Eggs, canned food, spices, etc. 8 Cooked meat, sausages, etc. 3 Jam, cheese, tomato sauce, etc. 9 MyZone box: canned beverages (Q-Cool), raw fresh food (Chiller), all frozen food 4 Drinks and bottled foods.
- Page 18 5- Use 5.12.2 Storage into the freezer compartment Keep the freezer temperature at- 18°C. ▶ 24 hours before freezing switch on the Super-Freeze function; - for small quantities ▶ of food 4-6 hours are sufficient. Hot food must be cooled to room temperature before storing in the freezer com- ▶...
-
Page 19: 6- Energy Saving Tips
6- Energy saving tips Energy saving tips ▶ Make sure the appliance is properly ventilated (see INSTALLATION). ▶ Do not install the appliance in direct sunlight or in the near of heat sources(e.g. stoves, heaters). ▶ Avoid unnecessarily low temperature in the appliance. The energy consumption in- creases the lower the temperature in the appliance is set. -
Page 20: 7- Equipment
7- Equipment Notice: Differences depending on model Due to different models, your product may not have all of the following features. Please refer to chapter PRODUCT DESCRIPTION. 7.1 Multi-air-flow The refrigerator is equipped with a multi-air-flow sys- tem, with which cool air flows are located on every shelf level (Fig. - Page 21 7- Equipment 7.4 Removable door racks The door racks can be removed for cleaning: Place hands on each side of the rack, lift it upwards (1) and pull it out (2) (Fig. 7.4). In order to insert the door rack, the above steps are carried out in reverse order.
- Page 22 7- Equipment 7.9 Removable freezer drawer To remove the drawer out, pull out to the maximum ex- tent (1), lift and remove (2) (Fig. 7.9). In order to insert the drawer, the above steps are car- ried out in reverse order. 7.10 3D-freezer drawer 7.10 The freezer drawers (Fig.
- Page 23 7- Equipment 2. Quick thawing By using the Fresher Pad outside the appliance food will be thawed five times faster than without pad because: ▶ allow the Fresher Pad to cool down at ambient temperature and put it on a flat surface outside the appliance.
-
Page 24: 8- Care And Cleaning
8- Care and Cleaning WARNING! Disconnect the appliance from the power supply before cleaning. 8.1 General Clean the appliance when only little or no food is stored. The appliance should be cleaned every four weeks for good maintenance and to prevent bad stored food odours. WARNING! ▶... - Page 25 8- Care and Cleaning Parameters of the lamp: Voltage in V Max Power in W Amount of light in lumen LED Spec white-5050 Usage temperature -30°C to +85°C 8.4 Removable auxiliary door gaskets There are six auxiliary door gaskets on the upper and lower freezer drawer.
-
Page 26: 9- Troubleshooting
9- Troubleshooting Many occuring problems could be solved by yourself without specific expertise. In case of a problem please check all shown possibilities and follow below instructions before you contact an after sales service. See CUSTOMER SERVICE. WARNING! ▶ Before maintenance, deactivate the appliance and disconnect the mains plug from the mains socket. - Page 27 9- Troubleshooting Problem Possible Cause Possible Solution • The temperature is set too high. • Reset the temperature. It is not cold enough inside the appli- • Too warm goods has been stored. • Always cool down goods before ance. storing them.
- Page 28 9- Troubleshooting Problem Possible Cause Possible Solution • This is normal. • - A slight sound is to be heard simi- lar to that of flow- ing water. • The fridge storage compartment • Close the door or silence the You will hear an alarm beep.
-
Page 29: 10- Installation
Required space when door is opened (Fig. 10.4): Appliance Appliance width in mm depth in mm Model A3FE737CPJM 1200 10.5 10.5 Ventilaton cross-section 200 mm To achieve sufficient ventilation of the appliance for safety reasons, the information of the required venti- 100 mm lation cross sections must be observed (Fig. - Page 30 10- Installation 10.6 Aligning the appliance 10.6 The appliance should be placed on a flat and solid sur- face. 1. Tilt the appliance slightly backwards (Fig. 10.6). 2. Set the feet to the desired level. 3. The stability can be checked by alternately bump- ing on the diagonals.
- Page 31 10- Installation 10.9 Door Reversibility Before connecting the appliance to the power supply you should check, whether the door swing must changed from right (as delivered) to left, if this is required by the installation location and the usability. WARNING! ▶...
- Page 32 10- Installation 12. Take out the new lower hinge of upper door from the accessory bag and screw it to the left side of the appliance. 13. Lift the upper door carefully on to the lower hinge so that the pivot fits into the hinge barrel. Be sure the pivot fits into the hinge barrel of up- per door.
-
Page 33: 11- Technical Data
11- Technical data 11.1 Product fiche according to regulation EU No. 1060/2010 Trade mark Haier Model identifier A3FE737CPJM Refrigerator-freezer Category of the model Energy efficiency class Annual energy consumption (kWh/year) Storage volume cooling (L) Storage volume freezing (L) **** Star rating Temperature of other compartments >... - Page 34 11- Technical data 11.2 Additional technical data Model identifier A3FE737CPJM Voltage / Frequency 220-240V ~/ 50Hz Input current (A) Main fuse (A) 10.0 Coolant R600a Total volume (L) Net volume (L) Dimensions (in mm) Depth Width Height 2005 11.3 Standards and directives This product meets the requirements of all applicable EC directives with the correspond- ing harmonised standards, which provide for CE marking.
-
Page 35: 12- Customer Service
If you cannot find a solution there, please contact ▶ your local dealer or ▶ the Service & Support area at www.haier.com where you can find telephone numbers and FAQs and where you can activate the service claim. To contact our Service, ensure that you have the following data available. - Page 36 A3FE-737CPJM_EN-V03_190318...
- Page 37 Gebrauchsanleitung Kühl-Gefrierkombination A3FE737CPJM...
- Page 38 Danke Danke, dass Sie sich für ein Haier Produkt entschieden haben. Bitte lesen Sie diese Gebrauchsanleitung sehr sorgfältig bevor Sie das Gerät in Betrieb nehmen. Sie enthält wichtige Informationen, damit Sie viel Freude an Ihrem Gerät haben und ein sicherer und sauberer Betrieb gewährleistet ist.
- Page 39 Inhalt 1- Sicherheitshinweise ........................4 2- Vorgesehener Gebrauch ......................9 3- Gerätebeschreibung ........................10 4- Bedienblende ..........................11 5- Bedienung ............................ .12 6- Energiespartipps .........................21 7- Ausstattung ..........................22 8- Reinigung und Pflege ........................ .26 9- Fehlerbehebung ......................... .28 10- Installation ..........................31 11- Technische Daten ........................
-
Page 40: 1- Sicherheitshinweise
1- Sicherheitshinweise Diese Hinweise dienen der Sicherheit und sollten daher vor der Ins- tallation und Inbetriebnahme aufmerksam gelesen werden. WARNUNG! Vor dem ersten Einschalten ▶ Vergewissern Sie sich, dass das Gerät keinen Transportschaden aufweist. ▶ Entfernen Sie alle Verpackungsmaterialien und bewahren Sie die- se außerhalb der Reichweite von Kindern auf. - Page 41 1- Sicherheitshinweise WARNUNG! ▶ Das Gerät wird mit 220-240 V/50 Hz betrieben. Abnorma- le Spannungsschwankungen können bewirken, dass das Gerät nicht startet, dass der Temperaturregler oder der Kompressor beschädigt werden oder dass während des Betriebes unnormale Geräusche auftreten. In einem solchen Fall muss ein automati- scher Spannungsregler eingebaut werden.
- Page 42 1- Sicherheitshinweise WARNUNG! ▶ Öffnen und schließen Sie die Tür(en) nur an den Griffen. Der Spalt zwischen den Abteilen sowie zwischen Tür und Schrank ist sehr schmal. Nicht hineingreifen; es besteht Quetschgefahr. Die Gerätetür(en) nur öffnen und schließen, wenn sich im Bewe- gungsbereich der Tür keine Kinder aufhalten.
- Page 43 1- Sicherheitshinweise WARNUNG! Wartung / Reparatur ▶ Die Reinigung und Wartung darf nur dann von Kindern durchge- führt werden, wenn sie beaufsichtigt werden. ▶ Trennen Sie das Gerät vor der Durchführung von Wartungsarbeiten von der Stromzufuhr. Vor dem Wiedereinschalten mindestens 5 Minuten warten, da häufiges Einschalten den Kompressor be- schädigen kann.
- Page 44 1- Sicherheitshinweise Informationen zum Kühlmittel WARNUNG! Dieses Gerät ist mit dem brennbaren Kühlmittel ISOBUTAN (R600a) befüllt. Achten Sie darauf, dass die Kühlmittelrohre bei Transport oder Installation nicht beschädigt werden. Austretendes Kühlmittel kann Augenschäden verursachen oder sich entzünden. Im Schadensfall sind offenen Feuerquellen fernzuhalten und der Raum gründlich zu lüften.
-
Page 45: 2-Vorgesehener Gebrauch
Das Gerät ist zum Kühlen und Gefrieren von Lebensmitteln geeignet. Dieses Gerät wur- de ausschließlich für den Gebrauch in trockenen Innenräumen im Haushalt konzipiert. Bei gewerblicher Nutzung entfällt die Haier Garantie. Verwenden Sie es nicht für andere Zwe- cke als die, für die es ausgelegt ist. -
Page 46: 3- Gerätebeschreibung
3- Gerätebeschreibung Hinweis Aufgrund technischer Änderungen und Modellvarianten können manche Abbildungen in dieser Bedienungsanleitung ev. von dem von Ihnen erworbenen Modell abweichen. Geräteabbildungen (Abb.3) A: Kühlabteil 1 LED Lampe 2 Lüftungsöffnungen und Sensor (hinter der Blende) 3 Metallkühlung 4 Glasablagen 5 O.K.-Sticker 6 Flaschenhalter 7 Typenschild... -
Page 47: 4- Bedienblende
4- Bedienblende Bedienblende (Abb. 4) Tasten: A Anwahl Kühlabteil (engl.: „Fridge“) B Anwahl My Zone Box Chiller C Anwahl Gefrierabteil (engl.: „Freezer“) D Anwahl Fuzzy Modus und Urlaubsfunktion ein/aus ( engl.: „Holiday“) E „Super-Cool“ Funktion ein/aus F „Super-Freeze“ Funktion ein/aus G Verriegelung Bedienblende Anzeigen: a Temperatur Kühlabteil... -
Page 48: 5- Bedienung
5- Bedienung 5.1 Vor dem ersten Gebrauch Alle Verpackungsmaterialien sind zu entfernen. Diese müssen unzugänglich für Kin- ▶ der aufbewahrt und auf umweltfreundliche Weise entsorgt werden. Vor dem Einlegen von Nahrungsmitteln sollte das Gerät innen und außen sowie die ▶ Innenausstattung und Zubehörteile mit warmen Wasser und einem milden Geschirr- spülmittel gereinigt und anschließend mit einem weichen Tuch getrocknet werden. - Page 49 5- Bedienung ▶ Zum Sperren der Bedienblende Taste „G“ für 3 Se- 5.5-1 5.5-2 kunden drücken (Abb. 5.5-1). ▶ Das zugehörige Symbol „g“ leuchtet auf (Abb. 5.5-2). Lock ▶ Zum Entsperren erneut die Taste 3 Sekunden lang drücken. Hold 3 Sec. 5.6 Türalarm Wenn die Kühlschranktür für mehr als 3 Minuten ge- öffnet ist, ertönt ein Türalarm (Abb.
- Page 50 5- Bedienung 5.7.2.1 Temperatureinstellung im Kühlabteil 1. Bedienblende durch Berühren der Taste „G“ ent- 5.7.2-2 5.7.2-1 sperren, falls diese gesperrt ist (Abb. 5.5-1). 2. Taste „A“ (Fridge) zur Anwahl des Kühlabteils drü- cken. Die aktuelle Temperatur im Kühlabteil wird angezeigt (Abb. 5.7.2-1). 3.
- Page 51 5- Bedienung 5.8 Super-Cool Funktion Wenn eine größere Menge von Lebensmitteln ein- 5.8-2 5.8-1 gelagert werden soll, zum Beispiel nach dem Einkauf, sollte die Super-Cool Funktion eingeschaltet werden. Super-Cool Super-Cool Die Super-Cool Funktion beschleunigt das Abküh- len frischer Lebensmittel und schützt gleichzeitig die bereits eingelagerte Ware vor unerwünschter Erwär- mung.
- Page 52 5- Bedienung 5.10 Holiday Funktion 5.10 Mit dieser Funktion wird die Kühlabteiltemperatur auf konstant 17 °C eingestellt. Dadurch besteht die Mög- lichkeit - ohne dass es zu einer Geruchs- oder Schim- melbildung kommt - bei längerer Abwesenheit (z.B. Urlaub= englisch: holiday) das leere Kühlabteil auch geschlossen zu halten.
- Page 53 5- Bedienung 5.11.2 D-Frost (Auftauen) Mit dieser Funktion lassen sich Lebensmittel auftauen, ohne dass sich dabei flüssige Rückstände auf dem Lebensmittel bilden. Die Lebensmittel bleiben teilgefroren, was das Zerkleinern und Kochen erleichtert. Die Temperatur in der MyZone-Box ist auf + 1 ° C eingestellt. Hinweis: D-Frost Funktion Die Auftauzeit kann je nach Größe und Dicke der Lebensmittel variieren.
- Page 54 5- Bedienung 5.12 Tipps für das Einlagern von Lebensmitteln Damit Lebensmittel nicht sinnlos verderben, halten Sie sich bitte an die folgenden Emp- fehlungen: - Wenn die Gerätetür längere Zeit geöffnet bleibt, steigt die Temperatur im Inneren natürlich schnell an. Öffnen Sie die Tür also nur dann, wenn es wirklich nötig ist, mögli- chst auch nur kurz.
- Page 55 5- Bedienung 5.12.1 1 Butter, Käse, Eier, Gewürze usw. 7 Wen, Sekt usw. 2 Eier, Konserven, Gewürze usw. 8 Gekochtes Fleisch, Wurst usw. 3 Marmelade, Käse, Tomatensauce usw. 9 My Zone Box: Dosengetränke (Q- Cook), rohe frische Lebensmittel 4 Getränke, Flaschen, Tuben (Chiller), alle gefrorenen Lebensmittel, 5 Eingelegte Lebensmittel, Konserven usw.
- Page 56 5- Bedienung 5.12.2 Einlagern in das Gefrierabteil Die Temperatur des Gefrierabteils sollte stets bei -18°C gehalten werden. ▶ 24 Stunden vor dem Einfrieren den Temperaturregler auf MAX Position stellen- bei ▶ kleinen Mengen genügen 4-6 Stunden. Warme Lebensmittel müssen vor dem Einlegen in das Gefrierabteil auf Zimmer- ▶...
-
Page 57: 6- Energiespartipps
6- Energiespartipps Tipps zum Energiesparen ▶ Darauf achten, dass das Gerät ausreichend belüftet ist (siehe INSTALLATION). ▶ Das Gerät nicht im direkten Sonnenlicht oder in der Nähe einer Wärmequelle (z.B. Heizkörper, Herd und andere Wärme abgebende Geräte) aufstellen. ▶ Unnötige tiefe Temperatureinstellungen sollten vermieden werden. Je niedriger die Temperatur eingestellt ist, desto höher ist der Energieverbrauch. -
Page 58: 7- Ausstattung
7- Ausstattung Hinweis: Abweichungen je nach Modell Aufgrund unterschiedlicher Modellvarianten verfügt Ihr Produkt möglicherweise nicht über alle der folgenden Ausstattungen. Siehe auch Kapitel GERÄTEBESCHREIBUNG. 7.1 Multi-air-flow Das Kühlabteil ist mit einem ventilatorgestützten Mul- ti- Air-Flow-System ausgestattet, welches für eine gleichmäßige Verteilung der Kühlluft auf unterschied- lichen Ebenen sorgt (Abb. - Page 59 7- Ausstattung 7.4 Abnehmbare Türablagen Zur Reinigung lassen sich die Türablagen entfernen. Türablage auf beiden Seiten fassen, in Richtung (1) nach oben anheben und in Richtung (2) herausziehen (Abb. 7.3). Die Schritte in umgekehrter Reihenfolge ausführen, um die Türablage wieder einzusetzen. 7.5 Separates Fach Im separaten Fach können Lebensmittel in kleinen Gebinden wie Marmelade, Käse, Tomatenmark usw.
- Page 60 7- Ausstattung 7.9 Herausnehmbare Schubladen Zum Herausnehmen die Schubladen bis zum Anschlag vorziehen (1), anheben und herausnehmen (2) (Abb. 7.9). Die Schritte in umgekehrter Reihenfolge ausführen, um die Schubladen wieder einzusetzen. 7.10 7.10 3D-Gefrierschublade Die Gefrierschubladen (Abb. 7.10) lassen sich gerade und komplett ausziehen.
- Page 61 7- Ausstattung 2. Schnell Auftauen Gefriergut, das zum Auftauen auf das Fresher Pad gelegt wird, welches sich außerhalb des Gerätes befindet, taut fünf mal schneller auf als ohne diese Ablage. ▶ Fresher Pad bei Raumtemperatur abkühlen lassen. Gefriergut auf die mit „Fresher Pad“ be- druckten Seite platzieren und auf einer ebenen Fläche außerhalb des Gerätes ruhen lassen.
-
Page 62: 8- Reinigung Und Pflege
8- Reinigung und Pflege WARNUNG! Schalten Sie vor jeder Wartung das Gerät aus und ziehen Sie den Netzstecker. 8.1 Allgemeines Gerät am besten dann reinigen, wenn nur wenig oder kein Kühl- bzw. Gefriergut ein- gelagert ist. Um unangenehme Gerüche im Gerät zu vermeiden, wird empfohlen, das Kühlabteil alle vier Wochen zu reinigen. - Page 63 8- Reinigung und Pflege Technische Daten LED Lampe: Spannung in V Max Leistung in W Lichtstrom in Lumen weiß-5050 LED Spec -30 °C bis +85 °C. Gebrauchstemperatur 8.4 Austauschbare Schubladendichtung Es gibt sechs Dichtungen für die obere und die untere Gefrierschublade, die bei Bedarf wie folgt ausgtauscht werden können.
-
Page 64: 9- Fehlerbehebung
9- Fehlerbehebung Die im Folgenden aufgezählten Probleme können meist selbst behoben werden. Wenden Sie sich erst dann an den Kundendienst (siehe Garantiekarte), wenn Sie alles geprüft ha- ben und den Fehler nicht beseitigen können. WARNUNG! ▶ Schalten Sie vor jeder Wartung das Gerät aus und ziehen Sie den Netzstecker. ▶... - Page 65 9- Fehlerbehebung Problem Mögliche Ursachen Lösungen • Der Temperaturregler ist auf • Temperatur neu einstellen. Im Gerät wird es nicht kalt genug. „schwach“ eingestellt. • Es wurde zu warmes Gut ein- • Gut erst abkühlen lassen. gelagert. • Es wurde zu viel auf einmal ein- •...
- Page 66 9- Fehlerbehebung Problem Mögliche Ursachen Lösungen • Dies ist normal. • - Die Seiten des Gehäuses werden warm. • Das Gerät steht nicht auf ebe- • Das Gerät so ausrichten, dass es ge- Das Gerät gibt ungewöhnliche nem Untergrund. rade steht. Geräusche von •...
-
Page 67: 10- Installation
Erforderlicher Gesamtraumbedarf bei geöffneter Tür 10.4 (Abb. 10.4): Gerätebreite Gerätetiefe in mm in mm Modell A3FE737CPJM 1200 10.5 Lüftungsquerschnitte 10.5 200 mm Um aus Sicherheitsgründen eine ausreichende Be- lüftung des Gerätes zu erzielen, müssen die Angaben 100 mm des erforderlichen Lüftungsquerschnittes eingehalten werden (Abb. - Page 68 10- Installation 10.6 Gerät ausrichten 10.6 Gerät auf ebenen harten Boden aufstellen. 1. Das Gerät leicht nach hinten kippen (Abb. 10.6). 2. Die Füße auf die gewünschte Höhe einstellen. Darauf achten, dass der Abstand zur Wand auf der Türanschlagseite mindestens 100 mm beträgt, damit die Tür richtig geöffnet werden kann.
- Page 69 10- Installation 10.9 Türanschlagwechsel Vor Anschluss des Gerätes an das Stromnetz sollte überprüft werden, ob der Türanschlag von rechts (Lieferzustand) nach links gewechselt werden muss, falls der Aufstellort und die Bedienbarkeit dies erfordern. WARNUNG! ▶ Das Gerät ist schwer. Nehmen Sie eine zweite Personen zu Hilfe. ▶...
- Page 70 10- Installation 12. Unteres Scharnier für die obere Tür aus dem Bei- pack entnehmen und auf die andere Seite der Türöffnung schrauben. 13. Obere Tür vorsichtig auf das untere Scharnier setzen und den Scharnierzapfen in die Türbuchse einführen Dabei sicherstellen, dass der untere Schar- nierzapfen in die Buchse der oberen Tür gleitet.
-
Page 71: 11- Technische Daten
11- Technische Daten 11.1 Produktdatenblatt gemäß Verordnung EU 1060/2010 Marke Haier Modellkennung A3FE737CPJM Kühl-Gefrierkombination Kategorie Energieeffizienzklasse Energieverbrauch (kWh/Jahr) Nutzinhalt Kühlen (L) Nutzinhalt Gefrieren (L) **** Stern-Einstufung Auslegungstemperatur „sonstige Fächer“ > 14°C Nicht anwendbar Frostfrei System Lagerzeit bei Störung (h) Gefriervermögen (kg/24h) Klimaklasse D i e s e s G e rä... - Page 72 11- Technische Daten 11.2 Zusätzliche technische Daten Modell A3FE737CPJM Spannung / Frequenz 220-240V ~/ 50Hz Nennstrom (A) Hauptsicherung (A) 10.0 Kühlmittel R600a Total volume (L) Net volume (L) Abmessungen (mm) Tiefe Breite Höhe 2005 11.3 Normen und Richtlinien Dieses Produkt erfüllt die Anforderungen aller anwendbaren EG-Richtlinien,die eine CE-...
-
Page 73: 12- Kundendienst
Haier Poland Sp. zo.o. GERMANY Ungarn Al. Jerozolimskie 181B Haier Appliances UK Co.Ltd. Griechenland 02-222 Warszawa One Crown Square Rumänien POLAND Großbritannien Church Street East Russland Woking, Surrey, GU21 6HR * Die Telefonnummern von weiteren Ländern finden Sie im Internet unter www.haier.com... - Page 74 A3FE-737CPJM_DE-V03_190318...
- Page 75 Instrukcja Instrukcja obsługi obsługi Chłodziarko-zamrażarka A3FE737CPJM...
- Page 76 Dziękujemy Dziękujemy za zakup produktu Haier. Przed użyciem urządzenia prosimy o dokładne zapoznanie się z instrukcją. Instrukcja za- wiera ważne informacje, które pomogą Ci uzyskać jak najlepszą pracę urządzenia i zapew- nić bezpieczną i prawidłową instalację, użytkowanie i konserwację. Instrukcję należy przechowywać w dogodnym miejscu, aby zawsze można było znaleźć w niej informacje dotyczące bezpiecznego i prawidłowego korzystania z urządzenia.
- Page 77 Zawartość 1- Informacje dotyczące bezpieczeństwa................. 4 2- Przeznaczenie ..........................8 3- Opis produktu ..........................9 4- Panel kontrolny ..........................10 5- Użytkowanie ..........................11 6- Porady dotyczące oszczędzania energii ................19 7- Wyposażenie..........................20 8- Konserwacja i czyszczenie .....................24 9- Rozwiązywanie problemów ....................26 10- Montaż ............................29 11- Dane techniczne ........................33 12- Obsługa klienta ........................35...
-
Page 78: 1- Informacje Dotyczące Bezpieczeństwa
1- Informacje dotyczące bezpieczeństwa Przed włączeniem urządzenia po raz pierwszy, przeczytaj poniższe wskazówki dotyczące bezpieczeństwa!: OSTRZEŻENIE! Przed pierwszym użyciem ▶ Upewnij się, że nie ma uszkodzeń transportowych. ▶ Usuń wszelkie opakowania i trzymaj je poza zasięgiem dzieci. ▶ Odczekaj co najmniej dwie godziny przed zainstalowaniem urzą- dzenia, aby upewnić... - Page 79 1- Informacj e dotyczące bezpi e czeństwa OSTRZEŻENIE! Codzienne używanie ▶ Nie uszkodź obiegu chłodzącego. ▶ Urządzenie to może być używane przez dzieci w wieku lat 8 lub star- sze, osoby z obniżoną sprawnością fizyczną, zmysłową lub umysło- wą, osoby z brakiem doświadczenia i wiedzy, jeśli są one nadzorowane lub gdy je poinstruowano jak korzystać...
- Page 80 1- Informacje dotyczące bezpieczeństwa OSTRZEŻENIE! Codzienne używanie ▶ Nie ustawiaj niepotrzebnie niskiej temperatury w komorze lo- dówki. Ujemne temperatury mogą wystąpić przy wysokich usta- wieniach. Uwaga: Butelki mogą wybuchnąć. ▶ Nie dotykaj zamrożonych rzeczy wilgotnymi rękami (załóż ręka- wiczki). Szczególnie nie jeść lizaków lodowych natychmiast po wyjęciu z zamrażalnika.
- Page 81 1- Informacj e dotyczące bezpi e czeństwa OSTRZEŻENIE! Konserwacja/utrzymywanie w czystości ▶ Nie próbuj naprawiać, rozbierać lub modyfikować urządzenia sa- modzielnie. W przypadku naprawy, prosimy o kontakt z działem obsługi klienta. ▶ Usuń kurz z tyłu urządzenia co najmniej raz w roku, aby uniknąć zagrożenia ogniem, a także zwiększonego zużycia energii.
-
Page 82: 2- Przeznaczenie
2- Przeznaczenie 2.1 Przeznaczenie Urządzenie jest przeznaczone do chłodzenia i zamrażania żywności. Zostało ono zapro- jektowane do stosowania wyłącznie w suchym wnętrzu, do użytku domowego. Nie jest ono przeznaczone do zastosowania komercyjnego. Zmiany i modyfikacje urządzenia nie są dozwolone. Używanie niezgodne z przeznacze- niem może spowodować... -
Page 83: 3- Opis Produktu
3- Opis produktu Uwaga Z powodu zmian technicznych i różnych modeli, niektóre ilustracje w tej instrukcji mogą się różnić od Twojego modelu. Zdjęcia urządzeń (Rys. 3) A: Refrigerator compartment: 1. Żarówka LED w lodówce 2. Kanał powietrza i czujnik (za panelem) 3. -
Page 84: 4- Panel Kontrolny
4- Panel kontrolny Panel kontrolny (rys. 4) Przyciski: A Ustawianie temperatury lodówki B Ustawienie Mojej Strefy C Ustawienia temperatury zamrażarki Chiller D Włączanie/wyłączanie trybu „Fuzzy“ oraz funkcji „wakacji“ E Włączanie/wyłączanie funkcji Super- Cool F Włączanie/wyłączanie funkcji Super- -Freeze E Blokowanie/odblokowanie panelu Wskaźniki: a Temperatura komory lodówki b Funkcja Mojej Strefy... -
Page 85: 5- Użytkowanie
5- Użytkowanie 5.1 Przed pierwszym użyciem Usuń całe opakowanie, trzymaj je poza dostępem dzieci i usuń je w sposób przyjazny ▶ dla środowiska. Wyczyść wnętrze i obudowę urządzenia wodą z dodatkiem łagodnego detergentu. ▶ Po wypoziomowaniu i oczyszczeniu urządzenia, odczekaj co najmniej 2 godziny ▶... - Page 86 5- Użytkowanie 5.6 Alarm otwarcia drzwi Gdy drzwi lodówki są otwarte przez więcej niż 1 minuta, włącza się alarm otwarcia drzwi (rys. 5.6). Alarm można wyłączyć poprzez zamknięcie drzwi. Jeśli drzwi lodówki będą otwarte przez ponad 7 minut, oświetlenie lodów- ki i panel kontrolny zgasną...
- Page 87 5- Użytkowanie 4. Dotknij dowolny klawisz, z wyjątkiem „A” (lodówka), aby potwierdzić, lub ustawienie potwierdzi się au- tomatycznie po 5 sekundach. Wyświetlana temper- atura przestanie migać. 5.7.2-3 5.7.2-4 5.7.2.2 Regulacja temperatury w zamrażarce 1. Odblokuj panel przez dotknięcie przycisku „C“, jeśli jest zablokowany (rys.
- Page 88 5- Użytkowanie 5.9 Funkcja Super-Freeze Świeże jedzenie powinno być całkowicie zamrożone 5.9-2 5.9-1 możliwie jak najszybciej. Zachowa to najlepsze wartości odżywcze, wygląd i smak. Funkcja Super-Freeze pr- Super-Frz. Super-Frz. zyspiesza zamrażanie świeżej żywności i chroni jedzenie już przechowywane przed niepożądanym ociepleniem. Jeśli musisz zamrozić...
- Page 89 5- Użytkowanie 5.11.1 Chłodziarka Funkcja ta ustala temperaturę w pojemniku Mojej strefy na 0°C. Nadaje się do przechow- ywania świeżej żywności, takich jak mięso lub produkty typu instant. Większość jedzenia pozostaje świeża w 0 ° C, ale nie zamarza Uwaga: Chłodziarka ▶...
- Page 90 5- Użytkowanie 5.12 Wskazówki dotyczące przechowywania świeżej żywności Aby uniknąć zanieczyszczenia żywności, należy przestrzegać następujących instrukcji: - Otwieranie drzwi na dłuższy czas może spowodować znaczny wzrost temperatury w komorach urządzenia. - Przechowuj surowe mięso i ryby w odpowiednich pojemnikach w lodówce, tak aby nie dotykały ani nie ściekały na inne produkty spożywcze.
- Page 91 5- Użytkowanie 5.12.1 1. Masło, ser, jajka, przyprawy, itp. 7. Wino, szampan, itd. 2. Jajka, jedzenie w puszkach, przyprawy, itp. 8. Gotowane mięso, kiełbasa, itp. 3. Dżem, ser, koncentrat pomidorowy, itp. 9. Pojemnik Moja strefa: Napoje w pusz- kach (Q-Cool), surowe, świeże, jedzenie 4.
- Page 92 5- Użytkowanie 5.12.2 Przechowywanie w zamrażarce Utrzymuj temperaturę zamrażarki na poziomie -18°C. ▶ 24 godziny przed zamrażaniem włącz funkcję Super-Freeze; dla małych ilości jedze- ▶ nia 4-6 godzin jest wystarczające. Gorące jedzenie musi zostać schłodzone do temperatury pokojowej, zanim będzie ▶...
-
Page 93: 6- Porady Dotyczące Oszczędzania Energii
6- Porady dotyczące oszczędzani a energi i Porady dotyczące oszczędzania energii ▶ Upewnij się, że urządzenie jest odpowiednio wentylowane (patrz: Montaż). ▶ Nie instaluj urządzenia w miejscu narażonym na bezpośrednie działanie promieni sło- necznych lub w pobliżu źródeł ciepła (np. pieców, grzejników). ▶... -
Page 94: 7- Wyposażenie
7- Wyposażenie Uwaga: Różnice pomiędzy modelami Z powodu różnic pomiędzy modelami, Twój model może nie posiadać wszystkich tych funkcji. Patrz: rozdział OPIS PRODUKTU. 7.1 Wielobiegowy przepływ powietrza Lodówka jest wyposażona w system wielobiegowego przepływu powietrza, w którym dysze chłodnego powie- trza znajdują... - Page 95 7- Wyposażenie 7.4 Zdejmowane półki na drzwiach Półki na drzwiach można wyjmować do czyszczenia. Umieść ręce z obu stron półki, unieś ją do góry (1) i wyciągnij (2) (rys. 7.4). W celu zamontowania półki na drzwiach, powyższe etapy trzeba wykonać w odwrotnej kolejności. 7.5 Pojemnik zamykany hermetycznie Jest on używany do przechowywania drobnych rzeczy, takich jak dżem, ser, koncentrat pomidorowy, itp.
- Page 96 7- Wyposażenie 7.9 Wyjmowana szuflada zamrażarki Aby wyjąć szufladę, należy ją maksymalnie wyciągnąć (1), unieść i wyjąć (2) (rys. 7.9). W celu włożenia szuflady, powyższe instrukcje należy wykonać w odwrotnej kolejności. 7.10 Szuflada 3D zamrażarki 7.10 Szuflady zamrażarki (rys. 7.10) mogą być wyciągane łatwo i całkowicie.
- Page 97 7- Wyposażenie 2. Szybkie rozmrażanie Korzystając z Fresher Pad poza urządzeniem, rozmrozimy żywność pięć razy szybciej niż bez podkładki, ponieważ: ▶ pozwól Fresher Pad schłodzić się w temperaturze pokojowej i umieść go na płaskiej powierzchni poza urządzeniem. Umieść żywność na stronie napisem „Fresher Pad”. Uwaga: Fresher Pad ▶...
-
Page 98: 8- Konserwacja I Czyszczenie
8- Konserwacja i czyszczenie OSTRZEŻENIE! Przed czyszczeniem odłącz urządzenie od sieci. 8.1 Ogólne Czyść urządzenie, gdy jest w niej niewiele produktów lub żadna żywność nie jest przecho- wywana. Urządzenie powinno być czyszczone co cztery tygodnie dla konserwacji i aby za- pobiec utrzymywaniu się... - Page 99 8- Konserwacja i czyszczenie Parametr Napięcie w V Maksymalna moc W Ilość światła w lumenach Specyf. LED -5050 biała Temperatura użycia -30°C +85°C. 8.4 Wymienne uszczelki pomocnicze drzwi Istnieje sześć dodatkowych uszczelek drzwi na górnej i dol- nej szufladzie zamrażarki. 1.
-
Page 100: 9- Rozwiązywanie Problemów
9- Rozwiązywanie problemów Wiele problemów można rozwiązać samodzielnie, bez specjalistycznej wiedzy. W przy- padku problemów prosimy sprawdzić wszystkie pokazane możliwości i postępować zgod- nie z poniższymi instrukcjami przed skontaktowaniem się z obsługi posprzedażnej. Patrz: OBSŁUGA KLIENTA. OSTRZEŻENIE! ▶ Przed przystąpieniem do konserwacji, wyłącz urządzenie i wyjmij wtyczkę z gniazdka sieciowego. - Page 101 9- Rozwiązywanie problemów Problem Możliwa przyczyna Możliwe rozwiązanie Wewnątrz urządze- • Temperatura jest zbyt wysoka. • Ponownie ustaw temperaturę. nia nie jest wystar- • Zostały włożone zbyt ciepłe pro- • Zawsze ostudź produkty przed czająco zimno. dukty. włożeniem ich do urządzenia. •...
- Page 102 9- Rozwiązywanie problemów Problem Możliwa przyczyna Możliwe rozwiązanie Słychać delikatny • To jest normalne. • - szum podobny do płynącej wody. Słychać dźwięk • Schowek na drzwiach lodówki jest • Zamknij drzwi lub wyłącz alarm alarmu. otwarty. ręcznie. Słychać cichy po- •...
-
Page 103: 10- Montaż
10- Montaż 10.1 Rozpakowanie OSTRZEŻENIE! ▶ Urządzenie jest ciężkie. Zawsze przenoś urządzenie z pomocą co najmniej dwóch osób. ▶ Zachowaj wszystkie materiały opakowania poza zasięgiem dzieci i wyrzucić je w spo- sób przyjazny dla środowiska. Wyjmij urządzenie z opakowania. ▶ Usuń... - Page 104 10- Montaż 10.6 Ustawianie urządzenia 10.6 Urządzenie powinno być umieszczone na płaskiej i sta- bilnej powierzchni. 1. Pochyl urządzenie lekko do tyłu (rys. 10.6). 2. Ustaw nóżki na pożądanym poziomie. 3. Stabilność można sprawdzić popychając na prze- mian rogi urządzenia. Lekkie kołysanie powinno max 45°...
- Page 105 10- Montaż 10.9 Odwracalność drzwi Przed podłączeniem urządzenia do zasilania należy sprawdzić, czy nie trzeba zmienić kie- runku otwierania drzwi z prawego (ustawienie przy odbiorze) na lewy, jeśli jest to konieczne ze względu na miejsce instalacji i użytkowania. OSTRZEŻENIE! ▶ Urządzenie jest ciężkie. Potrzeba dwóch osób do zmiany kierunku otwierania drzwi. ▶...
- Page 106 10- Montaż 12. Wyjmij nowy dolny zawias z woreczka z akceso- riami i wkręć go po lewej stronie urządzenia. 13. Unieś ostrożnie górne drzwi na dolnym zawiasie tak, aby sworzeń pasował do tulei zawiasu. Upewnij się, że trzpień pasuje do otworu zawiasu górnych drzwi.
-
Page 107: 11- Dane Techniczne
11- Dane techniczne 11.1 Karta produktu, zgodnie z Zarządzeniem UE Nr 1060/2010 Znak towarowy Haier Identyfikator modelu A3FE737CPJM Chłodziarko-zamrażarka Kategoria modelu Klasa efektywności energetycznej Roczne zużycie energii (KWh/rok) Objętość komory chłodzenia (L) Objętość komory zamrażarki (L) **** Klasyfikacja gwiazdkowa Temperatura innych komór > 14°C... - Page 108 11- Dane techniczne 11.2 Dodatkowe dane techniczne Model A3FE737CPJM Napięcie / Częstotliwość 220-240V ~/ 50Hz Prąd wejściowy (A) Główny bezpiecznik (A) 10.0 Płyn Chłodniczy R600a Całkowita pojemność (l) Pojemność netto (l) Wymiary (wys./szer./gł. w mm) Głębokość Szerokość Wysokość 2005 11.3 Normy i dyrektywy Produkt ten spełnia wymagania wszystkich obowiązujących dyrektyw UE z odpowiednimi...
-
Page 109: 12- Obsługa Klienta
12- Obsługa klienta Polecamy nasz system Obsługi Klienta Haier i stosowanie oryginalnych części zamien- nych. Jeśli masz problem z urządzeniem, najpierw sprawdź sekcję ROZWIĄZYWANIE PROBLEMÓW. Jeżeli nie możesz znaleźć rozwiązania, prosimy o kontakt ▶ z twoim lokalnym sprzedawcą lub ▶ miejscowym Serwisem na www.haier.com, gdzie można znaleźć numery telefonów i FAQ, oraz gdzie można aktywować... - Page 110 A3FE-737CPJM_PL-V03_190318...
Need help?
Do you have a question about the A3FE737CPJM and is the answer not in the manual?
Questions and answers