Table of Contents
Advertisement
Quick Links
Item #1003 391 254
Model #715.0400.000
USE AND CARE GUIDE
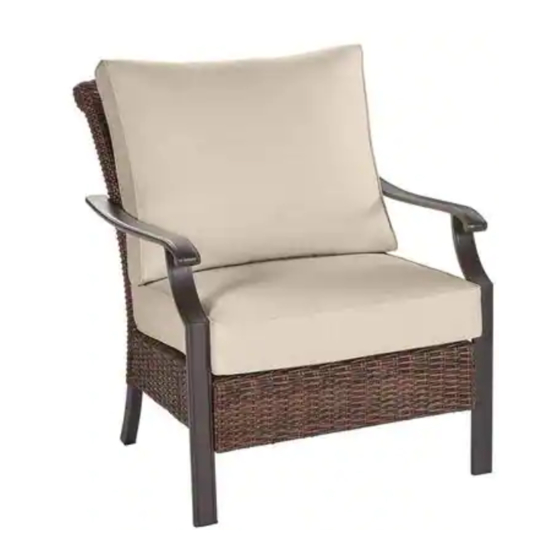
HARPER CREEK SINGLE SOFA
Questions, problems, missing parts? Before returning to the store,
call Hampton Bay Customer Service
8 a.m. - 7 p.m., EST, Monday – Friday, 9 a.m. – 6 p.m., EST, Saturday
1-855-HD-HAMPTON
HAMPTONBAY.COM
THANK YOU
lly create
quality products designed to enhance your home. Visit us online to see our full line of products available for your home improvement needs.
Thank you for choosing Hampton Bay!
Advertisement
Table of Contents

Related Manuals for HAMPTON BAY 715.0400.000


Summary of Contents for HAMPTON BAY 715.0400.000
- Page 1 8 a.m. - 7 p.m., EST, Monday – Friday, 9 a.m. – 6 p.m., EST, Saturday 1-855-HD-HAMPTON HAMPTONBAY.COM THANK YOU lly create quality products designed to enhance your home. Visit us online to see our full line of products available for your home improvement needs. Thank you for choosing Hampton Bay!
-
Page 2: Table Of Contents
Table of Contents Table of Contents ........2 Hardware Included . -
Page 3: Pre-Assembly
Pre-Assembly PLANNING ASSEMBLY Please read this entire instruction manual prior to assembly. Identify all parts packed in the carton against the parts list. Remove all protective materials and place the parts on a non-abrasive surface to avoid scratching. NOTE: More than one person may be required to assemble this product. -
Page 4: Chair Package Contents
Pre-Assembly CHAIR PACKAGE CONTENTS IMPORTANT: Do not fully tighten bolts/screws until all pieces are loosely assembled. Part Description Quantity Chair back Right arm Left arm Chair seat Seat cushion Back cushion... -
Page 5: Assembly
Assembly Atta ching the left arm to the seat and Attaching the chair back to the seat back □ Attach the chair back (A) to the seat (D) using M6 bolts □ Attach the left arm (C) to the chair seat (D) and back (A) by (BB) and washers (CC). -
Page 6: Care And Cleaning
Care and Cleaning □ Do not allow water to build up in the frames. This will cause corrosion and possible freezing damage in cold climates. □ Use a mild soap and water for normal cleaning. Do not use janitorial or alcohol based cleaners. Some cleaners may be marked as □... - Page 7 Questions, problems, missing parts? Before returning to the store, call Hampton Bay Customer Service 8 a.m. – 7 p.m., EST, Monday – Friday, 9 a.m. – 6 p.m., EST, Saturday 1-855-HD-HAMPTON HAMPTONBAY.COM Retain this manual for future use.
- Page 8 ¿Tiene preguntas, problemas o la faltan partes? Antes de hacer una devolución a la tienda, llame al Servicio de Atención al Cliente de Hampton Bay de lunes a viernes de 8:00 a 19:00 (hora de la costa este de EEUU), de sábado de 9:00 a 18:00 (hora de la costa este de EEUU)
- Page 9 Índice Índice..........2 Elementos de Montaje Incluidos .
- Page 10 Pre-Montaje PLANIFICACIÓN DEL MONTAJE Lea este manual de instrucciones completo antes del montaje. s partes NOTA:Puede que más de una persona sea necesaria para armar este producto. ELEMENTOS DE MONTAJE INCLUIDOS NOTA: Los elementos de montaje no se muestran en tamaño real. Parte Descripción Quantity Perno...
- Page 11 Pre-Montaje CONTENIDO DEL PAQUETE DE SILLA IMPORTANTE: No apretar los pernos / tornillos hasta que todas las piezas se ensamblan sin apretar. Parte Descripción Cantidad Presidente del respaldo Brazo derecho Brazo izquierdo Asiento de la silla Cojín del asiento Cojín trasero...
- Page 12 Montaje Colocación del brazo izquierdo en el Colocación del asiento de la silla en asiento de la silla y vuelta la silla espalda □ Coloque el brazo izquierdo (C) en la parte posterior de la silla (A) □ Fije el asiento de la silla (D) a la parte posterior de la silla con pernos M6 (AA) y arandelas (CC).
- Page 13 Cuidado y Limpieza □ No permita la acumulación de agua en el bastidor. Ello provocará corrosión y la posibilidad de daños por congelamiento en climas fríos. □ Use un jabón suave y agua para la limpieza normal. No utilice productos de limpieza domésticos ni ningún producto a base de alcohol.
- Page 14 ¿Tiene preguntas, problemas o la faltan partes? Antes de hacer una devolución a la tienda, llame al Servicio de Atención al Cliente de Hampton Bay de lunes a viernes de 8:00 a 19:00 (hora de la costa este de EEUU), de sábado de 9:00 a 18:00 (hora de la costa este de EEUU)
- Page 15 8 a.m. - 7 p.m., EST, Monday – Friday, 9 a.m. – 6 p.m., EST, Saturday 1-855-HD-HAMPTON HAMPTONBAY.COM THANK YOU quality products designed to enhance your home. Visit us online to see our full line of products available for your home improvement needs. Thank you for choosing Hampton Bay!
- Page 16 Table of Contents Table of Contents ........2 Hardware Included .
- Page 17 Pre-Assembly PLANNING ASSEMBLY Please read this entire instruction manual prior to assembly. Identify all parts packed in the carton against the parts list. Remove all protective materials and place the parts on a non-abrasive surface to avoid scratching. NOTE: More than one person may be required to assemble this product.
- Page 18 Pre-Assembly TABLE PACKAGE CONTENTS IMPORTANT: Do not fully tighten bolts/screws until all pieces are loosely assembled. Part Description Quantity Table top Table legs Support rim...
- Page 19 Assembly Attaching the support rim to the table Attaching the table legs to the table top legs □ Attach the table legs (B) to the table top (A) using M6 bolts □ Attach the support rim (C) to the table legs (B) using M6 (FF) and washers (CC).
- Page 20 Care and Cleaning □ Do not allow water to build up in the frames. This will cause corrosion and possible freezing damage in cold climates. □ Use a mild soap and water for normal cleaning. Do not use janitorial or alcohol based cleaners. Some cleaners may be marked as □...
- Page 21 Questions, problems, missing parts? Before returning to the store, call Hampton Bay Customer Service 8 a.m. – 7 p.m., EST, Monday – Friday, 9 a.m. – 6 p.m., EST, Saturday 1-855-HD-HAMPTON HAMPTONBAY.COM Retain this manual for future use.
- Page 22 ¿Tiene preguntas, problemas o la faltan partes? Antes de hacer una devolución a la tienda, llame al Servicio de Atención al Cliente de Hampton Bay de lunes a viernes de 8:00 a 19:00 (hora de la costa este de EEUU), de sábado de 9:00 a 18:00 (hora de la costa este de EEUU)
- Page 23 Índice Índice ........2 Elementos de Montaje Incluidos ....... . . 3 Tabla Contenido del paquete .
- Page 24 Pre-Montaje PLANIFICACIÓN DEL MONTAJE Lea este manual de instrucciones completo antes del montaje. s partes NOTA:Puede que más de una persona sea necesaria para armar este producto. HARDWARE INCLUDED NOTA: Los elementos de montaje no se muestran en tamaño real. Parte Descripción Cantidad Perno M6x15...
- Page 25 Pre-Asamblea CONTENIDO DEL PAQUETE DE MESA IMPORTANTE: No apretar los pernos / tornillos hasta que todas las piezas se ensamblan sin apretar. Parte Descripción Cantidad Tapa de la mesa Pata de la mesa Bastidor inferior...
- Page 26 Montaje Fijando el borde de soporte a la mesa Colocación de la pata de la mesa en la pierna parte superior de la mesa □ Fije las patas de la mesa (B) a la parte superior de la mesa (A) □...
- Page 27 Cuidado y Limpieza □ No permita la acumulación de agua en el bastidor. Ello provocará corrosión y la posibilidad de daños por congelamiento en climas fríos. □ Use un jabón suave y agua para la limpieza normal. No utilice productos de limpieza domésticos ni ningún producto a base de alcohol.
- Page 28 ¿Tiene preguntas, problemas o la faltan partes? Antes de hacer una devolución a la tienda, llame al Servicio de Atención al Cliente de Hampton Bay de lunes a viernes de 8:00 a 19:00 (hora de la costa este de EEUU), de sábado de 9:00 a 18:00 (hora de la costa este de EEUU)
Need help?
Do you have a question about the 715.0400.000 and is the answer not in the manual?
Questions and answers