
Related Manuals for Epilog Radius 4000


Summary of Contents for Epilog Radius 4000
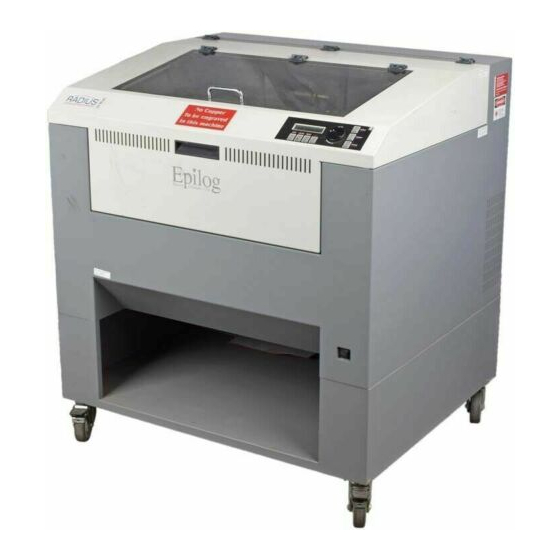
- Page 1 500 Corporate Circle - Suite L Golden, CO 80401 Phone (303) 277-1188 Fax (303) 277-9669 Owner's Manual for EPILOG Radius Model 4000 Revision E, December 1998...
-
Page 2: Table Of Contents
UNPACKING YOUR MACHINE ................... 5 CONNECTING POWER AND CONNECTING THE COMPUTER ........5 CONNECTING THE EXHAUST .................... 7 CONFIGURE YOUR COMPUTER ..................8 INSTALLING THE EPILOG RADIUS PRINT DRIVER ..............8 SECTION 2: SAFETY ..................... 10 LASER SAFETY ........................10 ELECTRICAL SAFETY. - Page 3 ENGRAVING MACHINE MAINTENANCE ........48 SECTION 13: MATERIAL SUPPLIERS ..............50 SECTION 14: ABOUT THE RADIUS..............53 RECOMMENDED COMPUTER ......................53 SCANNER ............................53 SOFTWARE ............................53 Getting Started Laser Safety Using the Epilog Print Driver Using the Epilog Radius Speed and Power Recommendations...
- Page 4 DO’s & DON’Ts Double Head Option Air Assist Option Rotary Option Rubber stamp engraving Memory configuration In Case of Difficulty Maintenance Supplier Information General information...
-
Page 5: Getting Started
3) Connect the exhaust system* Configure your computer *You may need a contractor to install the exhaust(all models) and the 208-240 volts (50 & 100 watt only). This must be done PRIOR to the arrival of the Epilog Installation technician. UNPACKING YOUR MACHINE 1) Cut the strapping around the box, and remove it. - Page 6 The Radius requires 208-240 VAC, single phase. Building wiring must be performed by a licensed electrician if not already available, and must be done prior to the arrival of the Epilog installation technician. Two 15 amp circuits must be provided. One for the Radius and one for the chiller.
-
Page 7: Connecting The Exhaust
Reach under the table and remove the two foam shipping supports. CONNECTING THE EXHAUST The exhaust system should be installed by a contractor prior to the arrival of the Epilog installation technician. The blower should be mounted outside your building for noise considerations. -
Page 8: Configure Your Computer
CONFIGURE YOUR COMPUTER Included in the accessories kit is a 3.5 inch diskette labeled EPILOG. With the computer turned on and Windows open, insert the diskette into your 3.5 inch disk drive to install the print driver. Your computer must have Windows 95 or Windows 98 already installed. - Page 9 Set the “PIECE SIZE” to 24 Horizontal, 18 Vertical l) Click “OKAY” m) Click “OKAY” again, then exit the Printer windows This procedure will allow Corel version 5.0 to print all resolutions offered in the Epilog Print Driver. YOUR RADIUS LASER IS NOW READY FOR USE!
-
Page 10: Safety
SECTION 2: SAFETY LASER SAFETY Epilog Radius Model 4000 Laser Engravers not equipped with the Laser Diode Pointer option are Class I laser products, as defined in 21 CFR 1040, the Federal Performance Standards for Light- Emitting Products. They are fully enclosed, with interlocked doors, and no special precautions are necessary to operate them safely. -
Page 11: Electrical Safety
(407) 380-1553 ELECTRICAL SAFETY. The AC input power to the Epilog Radius Model 4000 Laser Engravers is potentially lethal and is fully contained within the cabinet. DO NOT open the power inlet panel on the rear of the unit. There are no operator- serviceable components inside, and opening this cover will expose the operator to the engraver’s AC input power. -
Page 12: Safety Features And Regulatory Compliance
SAFETY FEATURES AND REGULATORY COMPLIANCE. Epilog has incorporated specific safety features into the Radius Model 4000 Laser Engravers in order to meet the requirements of 21 CFR 1040.10. These safety features are as follows: A safety enclosure (cabinet) which fully encloses the engraving laser and its beam path. - Page 13 Epilog Corporation 500 Corporate Circle Suite L Golden, Colorado 80401 USA Model Number: 4000/25 Laser Engraver With Laser Diode Pointer Option Serial Number: 4025-980XXX Date of Manufacture: February 1998 Class IIIa Laser Product This product complies with 21 CFR 1040.10 Made In USA 2) Non-interlocked Protective Housing Safety Label.
- Page 14 5) Radius Model 4000 Laser Engravers having the Laser Diode Pointer option bear two additional warning labels: a) Class IIIa Warning Logotype. This label is located on the right-hand side of the engraver’s cabinet, directly below the Certification/Identification label. b) Aperture Safety Label. This label is located inside the engraver’s cabinet, at the right rear, above the aperture through which the engraving laser and Laser Diode Pointer beams enter the cabinet.
-
Page 15: Using The Epilog Radius Print Driver
SECTION 3: USING THE EPILOG RADIUS PRINT DRIVER The Epilog Radius print driver allows you to control the laser functions from your computer. The Print Driver Setup window is shown below. RESOLUTION Resolution determines how many cuts or lines per inch the machine will engrave. Available resolutions range from 160 to 1200 DPI. - Page 16 The photograph setting should be selected when you are raster engraving scanned photographs. Epilog uses an error diffusion process in the print driver to greatly enhance the look of an engraved photograph. All black text and other scanned black & white images will engrave correctly in the Photograph setting.
-
Page 17: Piece Size
(spaces are allowed). When you click the SAVE button this custom setup will be saved. When you are in the Epilog Radius Laser Setup window you can click on the Configurations down arrow to retrieve your different custom job setups. -
Page 18: Rate Automatic
RATE AUTOMATIC Rate Automatic is used when vector cutting to adjust the rate that the laser is firing to the match the speed of the carriage. The higher the rate the more pulses that the laser will fire in a given distance. - Page 19 SETTINGS Here you set the speed and power values for the color you have created. Adjust the sliders to the values that you want and click on the ADD button. You should see the color you entered with the speed and power show up in the list of colors on the right. Please be careful not to add the same color to the list twice.
-
Page 20: Using The Epilog Radius
SECTION 4: USING THE EPILOG RADIUS KEYBOARD COMMANDS The keyboard is set up so that most keys have two jobs. The shift key determines whether the red or the white function will be done. When the shift key is pressed, the display will say “shift”... -
Page 21: Reset
send a new design while the machine is engraving; if you do, your computer will display an error message and you may have other difficulties. RESET This key is used to terminate a job in process or to clear an error. To avoid accidental resets, the machine must first be Stopped or taken Offline. -
Page 22: Move X
You will need to focus manually, and set the distance from the work to the lens at 2 and ½ inches. Epilog provides a special focus gage designed specifically for this purpose. - Page 23 REMEMBER THE STEPS: 1) Insert the item to be engraved 2) Focus (or enable autofocus) 3) Close the door 4) Confirm the exhaust is on. 5) Press ONLINE and then "Print" from your computer.
-
Page 24: Speed And Power Recommendations
SECTION 5: SPEED AND POWER RECOMMENDATIONS Material hardness, the desired effect and personal taste will by nature require adjustments to the recommendations given below. Depth of cut varies with speed and power. Generally, you will want to experiment on a practice piece any time you are not sure what settings to use. Don't be afraid to experiment over the whole range of settings. - Page 25 Matboard 100-70 100-70 20-80 Melamine 40-100 60-100 Rubber Stamps 15-100 20-100 5-100...
-
Page 26: Watt Radius
30 WATT RADIUS 300 DPI ENGRAVING 600 DPI ENGRAVING SPEED-POWER SPEED-POWER CUTTING SPEED-POWER 1/4" Wood 25-100 35-100 5-100 25-100 100-15 5-100 1/4" Acrylic Anodized Aluminum 100-60 100-40 100-55 100-40 Brass-Painted Corian Or Avonite 25-100 25-100 30-100 35-100 15-100 Delrin Glass 45-100 50-100 100-65... -
Page 27: 50 Watt Radius
50 WATT RADIUS 300 DPI ENGRAVING 600 DPI ENGRAVING SPEED-POWER SPEED-POWER CUTTING SPEED-POWER 3/8' Wood 60-100 80-100 20-100 100-30 100-20 10-100 3/8" Acrylic Anodized Aluminum 100-40 100-30 100-40 100-30 Brass-Painted Corian Or Avonite 40-100 50-100 40-100 60-100 45-100 Delrin Seals Glass 50-100 60-100... -
Page 28: 100 Watt Radius
100 WATT RADIUS 300 DPI ENGRAVING 600 DPI ENGRAVING SPEED-POWER SPEED-POWER CUTTING SPEED-POWER 1/2" Wood 100-100 100-100 1-100 100-20 100-25 5-100 1/2" Acrylic Anodized Aluminum 100-30 100-30 100-25 100-25 Brass-Painted Corian Or Avonite 100-100 100-100 40-100 60-100 35-25 Delrin Seals Glass 60-100 70-100... -
Page 29: Do's And Dont's
SECTION 6: DOs AND DON’Ts DON’T! NEVER operate the machine without a properly operating vent to the outside! Most material will only produce an irritating smoke when engraved. Some materials, including but not limited to paint, varnish, composition board and plastics produce compounds that can be harmful if concentrated. - Page 30 bottom lines of text is skipped, greatly reducing the required engraving time. The machine will be more efficient if your designs allow the laser to work with a logo and text, as opposed to having to work strictly in terms of the number of square inches on the item to be engraved (which is the case with a border).
-
Page 31: Double Head Option
SECTION 7: DOUBLE HEAD OPTION Locate the components for the Double head option. Connecting strut Strut thumbscrews (2) Bearing Plate Optical Assembly Bearing plate screws (2) 1) With the machine off, open the door and slowly pull the “I” beam assembly to the front of the machine to where it is a comfortable reach. - Page 32 will take care of the duplication automatically. Prepare your artwork as though you were making only a single piece.
-
Page 33: Air Assist Option
SECTION 8: AIR ASSIST OPTION The air assist option is to allow for deeper engraving and cutting than would otherwise be possible without the assist. The assist carries away the materials that might combust at the point of engraving, providing a cleaner removal of material. Generally, compressed air at 20 PSI is adequate. -
Page 34: Rotary Option
SECTION 9: ROTARY OPTION The rotary option allows you to mark or engrave “in the round”. To install the fixture in the machine please do the following: 1) Lower the engraving table to its lowest point. 2) Turn off the power to the engraver. 3) Set the rotary attachment onto the engraving table so that the three pins in the bottom of the rotary attachment slide into the three corresponding holes in the table. -
Page 35: Focus With The Rotary
1) Load your glass with the open end to the left side of the attachment. The clamp is designed to sit inside the glass and clamp the glass to the drive wheels. Insure the glass is all the way to the left against the plastic stop. 2) The elevator lock is in the unlock position when it is in the forward position. -
Page 36: Rotary Removal
ROTARY REMOVAL 1) Open the large door. 2) Turn off the power to the laser. 3) Depress the release tab on the connector and unplug the connector. 4) Remove the rotary attachment. *NOTE! The rotary device only works in Raster mode. The front control panel will display “Remove Rotary”... -
Page 37: Engraving Rubber Stamps
SECTION 10: ENGRAVING RUBBER STAMPS The Epilog Radius is has a second print driver for doing rubber stamps. All unique stamp attributes are added by the driver including shoulders, mirroring of the artwork and raising the pattern from the background. - Page 38 Please remember, the fence must have a .001” outline and must completely enclose your design. You can cut out individual stamps by using a .001” outline within the fence. The stamp driver panel is shown below. Once your artwork is set up, you need to specify how you want the machine to cut the stamp.
- Page 39 RESOLUTION: 600 DPI resolution is recommended. This resolution provides a very high quality engraving with appropriate depth. 1200 DPI will provide a higher quality stamp. 1200 DPI will take about twice as long to engrave as 600 DPI. PIECE SIZE: This is the size of the plate. If the size here is not the same as the size in your drawing program the engraving will be in the wrong position.
-
Page 40: Memory Configuration
MEMORY CONFIGURATION The Epilog Radius memory buffer allows you to download any size single file of up to 16 MB in size. The file will remain in memory as long as the machine is turned on or until you send down another job. -
Page 41: In Case Of Difficulty
SECTION 12: IN CASE OF DIFFICULTY Avoiding Common print problems: Your Radius will begin to engrave as soon as the first line of data from the computer has been received by the engraver. This has the advantage of reducing the total time required for engraving, as the machine is not idle while the job is being loaded. - Page 42 Solution: - Some operations with Text in some versions of CorelDRAW require the text to be converted to curves. This command is located in one of the pull down menus. Problem: Engraving appears weak. Solution: - All mirrors and lens need to be cleaned and inspected for damage. See section thirteen for instructions.
- Page 43 3) If you are experiencing a double image problem or any other quality issue, it is best to run a sample of what the machine is doing and send it to Epilog attention Technical Support. Please include a letter stating the configuration of your machine along with speed and power settings of the sample you ran and any other pertinent information.
- Page 44 -The plastic lens over the light can be removed by squeezing the top and bottom, then gently pulling. Try reseating the bulb. Replace the bulb if it still won’t turn on. You can get one from Epilog, or from a hardware or leisure (RV’s, Campers) store. Problem: Table will not move.
- Page 45 It should just touch the table in the four corners as it did in the starting position (upper left corner). If there is a variance the table will need to be readjusted. Contact Epilog for the correct procedure.
- Page 46 The engraver received data it did not recognize. Check to be sure you are printing with the Epilog Radius driver. Also check to make sure you haven’t interrupted a previous print job without clearing out the balance of the job. You can check by click on “START”, settings, printers and double clicking on the...
- Page 47 Solution This indicates a fault in one of the electrical systems. Turn power off, and try again. If the error persists, your machine needs to have a component replaced. Contact Epilog technical support. Problem: Engraver displays “remove rotary” Solution: The rotary can not be used for vector jobs. Reset the print mode to “RASTER”.
-
Page 48: Engraving Machine Maintenance
SECTION 13: ENGRAVING MACHINE MAINTENANCE IMPORTANT! The single most important thing that you can do to keep your Radius working as if it were new is to keep it clean! Five minutes once a day will keep the residue and debris from building up and causing problems. - Page 49 LASER: The laser tube used in the Epilog engraver does have a maximum service life. The amount of engraving time that you get from a tube will depend to a large extent on how much material you remove from your plaques.
-
Page 50: Material Suppliers
SECTION 14: MATERIAL SUPPLIERS Laser Engraving Materials Sources For Use With Your Epilog Radius 1) ACRYLIC Acrylic Idea Factory 6669-C Peachtree Industrial Blvd. Norcross, GA 30092 800-543-9253 LASER ENGRAVABLE COATED METALS Identification Plates, Inc. 1555 HighPoint Drive Mesquite, TX 75149-9009... - Page 51 (970) 667-8880 - FAX Kentucky Woodcrafts Co. PO Box 220 McKee Industrial Park McKee, KY 40447 800-354-0196 Lee's Wood Products 31 Smithers Street P.O. Box 159 Rocky Mount, VA 24151 800-552-5337 Stanton Manufacturing Lake Road 54-15 Lake Ozark, MO 65049 573-365-2441 MIRRORED ACRYLIC Alenite Dodge...
- Page 52 800-869-7800 - Customer Service 8) FLAT GLASS Gold Coast Graphics 15841 Graham Street Huntington Beach, CA 92649 888-733-0061 9) PEN & PENCIL SETS IMARK Pen Co. 3008 Pleasant Valley Lane Arlington, TX 76015 (817) 465-6681 RUBBER STAMP MATERIAL Stewart Superior 1800 W.
-
Page 53: About The Radius
Corel Draw Version 5.0, 7.0, or 8.0. Other packages are available, but the technical support staff at Epilog may be less familiar with them and less able to help with questions. Check with Epilog if you have a question on compatibility. - Page 54 geometric shape like a circle. The laser will cut entirely through the material, separating the part from the background. For marking (engraving), the laser is swept across the work from left to right, and the laser is turned on and off at the correct points to produce the first line of the image.
Need help?
Do you have a question about the Radius 4000 and is the answer not in the manual?
Questions and answers