Table of Contents
Advertisement
Available languages
Available languages
Quick Links
PROFESSIONAL MEDICAL PRODUCTS
TERMOMETRO DIGITALE AMPIO SCHERMO
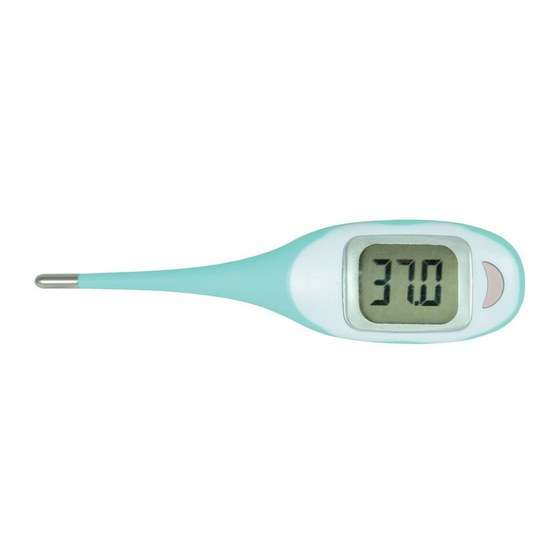
WIDE SCREEN DIGITAL THERMOMETER
THERMOMÈTRE NUMÉRIQUE ÉCRAN LARGE
TERMÓMETRO DIGITAL DE PANTALLA ANCHA
25552 / KD-601
Kellyunion Electronics Co., Ltd
No. 114, Five Star Village, Jiangkou Town
Hanjiang District 3511115 Putian, Fujian
PEOPLE'S REPUBLIC OF CHINA
Made in China
Landlink GmbH
Dorfstrasse 2/4, Emmendingen,
79312 Germany
Gima S.p.A.
Via Marconi, 1 – 20060 Gessate (MI) Italy
gima@gimaitaly.com
www.gimaitaly.com
–
export@gimaitaly.com
Advertisement
Table of Contents

Related Manuals for Gima KD-601


Summary of Contents for Gima KD-601
- Page 1 TERMOMETRO DIGITALE AMPIO SCHERMO WIDE SCREEN DIGITAL THERMOMETER THERMOMÈTRE NUMÉRIQUE ÉCRAN LARGE TERMÓMETRO DIGITAL DE PANTALLA ANCHA 25552 / KD-601 Kellyunion Electronics Co., Ltd No. 114, Five Star Village, Jiangkou Town Hanjiang District 3511115 Putian, Fujian PEOPLE’S REPUBLIC OF CHINA...
-
Page 2: Istruzioni Operative
ITALIANO ISTRUZIONI OPERATIVE Siete pregati di leggere queste istruzioni integralmente e con attenzione prima di utilizzare il prodotto e di conservarle per consultazione futura. Sonda di misurazione Display LCD Interruttore ON/OFF SOSTITUZIONE DELLA BATTERIA Batteria: una batteria LR41 Una sola batteria può essere utilizzata per più di 1.000 misurazioni. Quando sul display compare il simbolo della batteria “... -
Page 3: Cura E Manutenzione
ITALIANO • Premere e tenere premuto il pulsante ON/OFF per circa 4 secondi finché sullo schermo LCD viene visualizzato “Lo°C”, poi premere nuovamente il pulsante ON/OFF per passare da “°C” a “°F” Figura 1 • Dopo l’uso conservare il termometro nella custodia protettiva. USO PER VIA ORALE (FIGURA 1) · La bocca dovrebbe rimanere chiusa da 3 a 5 minuti prima di tentare una lettura. · Collocare il termometro in bocca, sotto la lingua, in modo che poggi a destra o a sinistra della radice della lingua. · Fare pressione verso il basso con la lingua per mantenere il termometro in posizione. ·... - Page 4 ITALIANO PROVE E METODI DI PROVA (SOLTANTO A SCOPO DI RIFERIMENTO PER IL LABORATORIO) 1. Precisione di temperatura del metodo di rilevamento: Mettere il termometro nel serbatoio dell’acqua, il sensore del termometro deve essere collocato circa 2 cm sotto la superficie dell’acqua e bisogna attendere 22 secondi; poi premere il pulsante ON/OFF per accendere il termometro, che accederà alla modalità di misurazione della temperatura standard e visualizzerà la temperatura del serbatoio dell’acqua con il simbolo dell’unità di misura °C (°F) lampeggiante. 2. Metodo di prova clinico sull’uomo: accendere il termometro, attendere che il simbolo dell’unità di misura della temperatura °C (°F) lampeggi tre volte, mettere il termometro nella bocca o sotto l’ascella, attendere circa 22 secondi;...
-
Page 5: Battery Replacement
ENGLISH OPERATING INSTRUCTIONS Please read all of these instructions carefully before you operate this product and save these instructions for later use. Measuring sensor Display ON/OFF Button BATTERY REPLACEMENT Battery: One LR41 battery One single battery can be used for more than 1,000 times’ measurement. When the battery sign “ ” appears on the display, please replace with a new battery. Follow the steps below to replace the battery: 1. -
Page 6: Care And Maintenance
ENGLISH Figure 1 ORAL USE (FIGURE 1) · The mouth should remain closed 3 to 5 minutes before attempting a reading. · Place the thermometer in the mouth under the tongue so that it rests to the left or right of the root of the tongue. · Use downward tongue pressure to hold the thermometer in place. ·... - Page 7 ENGLISH TESTING AND TEST METHOD (LABORATORY REFERENCE PURPOSES ONLY) 1. Temperature accuracy of detection method: Put the thermometer into the water tank, the sensor of thermometer must be placed approximately 2cm below the water surface and wait about 22 seconds, then press the ON/OFF button to turn the thermometer on, then the thermometer will enter standard temperature measurement mode and display water tank temperature with temperature unit symbol °C (°F) flashing.
-
Page 8: Instructions D'utilisation
FRANÇAIS INSTRUCTIONS D’UTILISATION Veuillez lire toutes instructions ci-dessous avec soin avant d’utiliser ce produit et conservez ces instructions pour vous y référer ultérieurement. Capuchon sonde Affichage LCD Interrupteur REMPLACEMENT DE LA PILE Pile : Une pile LR41 Une seule pile peut assurer plus de 1 000 mesures. Lorsque le signe de batterie “ ”... -
Page 9: Spécifications
FRANÇAIS • Appuyez et maintenez le bouton ON/OFF pendant environ 4 secondes jusqu’à ce que le signe « Lo°C » s’affiche sur l’écran LCD, puis appuyez sur le bouton ON/OFF à nouveau pour basculer entre « °C » et « °F » Figure 1 • Rangez le thermomètre dans le boîtier de rangement après usage. UTILISATION ORALE (FIGURE 1) · La bouche doit rester fermée pendant 3 à 5 minutes avant la première lecture. · Placez le thermomètre dans la bouche sous la langue de sorte qu’il repose à gauche ou à... - Page 10 FRANÇAIS TESTS ET MÉTHODES DE TEST (À DES FINS DE RÉFÉRENCE DE LABORATOIRE UNIQUEMENT) 1. Précision de température de la méthode de détection : Placez le thermomètre dans le réservoir d’eau, le capteur du thermomètre doit être placé approximativement à 2 cm en dessous de la surface de l’eau et attendez environ 22 secondes, puis appuyez sur le bouton ON/OFF pour allumer le thermomètre, le thermomètre va alors entrer en mode mesure de température standard et afficher la température du réservoir d’eau avec le symbole d’unité °C (°F) qui clignote.
-
Page 11: Instrucciones De Funcionamiento
ESPAÑOL INSTRUCCIONES DE FUNCIONAMIENTO Lea todas las instrucciones cuidadosamente antes de utilizar este producto y guarde estas instrucciones para su uso posterior. Cubierta del sensor Pantalla LCD Contacto CAMBIO DE PILAS Pila: Una batería LR41 Una sola pila puede usarse para más de 1000 mediciones. Cuando el símbolo de batería “ ” aparece en la pantalla, por favor reemplace con baterías nuevas. Siga los pasos a continuación para sustituir la batería: 1. Presione hacia abajo la cubierta posterior y, a continuación, empuje la cubierta posterior a lo largo de la dirección de la flecha “> > >” por 1mm (figura A), la cubierta posterior emitirá un sonido de clic, la cubierta posterior se puede... -
Page 12: Cuidado Y Mantenimiento
ESPAÑOL • Almacene el termómetro en la funda de almacenamiento después de utilizarlo. Figura 1 USO ORAL (Figura 1) · La boca debe permanecer cerrada de 3 a 5 minutos antes de intentar realizar una lectura. · Coloque el termómetro en la boca debajo de la lengua, de modo que quede a la izquierda o a la derecha de la raíz de la lengua. · Utilice presión hacia abajo con la lengua para sujetar el termómetro. - Page 13 ESPAÑOL PRUEBA Y MÉTODO DE PRUEBA (REFERENCIA DE LABORATORIO ÚNICAMENTE) 1. Precisión de temperatura del método de detección: Coloque el termómetro en el depósito de agua, el sensor del termómetro debe colocarse aproximadamente 2 cm por debajo de la superficie del agua y espere unos 22 segundos y, a continuación, pulse el botón de ON/OFF para encender el termómetro, el termómetro entrará en el modo de medición de temperatura estándar y mostrará la temperatura del depósito de agua con el símbolo de la unidad de temperatura °C (°F) parpadeando. 2. Método de prueba clínica en personas: Encender el termómetro, esperando que el símbolo de la unidad de temperatura °C (°F) parpadee tres veces, coloque el termómetro en la boca o en la axila, alrededor de 22 segundos, el indicador del termómetro muestra la lectura máxima, se emitirá...
Need help?
Do you have a question about the KD-601 and is the answer not in the manual?
Questions and answers