Table of Contents
Advertisement
Available languages
Available languages
Quick Links
Advertisement
Table of Contents

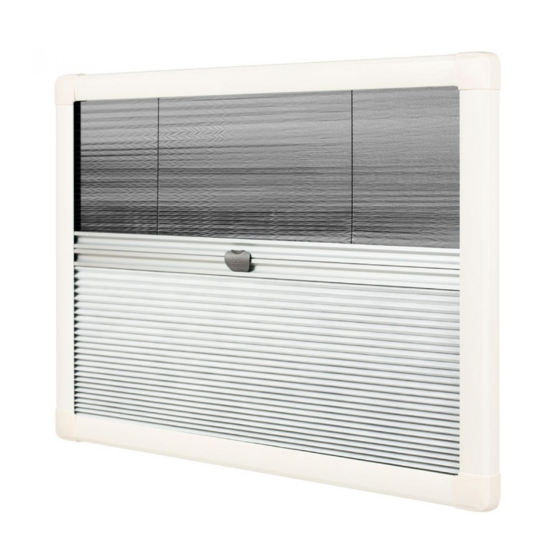
Summary of Contents for Horrex Resizeable UCS
- Page 1 Montagehandleiding Installation Manual Resizeable UCS...
- Page 2 HORREX MONTAGEHANDLEIDING...
-
Page 3: Table Of Contents
Table of content Package contents Symbols Options Safety instructions Installation Check before installing Customization Assembly Installation Maintenance Warranty Recycling Technical data... -
Page 4: Package Contents
* Systems smaller than 900 mm. have 4 wall screws and no Z-clips. * Systems between the 900 and 1400mm have 6 wall screws and 2 Z-clips. * Systems wider than 1400 mm have 8 wall screws and 4 Z-clips. HORREX MONTAGEHANDLEIDING... -
Page 5: Symbols
SymbolS Caution! Not following or incorrectly following these instruction can lead to serious injuries. Note! Not following or incorrectly following these instructions can lead to damage or reduced functionality of the product. Info Additional information about the product. -
Page 6: Options
B 1473 x H 240 mm B 1800 x H 808 mm B 1473 x H 502 mm B 1800 x H 1100 mm B 1473 x H 809 mm Spare parts Clicker Cord package Z-clips Corner cap HORREX MONTAGEHANDLEIDING... -
Page 7: Safety Instructions
Safety instructions Please follow the prescribed safety instructions from the vehicle manufacturer at all times. Horrex is not responsible for damage caused in the following situations: • Incorrect assembly or connection to the product; • Damage to the product due to mechanical influences;... -
Page 8: Use
Use only in combination with the supplied parts or additional parts from Horrex. This can be found in chapter 2 of this manual. It is not permitted to use the product for purposes other than the usage shown below. -
Page 9: Installation
Installation 5.1 Check before installing Check before installing whether there is enough space to install the product, the UCS does not block any other products after installing, and if the wall thickness is enough for the screws supplied. For safety reason, please pay attention to any wiring and electrical components in the installation area. - Page 10 Note! Never cut through the cord! Check again to make sure that there are no cords present in and around the cutting area. HORREX MONTAGEHANDLEIDING...
-
Page 11: Use
Place the brushes back into the side profiles and cut them to the same size. In case of the product being too small, please contact the supplier of the product. Info Horrex is not liable if the product is too small due to incorrectly carrying out the measuring and/or cutting instructions. -
Page 12: Assembly
Herhaal dit in het hoekstuk aan de andere zijde van de mesh cassette. Let op! Als het koord onder spanning staat kan deze wegschieten in het systeem, houdt daarom het koord goed vast. HORREX MONTAGEHANDLEIDING... -
Page 13: Installation
De trekbalk van de blackout cassette is nu opgespannen, omdat de koorden in de hoekstukken van de mesh cassette bij de blackout trekbalk horen. Controleer of deze trekbalk recht zit ten opzichte van de cassette, of deze soepel loopt en of deze niet zakt als de UCS rechtop gezet wordt en de blackout uitgetrokken wordt. -
Page 14: Maintenance
Dit zorgt ervoor dat de blind geventileerd wordt aan beide zijdes (dit om schimmel te voorkomen). 5.6 Onderhoud Maak regelmatig het product voorzichtig schoon met een vochtige doek. Let op! Gebruik géén scherpe objecten of chemische schoonmaakmiddelen die het product kunnen beschadigen HORREX MONTAGEHANDLEIDING... - Page 16 HORREX MONTAGEHANDLEIDING...
- Page 18 HORREX MONTAGEHANDLEIDING...
- Page 20 HORREX MONTAGEHANDLEIDING...
- Page 22 HORREX MONTAGEHANDLEIDING...
- Page 24 HORREX MONTAGEHANDLEIDING...
- Page 26 HORREX MONTAGEHANDLEIDING...
-
Page 27: Warranty
Voor dit product geldt standaard een garantie van 2 jaar . Als het product defect is, neem dan in eerste instantie contact op met uw dealer of verkooppunt Distributeurs van originele Horrex producten en accessoires zijn terug te vinden op onze website: https://www.horrex.nl/service... -
Page 28: Technical Data
Technische data Onderdeel Materiaal Basisprofiel Kapprofiel Trekbalk Aluminium Overige kunststof PA6 / PA6.6 onderdelen Blackout PET met aluminiumlaag Mesh Polyester HORREX MONTAGEHANDLEIDING... - Page 30 HORREX MONTAGEHANDLEIDING...
- Page 32 Horrex BV Taanderijstraat 19 3133 ET Vlaardingen +31(0)10 26 19 600 www.drivingchangeint.com www.horrex.nl info@horrex.nl...


Need help?
Do you have a question about the Resizeable UCS and is the answer not in the manual?
Questions and answers