
Related Manuals for HAEGER Xplorer FX-400


Summary of Contents for HAEGER Xplorer FX-400
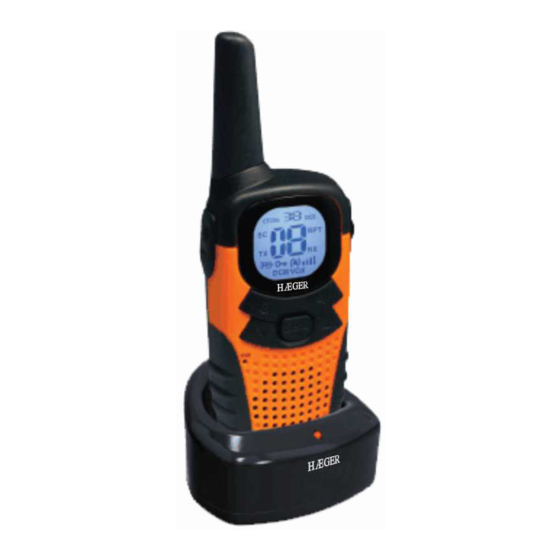
- Page 1 PMR – 2 Way Rádio Emissor / Receptor PMR Model: Xplorer FX-400 EN User Manual Manual de Utilização...
- Page 2 The features described in this manual are published subject to modifications. As características descritas neste manual são publicadas sob reserva de modificações. The CE Symbol indicates that the unit complies with the essential requirements of the R&TTE directive. O símbolo CE indica que esta unidade cumpre com os ...
-
Page 3: Table Of Contents
Index ................1 NTRODUCTION ..............1 NTENDED URPOSES ..............1 AFETY NSTRUCTIONS General..................1 Burning Injuries................ 1 Personal Safety ................ 2 Poisoning Danger..............2 Legal ..................2 Notes ..................3 ..............3 NCLUDED IN ACKAGE ............3 LEANING AINTENANCE ..............4 ISPOSAL OF EVICE ................. - Page 4 Selecting a Call- Ring tone ............13 8.10 Activating the Vibrator mode ..........14 8.11 Setting the Roger Beep ............14 8.12 Setting the Key Tone ON or OFF ..........14 8.13 Setting the Dual Watch Mode ..........15 ..............15 UXILIARY EATURES Key Lock.................
- Page 5 Índice ................19 NTRODUÇÃO ..............19 INALIDADE SPECÍFICA ............19 NSTRUÇÕES DE EGURANÇA Geral..................19 Queimaduras ................. 19 Segurança Pessoal..............20 Perigo de Envenenamento ............. 20 Legislação ................20 Notas: ..................21 ..............21 ONTEÚDO DO ACOTE ............. 21 ANUTENÇÃO E IMPEZA ............
- Page 6 Definir o Tom de Chamada............. 31 8.10 Activar o modo de Vibração ........... 32 8.11 Definir Roger Beep..............32 8.12 Activar ou Desactivar o Tom de Tecla ........32 8.13 Definir o modo Canal Duplo ........... 33 ..............33 UNÇÕES UXILIARES Bloqueio de Tecla..............
-
Page 7: Introduction
English NTRODUCTION Thank you for purchasing the Xplorer FX-400. It’s a short range, low powered radio communication device that has no running costs other than the minimal cost of the batteries. The Xplorer FX-400 operates on Private Mobile Radio frequencies and can be used in any country where PMR446 frequencies are authorised as indicated on the packing box and in this manual. -
Page 8: Personal Safety
English terminals. The material may complete an electrical circuit (short circuit) and become quite hot. Exercise care in handling any charged battery, particularly when placing it inside a pocket, purse or other container with metal objects. Do not replace or charge batteries in a potentially explosive atmosphere. -
Page 9: Notes
Remove the battery if the device is not going to be used for a long period. NCLUDED IN ACKAGE 2 x Xplorer FX-400 Units 2 x Desktop chargers pods 2 x Power adaptors 8 x AAA Rechargeable batteries ... -
Page 10: Disposal Of The Device
English water damage. Leave the cover off the battery compartment overnight or until completely dry. Do not use the unit until completely dry. ISPOSAL OF EVICE Dispose of the unit and used batteries in an environment friendly manner. Do not dispose of batteries in normal household garbage. -
Page 11: Lcd Screen
English LCD Screen Channel Number: Changes from 1 to 8 as selected by the user CTCSS Code: Changes from 1 to 38 as selected by the user Displays when Battery level goes low Displayed when transmitting a signal Displayed when receiving a signal Displayed when the Dual watch function is turned ON Displayed when the VOX feature is enabled Displays when the PMR is scanning all channels... -
Page 12: Battery Installation
English Battery Installation Figure 3 Figure 4 Caution: Observe the proper battery polarity orientation when installing batteries. Incorrect positioning can damage both the batteries and the unit. Pull up the battery cover latch, Lift up Battery Compartment Cover. Install the rechargeable batteries by following the orientation as shown in Figure 3 (the arrow is showing and pointing upward.) Replace the Battery Compartment Cover. -
Page 13: Charging The Batteries Using Direct Charger
English Charging the batteries using direct charger 1. Lift up the Mic/Ear/Charger cover; insert the round connector at the side of the unit. 2. Plug in the mains adaptor into a 220-240V AC, 50Hz main socket with the switch on the socket set to OFF. 3. -
Page 14: Battery Meter
English 4. Place the FX-400 units in the charge cradle in an upright position and facing outward. The Charge LED indicators will light up. 5. It takes about 10 hours to fully recharge the batteries if they are completely run down. New batteries take up to 14 hours to fully charge. -
Page 15: Battery Life
English Battery life The FX-400 has a built in power saver feature to make the batteries last longer. But when you are not using the units, turn them OFF to conserve power. PERATION Transmitting range The talk range depends on the environmental and terrain. It should be longest (up to about 8km) in wide open spaces, without obstructions such as hills or buildings. -
Page 16: Adjusting The Speaker Volume
English Adjusting the Speaker volume The volume level is shown by vertical bars on the LCD screen. You can change the volume while using your FX-400, or while the unit is idle (switched on but not in use). Press the UP button to increase, or press the DOWN button to decrease the speaker volume. -
Page 17: Setting The Dcs Advanced Digital Code
English To turn the sub-channel function off simply set the sub-channel to 0 (zero). You can communicate with any FX-400 user set to the same channel who also turns off the sub-channel operation (or whose FX-400 unit does not have the feature). 8.4.2 Setting the DCS advanced digital code Each channel also has 83 digital codes to let you set up group of users for... -
Page 18: Monitor
English the PTT button, speak into the microphone in a normal tone of voice. c. Release the PTT button when you have finished transmitting. 8.4.4 Monitor You can use the Monitor feature to check for weak signals on the current channel. -
Page 19: Activating The Auto Channel And Sub-Channel Scan
English Activating the auto Channel and sub-channel Scan Channel scan perform searches for active signals in an endless loop for all 8 channels, 38 CTCSS codes and all 83 DCS codes. a. Press the MENU button 5 times b. Press the UP or DOWN button to begin scanning channels when an active signal is detected, channel scan pauses on the active channel. -
Page 20: Activating The Vibrator Mode
English a. Press the MENU button 8 times; the LCD Screen will display Call Icon and blinking. b. Press the UP or DOWN button to select the desired Call- ring tone. A respective Call- Ring tone sound will be played when changing from one tone to another. -
Page 21: Setting The Dual Watch Mode
English a. Press the MENU button 11 times, “ON” flashes on the LCD Screen. b. Press the UP or DOWN button (“ON” will be displayed on the LCD screen) or deactivate (“OFF” will be displayed on the LCD screen) the key tone feature. c. -
Page 22: Lcd Screen Back Light
English a. To activate the Key Lock feature, press and hold the MENU button until “ ” appears on the LCD Screen. b. To deactivate the key Lock feature, press and hold the MENU button until “ ” disappears on the LCD Screen. The PTT and POWER buttons will remain functional even if the Key Lock feature is activated. -
Page 23: Warranty
English ARRANTY 12.1 Warranty Period HÆGER units have a 24-month warranty period. The warranty period starts on the day the new unit is purchased. Consumables or defects causing a negligible effect on operation or value of the equipment are not covered. -
Page 24: Ce Conformity Eclaration
2 Way Radio: Model: FX-400 Brand Name: Haeger Xplorer is in conformity with the following standard: - EN301489-5 v1.3.1 (2002-08), - EN 301 489-1 v1.8.1 (2008-04) - EN300296-2 v1.2.1:2009, - EN60950-1:2006+A11:2009 The product complies with the essentials requirements of the European Parliament and Council’s, directive R&TTE 1995/5/EC on user’s safety and... -
Page 25: Introdução
Português NTRODUÇÃO Agradecemos o facto de ter adquirido o Xplorer FX-400. Este é um dispositivo de rádio comunicação de baixa potência e de curto alcance, que não possui custos de funcionamento, à parte do custo mínimo de pilhas. O Xplorer FX-400 funciona em frequências de Rádio Móvel Privadas e pode ser utilizado em qualquer país aonde se encontre autorizado o... -
Page 26: Segurança Pessoal
Português As pilhas podem ocasionar danos materiais tais como queimaduras quando materiais condutivos como jóias, chaves ou fios de pérolas tocam nos terminais visíveis. Estes materiais podem fechar o circuito eléctrico (curto-circuito) e ficar extremamente quente Tome os devidos cuidados ao manusear qualquer bateria carregada, especialmente ao colocá-la no interior de bolsos, carteira ou outros recipientes com objectos metálicos. -
Page 27: Notas
Retire as pilhas se o dispositivo não for utilizado durante um longo período de tempo. ONTEÚDO DO ACOTE 2 x unidades PMR Xplorer FX-400 2 x Carregadores de secretária 2 x Carregadores directos ... -
Page 28: Eliminação Do Aparelho
Português pilhas destapado durante a noite ou até estar completamente seco. Não utilize o aparelho até estar completamente seco. LIMINAÇÃO DO APARELHO Elimina a unidade e pilhas usadas de forma ecologicamente segura. Não deite fora as pilhas depositando as mesmas em contentores de lixo doméstico. -
Page 29: Visor Lcd
Português Visor LCD Número do Canal: Varia de 1 a 8 de acordo com a selecção do utilizador Código CTCSS: Varia de 1 a 38 de acordo com a selecção do utilizador Mostra o estado de carga das pilhas Exibido quando está a transmitir Exibido quando está... -
Page 30: Instalação Das Pilhas
Português Instalação das pilhas Figura 3 Figura 4 Atenção: Observa adequadamente a orientação da polaridade das pilhas. A colocação incorrecta pode causar danos tanto às pilhas como á unidade. Puxe a trava da tampa das pilhas e levante-a. Coloque as pilhas recarregáveis seguindo a orientação indicada na figura 3 (a seta mostra e aponta para cima.) Volte a colocar a tampa. -
Page 31: Carregar As Pilhas Usando O Carregador Directamente
Português Carregar as pilhas usando o carregador directamente 1. Levante a capa de protecção da tomada Mic/Auricular/Carregador. Insira o conector redondo na unidade. 2. Ligue o adaptador de corrente a uma tomada de 220-240V AC, 50Hz com o interruptor da tomada desligado. 3. -
Page 32: Indicador De Carga Das Pilhas
Português 4. Coloque as unidades FX-400 na base carregadora em posição vertical e voltadas para o exterior. O LED indicador de carga acenderá. 5. Demora cerca de 10 horas para recarregar as pilhas quando estiverem completamente descarregadas. As pilhas novas levam cerca de 14 horas para carregarem completamente. -
Page 33: Vida Útil Das Pilhas
Português Vida útil das pilhas O FX-400 incorpora um circuito economizador de energia para que as pilhas durem mais tempo. Mas quando não estiver a utilizá-lo, recomendamos que desligue para conservar a energia que resta nas pilhas. PERAÇÃO Alcance de Transmissão O alcance depende do meio ambiente e das condições do terreno. -
Page 34: Regular O Volume Do Altifalante
Português Regular o volume do altifalante O nível de volume é mostrado com barras verticais no visor LCD. Pode alterar o volume durante a utilização do FX-400, ou quando o aparelho está em modo de vigília (ligado mas não em uso). Prima o botão para cima para aumentar, ou para baixo para diminuir. -
Page 35: Configurar O Código Digital Avançado Dcs
Português Para desactivar a função sub-canal basta definir o sub-canal para 0 (zero). Pode se comunicar com qualquer utilizador do FX-400 definido no mesmo canal que tenha o sub-canal também desactivado (ou com aparelhos que não suportem esta funcionalidade). 8.4.2 Configurar o Código Digital avançado DCS Cada canal tem também 83 códigos digitais que permite criação de grupo de utilizadores para comunicações privadas ainda mais seguras. -
Page 36: Monitor
Português premido, fale para o microfone com um tom de voz normal. c. Liberte o botão PTT quando acabar de falar. 8.4.4 Monitor Pode utilizar a função monitor para verificar se existem sinais fracos no canal actual. a. Prima os botões MENU e PARA BAIXO ao mesmo tempo, “RX”... -
Page 37: Activar A Procura Automática De Canal E Sub-Canal
Português Activar a procura automática de Canal e sub-canal A procura automática pesquisa sinais activos em anel infinito de todos os 8 canais, 38 sub-canais CTCSS e 83 códigos DCS. a. Prima o botão MENU 5 vezes. b. Prima o botão PARA CIMA ou PARA BAIXO para iniciar a pesquisa de canal. -
Page 38: Activar O Modo De Vibração
Português a. Prima o botão MENU 8 vezes, no visor irá aparecer o símbolo de chamada a piscar. b. Prima o botão PARA CIMA ou PARA BAIXO para escolher o tom de chamada pretendido. O tom de chamada respectivo será escutado sempre que mudar de um para o outro. -
Page 39: Definir O Modo Canal Duplo
Português a. Prima o botão MENU 11 vezes; o símbolo “ON” começa a piscar. b. Prima o botão PARA CIMA ou PARA BAIXO (“ON” indica que a função está activa e “OFF” indica que a função está desactiva). c. Prima o botão PTT para confirmar. 8.13 Definir o modo Canal Duplo O seu FX-400 é... -
Page 40: Iluminação Do Visor Lcd
Português a. Para activar a função, prima e mantenha premida o botão MENU até que o símbolo “ ” apareça no visor. b. Para desactivar a função, prima e mantenha premida novamente o botão MENU até que o símbolo “ ”... -
Page 41: Garantia
Português ARANTIA 12.1 Período de Garantia As unidades HÆGER têm um período de garantia de 24-meses. O período de garantia tem efeitos a partir da date de compra da unidade. Consumíveis e defeitos causados por negligência que possam afectar o funcionamento ou o valor do equipamento não se encontram cobertos por esta garantia. -
Page 42: Declaração De Conformidade
Arneiro, 2660-314 S. Julião do Tojal, Portugal, declaramos sob a própria responsabilidade, que o seguinte produto: Emissor / Receptor PMR Modelo: Xplorer FX-400 Marca: HAEGER está em conformidade com as seguintes normas: - EN301489-5 v1.3.1 (2002-08), - EN 301 489-1 v1.8.1 (2008-04) - EN300296-2 v1.2.1:2009, - EN60950-1:2006+A11:2009... - Page 43 CERTIFICADO DE GARANTIA Costumer Data/Dados do Cliente: Name/Nome: ___________________________________________________________________ Address/Endereço: ___________________________________________________________________ Telefone: ____________ Product Data/Dados do equipamento: Type/Tipo: PMR Model/Modelo: Xplorer FX-400 Serial Nº/Nº de Série: __________ Purchase Date/Data de Compra: _______/____/___ Otheres/Outros: ___________________________________________________________________ Vendor data/Dados do estabelecimento vendedor: Vendor/Estabelecimento: ___________________________________________________________________ Address/Endereço:...
- Page 46 Praceta Cidade de Londres, 1 Tel.: +351 21 949 8300 Parque Industrial do Arneiro Fax: +351 21 949 8325 2660-456 São Julião do Tojal e-mail: suporte.tec@haeger.pt Portugal http://www.haeger.pt Any reprint of this documentation is prohibited without the prior express consent of HÆGERTEC.
Need help?
Do you have a question about the Xplorer FX-400 and is the answer not in the manual?
Questions and answers