Table of Contents
Advertisement
Quick Links
Advertisement
Table of Contents

Related Manuals for Keith McMillen Instruments QuNexus RED


Summary of Contents for Keith McMillen Instruments QuNexus RED
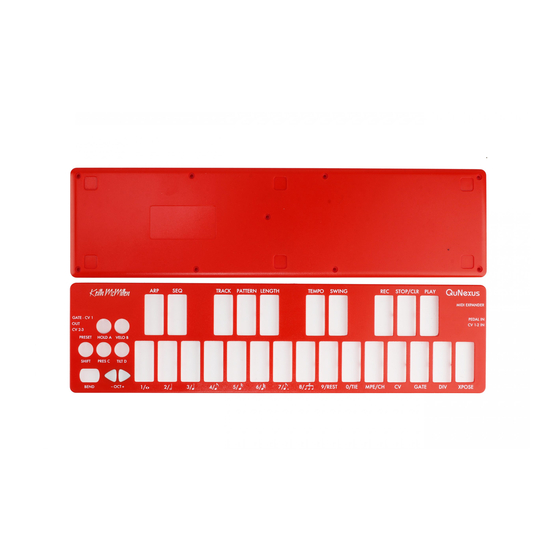
- Page 1 e x u s s e r a N u a l...
-
Page 2: Table Of Contents
able ONTeNTs exus exus GETTING STARTED �����������������������������������������������������������������������������������������������������������������������������������������������������5 WELCOME �������������������������������������������������������������������������������������������������������������������������������������������������������������������6 1. FEATURES OVERVIEW �������������������������������������������������������������������������������������������������������������������������������������������7 1�1 Keyboard Expression �����������������������������������������������������������������������������������������������������������������������������������8 1�2 Control, Composition, and Jamming ����������������������������������������������������������������������������������������������������������8 1�3 MPE Compatible �������������������������������������������������������������������������������������������������������������������������������������������������������� 8 2. QUNEXUS HARDWARE ������������������������������������������������������������������������������������������������������������������������������������������9 2�1 Connecting QuNexus ���������������������������������������������������������������������������������������������������������������������������������10 2�2 Input/Output Routing ���������������������������������������������������������������������������������������������������������������������������������11 2�2�1 USB ��������������������������������������������������������������������������������������������������������������������������������������������������11 2�2�2 MIDI Expander Port �������������������������������������������������������������������������������������������������������������������������12 2�2�3 CV�����������������������������������������������������������������������������������������������������������������������������������������������������13... - Page 3 able ONTeNTs exus 3�4�2 Assigning MIDI Channels to Tracks ���������������������������������������������������������������������������������������������� 19 3�4�3 Assigning Program Changes to Tracks ���������������������������������������������������������������������������������������� 19 3�4�4 Enabling MPE on Track 1 �������������������������������������������������������������������������������������������������������������� 19 3�4�5 USB and Expander MIDI Routing ������������������������������������������������������������������������������������������������� 20 3�4�6 CV and Gate Output Routing ������������������������������������������������������������������������������������������������������� 20 3�5 Arpeggiator ����������������������������������������������������������������������������������������������������������������������������������������������...
- Page 4 able ONTeNTs exus 4�7�3 Hardware Menu ������������������������������������������������������������������������������������������������������������������������������ 29 4�7�3�1Update Firmware ��������������������������������������������������������������������������������������������������������� 29 4�7�3�2 Load Preset ����������������������������������������������������������������������������������������������������������������� 29 4�7�3�2 LED Refresh Mode ������������������������������������������������������������������������������������������������������ 30 4�7�3�3 Per Key Sensitivity ������������������������������������������������������������������������������������������������������� 30 4�7�3�4 CV Trims ���������������������������������������������������������������������������������������������������������������������� 30 4�7�3�5 Tables �������������������������������������������������������������������������������������������������������������������������� 31 4�8 Keyboard Layer ������������������������������������������������������������������������������������������������������������������������������������������ 31 4�8�1 Message Types �������������������������������������������������������������������������������������������������������������������������������...
- Page 5 able ONTeNTs exus APPENDIX A: QUNEXUS 2�0 FACTORY PRESETS: �������������������������������������������������������������������������������������������������� 41 Preset A (Basic 2�0) ������������������������������������������������������������������������������������������������������������������������������������������� 41 Preset B (Aftertouch and Mod) ������������������������������������������������������������������������������������������������������������������������ 41 Preset C (MPE and Sequencer) ������������������������������������������������������������������������������������������������������������������������ 42 Preset D (Drums & Clips 2�0) ���������������������������������������������������������������������������������������������������������������������������� 42 APPENDIX B: KEY SENSITIVITY ADJUSTMENTS ����������������������������������������������������������������������������������������������������� 44 Global Sensitivity Adjustment ����������������������������������������������������������������������������������������������������������������������������������...
-
Page 6: Getting Started
Getting Started... -
Page 7: Welcome
TarTed exus elCOMe QuNexus RED is a powerful 25-key MPE keyboard controller and three track arpeggiator/step sequencer with USB, MIDI, and CV outputs� The keys detect velocity, polyphonic aftertouch, and per-key tilt, giving you unprecedented control and musical expression� QuNexus is a hub for new and vintage technology� Plug into your computer, iPad (Apple Camera Connector required), or Android tablet via USB�... -
Page 8: Features Overview
Features Overview... -
Page 9: 1�1 Keyboard Expression
eaTures vervieW exus 1 - f hapTer eaTures vervieW The QuNexus is a compact composition tool for your home or mobile studio, with a highly nuanced keyboard and a powerful sequencer� 1.1 k eybOard xpressiON The QuNexus keys capture Pitch, Velocity, Pressure, and Tilt (aka slide, or Y-Axis)� These dimensions of expression can be sent to your instruments as a variety of different MIDI messages and control voltages�... -
Page 10: Qunexus Hardware
QuNexus Hardware... -
Page 11: 2�1 Connecting Qunexus
exus ardWare exus 2 - Q hapTer exus ardWare QuNexus is a class compliant USB device that does not require a driver or software to function� Out of the box, QuNexus has everything you need to get started� We also provide a QuNexus Editor application (for Mac and Windows), which allows further customization (discussed in Chapter 3)�... -
Page 12: 2�2 Input/Output Routing
exus ardWare exus 3� Connect the power supply to the MIDI Expander USB “Power” port� (You can also power the unit via the QuNexus micro USB port (the same port that connects to a computer)� Connecting QuNexus to Eurorack Synthesizers or other CV devices: There are 3 different ways to connect QuNexus to your CV devices�... -
Page 13: 2�2�2 Midi Expander Port
The QuNexus has a USB mini “Expander” port that breaks out to 5-pin DIN MIDI, either with the MIDI Out cable (included with QuNexus RED), or with the KMI MIDI Expander (sold separately)� To use QuNexus with the KMI MIDI Expander follow these steps: 1�... -
Page 14: 2�2�3
exus ardWare exus 2.2.3 Cv QuNexus can control modular synthesizers and other CV devices using Control Voltages� 2.2.3.1 Cv C able ONNeCTiONs There are 2 CV output ports on the left side of the QuNexus and 1 CV input port on the right side� Outputs - The two output ports use stereo 1/8”... -
Page 15: 2�2�3�4 Avoiding Strange Behavior When Patching Cv Input Signals
exus ardWare exus Input: QuNexus receives data from the 2 CV inputs and converts them to MIDI messages: • CV1 - CC#112 • CV2 - CC#113 This data is sent on Channel 2 to USB Port 3 and the MIDI Expander� 2.2.3.4 a Cv i vOidiNG sTraNGe behaviOr WheN paTChiNG... -
Page 16: 2�3�3 The Shift/Preset Button
exus ardWare exus 2.3.3 T shifT/preseT b uTTON The SHIFT/PRESET Button is used to select Presets and access the “Shift” menu� QuNexus can store 4 presets� To load or save a preset, tap the SHIFT/PRESET Button on the left side of the QuNexus�... -
Page 17: 2�5 Expression Pedal
exus ardWare exus 2.5 e xpressiON edal When an expression pedal is plugged into the CV input of QuNexus, the expression pedal data will be converted to MIDI CC# 112 or 113 on Channel 2 and go from 0 - 127� This behavior can be changed using the QuNexus Editor�... -
Page 18: Sequencer/Arpeggiator
Sequencer/Arpeggiator... -
Page 19: 3�1 System Transport - Playback, Synchronization And Clock
eQueNCer rpeGGiaTOr exus 3 - T hapTer raCks eQueNCer aNd rpeGGiaTOr The QuNexus can function as a 3 track sequencer and arpeggiator� Each track can control different instruments, arpeggiate, and play step patterns up to 32 steps in length. Everything flows from the keyboard through the Tracks to the various USB, MIDI, CV and Gate outputs�... -
Page 20: 3�4 Understanding Tracks
eQueNCer rpeGGiaTOr exus 3.4 u NdersTaNdiNG raCks The QuNexus has three Tracks that can be set to either arpeggiate keyboard input or record and playback step sequence patterns� Each track can be assigned its own MIDI channel, routed to either or both USB and Expander MIDI outputs, and tracks can have their own lengths and time divisions�... -
Page 21: 3�4�5 Usb And Expander Midi Routing
eQueNCer rpeGGiaTOr exus 3.4.5 usb Midi r xpaNder OuTiNG To assign the current track’s MIDI output to the USB and/or Expander ports, hold shift and press “Track”, then while still holding shift, press MPE/CH� Numeric keys 1 (USB) and 2 (Expander) will either blink (enabled) or be lit at half brightness (disabled), and can be pressed to toggle the routing status�... -
Page 22: 3�5�2 Arpeggiator Playback Patterns
eQueNCer rpeGGiaTOr exus To enable hold mode, long-press the “Hold” key until it lights up� You can disable hold by long-pressing the hold key again� To switch between the Standard and Toggle hold modes, hold the shift key and press/release the ARP key, which will stay solid to indicate that standard mod is enabled, or blink to indicate that toggle mode is enabled�... -
Page 23: 3�6�3 Playing, Stopping And Clearing Sequences
eQueNCer rpeGGiaTOr exus To enter a Tie/Slur (Legato), hold Shift and press the “10/Tie” for 3+ seconds. This will flag the last note that you played as a Tie, but will not duplicate the note� Instead, the previous note will be tied to the next note that you play, creating a legato effect�... -
Page 24: 3�6�6 Playback Patterns (Ie Arpeggiator "Patterns")
eQueNCer rpeGGiaTOr exus 3.6.6 p “p ”) laybaCk aTTerNs rpeGGiaTOr aTTerNs By default, the step sequencer plays patterns in the order that they are entered/played� However, you can select the same playback patterns available in the Arpeggiator using the methods described in the “Arpeggiator - Playback Pattern”... -
Page 25: 3�6�11 Setting Track Clock Division
eQueNCer rpeGGiaTOr exus To change the clock destinations, enter the clock settings menu by holding Shift, pressing Tempo once, and then pressing Tempo again for 3+ seconds� You are now in the Clock Sources Menu� The press the right octave (+) key to select the Clock Destinations Menu (right)� From the Clock Destinations Menu you can route clock to the following clock outputs: •... -
Page 26: 3�6�13 Transposition
eQueNCer rpeGGiaTOr exus 3.6.13 T raNspOsiTiON You can transpose the keyboard and all step sequencers simultaneously by holding Shift and pressing “XPOSE”� The current transposition (in reference to middle C) is displayed on the keyboard LEDs� For example, to transpose from the key of C to the key of D, press the D key� Release the shift button to audition the new transposition�... - Page 27 QuNexus Editor...
-
Page 28: Qunexus Editor Software
exus diTOr exus 4 - Q hapTer exus diTOr OfTWare The QuNexus Editor software allows you to create customized Presets and load them onto QuNexus� This chapter will guide you through everything you need to know to install and operate the QuNexus Editor software� 4.1 s ysTeM eQuireMeNTs... -
Page 29: 4�4 Syncing The Qunexus And Editor
exus diTOr exus 4.4 s yNCiNG The exus aNd diTOr When you connect a QuNexus to the Editor, a window will pop up asking you to choose a Sync Method� This is so that you don’t accidentally overwrite an editor preset you’re currently working on, or so you can save settings from the QuNexus hardware to a new editor preset�... -
Page 30: 4�7 Menu Bar
exus diTOr exus The Delete and Save As buttons under the Preset Library allow you to add or remove presets� Copy/Add a Preset by first double clicking on the preset you wish to copy and then clicking the Save As button. You can assign it a name and it will be added to the bottom of the Library�... -
Page 31: 4�7�3�2 Led Refresh Mode
exus diTOr exus 4.7.3.2 led r efresh “LED Refresh Mode” allows you to set the behavior of the LEDs� • Normal - LEDs behave normally, lighting up and responding to Remote LED messages as expected� • Control Only - Only the LEDs on the Side Buttons will light up� The Keyboard LEDs will not light when touched or respond to Remote LED Control�... -
Page 32: 4�7�3�5 Tables
exus diTOr exus 4.7.3.5 T ables The “Tables” menu item lets you view and create tables for use in the sensor response curves� There are options for Linear, Logarithmic, Sine, Cosine, Exponential and Invert, as well as two user-defined tables designated “Custom 1”... -
Page 33: 4�8�2 Sensor Sources
exus diTOr exus 4.8.2 s eNsOr OurCes Key Velocity (for Notes only): The value between 0 and 127 that represents the striking velocity on the QuNexus keys at the moment a Note On message is detected� Pressure: A continuous value (0-127) representing the pressure applied to the QuNexus keys� Tilt: A continuous value (0-127) representing the Y-axis Tilt of the QuNexus keys�... -
Page 34: 4�8�5 Key Priority
exus diTOr exus Tilt controls how easy it is to activate the Tilt source� By default, Tilt engages instantly to allow quick modulation of parameters� Lower this value, and tilt will require an intentional pressure shift/tilt of your finger to engage. This makes it easier to activate Tilt only when you want to. The higher the value of Tilt Speed, the easier it is to activate Tilt�... -
Page 35: 4�9 Sequencer Tab
exus diTOr exus 4.9 s eQueNCer The Sequencer Tab allows you to configure the various settings of the three track arpeggiator and step sequencer. Each of the three tracks receives information from the keyboard and/or sequencer, and routes it to the assigned track destinations�... -
Page 36: 4�9�3 Track Settings
exus diTOr exus 4.9.3 T raCk eTTiNGs QuNexus has three “Tracks” that perform in parallel� By selecting these tracks with the shift menu, you can quickly control different MIDI and CV devices on the fly. The tracks can also be programmed to play different sequences or arpeggios, of varying lengths, with different sounds on different MIDI Channels and CV outputs�... -
Page 37: 4�10�1 Pitch Scaling
exus diTOr exus 4.10.1 p iTCh CaliNG Use this dropdown to set the Pitch Scaling scheme for CV Out 1� You can set this to 1 Volt per Octave, 1�2 Volts per Octave, or Hertz per Volt (an older scaling scheme)� 4.10.2 G eGaTO aNd These two checkboxes change the behavior of the Gate output signals�... -
Page 38: 4�11 Controller Layer
exus diTOr exus 4.11 C ONTrOller ayer With the Controller Layer, QuNexus becomes its own unique control surface with deep customization options for each key�Each key is assigned its own additional Note, Toggle CC#, Pressure CC#, and Tilt CC#� Additionally, each key can be selected to “Participate”... -
Page 39: 4�11�1�2 Controller Layer Sources
exus diTOr exus If both Keyboard Layer and Controller Layer are enabled, the selected key will send out everything that you have assigned it here in Controller Layer Tab and also in the Keyboard Layer Tab� For Example: if you turn Channel Pressure on and Pitch Bend set to Tilt in Keyboard Layer and have all 4 sources on in Controller Layer, then that Key will send out 2 notes, Channel Pressure, Pitch Bend, and CC values for an additional Pressure, Tilt, and Toggle source�... -
Page 40: 4�12 Settings Tab
exus diTOr exus 4.12 s eTTiNGs The Settings Tab is where you adjust LED brightness and behavior, and toggle MIDI Thru� 4.12.1 led C ONTrOl aNd riGhTNess By default, the QuNexus keys will light up when they are played� The LED Mode checkbox allows you to disable Local LED Control�... - Page 41 Appendices...
- Page 42 ppeNdiCes exus a: Q 2.0 f ppeNdix exus aCTOry reseTs a (b 2.0) reseT asiC This preset functions as a traditional keyboard and 3-track sequencer, and will work with any MIDI-enabled software or Eurorack hardware� Though some of the more exciting functions are turned off, the basic preset outputs notes with a variable velocity and is a great starting point when working with QuNexus�...
- Page 43 ppeNdiCes exus C (Mpe reseT eQueNCer QuNexus was the first MPE keyboard controller, released before the MPE specification had begun being developed� What we used to call “Channel Rotation” has now become standard with most major DAWs and many of the newest polyphonic hardware Synthesizers� This preset maps Pressure to Channel Aftertouch, and Tilt to CC74 (aka “Slide”, “Y-Axis”, or “Polyphonic Mod Wheel”)�...
- Page 44 ppeNdiCes exus • Keyboard/Sequencer Track 2 • MIDI Channel 10 routed to the USB and MIDI Expander Ports • Assigned to CV2 (gate) out • Keyboard/Sequencer Track 3 • MIDI Channel 10 routed to the USB and MIDI Expander Ports •...
- Page 45 Troubleshooting...
- Page 46 rOubleshOOTiNG exus ry a NeW Cable One of the first (yet most often overlooked) things to try is a different USB cable, preferably one that is known to work well. When a cable goes bad it can lead to all sorts of odd behavior (flaky connections, dropped messages), or no behavior at all (won’t even power on)�...
- Page 47 rOubleshOOTiNG exus usb a Oise WiTh udiO Some users may experience ground loop issues when simultaneously using the QuNexus USB MIDI, CV outs, and a computer with a USB Audio interface� Most often the cause of this noise is a ground loop between the USB ports of the QuNexus and the audio interface�...
- Page 48 Safety Precautions...
- Page 49 afeTy reCauTiONs exus ediCal eviCes QuNexus may emit electromagnetic fields. These electromagnetic fields may interfere with pacemakers or other medical devices� If you wear a pacemaker, maintain at least 6 inches (approximately 15cm) of separation between your pacemaker and QuNexus� If you suspect QuNexus is interfering with your pacemaker or any other medical device, stop using QuNexus and consult your physician for information specific to your medical device�...
Need help?
Do you have a question about the QuNexus RED and is the answer not in the manual?
Questions and answers