Keith McMillen Instruments QuNexus Reference Manual
Smart sensor keyboard controller
Hide thumbs
Also See for QuNexus:
- User manual (12 pages) ,
- User manual (7 pages) ,
- Quick start manual (13 pages)
Table of Contents
Advertisement
Quick Links
QuNexus Reference Manual
QuNexus Version 1.1.1
July, 2013
Keith McMillen, Conner Lacy, Nick Wang, Evan Adams, Jimmy Allison, Jasmin Blasco, Diane
Douglas, Tom Ferguson, Steven Fruhwirth, Paul Gaeta, Ingmar Gorman, Christian Heilman,
Matthew Hettich, Sarah Howe, William Leach, Daniel McAnulty, Jon Short, Carson Whitley, and
Steve Wright
1
Advertisement
Table of Contents

Related Manuals for Keith McMillen Instruments QuNexus


Summary of Contents for Keith McMillen Instruments QuNexus
- Page 1 QuNexus Reference Manual QuNexus Version 1.1.1 July, 2013 Keith McMillen, Conner Lacy, Nick Wang, Evan Adams, Jimmy Allison, Jasmin Blasco, Diane Douglas, Tom Ferguson, Steven Fruhwirth, Paul Gaeta, Ingmar Gorman, Christian Heilman, Matthew Hettich, Sarah Howe, William Leach, Daniel McAnulty, Jon Short, Carson Whitley, and...
- Page 2 The content of this manual is furnished for informational use only, is subject to change without notice, and should not be construed as a commitment by Keith McMillen Instruments. Every effort has been made to ensure that the information in this manual is accurate. No warranties, express or implied, are made with regard to the quality, suitability or accuracy of this document.
-
Page 3: Table Of Contents
Table of Contents Chapter 1 Welcome Questions or Feedback? Contact us! What’s in the QuNexus Package? Chapter 2 QuNexus Hardware / Getting Started Connecting QuNexus Input/Output Routing 2.2.1 2.2.2 MIDI 2.2.2.1 The KMI MIDI Expander 2.2.3 2.2.3.1 Cable Connections 2.2.3.2 CV Cable Kit 2.2.3.3 CV Data... - Page 4 4.3.3.1 Unplug Other USB Devices 4.3.3.2 Try a New Micro-USB Cable 4.3.3.3 “Hotplugging” on Windows 4.3.3.4 Don’t Send MIDI to QuNexus During an Update 4.3.3.5 If Things are Working Fine, DON’T Update Right Before your Show 4.3.3.6 Manually Updating Firmware...
-
Page 5: Chapter 1 Welcome
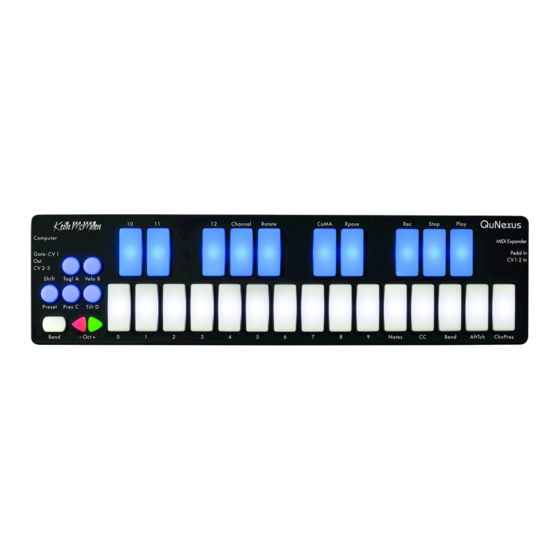
Chapter 1 Welcome QuNexus is a vividly illuminated keyboard controller that is fun for beginners and a must for professionals. 25 touch-sensitive keys detect finger pressure, velocity, and tilt, giving you an unprecedented degree of musical control. Blue and white LEDs with 16 levels of brightness give you valuable feedback. -
Page 6: Chapter 2 Qunexus Hardware / Getting Started
Editor application (for Mac and Windows), which allows further customization (discussed in Chapter 3). This chapter is a guide to getting started using QuNexus out of the box and will provide detailed information about how to use the hardware features of QuNexus. - Page 7 Connect QuNexus to Synthesizers or other CV devices: The images to the right below show QuNexus connected to a CV device. There are 3 different ways to set this up: Powered by a Computer (or iPad): 1.
-
Page 8: Input/Output Routing
QuNexus as the central device in the setup. The subchapters below will focus one at a time on each data type’s communication with QuNexus and then provide detail about converting one data type to another. -
Page 9: Usb
QuNexus has 3 virtual MIDI ports that communicate with the computer. Port 1 is the main port on which the QuNexus sends and receives MIDI data to and from the computer or iPad. Port 2 and 3 can be used for this purpose as well but are also used for communication with other devices. -
Page 10: The Kmi Midi Expander
Using adapters if needed, make sure one end can plug into one of the stereo 1/8in CV out ports on the left side of QuNexus. QuNexus’ CV input port (on the right side) requires one end to be a 3.5 mm TRRS (like the ones used for Apple iPhone headsets). -
Page 11: Cable Connections
2.2.3.1 Cable Connections There are 2 CV output ports on the left side of the QuNexus and 1 CV input port on the right side. Outputs - Since the two output ports use stereo 1/8in connectors (TRS - shown below), they provide 4 outputs: a gate output and three 16-bit CV outputs. -
Page 12: Cv Cable Kit
We recommend the Roland EV-5. 2.2.3.2 CV Cable Kit The QuNexus CV Cable Kit is an optional add on, which makes it easy to gather the cables and adapters needed to convert MIDI to CV and vice versa using QuNexus. -
Page 13: Cv Data
3.5mm (1/8in) stereo plug to dual 3.5mm (1/8in) mono plugs This is helpful for splitting the second CV output into CV2 and CV3 2.2.3.3 CV Data Output: By default, QuNexus sends different data out Input: By default, QuNexus receives data from the 2 CV inputs and... -
Page 14: Converting Cv Input From +/- 10V To 0V/5V
2.2.3.4 Converting CV Input from +/- 10V to 0V/5V QuNexus’ CV In is uni-polar. If you send it a bi-polar signal, half of the signal will be clipped and can cause malfunctions in extreme cases. Sending a signal above 5 Volts is also unsupported. -
Page 15: Dual Expression And Sustainer Inputs
2.2.3.5 Dual Expression and Sustainer Inputs It is possible to create a TRRS cable wired so that you can use two Expression or Sustainer pedals with QuNexus. Though we do not provide these, you can make them using the schematics shown below:... -
Page 16: Converting Data Types
2.2.4 Converting Data Types It is possible to use QuNexus to convert data from MIDI to CV and vice versa. This can be accomplished in multiple ways: With a Computer: The image on the right shows the QuNexus connected to a computer, a CV device, and a MIDI device via the KMI MIDI Expander. -
Page 17: Left Side Buttons
There are 2 triangular Oct buttons that increment or decrement the keyboard octave (Keyboard Layer only). When QuNexus is first plugged in the - and + Oct buttons are both lit up and the keyboard starts at C2 (note 48) and goes up to C4 (note 72). QuNexus treats C3 as note 60. -
Page 18: The Bend Pad
There are four Preset slots on QuNexus. To select different presets tap the Shift / Preset button on the left side of the QuNexus. The LEDs on the keyboard will swipe to indicate that you are in Preset Select Mode. Then one of the four lettered buttons will light up to indicate which Preset is currently selected (A, B, C, or D). -
Page 19: Togl A, Velo B, Pres C, & Tilt D
Tap the Togl A button on the left side of the QuNexus to clear a note without having to hit the next one. - Page 20 Velo B - This button turns velocity response on and off for notes in Keyboard Layer*. If the blue LED is lit velocity response is on. If the LED is off then the velocity of each note will be 127. Velo B is on by Default Hold Velo B for 1 sec to turn Velocity Off Pres C - Turn on and off anything assigned to the pressure source in Keyboard Layer* with this...
-
Page 21: Data Sources And Sensor Output
Being aware of the data sources that the QuNexus provides will help in understanding how QuNexus uses this data and how it is converted to MIDI and CV. The next chapter will let you know how the sources are used for each Factory Preset that comes on the QuNexus. - Page 22 Preset B (Press and Tilt) - The Press and Tilt preset was designed for a wide variety of synths, apps, and plugins with pitch bend and modulation functionality. This preset maps QuNexus’ key tilt to pitch bend, and pressure sensitivity to the modulation parameter in most synths. Right out...
- Page 23 ● Control Voltage (CV) output and input are enabled with pitch, gate, bend, and pressure all being sent out of the CV outputs. These four presets can be customized using the QuNexus Editor. See the QuNexus Editor Chapter for more information.
-
Page 24: Coma Mode
If so, Channel Rotation is on. Channel Rotation is only turned on in the QuNexus Factory Preset C. To make a custom preset with Channel Rotation you will need to turn it on in the QuNexus Editor (see the... - Page 25 Channel Rotation off: Keyboard Layer Controller Layer 1. After entering CoMA Mode hit the desired 1. After entering CoMA Mode hold source button: the Togl A button for 1 second to a. “Velo” button for note map Controller Layer. The b.
- Page 26 The numbered keys display what number you are on as you go. a. Since the QuNexus keys only have number labels up to 12, numbers above 12 in Live Edit Mode are displayed with a solid LED in the tens place and a blinking LED in the ones place.
-
Page 27: Live Edit Mode
It should be noted that these edits do not persist after changing presets or unplugging QuNexus. Any Live Edits will affect Keyboard Layer only (not Controller Layer). An illegal entry will just kick you out of Live Edit Mode but any legal entries made prior to that will be kept. - Page 28 Since the QuNexus keys only have number labels up to 12, numbers above 12 in Live Edit Mode are displayed with a solid LED in the tens place and a blinking LED in the ones place.
-
Page 29: Controlling Leds
Controlling LEDs LEDs can be controlled by sending MIDI Notes through USB Port 1 to the QuNexus. Notes 48 (C2) - 72(C4) will control the keyboard LEDs. If you send notes outside of that range they will wrap around and still control the LEDs of the Keyboard. -
Page 30: Chapter 3 Qunexus Editor
Chapter 3 QuNexus Editor The QuNexus Editor is a free application that we provide on our website. It allows you to create customized Presets and load them onto QuNexus. This chapter will guide you through everything you need to know to acquire and operate the QuNexus Editor. -
Page 31: Updating The Firmware
An “Update Firmware” option is located in the Hardware Menu of the QuNexus Editor. Select this option to force a firmware update. Keith McMillen Instruments cannot be held liable for damage resulting from installation... -
Page 32: Main Window Overview
Main Window Overview The QuNexus Editor opens with this window: Customize the QuNexus output and input using the Keyboard, Controller, and CV tabs (Layers). Just above the right side of the tabbed box are the global sensitivity settings to control Gain, On Threshold, Off Threshold, and Tilt Sensitivity for the QuNexus keys. -
Page 33: Saving Presets
As button. You can name it and it will be added to the bottom of the Library. To send any of the Presets in the Library down to the QuNexus, click on the Preset in the Library and use the buttons in the Send box (shown to the right) to send it to any of the four Preset slots. -
Page 34: Importing And Exporting Presets
QuNexus with Symphonix Evolution. The top 8 keys on QuNexus will control transport, the arpeggiator, track selection, mute, and solo (shown in blue). The other keys (shown in white) can be used for playing melodies. These keys also use Pressure to control modulation and tilt to control pitch bend. -
Page 35: Menu Bar
Menu Bar The QuNexus Editor’s Menu Bar contains several useful features. The File menu duplicates the New, Save, Delete, and Revert Preset functions from the Preset Library box, assigning them shortcuts to add convenience. You can also Revert or Import Factory Presets. -
Page 36: Sensitivity
Control. LEDs will still light up normally in Preset Select and Live Edit Modes. LED Refresh Mode saves in the preset so make sure to save and send your preset to QuNexus in order for this option to take effect. All of the Factory Presets use Normal mode. -
Page 37: Per Key Sensitivities
The Reset All Keys button will return all keys to their center positions. The settings in the Per Key Sensitivities window are not saved per preset. They are applied globally for all presets and are sent down to QuNexus as you adjust them in real time. -
Page 38: Keyboard Layer
Keyboard Layer Here you can choose how the QuNexus keys output MIDI. Start with what type of MIDI data you want, go across the row, and end with the output destination (USB, Expander, or USB + Expander). For example, if you want to add Pitch Bend to your keyboard follow these steps: 1. -
Page 39: Sources
Key Velocity (for notes only): The value between 0 and 127 that represents the overall pressure on the QuNexus keys at the moment a note on (or finger on) is detected. Sensitivity can be adjusted using the Sensitivity number box above the tabbed box. -
Page 40: Gain, Offset, Curve, Min, And Max
3.8.3 Gain, Offset, Curve, Min, and Max After selecting your source for the MIDI data type, you can then further modify what values you are sending to your MIDI device/software by using the math modifiers in the next five columns. Gain: The number in the gain box is used to multiply the raw value coming from the source. - Page 41 3.8.3.1 View/Edit Tables The Tables window is accessible from the Hardware Menu. When you first open it you will see the window shown above. You can select a table to view in the menu in the bottom right corner. If you select “Custom 1” or “Custom 2”...
-
Page 42: Midi Channel
The possible output destinations for the MIDI data results are: USB: MIDI goes from the QuNexus keyboard to an attached computer through USB Port 1. Expander: If a KMI MIDI Expander is attached, the MIDI data will go out the Expander’s 5-pin MIDI Out port. -
Page 43: Toggle
When a different key is pressed, the previous note is turned off and the new note is turned on. Tap the Togl A button on the left side of the QuNexus to clear a note without having to hit the next one. -
Page 44: Program Change
Remote LED Control. 3.8.10 Program Change Here you can set the Preset to use a Program Change Message. This will cause the QuNexus to output the Program Change value every time that preset is selected from the QuNexus. See the Selecting Presets chapter for more information. -
Page 45: Controller Layer
Controller Layer The Controller Layer tab appears next to Keyboard Layer. Here you can assign each key its own additional Note, Toggle CC#, Pressure CC#, and Tilt CC#. Do this by clicking on any key in the image so that it is highlighted with a green border. Then look below the image at the Sensor Settings. -
Page 46: Participate
3.9.1.1 Participate There are two “Participate” checkboxes on the right side of Controller Layer’s Sensor Settings, one for Keyboard Layer and one for Controller Layer. These allow you to isolate specific keys for controller use only, keyboard use only, or both. If Participate in Keyboard Layer is disabled, the selected key will no longer play its regular note or contribute to controlling Channel Pressure, Poly After Touch or anything else that might have been set up in the Keyboard Layer tab. -
Page 47: Controller Layer Toggle
3.9.1.3 Controller Layer Toggle There is a dedicated CC# for Toggling in Controller Layer. This has nothing to do with the Toggle options in Keyboard Layer. In fact, you must disable “Participate in Keyboard Layer” in order to use the Toggle CC#. This is because Keyboard Layer has it’s own built in Toggle behavior which cannot interact with Controller Layer’s Toggle. -
Page 48: Cv Layer
3.10 CV Layer Here you can choose how the QuNexus keys send and receive CV (Control Voltage). QuNexus has 4 possible CV outputs and 2 possible CV inputs (see the CV chapter for the hardware specs). There is a box labeled Gate S Trig in the upper right corner; if this is checked, the gate output will be inverted so that gate on is 0V and gate off is 5V. -
Page 49: Cv Input (Cv To Midi)
The settings in the CV Trims window are not saved per preset. They are applied globally for all presets and are sent down to QuNexus as you adjust them in real time. -
Page 50: Chapter 4 Troubleshooting
Steps taken to produce this problem Steps you have taken to try and solve your problem Also, please think about whether or not your question is actually a QuNexus question or a question about the software you’re using your QuNexus with. -
Page 51: Touchy Usb Connection
USB cables these days - they’re often located in the cell phone area. A bad USB cable can be the cause of a number of issues with the QuNexus. Check out the “Try a New Micro-USB Cable” section for some more info. - Page 52 4. Plug the Stereo end of the y cable into the Gate - CV 1 port or the CV 2 - 3 port. 5. Plug the 2 MONO ends into the CV destinations on your CV device. a. If plugged into the Gate - CV 1 port, the QuNexus presets send note ons and offs out the gate and pitch out CV1.
- Page 53 MIDI Data on. 5. Set the "MIDI To" menu to QuNexus Port 3 (the CV port). Set the Channel to "Ch. 2" if you are using a Factory Presets. All Factory Presets use Channel 2 for CV output and input.
- Page 54 8. Plug the Stereo end of the y cable into the Gate - CV 1 port or the CV 2 - 3 port. 9. Plug the 2 MONO ends into the CV destinations on your CV device. a. If plugged into the Gate - CV 1 port, the QuNexus presets send note ons and offs out the gate and pitch out CV1.
- Page 55 4. Open the Audio/MIDI software you wish to convert CV to MIDI with (like Ableton Live). 5. Check Ableton’s MIDI Preferences to make sure QuNexus Port 1 and Port 3 are enabled for MIDI Input and Output. In Ableton, make sure to enable the remote column for Input from Port 1 and Port 3.
-
Page 56: Audible High Pitched Noise In Computer Audio When Using Cv
Causes: QuNexus' CV Input is uni-polar and is meant for a signal up to 5 Volts. If you send it a bi-polar signal or a signal above 5 Volts, the signal will be clipped and can cause malfunctions in extreme cases. -
Page 57: Firmware Trouble
Solution: Make sure the CV signal you are sending QuNexus is uni-polar and within a 0-5 Volt range. You can convert a bi-polar 10V signal to a uni-polar 5V signal. Though we do not provide a converter, you can make one using the schematic shown below:... -
Page 58: Firmware Update Freezes Or Doesn't Work
Solution: Update your presets! To do this, simply send each preset to the desired QuNexus preset slot (A, B, C, or D) in the QuNexus Editor while your QuNexus is connected (make sure it says “Connected” just above the QuNexus logo). Once the update is done your QuNexus should be back to normal. -
Page 59: General Firmware Information And Suggestions
4.3.3.1 Unplug Other USB Devices While having other USB devices plugged in at the same time as your QuNexus should not be an issue, there may be some rare cases where other devices may interfere with your ability to properly update the firmware on your board. -
Page 60: Hotplugging" On Windows
You won’t hurt your QuNexus if you do this, but you will have to stop sending MIDI to it and then restart the firmware update for it to complete successfully. It’s also potentially possible to get stuck in bootloader mode when doing this. -
Page 61: Manually Updating Firmware
9. The destination menu will have reset when your QuNexus went into bootloader mode, so reselect QuNexus Port 1 from the drop down menu. 10. Select the firmware file you want to send to your QuNexus in the main windows to SysEx Librarian. - Page 62 5. Click “Open Sysex File”. When the browser window opens, navigate to the enter bootloader file (typically named “enter_bootloader.syx”) and click “Open” 6. Click the “Send Sysex” button - the blue shift button on your QuNexus should light up solid. Your QuNexus is now in bootloader mode and ready to receive firmware 7.
-
Page 63: Safety Precautions
QuNexus. Explosive Atmospheres Do not use QuNexus in any area with a potentially explosive atmosphere, such as at a fueling area, or in areas where the air contains chemicals or particles (such as grain, dust, or metal powders). Obey all signs and instructions.
Need help?
Do you have a question about the QuNexus and is the answer not in the manual?
Questions and answers