Table of Contents
Advertisement
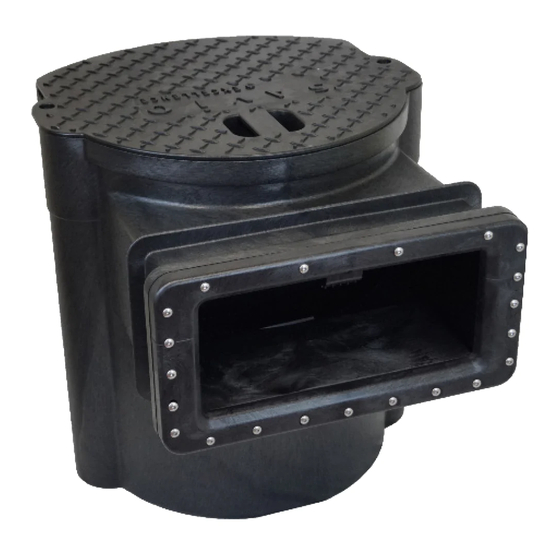
High Flow Skimmer™
Operating Manual & Specifications
Read the entire instructions prior to assembling and operating
• For Pump Flows up to 12,500 GPH
• Provides Excellent Skimming
• Perfect for Ponds & Water Gardens
with Separate Biological Filtration
_____________________________
Read entire instructions prior to assembly and operation
A
Advertisement
Table of Contents

Related Manuals for Savio High Flow Skimmer HFS12500


Summary of Contents for Savio High Flow Skimmer HFS12500
- Page 1 High Flow Skimmer™ Operating Manual & Specifications Read the entire instructions prior to assembling and operating • For Pump Flows up to 12,500 GPH • Provides Excellent Skimming • Perfect for Ponds & Water Gardens with Separate Biological Filtration _____________________________ Read entire instructions prior to assembly and operation...
-
Page 2: Replacement Parts
Replacement Parts Item Description RS001 Skimmer Tank RS002 Skimmer Cover RS003 Skimmer Leaf Basket RS004 Skimmer Center Baffle RS007 Skimmer Face Plate 16” RS010 Skimmer Weir Door 16” RS018 Skimmer Divider RS022 Skimmer Screw Packet RS105 Left Baffle Shield RS106 Right Baffle Shield High Flow Skimmer Accessories Item... -
Page 3: Components Diagram
Components Diagram RS002 RS004 RS003 RS105 / RS106 RS005 / RS006 RS010 RS001 RS004 RS019 Only insert baffle if pump flow is less than 2000 GPH... -
Page 4: Installation
Installation A) Place the High Flow Skimmer opposite the waterfall or water return in an easily accessible location. B) Avoid placing rocks or plants in front of the High Flow Skimmer. Anything placed in front will interfere with the water flow and skimming action. - Page 5 Installation Cut 3” opening by placing hole saw at the top indicator and cutting 3 - 1/8” blow the guide. Insert Weir Door 16” WEIR Push the weir door hinge tabs into the notches on the bottom Place Highflow Skimmer of the weir dividers, using Place the High Flow Skimmer in Insert Weir Dividers...
- Page 6 Installation Pull Liner Over Skimmer Make Incision Position pond liner over the High Flow Make a 3” wide incision through the centered Skimmer mouth and hold it in place. Smooth liner 3/4” below the top of the High Flow liner free of wrinkles and folds. Wipe clean. Skimmer opening.
- Page 7 Bury FreezeFlex Hose Bury the FreezeFlex below frost line. Dig a trench (shovel width) 10” below existing ground level along the pond perimeter from the Savio Skimmer to the Livingponds® Waterfall Filter or water return. Finishing Up Hide Neck Finish Coping...
-
Page 8: Maintenance
Maintenance Under normal operating conditions this Skimmer will provide years of trouble-free use. Here are a few items which will require periodic maintenance: Check and remove debris captured in the leaf basket every week or as needed. The frequency required will vary seasonally, with cleaning required more often in the fall than at other times. -
Page 9: Troubleshooting
Reinstall. Pump flow rate too high. Adjust pump flow rate to be below recommended maximum. Filter pad requires frequent cleaning. Heavy waste load in pond due to Remove filter pad. Add a Savio fish or plant debris. Livingponds filter. - Page 10 Maintenance Notes _____________________________________ _____________________________________ _____________________________________ ___ __________________________________ _____________________________________ _____ ________________________________ _____________________________________ _______ ______________________________ _____________________________________ _________ ____________________________ _____________________________________ ___________ __________________________ _____________________________________ _____________ ________________________ _____________________________________ _______________ ______________________ _____________________________________ _________________ ____________________ _____________________________________ ___________________ __________________ _____________________________________ _____________________ ________________ _____________________________________ _______________________ ______________ _____________________________________ _________________________ ____________ _____________________________________ ___________________________ __________ _____________________________________...
-
Page 11: Maintenance Notes
Maintenance Notes ______________________________________ ______________________________________ ______________________________________ ______________________________________ ______________________________________ ______________________________________ ______________________________________ ______________________________________ ______________________________________ ______________________________________ ______________________________________ ______________________________________ ______________________________________ ______________________________________ ______________________________________ ______________________________________ ______________________________________ ______________________________________ ______________________________________ ______________________________________ ______________________________________ ______________________________________ ______________________________________ ______________________________________ ______________________________________ ______________________________________ ______________________________________ ______________________________________ ______________________________________ ______________________________________ ______________________________________ ______________________________________ ______________________________________ ______________________________________ ______________________________________ ______________________________________... -
Page 12: Warranty
This warranty does not cover any faults caused by improper use, installation and handling of the device or as a result of wear and tear. Savio Engineering does not assume liability for consequential damage caused by the failure of the product.
Need help?
Do you have a question about the High Flow Skimmer HFS12500 and is the answer not in the manual?
Questions and answers