Table of Contents
Advertisement
Available languages
Available languages
Quick Links
Advertisement
Chapters
Table of Contents

Subscribe to Our Youtube Channel
Summary of Contents for KNOVA KN CM-11MA
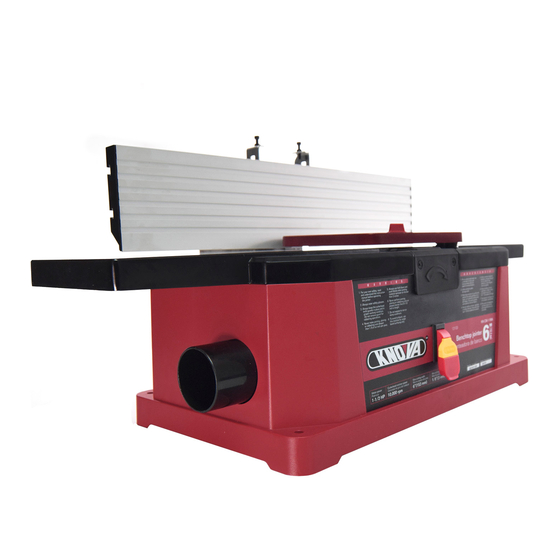
- Page 1 ” Benchtop jointer Canteadora de banco KN CM-11MA...
-
Page 2: Table Of Contents
CAUTION: Read and follow all Safety Rules and operating Instructions before First Use of this Product. Keep this manual with tool. PRODUCT SPECIFICATIONS KN CM-11MA Attention: Please choose proper power source, voltage and frequency that are shown in the label for your tool. -
Page 3: Additional Safety Rules For This Product
GENERAL 15. Disconnect tools. 20. Check damaged parts. When not in use, before servicing and changing Before further use of tool, a guard or other part that is accessories such as blades, bits and cutters, damaged should be carefully checked to determine that disconnect tools. -
Page 4: Accessories And Attachments
ELECTRICAL REQUIREMENTS WARNING WARNING Improper connection of equipment grounding This machine is for indoor use only. Do not expose to conductor can result in the risk of electrical shock. rain or use in damp locations. equipment should be grounded while in use to GUIDELINES FOR EXTENSION CORDS protect operator from electrical shock. -
Page 5: Assembly
ASSEMBLY ASSEBLE THE FENCE CHECK AND ADJUST THE FENCE ANDGE • Align the T-slot on the fence to the nut on fence support Before adjusting the fence, make sure the power assembly, slide the fence onto the nut until the arc groove is turn off. -
Page 6: Operation Instructions
ASSEMBLY INSTALL THE DUST CHUTE INSTALLING THE FILTER BAG Slide dust chute onto end of chip exhaust. Tighten the pan Open the zipper on the bottom head screw. of the bag, place the spring inside of the filter bag arm. Slide the arm with the spring over the dust exhaust port. - Page 7 OPERATION INSTRUCTIONS ADJUST THE FENCE POSITION • Place a straightedge over the out feed table and the blade. Before adjusting the fence, make sure the power is turn off. • The straight edge must touch evenly on the out feed table at both ends of the blade.
- Page 8 OPERATION INSTRUCTIONS As your trailing hand passes over the cutter head remove your leading hand and place behind your trailing hand and repeat until the entire length of work piece has been cut. Push stick Feed with the grain whenever possible, if the nature of the work piece is such that it must be feed against the grain take very light cuts and feed slowly.
-
Page 9: Maintenance
MAINTENANCE blade clamp using the four blade lock screws, do not tighten WARNING the blade lock screws until you have checked the blade height, Turn the planer off and unplug from the power source adjust as required using straight edge as described in before proceeding to do any maintenance work. -
Page 10: Exploded View
EXPLODED VIEW (152.4 mm) -
Page 11: Parts List
PARTS LIST ID No. ID No. ID No. D e s c r i p t i o n Qty. D e s c r i p t i o n Qty. D e s c r i p t i o n Qty. -
Page 12: Especificaciones Del Producto Kn Cm-11Ma
TABLA DE CONTENIDOS Especificaciones del producto KN CM-11MA ....11 Montaje ................14 Instrucciones de seguridad ..........11 Instrucciones de operación ..........16 General ................11 Mantenimiento ..............18 Reglas de seguridad adicionales para este producto ..12 Solución de problemas ............19 Requisitos eléctricos ............ -
Page 13: Reglas De Seguridad Adicionales Para Este Producto
GENERAL 13. No se exceda. 19. Manténgase alerta. Mantenga la postura y el equilibrio en todo momento. Cuidado con lo que está haciendo. Usa el sentido común. No utilice la herramienta cuando esté cansado. 14. Mantenga las herramientas con cuidado. Mantenga las herramientas de corte afiladas y limpias para 20. -
Page 14: Accesorios Y Complementos
REQUISITOS ELECTRICOS UNA CONEXIÓN INCORRECTA del conductor de puesta - Consulte con un electricista calificado si no comprende las a tierra del equipo puede resultar en riesgo de descarga instrucciones de conexión a tierra o si tiene dudas sobre eléctrica. El conductor con aislamiento verde (con o sin si la herramienta está... -
Page 15: Montaje
CONTENIDO DE LA CAJA 1. Base canteadora 2. Valla 3. Conjunto de soporte de valla 4. Base deslizante de valla 5. Resorte 6. Llave hexagonal de 4 mm 7. Manija de bloqueo 8. Arandela plana 9. Tuerca cuadrada 10. Bolsa de filtro 11. - Page 16 MONTAJE COMPRUEBE Y AJUSTE LA VALLA Y LA BANDA INSTALE PARA RECOLESTAR POLVO Antes de ajustar la valla, asegúrese de que la energía esté Deslice el conducto de polvo en el extremo del escape apagada. de virutas. Apriete el tornillo de cabeza plana. •...
-
Page 17: Instrucciones De Operación
INSTRUCCIONES DE OPERACION Al utilizar la canteadora se retira una pequeña cantidad de madera de los bordes y las caras de las tablas para obtener superficies lisas, rectas y uniformes, de modo que los dos bordes que atraviesan los bloques encajen perfectamente. El cepillado se refiere al tamaño de la madera a un espesor deseado mientras se crea una superficie nivelada paralela al tamaño opuesto de la tabla. - Page 18 INSTRUCCIONES DE OPERACIÓN Alimente con la veta siempre que sea posible, si la naturaleza de la pieza de trabajo es tal que debe alimentarse Borde recto de acero contra la veta, haga cortes muy ligeros y avance lentamente. Cuando utilice piezas de trabajo largas, utilice soportes adicionales en ambos extremos de la cepilladora.
-
Page 19: Mantenimiento
INSTRUCCIONES DE OPERACIÓN Palo de Borde biselado empuje Borde de chaflán USANDO LA MANGUERA DE VACÍO Se puede conectar una manguera de recolección de polvo estándar al puerto de escape (2-1/2” de diámetro) debajo de la mesa de salida. La ensambladora funcionará correctamente en todas las Bloque de empuje profundidades de corte de hasta 1/8”... -
Page 20: Solución De Problemas
MANTENIMIENTO INSPECCIÓN Y REEMPLAZO DE CEPILLOS Abrazadera de hoja Apague la cepilladora y desconéctela de la fuente de Cabezal alimentación. La vida útil de las escobillas depende de cortador la cantidad de carga del motor. Inspeccione regularmente Tornillo los cepillos después de 50 horas de uso. de bloque Para inspeccionar o reemplazar las escobillas, retire de la hoja... -
Page 21: Vista Explosivo
VISTA EXPLOSIVO (152.4 mm) -
Page 22: Lista De Partes
LISTA DE PARTES D e s c r i p c i ó n Cant. D e s c r i p c i ó n Cant. D e s c r i p c i ó n Cant. Asa deslizante para valla Arandela plana Resorte Arandela plana... -
Page 23: Notes
NOTES / NOTAS... - Page 24 www.knova.com.mx...
Need help?
Do you have a question about the KN CM-11MA and is the answer not in the manual?
Questions and answers