Advertisement
Quick Links
"Catch The Bug"
Body Build
Revision 2.0
™
Where are we ?
1) Body Build- The mechanical part
of the bug is constructed.
2) Electronics Lab- Bug Experiments
teach the fundementals of electronics.
3) Final Wiring- Permanant wires are
soldered on to "bring the Bug to life."
Process
1
#
Copyright © TeacherGeek 2007
Advertisement

Related Manuals for TeacherGeek Catch The Bug


Summary of Contents for TeacherGeek Catch The Bug
- Page 1 “Catch The Bug” Process Body Build Where are we ? 1) Body Build- The mechanical part of the bug is constructed. 2) Electronics Lab- Bug Experiments teach the fundementals of electronics. 3) Final Wiring- Permanant wires are ™ soldered on to “bring the Bug to life.”...
-
Page 2: Tools Needed
1- Bug Body 4- Long Screws 1- Spade Connector 2- Short Screws 1/2” (~14mm)- Tire Material 2” (~50mm) Blue Tubing 1- Battery Pack 30”- Stranded W ire (~76cm) 2- Steel Feeler Wires Copyright © TeacherGeek 2006. Only for use with TeacherGeek products. - Page 3 Body Build ™ Page 3 Your Bug Body is made of recycled polypropylene plastic. See how it was injection molded in the teachergeek.com forum. A. Bend The Body The Bug Body must be heated for bending. Here are some options: Adult Supervision Required.
- Page 4 2 Switches 4 Long Screws #1 Phillips Screwdriver Place screws into switches (as shown). Drive screws into holes 1. Partually drive in all screws (leaving them loose) 2. Tighten all screws Copyright © TeacherGeek 2006. Only for use with TeacherGeek products.
- Page 5 E. Attach The Motors What Is Needed? Push the motors down into the bug body so the copper terminals face outward. Terminals The motors with tire material (from step D) Terminals Copyright © TeacherGeek 2006. Only for use with TeacherGeek products.
- Page 6 Smoosh (flatten) the bend from step 2 4. Hold 6. Done !!! Have you made 2 feelers? They should look like this: Hold the wire as shown Copyright © TeacherGeek 2006. Only for use with TeacherGeek products.
- Page 7 ) into the tubing so it slides in front of the switch lever. Repeat the process to attach the second feeler. Blue Tubing Attached Feelers Feeler in front of switch lever Copyright © TeacherGeek 2006. Only for use with TeacherGeek products.
-
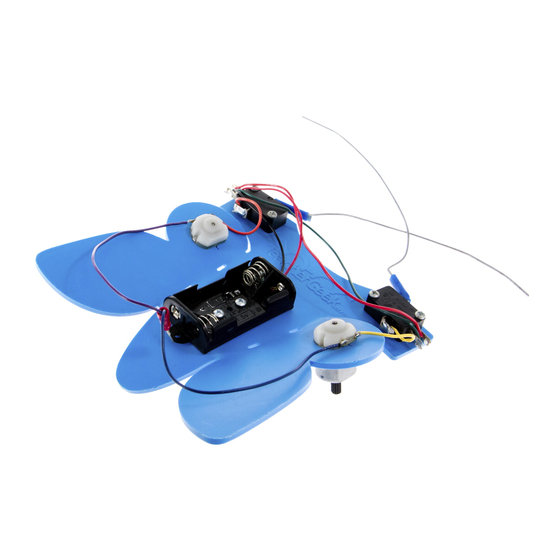
Page 8: You're Done
Body Build ™ Page 8 You’re Done !!! Your bug should look something like this: Next Step: The Electronics Lab Copyright © TeacherGeek 2006. Only for use with TeacherGeek products.
Need help?
Do you have a question about the Catch The Bug and is the answer not in the manual?
Questions and answers