Table of Contents
Advertisement
Quick Links
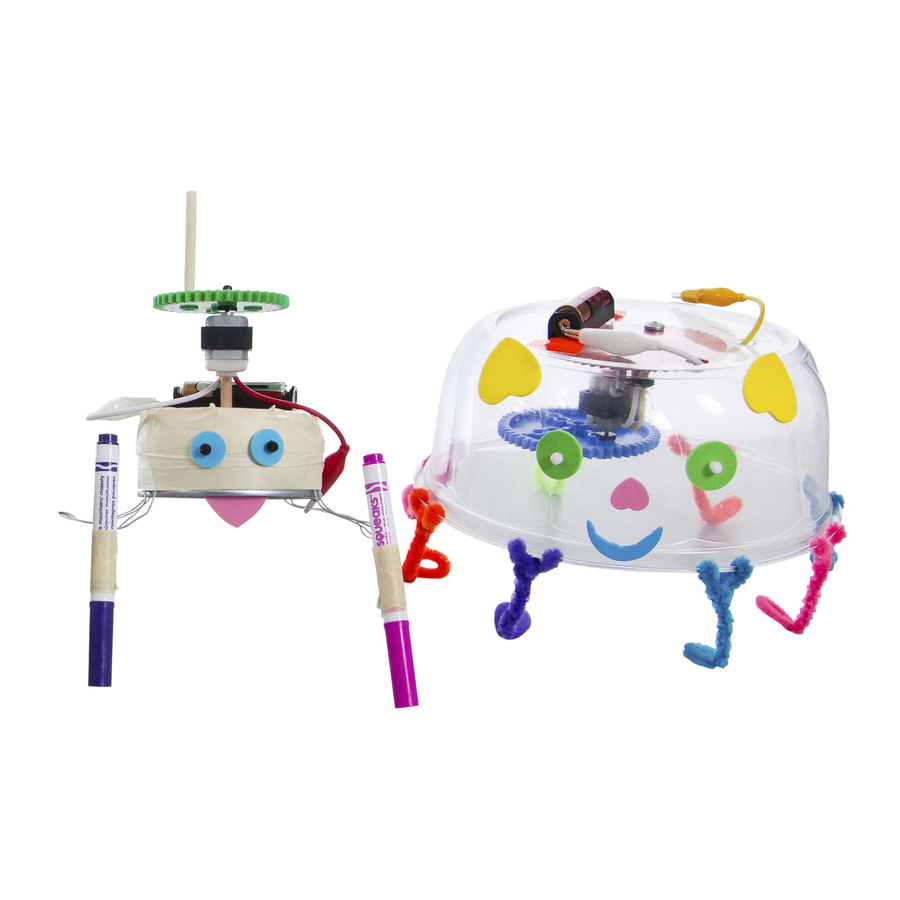
This is a real engineering project (not a toy). What does that mean? You get to design and build
your own unique Wiggle-Bot, rather than just following directions. You'll also get to cut, wire and
maybe even pound. Experiment and try different ideas. Keep improving and changing your designs.
Get Ready...
What You Have
Materials in the TeacherGeek 1823-17 Wiggle-Bot Kit
2 300mm (12in), 2 150mm (6in),
1 75mm (3in), 1 50mm (2in)
1 AA Battery Holder
1 Motor with Holder & Leads
Colors will vary.
Get Set...
1. Bend
Bend up the leads
on the motor holder.
2. Power
Put the battery into the
holder with the flat side
against the spring.
4 Gears
50Tooth, 40Tooth,
20Tooth, 10Tooth
1 Motor Mount
2 Perpendicular Blocks
2 Steel Wire
t el Wire
300mm (12in)
3. Pinch
Open alligator
clip leads by
pinching.
Make sure wires go through
the motor mount. If they
don't, they will break off.
© TeacherGeek Inc. 2016. Wiggle-Bot supplies @ TeacherGeek.com R2.1
Quick Start
Large Paper or
Poster Sheet
Optional...
Recycling Bin &
Other Materials
• Plastic Containers
• Bottles & Caps
• Plastic Utensils
• Boxes
• Other Things
4. Run
Turn the motor
on and off by connecting
and disconnecting leads.
What You Need
2-4 Markers
Something to Cut
Strips & Dowels
(TeacherGeek Multi-Cutter,
Pruning Shears, Saw)
TeacherGeek Multi-Cutter
Put a battery in the holder
and connect the leads.
1 AA Battery
Scissors
Page 1
Advertisement
Table of Contents

Related Manuals for TeacherGeek Wiggle-Bot


Summary of Contents for TeacherGeek Wiggle-Bot
- Page 1 This is a real engineering project (not a toy). What does that mean? You get to design and build your own unique Wiggle-Bot, rather than just following directions. You’ll also get to cut, wire and maybe even pound. Experiment and try different ideas. Keep improving and changing your designs.
- Page 2 Roll or Spin You can cut dowels and connector strips to fit your projects. Wiggle in Use a TeacherGeek Wiggle Forwards Circles or Multi-Cutter, a saw, patterns or pruning shears. Page 2 © TeacherGeek Inc. 2016. Wiggle-Bot supplies @ TeacherGeek.com R2.1...
- Page 3 (a pen that wiggles when you try and write with it)? Ideas... Get help, watch videos and find more information at teachergeek.com/wiggle Page 3 © TeacherGeek Inc. 2016. Wiggle-Bot supplies @ TeacherGeek.com R2.1...
Need help?
Do you have a question about the Wiggle-Bot and is the answer not in the manual?
Questions and answers