Advertisement
Quick Links
Advertisement

Related Manuals for Bushnell GOLF Launch Pro


Summary of Contents for Bushnell GOLF Launch Pro
- Page 1 BU SH NE LL G OLF User Manual...
- Page 2 Thanks to the advanced photometric technology inside, the Launch Pro remains accurate and reliable both on the range and in your home simulator. Combine it with the FSX performance and gaming suite and enjoy hundreds of world-class courses, skill-building games, and global leagues and competitions.
-
Page 3: Table Of Contents
TABLE OF CONTENTS Table of contents Getting Started Registration Subscriptions Ball Placement & Hitting Quick Settings Club Tracking Target Alignment Storage & Maintenance Specifications & Support... -
Page 4: Getting Started
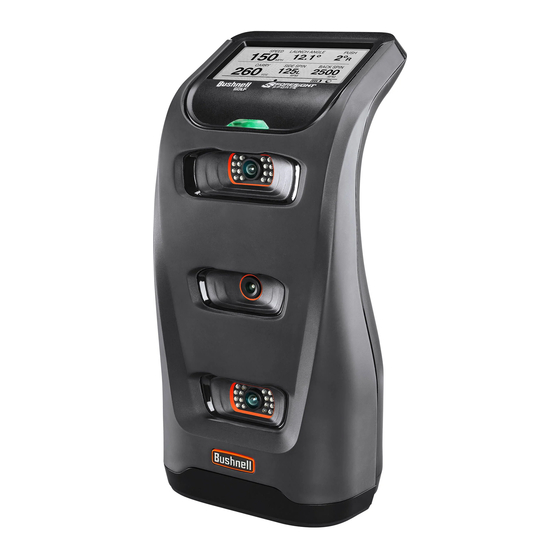
GETTING STARTED WHAT’S IN THE BOX Getting Started WELCOME TO YOUR LAUNCH PRO Launch Pro Launch Monitor Power Cord A/C Power Adapter USB-C Cable 28 Club Marker Pack Alignment Stick... - Page 5 GETTING STARTED FEATURE OVERVIEW Touch Display Handle LED Indicator Light 3 High-Speed Cameras USB-C/Ethernet Port Power Button AC Adaptor Input Bushnell Badge...
- Page 6 Launch Pro and allow the battery to fully charge before use. Note: To use all the functions of the Launch Pro, it must connect to the internet at least once every 45 days. You To power on the Launch Pro, press and release the power button. You will see a flashing will see a warning if you need to connect within 5 days.
-
Page 7: Registration
The Launch Pro requires online registration renewal every 45 days. If the registration of your device has expired, all data channels from the Launch Pro (USB, ethernet, Wi-Fi, and Bluetooth) will be blocked until registration renewal is completed. The Launch Pro will continue to work as a stand-alone device. -
Page 8: Subscriptions
SUBSCRIPTIONS SUBSCRIPTIONS Subscriptions YOUR GAME, YOUR CHOICE If you see the ADD A SUBSCRIPTION screen , scan the QR code with your phone or tablet and follow the prompts to set up your subscription. -
Page 9: Ball Placement & Hitting
Launch Pro is raised to the same level as the hitting surface. Place the ball on the ground in fornt of your Launch Pro. If the ball is outside of the hitting zone, you will see the MOVE BALL INTO HITTING ZONE screen. If there are multiple balls in the hitting zone, you will see the MULTIPLE BALLS DETECTED screen. - Page 10 The more sidespin, the greater the ball curvature. After hitting the ball, the Launch Pro records your speed, launch angle, push/pull, spin, and carry. To access previous shot data, swipe down to access the QUICK SETTINGS screen, then Back Spin The backward rotation of the ball.
-
Page 11: Quick Settings
Quick Settings NAVIGATING THE MENU SCREENS On your Launch Pro touch display, swipe down to access the QUICK SETTINGS screen. On the QUICK SETTINGS screen, you can access the BACKLIGHT, SETTINGS, LEFT/RIGHT- HANDED modes, ABOUT, and you can check the battery life. - Page 12 QUICK SETTINGS QUICK SETTINGS Quick Settings Explained Backlight Turn on/off the backlight Settings Turn on/off tracking mode, access target alignment, check firmware, choose units of measurement, access Wi-Fi, change the display, access diagnostics, access shot saver Left/Right Toggle between left and right handed modes Handed About Access account information, version, patents, system information,...
-
Page 13: Club Tracking
CLUB TRACKING CLUB TRACKING Club Tracking TRACK YOUR CLUBFACE FOR MORE DATA To turn on Club Tracking mode, swipe down to access the QUICK SETTINGS screen, then go to SETTINGS, then TRACKING MODE. Once the ball is in the hitting zone, the Launch Pro will display the READY screen and the green LED indicator light will change from blinking to solid. - Page 14 LEARN HOW TO APPLY A CLUB MARKER TO YOUR CLUB Your Launch Pro doesn’t only look at the ball, but the club too. To take advantage of this After your next swing, your Launch Pro will now display club speed, path in and path out, feature, open the club marker packet (included) and follow the directions to apply the club angle of attack, and efficiency.
-
Page 15: Target Alignment
TARGET ALIGNMENT TARGET ALIGNMENT Target Alignment USING THE ALIGNMENT STICK To activate target alignment, swipe down to access the QUICK SETTINGS screen. Select SETTINGS, then go to TARGET ALIGNMENT. - Page 16 LED indicator light will turn Target alignment can be adjusted up to 10 degrees on the Launch Pro via the FSS solid orange. The new alignment angle will be Alignment Stick.
- Page 17 CARING FOR YOUR LAUNCH PRO How to store the Launch Pro Prior to storing the Launch Pro, make sure the device is powered off. Store the Launch Pro in a cool, dry environment in its original foam-lined packaging or in a specially designed carrying case to prevent damage.
- Page 18 SAFETY Safety To charge your Launch Pro, use the power adapter that came with the device. Using any other power adapter or charger may cause damage to the device and may cause fire or injury. SAFETY TIPS FOR YOUR GC3 DO NOT disassemble, change, or attempt to repair the Launch Pro.
- Page 19 SPECIFICATIONS SUPPORT Specifications Support Questions? Battery Life 5-7 Hours We’re here to help. For product-related issues or questions, go to Dimensions 6”L x 6.2”W x 12”H www.bushnellgolf.com/contact 800-423-3537 or call Interfaces USB-C / Ethernet / WiFi Ball Data Collected Ball Speed / Launch Angle / Horizontal Launch Angle / Total Spin Club Data Collected Club Speed / Smash Factor Weight...
Need help?
Do you have a question about the Launch Pro and is the answer not in the manual?
Questions and answers