
Related Manuals for Cambro AIR CURTAIN ULTRA


Summary of Contents for Cambro AIR CURTAIN ULTRA
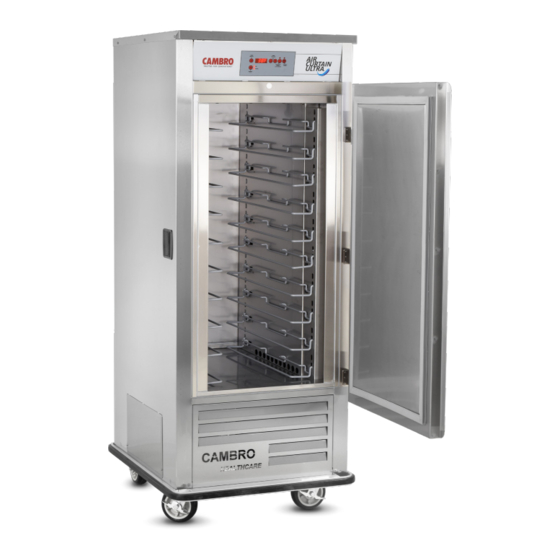
- Page 1 OWNER’S CAMBRO AIR CURTAIN ULTRA MANUAL ® ™ This owner’s manual applies to all models that begin with the prefix ACU. www.cambro.com...
-
Page 2: Table Of Contents
Should there be noted damage upon uncrating, carefully check the crate for visible signs of the cause. Save all crating material and immediately file a claim of damage with the carrier. Under no conditions may a damaged unit be returned to Cambro without prior written factory authorization (RMA). -
Page 3: Delivery Inspection
Note: Cambro does not recommend laying the unit down on its front, side or back. However, if you must, please be certain to allow the unit to remain in an upright position afterwards for 48 hours before plugging the unit in or attempting to place the unit in to service, to assure that the compressor oils and refrigerant may settle. -
Page 4: Installation
(Note: Packing material should be saved should there be any damage to the unit.) Remove the Cambro Air Curtain Ultra from the shipping skid. This is done by lifting the unit and rolling it off the skid. Do not lay the cabinet down. -
Page 5: Intended Use
V - Intended Use Typical Operating Parameters: The “curtain” of air is capable of maintaining 41°F (5°C) temperature or below for a minimum of 45 minutes and a maximum of 2 hours based at 75°F / 45% RH. 120V 20 amp dedicated circuit. A “typical” operational environment can expect a result of a 60 minute range. HOWEVER, actual time your unit will run in this temperature zone depends on may factors, such as: •... - Page 6 (D) TEMPERATURE DISPLAY: Your unit allows you to select the temperature display in two modes, Actual temperature or Set Point temperature. Set Point temperature is the Cambro factory default. In circumstances where displaying the Actual temperature is desired the Cambro Air Curtain Ultra allows you to choose this function.
- Page 7 TEMPERATURE: important thing you can do to insure a long, Degrees (F) Fahrenheit to reliable service life for your Air Curtain Ultra Degrees (C) Celsius Press UP Arrow - or - is to regularly clean the condenser coil.
-
Page 8: Transporting
Cleaning the Condenser: The most important thing you can do to insure a long, reliable service life for your Cambro Air Curtain ultra Refrigerator is to regularly clean the condenser (compressor) coil. The condensing unit requires regularly scheduled cleaning to keep the finned condenser clean of link and dust accumulation. - Page 9 Cleaning the Condenser, Continued: To clean the condenser, first disconnect electrical power to the cabinet and remove the front and/or rear louver assembly. To remove the front louver assembly simply pull the assembly down and out, the louver assembly is held in place with magnets. To remove the rear louver assembly, remove all screws located on the louver assembly.
-
Page 10: Service Information
Is the circuit breaker on and fuse OK? • Is the “ON” indicator light illuminated? Press POWER On/Off button to illuminate. If after checking the above items and the unit is still not operating properly, please contact Cambro for an authorized service agent. Phone 833-935-1091 Email: AirCurtainUltra@Cambro.com Spare Parts: Spare or replacement parts may be obtained through a parts supplier or an authorized service agent. -
Page 11: Troubleshooting Guide
XII - Troubleshooting Guide Product zone temperature too high. 1. Control Setting Too High - Reset Control 2. Inadequate Air Circulation - Rearrange Product Load To Improve Air Circulation And Flow. Keep Empty Trays in Position. 3. Unit May Need To Be Manually Defrosted. (Refer to Page 5.) 4. -
Page 12: Replacement Parts
6. Key Shorted “Err7” 7. Door Switch “Err8” 8. EEPROM Possible Corruption XII - Replacement Parts www.fweparts.com/cambro Please visit for a full list of replacement parts, exploded view documents and other resources or scan the below QR code from a mobile device:... -
Page 13: Wiring Diagram
XIII - Wiring Diagram... -
Page 14: Warranty
Non-commercial setting. This states the exclusive remedy against Cambro Manufacturing relating to the product(s), whether in contract or in tort or under any other legal theory, and whether arising out of warranties, representations, instructions, installations or defects from any cause. Cambro Manufacturing shall not be liable, under any legal theory, for loss of use, revenue or profit, or for substitute use of or performance, or for incidental, indirect, or special or consequential damages or for any other loss or cost of a similar type. -
Page 15: Service Record
XV - Service Record Model Number ____________________________________________________________________________________________________ Serial Number _________________________________________________________________________________________________________________ Date of Purchase _______________________________________________________________________________________________________________ Notes ________________________________________________________________________________________________________________________ ______________________________________________________________________________________________________________________________ ______________________________________________________________________________________________________________________________ ______________________________________________________________________________________________________________________________ ______________________________________________________________________________________________________________________________ ______________________________________________________________________________________________________________________________ ______________________________________________________________________________________________________________________________ ______________________________________________________________________________________________________________________________ ______________________________________________________________________________________________________________________________ ______________________________________________________________________________________________________________________________ ______________________________________________________________________________________________________________________________ ______________________________________________________________________________________________________________________________ ______________________________________________________________________________________________________________________________ ______________________________________________________________________________________________________________________________ ______________________________________________________________________________________________________________________________ ______________________________________________________________________________________________________________________________ ______________________________________________________________________________________________________________________________ ______________________________________________________________________________________________________________________________ ______________________________________________________________________________________________________________________________ ______________________________________________________________________________________________________________________________ ______________________________________________________________________________________________________________________________ ______________________________________________________________________________________________________________________________ ______________________________________________________________________________________________________________________________ ______________________________________________________________________________________________________________________________ ______________________________________________________________________________________________________________________________ ______________________________________________________________________________________________________________________________ ______________________________________________________________________________________________________________________________ ______________________________________________________________________________________________________________________________... - Page 16 Telephone 714 848 1555 Toll Free 800 854 7631 Customer Service 800 833 3003 © Cambro Manufacturing Company 5801 Skylab Road, Huntington Beach, California 92647-2056 Printed in USA 12/19...
Need help?
Do you have a question about the AIR CURTAIN ULTRA and is the answer not in the manual?
Questions and answers