Table of Contents
Advertisement
Advertisement
Table of Contents

Related Manuals for Sequential TAKE 5


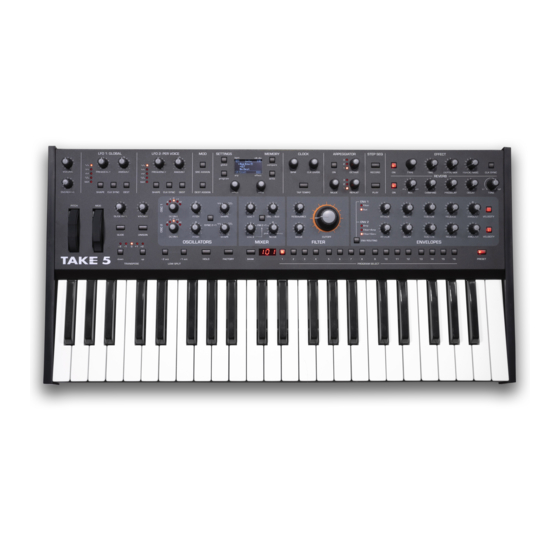
Summary of Contents for Sequential TAKE 5
- Page 1 C O M P A C T 5 - V O I C E P O L Y S Y N T H ®...
- Page 3 User’s Guide Version 1.0 August, 2021 Sequential LLC 1527 Stockton Street, 3rd Floor San Francisco, CA 94133 ©2021 Sequential LLC www.sequential.com...
- Page 4 For Technical Support, email: support@sequential.com This device is to be serviced by a Sequential-qualified technician only. Service technician must exercise due caution when opening the device to avoid electric shock and the device being unsecured when open.
- Page 5 Michelle Marshall, Andrew McGowan, Joanne McGowan, Julio Ortiz, Denise Smith, Brian Tester, Tracy Wadley, Gabby Wen, and Mark Wilcox THE TAKE 5 SOUND DESIGN TEAM Drew Neumann, Francis Preve, Gil Assayas (GLASYS), Huston Singletary, James Terris, Julian Pollack (J3PO), Kurt Kurasaki, Matia Simovich, Paul Schilling, Peter Dyer, Robert Rich.
- Page 6 A Few Words of Thanks Thank you for purchasing the Take 5. Our goal with this awesome little synth was to give you a very compact, very powerful instrument that you could take pretty much anywhere and sound great. Whether it’s your first synth, your gigging synth, or just the right synth to fit your studio space, we think you’re going to...
-
Page 7: Table Of Contents
Using Low Split ..........7 Exploring the Take 5 in More Depth ....... 9 Chapter 2: Take 5 Controls . -
Page 8: A Few Words Of Thanks
Warranty Repair ..........74 viii A Few Words of Thanks Sequential... - Page 9 Appendix D: Calibrating the Take 5 . . . . . . . . . . . . . . . . .
-
Page 10: Chapter 1: Getting Started
We’ve designed the Take 5 to be as easy to use as possible. Its essential controls are within easy reach on its front panel, so don’t hesitate to dive in and start turning knobs and pressing buttons. Then, when you’re ready, dig into this user’s guide to explore the deeper parts of the synth. -
Page 11: Rear Panel Connections
Rear Panel Connections The rear panel of the Take 5 has connectors for power, USB, MIDI, audio, and pedals. This rocker switch controls power on and off to the 1 . Power On/Off— Take 5. Accepts a standard, grounded IEC power 2 . -
Page 12: Setting Up The Take 5
Setting Up the Take 5 Here’s how to get your Take 5 up and running: 1. Plug the power cable into the power connector on the back of the Take 5. 2. If you have an expression pedal, connect it to the... -
Page 13: Tune The Oscillators And Filters
Tune the Oscillators and Filters The first time you use the Take 5, run its built-in oscillator and filter cali- bration procedure. Repeat the calibration procedure if needed over the next few days. The Take 5 learns the range of temperatures and will keep itself in tune over this range. -
Page 14: Using The Main Display
1. Hold bank and press 5. Release the bank button. 2. Press program selector button 12. Using the Main Display The most frequently used controls on the Take 5 are on its front panel. But there are additional Global settings and Program-specific settings accessible in its main display. -
Page 15: Editing Programs
(see “Saving a Program” on page 6). Creating a Program from Scratch The Take 5 makes it easy to create a new sound from scratch by provid- ing a “basic program” that you can quickly recall at any time. This provides a simple starting point that you can quickly build on. -
Page 16: Canceling Save
Live Panel Mode The Take 5 also features a “live panel” mode in which its sound switches to the current settings of its knobs and switches. In other words, the current preset is ignored and what you see on the front panel is what you hear. This is a great mode for learning, experimentation, and instant gratification. -
Page 17: Using Low Split
-2 button. The low split Low Split parameters appear in the display. 3. Either press the desired key/split point on the Take 5 keyboard, or use knob to set the split point to your preference. value 4. Release the -1 button and -2 buttons. -
Page 18: Exploring The Take 5 In More Depth
Also, in “Rear Panel Connections” on page 2 read about the various connectors on the back of your Take 5 and how you can use its various pedal, audio, MIDI, and USB inputs and outputs. -
Page 19: Chapter 2: Take 5 Controls
Chapter 2: Take 5 Controls This chapter explains all of the front-panel controls of the Take 5, section by section and the role each plays in synthesizing sounds. If you’re just getting started with synthesis, take a look at Chapter 4, Creating Sounds, for step-by-step tutorials on how to program some classic sounds such as synth bass, brass, strings, and more. - Page 20 Take 5. When off, the controls are transmitted via MIDI but do not directly affect the “local” synth (that is, the Take 5). This is primarily useful for avoiding MIDI data loops that can occur with some external sequencers. When...
- Page 21 (fully closed to half open). Selects whether aftertouch (key pressure) is 9 . Aftertouch On: On, Off— enabled or disabled. If disabled, the Take 5 will neither respond to nor transmit aftertouch/key pressure data. Sets one of eight pressure 10 . Aftertouch Curve: Curve 1... Curve 8—...
- Page 22 Additional tunings can be imported as a SysEx message. The Take 5 display has a built-in screen 13 . Screen Saver: On, Off— saver that puts it to sleep when not in use. This feature is designed to prolong the life of the display and we recommend using it.
- Page 23 When set to , Arpeggiator 27 . Arp Beat Sync: Off, Quantize— quantize note playback occurs only on the beat (relative to the current clock divide setting) regardless of when you press a key on the keyboard. Global Settings Sequential...
- Page 24 34 . Dump All Banks— selected MIDI port. (See “MIDI SysEx Cable: on page 14.) Dumped banks will load back into the same location in memory when imported back into the synth via MIDI. Take 5 User’s Guide Global Settings...
-
Page 25: Oscillators
Oscillators Oscillators generate the raw building blocks of the Take 5’s sound by producing waveforms, each of which has its own sound character based on its harmonic content. The Take 5 has two analog, voltage-controlled oscillators and a sub-oscillator. Oscillators 1 and 2 generate sine, sawtooth, and pulse waves. You can... - Page 26 Oscillator 1 to sweep the oscillator’s pitch and create this effect each time you play a note. You’ll learn more about the mod matrix in “Modulation” on page 34. Take 5 User’s Guide Global Settings...
-
Page 27: Oscillator Parameters
In the modulation matrix you can use a modulator such as an LFO waveshape or one of the Take 5 envelopes to modulate the waveshape of Oscillator 1 or 2 or both simultaneously, this changes the “pulse” width of the selected waveform, which modifies its harmonic content and timbre. -
Page 28: Additional Oscillator Parameters (Program Menu)
5th) up or down. The 12 o’clock position is centered. Fine tune control with a range of 7 semitones (a major Osc 2 Fine Freq: 5th) up or down. The 12 o’clock position is centered. Take 5 User’s Guide Global Settings... -
Page 29: Mixer Parameters
The Mixer section is where you set the levels of the various sound gener- ators on the Take 5. These include oscillators 1 and 2, the sub oscillator and the noise generator. You must turn up at least one of these sources in order to make sound with the Take 5. -
Page 30: Filter
In the previous example, you controlled the filter cutoff by hand. In most cases, you will use the Filter Envelope to do this. To learn more about the Filter Envelope, see “About the Filter Envelope” on page 24. Take 5 User’s Guide Filter... -
Page 31: Filter Parameters
When set to 127, the filter will track in half-step increments, which can be useful if you are using the filter to generate a pitch through self-oscillation. Filter Sequential... -
Page 32: Envelopes
Envelopes The Take 5 has two 5-stage envelope generators (attack, decay, sustain, release, plus delay). They are useful for creating modulation that varies over time according to the shape of the envelope. Routing an envelope to Filter Cutoff, for example, causes the filter to open or close according to the contour of the envelope. -
Page 33: About The Filter Envelope
Amplifier volume is simply triggered (gated) on/off each time you press a key on the Take 5 keyboard. Note that if the Env 2 velocity button is on, it affects only Filter Cutoff and not Amplifier volume. About the Filter Envelope... - Page 34 8. Now hold down a note and experiment with the Filter Envelope’s knob. This controls how wide the filter stays open while you sustain hold down a key on the keyboard. Take 5 User’s Guide About the Filter Envelope...
-
Page 35: Envelope Parameters
If on, the harder you play, the more the filter will open and the brighter the sound will be. If off, key velocity will not affect the filter. This control allows for more touch-sensitive sounds. About the Filter Envelope Sequential... -
Page 36: Additional Envelope Parameters (Program Menu)
Wind has a relatively slow attack, a long sustain, and a long decay and release. A snare drum has a sharp attack, no sustain, and very little decay or release. But again, they are both fundamentally white noise. Take 5 User’s Guide About the Amp Envelope... - Page 37 Amplifier Envelope’s knob clockwise decay and counterclockwise. Notice how it changes the sound as the note decays faster or slower after its initial attack stage. About the Amp Envelope Sequential...
-
Page 38: Auxiliary Envelope
Either of the Take 5’s envelopes can be routed to any destination (or multiple destinations) using the modulation matrix. See “Modulation” on page 34 for more details. -
Page 39: Low Frequency Oscillators
(sample & hold/random). Though & most often used for low-frequency modulation, the Take 5 LFOs can actu- ally function at speeds that extend into the audible range for extreme effects. LFO 1: GLOBAL LFO 2: PER VOICE... -
Page 40: Global Lfo Versus Per-Voice Lfo
MIDI clock for tempo-synced effects such as filter sweeps, tremolo, and so on. Global LFO Versus Per-Voice LFO The Take 5 has two separate LFOs. LFO 1 is “global” and LFO 2 is “per voice.” It’s useful to understand the difference:... -
Page 41: Lfo Parameters
Route an LFO to an oscillator’s parameter to make its timbre shape evolve. • Route the LFO’s triangle wave to the parameter of the stereo delay time and use a slow and low setting to create a chorus effect. freq amount Low Frequency Oscillators Sequential... -
Page 42: Additional Lfo Parameters (Program Menu)
LFO, then move the knob or control you want to use as a destination (the filter cutoff, for example). Set the amount using the LFO knobs. Be aware that not amount all front-panel controls can be used as a modulation destinations. Take 5 User’s Guide Low Frequency Oscillators... -
Page 43: Modulation
Modulation Although the overall sonic character of the Take 5 is determined by its oscillators and filters, much of its power to make unique sounds comes from creative use of modulation. Modulation is the process of routing one parameter (used as a control voltage) to another parameter in order to change the way the targeted parameter behaves. - Page 44 (Amp). Other poly mod sources include LFO 2, Envelope 1, Envelope 2, Note Number, and others. These can all be used to control things such as the pitch of individual oscillators/voices, oscillator wave shape per voice, and many other things. Take 5 User’s Guide Modulation...
-
Page 45: Modulation Examples
4. Hold down a note on the keyboard (or press the button and play a hold note on the keyboard) and move the Mod Wheel up and down. Modulation Examples Sequential... - Page 46 Add the rotating speaker effect as Effect 1 and set up a third mod path to control with the Mod wheel for even better results. • Route to distort a synth lead sound the harder velocity overdrive you play. Take 5 User’s Guide Modulation Examples...
-
Page 47: Unison
Unison When is on, the Take 5 acts like a monophonic synthesizer in unison that only 1 note can be played at a time. However, that one note can be powered by as many as five voices, depending on how many you choose to use. -
Page 48: Using Chord Memory
Unison has a useful feature called chord memory. Instead of assigning voices to a single note, hold down a chord on the keyboard and press the switch. The Take 5 memorizes the notes of the chord. Single notes unison played on the keyboard then trigger all notes of the stored chord, trans- posing them as you play up or down the keyboard. -
Page 49: Effects
Tape Delay 2 Time Feedback Chorus Rate Depth LPF Cutoff Flanger Rate Depth Feedback Phaser Rate Depth Feedback High-pass Filter Frequency Resonance Distortion Gain Output Level Tone Ring Modulation Pitch/Carrier Freq Pitch Track On/Off Rotating Speaker Speed Drive Mic Distance Effects Sequential... - Page 50 (absorption of the high damping frequencies of the reverb). Less damping allows high frequencies to decay slower to create a brighter reverb sound. More damping darkens the sound of the reverb. Take 5 User’s Guide Effects...
-
Page 51: Vintage Knob
Vintage Knob Because the Take 5 has analog VCOs and filters, it is capable of produc- ing many classic, vintage poly synth sounds, even though it was designed and constructed with state-of-the-art technology and components. To add even more vintage character, we designed the... -
Page 52: Overdrive
Overdrive The Take 5 has an Overdrive effect that is separate from the digital effects available in the Effect and Reverb sections. A little Overdrive is great for adding harmonic complexity and an aggressive edge to sounds. The character of the Overdrive is affected by the harmonic content of a program. - Page 53 , and repeats 5. To synchronize a delay effect to the Arpeggiator, enable Effect 1, choose a delay, then turn on in the delay’s parameter page in the display. Adjust sync the delay’s parameter as desired. time Arpeggiator Sequential...
-
Page 54: Arpeggiator "Momentary Sustain" Mode
Arpeggiator “Momentary Sustain” Mode The Take 5 allows you to use the sustain pedal to turn the Arpeggiator’s Hold function on and off and perform other Arpeggiator-related func- tions. To access this feature, use the setting in the foot function global menu. -
Page 55: Midi Note Output From The Arpeggiator
2. Use the value knob to select on. To control an external MIDI device: 1. Connect the MIDI or USB output of the Take 5 to the MIDI or USB input of the external device, depending on which type of connection the external device requires. -
Page 56: Arpeggiator Parameters
If you release all keys and play new notes, the arpeggio restarts using the new notes. Take 5 User’s Guide Arpeggiator... -
Page 57: Clock Parameters
You can also play along with a sequence (if there are voices avail- able), and transpose its playback. To program a note sequence: 1. Press the record button. 2. Play the notes of your sequence on the keyboard. The display indicates the current step as you play. Step Sequencer Sequential... - Page 58 Playing a note below middle C trans- poses the sequence lower by that interval. CLOCK ARPEGGIATOR STEP SEQ CLK DIVIDE OCTAVE RECORD TAP TEMPO MODE REPEAT PLAY The Sequencer and Clock controls Take 5 User’s Guide Step Sequencer...
-
Page 59: Master Volume/Program Volume
4. Use the value knob to set the volume level. 5. Press the button twice to save the program. write MIDI volume can also influence the overall volume of the Take 5 if you are controlling it from an external MIDI source. Master Volume/Program Volume Sequential... -
Page 60: Transpose
The Transpose controls Hold When is on, any notes played will continue to play until hold hold turned off. When used in conjunction with the Arpeggiator, notes are latched on. The Hold button Take 5 User’s Guide Transpose... -
Page 61: Glide
Glide is set to a fixed time, regardless of the interval Fixed Time: between notes. This mode is only available when Unison is on. The same as Fixed Time, but glide only occurs when Fixed Time A: playing legato. Glide Sequential... - Page 62 5. Use the value knob to set the desired amount of glide for oscillator 2 as you play a series of notes up and down the keyboard to hear the effect. 6. When you’re finished, press the button twice to save the write program. Take 5 User’s Guide Glide...
-
Page 63: Pitch And Mod Wheels
Pitch and Mod Wheels The Take 5 has a spring-loaded Pitch wheel and a Mod wheel. You can use these controls to enhance live performance by bending notes and adding modulation in real time as you play. PITCH The Pitch and Modulation wheels... -
Page 64: Modulation Wheel
Mod wheel. A negative amount setting will apply modulation in the negative direction. As a shortcut, you can hold down the button and move the Mod src assign wheel to quickly assign this modulation path. Take 5 User’s Guide Pitch and Mod Wheels... -
Page 65: Adding Aftertouch
The greater the pressure applied, the more modulation is applied. The Take 5 provides monophonic (or “channel”) aftertouch, which means that applying pressure to any key within a chord will apply modulation to all notes currently held. - Page 66 A amount negative amount setting will apply modulation in the negative direction. The Take 5 provides eight different aftertouch/pressure response settings. The default setting provides a linear response. To choose a different response curve, use parameter in the menu.
-
Page 67: Chapter 3: Creating Sounds
The Take 5 can produce a huge variety of sounds. While the factory programs give you some idea of its scope, if you only make use of its presets, you’re not really using the Take 5 to its full potential. The real excitement is in creating sounds that are uniquely your own. - Page 68 Play and hold a note, then turn the knob to step through shape the various waveshapes. 2. Select the sawtooth waveshape. Next, you’ll use the filter to shape the raw sound of the sawtooth wave. Take 5 User’s Guide Synthesis 101: Synth Bass...
- Page 69 So to hear the filter envelope’s parameter in action, set the both the Filter Envelope release and Amp Envelope’s values to an 11 o’clock position. release Synthesis 101: Synth Bass Sequential...
-
Page 70: Creating Synth Brass
Now you know how to create a simple synth bass program using the most essential synthesizer components of the Take 5: the oscillators, the filters, and the envelopes. Using just these three things you can create an enormous variety of sounds. Keep experimenting with them and if you like what you’ve created, save the programs in one of the user banks. - Page 71 Indicates mod slot number MOD 3 1/16 source Env 1 amount destination Osc2Fine Up+Down value select Use this knob to Use this knob to set the mod source scroll through mod amount mod slots and mod destination source/amount/destination Creating Synth Brass Sequential...
-
Page 72: Turning Synth Brass Into A String Pad
(Oscillator 2 shape). 8. Set the parameter to -39. amount 9. On , set to 9 o’clock. global frequency 10. Play some chords and listen to the sound. Take 5 User’s Guide Creating Synth Brass... - Page 73 2 o’clock. predelay 5. Set to 3 o’clock. decay 6. Set to 11 o’clock. tone 7. Play some chords. Experiment with the , and decay predelay tone settings to fine tune the reverb sound to your preference. Creating Synth Brass Sequential...
-
Page 74: Creating A Hard-Sync Lead
14. Play some notes. Classic hard-sync lead! 15. Experiment with Envelope 1’s Attack, Decay, Sustain, and Release settings to better understand how these affect the shape of pitch modu- lation routed to Oscillator 1. Take 5 User’s Guide Creating a Hard-Sync Lead... - Page 75 2. Use the knob to select type delay 3. Set to 12 o’clock. time 4. Set to 9 o’clock. depth 5. Set to 9 o’clock. feedback misc 6. Play some notes. Perfect hard-sync lead! Creating a Hard-Sync Lead Sequential...
-
Page 76: A Final Word
It’s often useful to start with a simple sound and make it progressively more complex, while saving edited versions as you go so that you can retrace your steps and branch off at different points in the sound design process if you want. Take 5 User’s Guide Creating a Hard-Sync Lead... -
Page 77: Modulation Sources
Modulation Sources No Source Osc 2 Noise LFO 1 LFO 2 Env 1 Env 2 Voice Spread Pitch Bend Mod Wheel Pressure Breath Foot Pedal Expression Pedal Velocity Note Number Filter Out Random Audio Out Appendix A: Modulation Sources Sequential... -
Page 78: Modulation Destinations
Mod 12 Amount Reverb Size Mod 13 Amount Reverb PreDelay Mod 14 Amount Reverb Decay Mod 15 Amount Reverb Tone Mod 16 Amount LFO 1 Freq LFO 2 Freq LFO All Freq Take 5 User’s Guide Appendix B: Modulation Destinations... - Page 79 Sequential...
-
Page 80: Appendix C: Troubleshooting And Support
If there is a ground hum in the audio output: • USB can cause ground loops, so try to resolve any grounding issues between the computer (if connected) and the Take 5. Or use MIDI, which is opto-isolated. Take 5 User’s Guide... - Page 81 (MIDI and USB cables) and see if the problem persists. You can also monitor the MIDI traffic with MIDI Monitor (Mac OS) or MIDI-OX (Windows) to see if the Take 5 is being overrun with dupli- cate messages. If the Take 5 doesn’t seem to respond to its controls: •...
-
Page 82: Resetting The Global Parameters
You can now can play the Take 5 again. Contacting Technical Support If you are still having a problem with the Take 5, contact Technical Support at support@sequential.com. Please include the purchase date of your Take 5, its serial number, and the operating system version. Press button to see this at the bottom of the main display. -
Page 83: Warranty Repair
Warranty Repair Sequential warrants that the Take 5 will be free from defects in materials and/or workmanship for 1 year from the date of purchase. Please register your product online at www.sequential.com to establish the date of purchase. (This is not a requirement for warranty service, but it will help expedite the process.) -
Page 84: Appendix D: Calibrating The Take 5
Appendix D: Calibrating the Take 5 Because the Take 5 is calibrated at the factory, controls such as the Pitch and Mod wheels, Touch Slider, and analog filters shouldn’t require re-calibration. But if you experience unexpected behavior with these controls, you can use the calibration function to tune them occasionally. - Page 85 To send a program or bank to another Take 5 as a SysEx file over MIDI: 1. Connect two Take 5 synthesizers together using MIDI cables and the jacks on their rear panels. midi in and midi out 2.
-
Page 86: Importing Programs And Banks
4. On the Take 5 that you want to send the programs from, in the global menu select , or , depending on dump preset dump bank dump all banks which of these you would like to do. 5. Press . -
Page 87: Appendix F: Alternative Tunings
Appendix F: Alternative Tunings By default, the Take 5 is set to standard, chromatic western tuning. Addi- tionally, it supports up to 64 additional alternative tunings, which you can access using the parameter in the menu. alt tunings global These 64 alternative tunings range from Equal temperament to Indo- nesian Gamelan tunings. - Page 88 Created by the group Other Music for their homemade gamelan, this offers a wide range of interesting chords and modes. C=1/1 (261.625 Hz) 1/1 15/14 9/8 7/6 5/4 4/3 7/5 3/2 14/9 5/3 7/4 15/8 Take 5 User’s Guide Appendix F: Alternative Tunings...
- Page 89 1/1 81/80 33/32 21/20 16/15 12/11 11/10 10/9 9/8 8/7 7/6 32/27 6/5 11/9 5/4 14/11 9/7 21/16 4/3 27/20 11/8 7/5 10/7 16/11 40/27 3/2 32/21 14/9 11/7 8/5 18/11 5/3 27/16 12/7 7/4 16/9 9/5 20/11 11/6 15/8 40/21 64/33 160/81 Appendix F: Alternative Tunings Sequential...
- Page 90 65 = Cents +498 66 = Cents +649 67 = Cents +702 68 = Cents +853 69 = Cents +906 70 = Cents +996 71 = Cents +1057 72 = Cents +1200 Take 5 User’s Guide Appendix F: Alternative Tunings...
- Page 91 12=1200 19. 12 Out of 31-tET, Meantone Eb-G# note 0=0 note 1=77 note 2=194 note 3=310 note 4=387 note 5=503 note 6=581 note 7=697 note 8=774 note 9=890 note 10=1006 note 11=1084 note 12=1200 Appendix F: Alternative Tunings Sequential...
- Page 92 Ratio: 7876/5267 68 = Cents +793.157 Ratio: 14771/9342 69 = Cents +889.735 Ratio: 11718/7009 70 = Cents +986.314 Ratio: 17561/9934 71 = Cents +1082.892 Ratio: 18204/9739 72 = Cents +1200. Ratio: 2/1 (JUST) Take 5 User’s Guide Appendix F: Alternative Tunings...
- Page 93 7 = Cents +706. Ratio: 857/570 8 = Cents +803. Ratio: 2681/1686 9 = Cents +910. Ratio: 12130/7171 10 = Cents +1011. Ratio: 1205/672 11 = Cents +1092. Ratio: 12599/6705 12 = Cents +1200. Ratio: 2/1 (JUST) Appendix F: Alternative Tunings Sequential...
- Page 94 Ratio: 12599/6705 15 = Cents +1170. Ratio: 18593/9459 16 = Cents +1248. Ratio: 14957/7274 17 = Cents +1326. Ratio: 8049/3742 18 = Cents +1404. Ratio: 9617/4274 19 = Cents +1482. Ratio: 1111/472 Take 5 User’s Guide Appendix F: Alternative Tunings...
- Page 95 18 = Cents +1148.4 Ratio: 13585/6998 19 = Cents +1212.2 Ratio: 17231/8555 20 = Cents +1276. Ratio: 12503/5983 21 = Cents +1339.8 Ratio: 10583/4881 22 = Cents +1403.6 Ratio: 12564/5585 23 = Cents +1467.4 Ratio: 8727/3739 Appendix F: Alternative Tunings Sequential...
- Page 96 Ratio: 11918/6357 32 = Cents +1123.168 Ratio: 13310/6957 33 = Cents +1158.267 Ratio: 17050/8733 34 = Cents +1193.366 Ratio: 14586/7321 35 = Cents +1228.465 Ratio: 13368/6575 36 = Cents +1263.564 Ratio: 1276/615 Take 5 User’s Guide Appendix F: Alternative Tunings...
- Page 97 80 = Cents +968.825906 Ratio: 7/4 (JUST) 81 = Cents +996.089998 Ratio: 16/9 (JUST) 82 = Cents +1061.427339 Ratio: 24/13 (JUST) 83 = Cents +1088.268715 Ratio: 15/8 (JUST) 84 = Cents +1200. Ratio: 2/1 (JUST) Appendix F: Alternative Tunings Sequential...
- Page 98 68 = Cents +813.686286 Ratio: 8/5 (JUST) 69 = Cents +918.641696 Ratio: 17/10 (JUST) 70 = Cents +1017.596288 Ratio: 9/5 (JUST) 71 = Cents +1111.199302 Ratio: 19/10 (JUST) 72 = Cents +1200. Ratio: 2/1 (JUST) Take 5 User’s Guide Appendix F: Alternative Tunings...
- Page 99 7 = Cents +699. Ratio: 6439/4300 8 = Cents +790.9 Ratio: 7578/4799 9 = Cents +896.1 Ratio: 15436/9199 10 = Cents +984.9 Ratio: 6357/3599 11 = Cents +1091.4 Ratio: 1591/847 12 = Cents +1200. Ratio: 2/1 (JUST) Appendix F: Alternative Tunings Sequential...
- Page 100 68 = Cents +733.721654 Ratio: 55/36 (JUST) 69 = Cents +884.358713 Ratio: 5/3 (JUST) 70 = Cents +989.314122 Ratio: 85/48 (JUST) 71 = Cents +1088.268715 Ratio: 15/8 (JUST) 72 = Cents +1200. Ratio: 2/1 (JUST) Take 5 User’s Guide Appendix F: Alternative Tunings...
- Page 101 Ratio: 5/3 (JUST) 75 = Cents +905.865003 Ratio: 27/16 (JUST) 76 = Cents +976.537429 Ratio: 225/128 77 = Cents +1017.596288 Ratio: 9/5 (JUST) 78 = Cents +1088.268715 Ratio: 15/8 (JUST) 79 = Cents +1200. Ratio: 2/1 (JUST) Appendix F: Alternative Tunings Sequential...
- Page 102 Ratio: 3/2 (JUST) 68 = Cents +794.133717 Ratio: 405/256 69 = Cents +903.911282 Ratio: 2048/1215 70 = Cents +998.043719 Ratio: 3645/2048 71 = Cents +1107.821284 Ratio: 256/135 72 = Cents +1200. Ratio: 2/1 (JUST) Take 5 User’s Guide Appendix F: Alternative Tunings...
- Page 103 68 = Cents +813.686286 Ratio: 8/5 (JUST) 69 = Cents +884.358713 Ratio: 5/3 (JUST) 70 = Cents +1017.596288 Ratio: 9/5 (JUST) 71 = Cents +1088.268715 Ratio: 15/8 (JUST) 72 = Cents +1200. Ratio: 2/1 (JUST) Appendix F: Alternative Tunings Sequential...
- Page 104 68 = Cents +794.133717 Ratio: 405/256 69 = Cents +905.865003 Ratio: 27/16 (JUST) 70 = Cents +996.089998 Ratio: 16/9 (JUST) 71 = Cents +1088.268715 Ratio: 15/8 (JUST) 72 = Cents +1200. Ratio: 2/1 (JUST) Take 5 User’s Guide Appendix F: Alternative Tunings...
- Page 105 68 = Cents +821.397809 Ratio: 45/28 (JUST) 69 = Cents +884.358713 Ratio: 5/3 (JUST) 70 = Cents +968.825906 Ratio: 7/4 (JUST) 71 = Cents +1088.268715 Ratio: 15/8 (JUST) 72 = Cents +1200. Ratio: 2/1 (JUST) Appendix F: Alternative Tunings Sequential...
- Page 106 69 = Cents +996.089998 Ratio: 16/9 (JUST) 70 = Cents +996.089998 Ratio: 16/9 (JUST) 71 = Cents +1126.319346 Ratio: 23/12 (JUST) 72 = Cents +1200. Ratio: 2/1 (JUST) 73 = Cents +1200. Ratio: 2/1 (JUST) Take 5 User’s Guide Appendix F: Alternative Tunings...
- Page 107 67 = Cents +701.955001 Ratio: 3/2 (JUST) 68 = Cents +813.686286 Ratio: 8/5 (JUST) 69 = Cents +968.825906 Ratio: 7/4 (JUST) 70 = Cents +996.089998 Ratio: 16/9 (JUST) 71 = Cents +1200. Ratio: 2/1 (JUST) Appendix F: Alternative Tunings Sequential...
- Page 108 68 = Cents +674.690909 Ratio: 189/128 69 = Cents +905.865003 Ratio: 27/16 (JUST) 70 = Cents +968.825906 Ratio: 7/4 (JUST) 71 = Cents +1109.775004 Ratio: 243/128 72 = Cents +1200. Ratio: 2/1 (JUST) Take 5 User’s Guide Appendix F: Alternative Tunings...
- Page 109 80 = Cents +996.089998 Ratio: 16/9 (JUST) 81 = Cents +1088.268715 Ratio: 15/8 (JUST) 82 = Cents +1107.821284 Ratio: 256/135 83 = Cents +1178.49371 Ratio: 160/81 (JUST) 84 = Cents +1200. Ratio: 2/1 (JUST) 100 Appendix F: Alternative Tunings Sequential...
- Page 110 68 = Cents +800.909593 Ratio: 27/17 (JUST) 69 = Cents +905.865003 Ratio: 27/16 (JUST) 70 = Cents +1017.596288 Ratio: 9/5 (JUST) 71 = Cents +1096.302298 Ratio: 81/43 (JUST) 72 = Cents +1200. Ratio: 2/1 (JUST) Take 5 User’s Guide Appendix F: Alternative Tunings...
- Page 111 68 = Cents +813.686286 Ratio: 8/5 (JUST) 69 = Cents +933.129094 Ratio: 12/7 (JUST) 70 = Cents +968.825906 Ratio: 7/4 (JUST) 71 = Cents +1088.268715 Ratio: 15/8 (JUST) 72 = Cents +1200. Ratio: 2/1 (JUST) 102 Appendix F: Alternative Tunings Sequential...
- Page 112 68 = Cents +813.686286 Ratio: 8/5 (JUST) 69 = Cents +884.358713 Ratio: 5/3 (JUST) 70 = Cents +968.825906 Ratio: 7/4 (JUST) 71 = Cents +1088.268715 Ratio: 15/8 (JUST) 72 = Cents +1200. Ratio: 2/1 (JUST) Take 5 User’s Guide Appendix F: Alternative Tunings...
- Page 113 73 = Cents +905.865003 Ratio: 27/16 (JUST) 74 = Cents +996.089998 Ratio: 16/9 (JUST) 75 = Cents +1059.050902 Ratio: 448/243 76 = Cents +1137.039096 Ratio: 27/14 (JUST) 77 = Cents +1200. Ratio: 2/1 (JUST) 104 Appendix F: Alternative Tunings Sequential...
- Page 114 Ratio: 30625/7776 26 = Cents +2484.862949 Ratio: 6125/1458 27 = Cents +2577.041666 Ratio: 30625/6912 28 = Cents +2688.772951 Ratio: 6125/1296 29 = Cents +2808.215759 Ratio: 4375/864 30 = Cents +2871.176663 Ratio: 30625/5832 Take 5 User’s Guide Appendix F: Alternative Tunings...
- Page 115 68 = Cents +813.686286 Ratio: 8/5 (JUST) 69 = Cents +884.358713 Ratio: 5/3 (JUST) 70 = Cents +1017.596288 Ratio: 9/5 (JUST) 71 = Cents +1088.268715 Ratio: 15/8 (JUST) 72 = Cents +1200. Ratio: 2/1 (JUST) 106 Appendix F: Alternative Tunings Sequential...
- Page 116 Ratio: 8182/5467 68 = Cents +796.09 Ratio: 13019/8220 69 = Cents +894.135 Ratio: 2427/1448 70 = Cents +1000. Ratio: 17189/9647 71 = Cents +1090.225 Ratio: 18484/9847 72 = Cents +1200. Ratio: 2/1 (JUST) Take 5 User’s Guide Appendix F: Alternative Tunings...
- Page 117 68 = Cents +737.651813 Ratio: 49/32 (JUST) 69 = Cents +968.825906 Ratio: 7/4 (JUST) 70 = Cents +941.561815 Ratio: 441/256 71 = Cents +1172.735908 Ratio: 63/32 (JUST) 72 = Cents +1200. Ratio: 2/1 (JUST) 108 Appendix F: Alternative Tunings Sequential...
- Page 118 68 = Cents +813.686286 Ratio: 8/5 (JUST) 69 = Cents +884.358713 Ratio: 5/3 (JUST) 70 = Cents +996.089998 Ratio: 16/9 (JUST) 71 = Cents +1088.268715 Ratio: 15/8 (JUST) 72 = Cents +1200. Ratio: 2/1 (JUST) Take 5 User’s Guide Appendix F: Alternative Tunings...
- Page 119 Sequential LLC 1527 Stockton Street, 3rd Floor San Francisco, CA 94133 ©2021 Sequential LLC www.sequential.com...
Need help?
Do you have a question about the TAKE 5 and is the answer not in the manual?
Questions and answers