Table of Contents
Advertisement
Available languages
Available languages
Quick Links
Advertisement
Table of Contents

Related Manuals for Flamelux PARIS


Summary of Contents for Flamelux PARIS
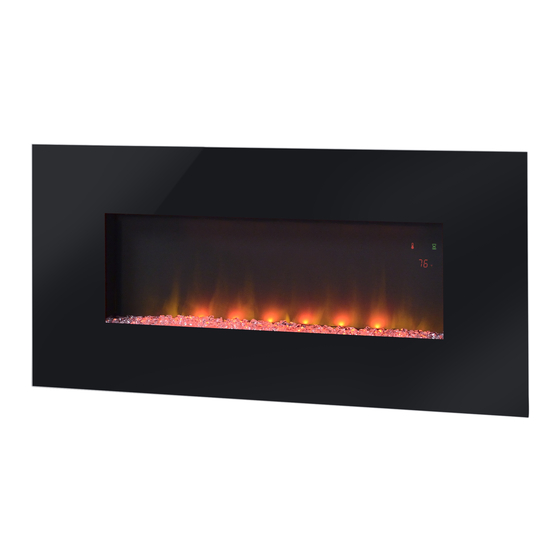
- Page 1 PARIS...
-
Page 2: Parts List
Unpack your fireplace package and make sure you have all of the parts listed above. If parts are missing, please contact customer service at info@flamelux.com or call 1-855-837-2569 immediately. This appliance is designed for use as a supplementary heat source. It is not intended to be the main source of heat. -
Page 3: Your Fireplace
IMPORTANT INSTRUCTIONS ASSEMBLY INSTRUCTIONS General 1. Read all instructions before using this appliance. 14. Do not insert or allow foreign objects to enter any 2. This heater is hot when in use. To avoid burns, do not let bare ventilation or exhaust opening as this may cause an electric skin touch hot surfaces. -
Page 4: Handling And Unpacking
IMPORTANT INSTRUCTIONS ASSEMBLY INSTRUCTIONS Handling and unpacking Before starting the installation of this fireplace, please read the following: 1. The installation should be carried out by two adults to avoid injury or d amage. If for any reason it is considered too heavy, please obtain assistance. - Page 5 IMPORTANT INSTRUCTIONS ASSEMBLY INSTRUCTIONS Hardware A x 1 B x 0.3 kg C x 4 D x 4 E x 4 Step 1 Remove the hanging bracket (A). Remove hanging bracket (A) from back of fireplace by removing the two screws (E) at the top of the unit.
- Page 6 IMPORTANT INSTRUCTIONS ASSEMBLY INSTRUCTIONS Step 2 Install wall plugs (C) into wall. 1. Drill 4 holes (8 mm diameter, 4 mm deep) on the wall. 2. Insert wall plugs (C) into the drilled holes. 270 mm 3. Please refer to the diagram for hole locations. 4.
- Page 7 IMPORTANT INSTRUCTIONS ASSEMBLY INSTRUCTIONS Step 4 Hang the fireplace insert onto the hanging bracket. 1. Check to make sure the hanging bracket (A) is securely attached to the wall. 2. Hang the fireplace insert on the hooks at the bottom of the hanging bracket (A) and push the fireplace insert into the hanging bracket (A).
- Page 8 IMPORTANT INSTRUCTIONS ASSEMBLY INSTRUCTIONS Step 6 Install the front panel. 1. Make sure the front panel is free of debris and dirt. 2. Hold the panel securely and hang it onto the fireplace hooks, located on both sides. 3. The panel should be secured on all four hooks on the fireplace.
- Page 9 Figure 1. fireplace fireplace Cover of 1. If the glass panel cracks or breaks, stop using the appliance Grounded immediately and have the glass replaced. Outlet BOX Grounding pin WALL MOUNTED FIREPLACE SPECIFICATIONS 41 x 6 1/8 x 19 1/4 in Dimensions (W x D x H) 104.1 x 15.6 x 49 cm 15.3 kg / 19.6 kg...
- Page 10 OPERATING INSTRUCTIONS Indicators Manual control Figure 2 When a function is changed from the control panel or remote there will be a corresponding indicator displayed. The indicator shows the function changed and the level selected. When the function is turned off, the corresponding indicator will fade off. Figure 3...
- Page 11 OPERATING INSTRUCTIONS FUNCTION ICON DESCRIPTION This button will not only put the fireplace insert in a standby mode, but also you can POWER see the flame effect through the screen. This will turn off all functions at once. The fireplace contains a fan forced heater. The default setting temperature is 72°F (22°C).
-
Page 12: Troubleshooting Guide
TROUBLESHOOTING GUIDE PROBLEM POSSIBLE CAUSE CORRECTIVE ACTION Inspect the heater and check that the air inlets and outlets are not blocked as this may cause overheating. Unplug the heater Manual Reset overheat Display shows “E1”. for 10 minutes and allow it to cool down. Plug back in and turn protection has triggered. -
Page 13: Replacement Parts List And Exploded View
REPLACEMENT PARTS LIST AND EXPLODED VIEW For replacement parts, please contact customer service at info@flamelux.com or call 1-855-837-2569, 7:00 a.m.–5:00 p.m. CST, Monday – Friday. Part Part Name Control Panel Buttons Main Circuit Board Heater / Blower Assembly Thermostat Sensor... -
Page 14: Replacing The Remote Control Battery
INSTRUCTIONS cleaning the appliance. REPLACING THE REMOTE DISPOSING OF USED CONTROL BATTERY BATTERIES When the remote control stops operating or its range seems reduced, The batteries may contain hazardous substances that could it is time to replace the batteries with new ones. endanger the enviroment and human health. -
Page 15: Year Warranty
Do not attempt to do any service work yourself. -
Page 16: Liste Des Pièces
Déballez votre foyer électrique et vérifiez que vous avez toutes les pièces énumérées ci-dessus. Si des pièces sont manquantes, veuillez communiquer avec le Service à la clientèle au info@flamelux.com ou appelez le 1 855 837-2569 immédiatement. Cet appareil est conçu pour être utilisé en tant que source de chaleur d’appoint. Il ne doit pas être utilisé comme source principale... - Page 17 INSTRUCTIONS IMPORTANTES INSTRUCTIONS DE MONTAGE Généralités 14. Évitez d’introduire ou de faire tomber des corps étrangers 1. Lisez toutes les directives avant d'utiliser cet appareil. dans les fentes d'entrée et de sortie de l'air car cela pourrait 2. Le foyer devient très chaud lorsqu'il est en marche. provoquer des décharges électriques, causer un incendie ou Pour éviter toute brûlure, ne laissez pas la peau nue endommager le foyer.
-
Page 18: Consignes De Sécurité
INSTRUCTIONS IMPORTANTES INSTRUCTIONS DE MONTAGE Manipulation et déballage Avant de commencer l’installation du foyer électrique, veuillez lire les directives suivantes : 1 L’installation doit être effectuée par deux adultes afin d’éviter le risque de blessures ou de dommages. Si l’appareil est trop lourd pour quelque raison que ce soit, veuillez obtenir de l’aide supplémentaire. - Page 19 INSTRUCTIONS IMPORTANTES INSTRUCTIONS DE MONTAGE Quincaillerie A x 1 B x 0.3 kg C x 4 D x 4 E x 4 Étape 1 Retirez le support de fixation (A). Retirez le support de fixation (A) de l’arrière du foyer en enlevant les deux vis (E) situées sur le dessus de l’unité.
- Page 20 INSTRUCTIONS IMPORTANTES INSTRUCTIONS DE MONTAGE Étape 2 Fixer les chevilles d’ancrage (C) dans le mur. 1. Percez 4 trous (8 mm diamètre, 40 mm de profondeur) dans le mur. 270 mm 2. Insérez les chevilles d’ancrage (C) dans les trous percés. 3.
- Page 21 INSTRUCTIONS IMPORTANTES INSTRUCTIONS DE MONTAGE Étape 4 Fixer le foyer sur le support de fixation. 1. Vérifiez que le support de fixation (A) est solidement fixé au mur. 2. Suspendez le foyer aux crochets situés au bas du support de fixation (A) et poussez le foyer dans le support de fixation (A). 3.
- Page 22 INSTRUCTIONS IMPORTANTES INSTRUCTIONS DE MONTAGE Étape 6 Installer le panneau avant. 1. Vérifiez que le panneau avant est exempt de débris et de saletés. 2. Tenez le panneau fermement et accrochez-le sur les crochets situés sur les deux côtés du foyer. 3.
-
Page 23: Entretien
ENTRETIEN RECOMMANDATIONS À L'UTILISATEUR DIRECTIVES DE MISE À LA TERRE 1. Toute réparation de cet appareil ne doit être effectuée que par une Cet appareil est conçu pour fonctionner sur un circuit de 120 personne qualifiée. volts. Le câble électrique est équipé d'une prise illustrée dans la 2. -
Page 24: Directives De Fonctionnement
DIRECTIVES DE FONCTIONNEMENT Indicateurs Commandes manuelles Figure 2 Lorsqu’une fonction est activée à partir du panneau de commande ou sur la télécommande l'indicateur correspondant apparaîtra sur le panneau de verre. L’indicateur montre la fonction qui a été choisie et le niveau sélectionné. Lorsque la fonction est désactivée, le témoin correspondant s'éteint. - Page 25 DIRECTIVES DE FONCTIONNEMENT FUNCTION ICÔNE DESCRIPTION Ce bouton met le foyer en mode de veille et l’effet de flames est visible. II arrêtera ALIMENTATION aussi toutes les fonctions. Le foyer comporte un radiateur à air pulsé. Le réglage par défaut de la température est de 22 °C (72 °F). ÉLÉMENT La plage de réglage du thermostat est de 10 °C à...
-
Page 26: Guide De Dépannage
GUIDE DE DÉPANNAGE PROBLÈME CAUSE PROBABLE ACTION CORRECTIVE Inspectez l'appareil et vérifiez que les entrées et les sorties d’air ne sont pas obstruées car cela peut causer une surchauffe. La protection à réinitialisation L’affichage indique “E1”. Débranchez le foyer pendant 10 minutes et laissez-le refroidir. manuelle contre la surchauffe Rebranchez-le et remettez-le en marche, en le surveillant pour s’est déclenchée. - Page 27 LISTE DES PIÈCES DE RECHANGE ET VUE ÉCLATÉE Pour obtenir des pièces de rechange, communiquez avec notre service à la clientèle au info@flamelux.com ou appelez le 1-855-837-2569, entre 7 h et 17 h, HNC, du lundi au vendredi. Pièce Nom de la pièce Panneau de commande Circuit imprimé...
-
Page 28: Directives D'entretien
DIRECTIVES D'ENTRETIEN foyer. câblage REMPLACEMENT DE LA PILE MISE AU REBUT DES DE LA TÉLÉCOMMANDE PILES USAGÉES Lorsque la télécommande s’arrête de fonctionner ou sa puissance Les piles peuvent contenir des substances dangereuses qui semble réduite, il est temps de remplacer les piles. pourraient mettre en péril l’environnement et la santé... - Page 29 N'essayez pas de réparer cet appareil vous-même. aucune responsabilité à cet égard.
-
Page 30: Lista De Piezas
Desempaquete su chimenea el paquete y asegúrese de que usted tener todas las piezas listadas arriba. Si se encuentra una avería delas piezas, por favor entre en contacto con el servicio de atención al cliente en info@flamelux.com o llame por 1-855-837-2569 inmediatamente. -
Page 31: Aspectos Generales
INSTRUCCIONES IMPORTANTES INSTRUCCIONES DE MONTAJE Aspectos Generales 1. Lea todas las instrucciones antes de usar este aparato. 14. No insertar o permitir objetos foráneos que entren en algún 2. Este calefactor está caliente cuando está en uso. Para evitar conducto de ventilación o apertura ya que puede causar descarga quemaduras, evite el contacto de la superficie caliente con la piel. - Page 32 INSTRUCCIONES IMPORTANTES INSTRUCCIONES DE MONTAJE Manejo y desempaque Antes de comenzar la instalación de esta chimenea, lea por favor el siguiente: 1. La instalación se debe realizar por dos adultos para evitar lesión o daño. Si por cualquier motivo se considera demasiado pesado, obtenga por favor la ayuda.
- Page 33 INSTRUCCIONES IMPORTANTES INSTRUCCIONES DE MONTAJE Hardware A x 1 B x 0,3 kg C x 4 D x 4 E x 4 Paso 1 Retire la abrazadera de montaje (A). Retire la abrazadera de montaje (A) de la base aflojando los cuatrotornillos de la parte superior de la unidad.
- Page 34 INSTRUCCIONES IMPORTANTES INSTRUCCIONES DE MONTAJE Paso 2 Instalar los enchufes (C) en la pared. 1. Taladre 4 orificios (8 mm de diámetro, 4 mm de profundidad) 270 mm en la pared. 2. Inserte los enchufes de pared (C) en los agujeros perforados. 3.
- Page 35 INSTRUCCIONES IMPORTANTES INSTRUCCIONES DE MONTAJE Paso 4 Cuelgue el relleno de chimenea en el soporte para colgar. 1. Asegúrese de que el soporte para colgar (A) esté correctamente fijado a la pared. 2. Cuelgue la chimenea en los ganchos en la parte inferior de la abrazadera de montaje (A) y empuje la chimenea en la abrazadera de montaje.
- Page 36 INSTRUCCIONES IMPORTANTES INSTRUCCIONES DE MONTAJE Paso 6 Instale el panel frontal. 1. Asegúrese de que el panel frontal esté libre de escombros y de suciedad. 2. Sujete el panel con firmeza y cuélguelo en los ganchos de la chimenea, que se encuentran en ambos lados.
-
Page 37: Instrucciones De Uso
INSTRUCCIONES DE USO INSTRUCCIONES PARA EL USUARIO INSTRUCCIONES DE CONEXIÓN 1. La reparación la deberá llevar a cabo solo una persona cualificada. Este calefactor funciona a 120 voltios. El cable va en un enchufe 2. Bajo ninguna circunstancia, se puede modificar este aparato. Las tal y como se muestra en la Figura 1. -
Page 38: Instrucciones De Funcionamiento
INSTRUCCIONES DE FUNCIONAMIENTO Indicadores Control manual Figura 2 Cuando una función es modificada desde el panel de control o de manera remota habrá un indicador correspondiente. El indicador muestra la función modificada y el nivel seleccionado. Cuando la función está desactivada, el indicador correspondiente se desvanecerá. Figura 3... - Page 39 INSTRUCCIONES DE FUNCIONAMIENTO FUNCIÓN ICONO DESCRIPCIÓN Este botón no sólo pondrá el aparato en modo Standby, sino que también podrás BOTÓN DE ver el efecto llama por la pantalla. Presionando este botón podrá desactivar todas ENCENDIDO las funciones con solo pulsarlo. La chimenea contiene un electroventilador.
-
Page 40: Guía Para La Solución De Problemas
GUÍA PARA LA SOLUCIÓN DE PROBLEMAS PROBLEMA POSIBLE CAUSA MEDIDAS CORRECTIVAS Revise el calentador y compruebe que las entradas y salidas de aire no estén bloqueadas, ya que podría causar el Se ha disparado la protección de La pantalla muestra "E1". sobrecalentamiento. - Page 41 LISTA DE PIEZAS DE REPUESTO Y VISTA DESPIEZADA Para piezas de repuesto, por favor entre en contacto con el servicio de atención al cliente en info@flamelux.com o llame por 1-855-837-2569, de 7:00 a.m. a 5:00 p.m. hora central estándar, de lunes a viernes.
- Page 42 INSTRUCCIONES La limpieza periódica del extractor/calefactor es recomendable. Asegúrese de que está apagada la unidad y desenchufada mientras se esté limpiando el calefactor o la chimenea. Compruebe las conexiones del enchufe y el cable del ADVERTENCIA : Asegúrese de que el aparato esté calefactor.
- Page 43 6. El propietario/usuario asume que todos los otros riesgos, si los info@flamelux.com hay, incluyendo el riesgo de cualquier pérdida directa, indirecta o No intente reparar el aparato por sí mismo.
- Page 44 数 量 描 述 图 示 壁炉芯 面 框 遥控器 挂墙固定件 (预组装在壁炉芯背面) 水晶石 塑料膨胀 螺丝 1 螺丝 2 所需工具(未含) 钻孔机 十字螺丝刀 打开电壁炉包装并确保上述所有零配件齐全。如果部件遗失,请发送邮件至info@flamelux.com,或联系售后客服 1-855-837-2569。 此电器是辅助热源,而非主要发热来源。...
- Page 45 重要说明 安装说明 安 全 注 意 事 项 1. 使用本产品前,请阅读本说明书的全部内容。 17. 使用此产品必须遵照本用户手册,任何非本用户手册说明 2. 使用过程中电壁炉会发热。为防止烫伤,请勿将皮肤直接 范围内的使用方法,可能引起火灾,触电或对人体造成伤 接触灼热处。确保所有的易燃物(如:家具,枕头,床上 害。 用品,文件,衣物和窗帘等)离电壁炉的前方至少0.9m, 18. 请将电壁炉直接插入壁式电源插座。严禁在延长线或重新 并远离电壁炉的两边和后方。 定位的电源插座上使用此产品。 3. 警告:电壁炉在被儿童或行动不便的人使用,或在其临近 19. 一旦此电壁炉的内部温度达到85±2°C,它将会自动停 区域使用,以及在无人看护时需尤其谨慎。 止工作。如需复位限温器,请先拔下电源线插头或关闭 4. 在不使用电壁炉时,请务必拔掉电源线插头。 主电源开关10分钟。 5. 此电壁炉在电源线或插头损坏,以及跌落或者其他任何形 20. 此B类数字设备,符合加拿大ICES-003标准。 式造成故障的情况下,严禁使用。并将此电壁炉退回到授 权维修机构进行检查或维修。 6. 此电壁炉的任何维修必须由具有维修资质的专业人员来操 作。 7.
- Page 46 重要说明 安装说明 拆除包装 安装前请认真阅读如下说明: 1. 为避免人员受伤或加热器受损,务必2个成年人一起组装此产品。如果您觉得还是太重,请询求援助。 2. 抬起本壁炉时,请始终保持您的背部挺直。弯曲您的腿部而不是背部。为避免扭伤腰,最好是移动您的脚步。 3. 抬起壁炉时,为避免头重脚轻,请勿弯腰,并保持您的膝盖弯曲。 4. 搬运时,请勿用指尖来受力,应用掌心来支撑。 5. 始终让加热器尽可能的靠近身体。减少臂力。 6. 为抓地更牢,可使用手套。 7. 打开包装并小心的将产品从箱子抬出,平稳地放置地面,面框朝上。 安全警示 1. 严禁将此电壁炉连接到其他程序、定时器、独立的遥控系统或任何其他可自动开启关闭此电壁炉的装置。 因为如果加热器被 覆盖或错误的放置的话,将存在火灾的隐患。 2. 电源线一旦受损,为避免风险,务必让制造商、售后服务处或专业维修人员更换。 3. 为了避免因限温器无意中自动复位而发生危险,此电器不得通过外部的开关装置来控制,如:定时器,或者连接到一条根据 实际需求,可随意开启关闭电源的线路。 4. 严禁在浴室、淋浴房或游泳池周围使用此电壁炉。 5. 如果玻璃破损,为避免风险,严禁再使用此电壁炉。 6. 始终确保电源线插座位于产品附近易触及,严禁位于此电壁炉之上。 7. 此电壁炉必须牢固的挂在墙体上。 安装说明 1. 此加热器必须固定在平整的墙面上。最好是,直接将加热器固定在砖墙、石造建筑墙或内部为木制结构的石膏板墙体上。 2. 我们不建议将产品固定在贴有发泡聚氯乙烯墙纸或聚苯乙烯瓷砖等的墙面上。 3.
- Page 47 A x 1 B x 0.3 kg C x 4 D x 4 E x 4 取下挂墙固定件(A)。 取下壁炉芯顶上的两颗螺钉(E)后,将挂墙固定件(A)从壁炉芯后取下。...
- Page 48 把塑料膨胀螺钉(C)固定在墙体上。 1. 在墙体上钻4个直径8mm,深度40mm的孔。 270 mm 2. 将塑料膨胀螺钉(C)插入钻好的孔内。 3. 请参考孔位图。 4. 最上面的2个空位需距离天花板至少420mm。 注意:在墙体上钻孔前,请先检查墙体,确保没有隐藏的 电线、管道等。并确保所配的螺丝和膨胀螺钉适合用在您的 墙面上,用以支撑此电壁炉。如果您不确定,请咨询专业人员。 将挂墙固定件(A)固定到墙体上。 1. 把挂墙固定件(A)固定在钻好的孔上,并将螺钉(D)穿过 上下排挂墙固定件并分别插入第二、第五个孔。 2. 用十字螺丝刀将挂墙固定件(A)锁紧。 3. 为了避免螺丝头在挂墙固定件上凸出来,螺丝必须要完全插 入且紧贴于墙体。 4. 确保挂墙固定件已被安全的固定。...
- Page 49 把壁炉芯挂到挂墙固定件上。 1. 检查并确保挂墙固定件(A)已被牢固地锁紧在墙体上。 2. 确保壁炉芯位于挂墙固定件(A)底部的挂钩上,并将壁 炉芯往后固定在挂墙固定件上。 3. 将步骤一中取下的两颗螺丝重新锁紧。 4. 再次检查确保壁炉芯的顶部距离天花板至少400mm。 将水晶石放入壁炉芯中。 1. 确保水晶石均匀的放入壁炉芯中。 2. 检查并确保水晶石摆放平整。...
- Page 50 安装面框。 1. 确保面框是完好且无尘的。 2. 小心的举起面框并将面框挂在壁炉芯两侧的 挂钩上。 3. 面框必须保证安全挂在壁炉芯的4个挂钩上。 4. 检查并确保面框已被安全的固定好。 将面框固定在壁炉芯上。 1. 左右两侧都有定孔位,将螺钉(E)穿过挂钩固定 在壁炉芯上。 2. 锁紧两侧的螺丝 3. 确保面框是安全稳定的。 注意:为避免面框受损,请小心地锁紧螺丝。...
- Page 51 1. 此电壁炉的维修必须由具有维修资质的专业人员操作。 此电壁炉仅适用于120V交流电压。 电源线插座如图1中A所示。 2. 严禁整改此电壁炉。部件需维修时,必须先将部件更换好后, 才可再使用此电壁炉。 3. 请用软锦布蘸水后清洁此电壁炉,严禁使用任何磨蚀性的清洁剂。 4. 在不使用电壁炉时,请务必拔下电源线插头。 1. 严禁在玻璃破损的情况下,使用此电壁炉。 接地插座盒 2. 严禁敲打或撞击玻璃。 3. 严禁用磨蚀性清洁剂清洁玻璃。 接地插片 4. 本产品采用钢化玻璃。更换由制造商提供的玻璃,应由具有维修 资质的专业人员操作。 图1 接地方式 41 x 6 1/8 x 19 1/4 inch 产品尺寸(长×宽×高) 104.1 x 15.6 x 49 cm 净重 / 毛重 15.3 kg / 19.6 kg 电压...
- Page 52 操 作 说 明 屏显 手动控制面板 图2 手动控制面板或遥控器转换功能后,屏幕显示的图示会相对应的变化。屏显体现功能的转变和档位的选择。任何一功能关闭后,屏显 的相关图标也会消失。 图3...
- Page 53 操 作 说 明 功 能 图 示 描 述 此按键即可以使电壁炉进入待机模式状态,也可以打开电壁炉看到火焰效果。此电源 电源 按键也可以直接关闭所有的功能。 该电壁炉具有加热功能。 默认设定温度为72℉(22℃)。 温度可调节范围: 50°- 86°F (10°- 30°C)。 加热功能 可按每档2 ℉或1℃循环设置温度值。 长按加热键5s可进行℉与℃温度单位切换。 在运行加热功能时按节能键,可降低功率。 节能功能 注意:通过长按节能键3s,可将任何加热模式强制关闭。 如需快速让房间温度升温,请按高效键可迅速加热。 高效功能 连续按高效键可以循环设置高效加热的时间:5分钟,10分钟,20分钟,25分钟, 30分钟和关闭。 按定时键可以循环定时设置:30分钟,1小时,3小时,4小时,5小时,6小时, 7小时,8小时和关闭。 定时 当定时达到零分钟,电壁炉将自动关闭。 亮度只能通过遥控器来调节。 亮度 这个按键是控制火焰效果的亮度。 5种不同火焰模式供选择: 1. 雪花白 2.
- Page 54 常 见 故 障 及 处 理 方 法 现 象 可 能 的 原 因 处 理 方 法 请检查电壁炉的进风口和出风口,确认未被堵塞,因为这可能会 导致过热。拔下电源插头,等待10分钟,让机器冷却。然后重新 屏幕显示“E1"。 手动复位过热保护功能被触发。 插上电源,重启,查看机器过热的迹象。如果问题仍然存在,请 停止使用,并联系售后客服。 温度感应器损坏或未连接。 屏幕显示“E2"。 请联系售后客服更换新的温度感应器。 请确保此电壁炉插头是插在标准的120V电源插座上。多次按电源 电壁炉不通电。 电壁炉未正确接入电源。 键并确保电源是设定在“ON”的位置。 加热功能无热风吹出。 温控设置阻止加热功能启动。 请调节温度设置确保温控器的设置高于当下室温。 请检查电源线和插头连接处。插座故障或插头松动都可引起过热 现象。请确保插头已准确插入电源插座。电壁炉的额定电流比一 般家电大,即使电壁炉不与其它电器设备共同使用一个插座也会 电源线发热。 常规操作。...
- Page 55 零 部 件 更 换 清 单 和 爆 炸 图 如需更换部件,请于周一至周五,早上7:00至下午5:00联系售后客服1-855-837-2569,或发送邮件至info@flamelux.com。 部件编号 部件名称 按键面板 主电路板 风机和发热体组件 温控感应器 反光束 遥控器 火焰步进电机 托盘 RGB火焰电路板 托盘电路板 火焰电路板 LED显示屏 有些部件和描述有可能会临时更改。 图4 C-12...
- Page 56 使 用 说 明 建议定期清洁加热器和贯流风机。每当您清洁电壁炉时,请务必确保您已关闭电源并拔下电源线插头。 警告: 检查你的电壁炉插头和插座的连接。若未插紧电源插座, 电壁炉的任何维修和重新布线均需在 可能会导致插头过热或引起火灾。请务必将电源线插头 电源开关已关闭的状态下进行,并确保是由取得 插紧在插座上。使用过程中请经常检查插头和插座,以确 国家或当地维修资质的专业维修人员操作。 保均是常温的。如果过热,请务必停止使用此电壁炉,并 找有资质的电工更换插座。 注:电壁炉的电流大于小家电,即使不与其他家用电器一 起使用,也有可能发生插座过热。 警告: 警告: 为降低火灾、触电和人身伤害的隐患,电源插 为了降低火灾,电击或人身伤害的隐 座的接线必须符合当地的建筑法规及其他相关法规。 患,在清洁或维修此电壁炉前,请务必断开电壁 炉的电源。 遥 控 器 电 池 更 换 废 电 池 的 处 理 当遥控器无法使用或按键失灵时,请及时更换新电池。 电池可能含有有害物质将会污染环境并危害人体健康。 1.在遥控器的背面后端处,按压滑动电池盒盖取出旧电池。 2.装入两节AAA电池,检查电池的正负极是否和电池盒 印刷在电池或者电池包装上的这个图标表示废电池不能当做普...
- Page 57 2. 保修权不可转让,只有从授权供应商处购买的产品 误用本产品。 享有此保修权。 (c)无有效发票。 3. 本保修只限于对材料及工艺上有缺陷的零部件进行 修理或更换,正常条件下使用后,发现缺陷的部 如果需要保修服务: 件需由本公司检查确认后,方可寄出补件。 4. 本公司可自行决定,通过退还缺陷部件的批发价格 请注意:当您打开外箱时,请仔细检查产品并确保没 来充分履行关于本保修条款中的所有义务。 有损坏。如果对产品的各项功能操作有任何疑问,包 5. 任何因安装、人为原因、施工、运输或其他原因造 括产品内部破损,或零部件缺失,都请发送邮件 成的损坏和维修,而产生的费用,本保修条款不 至Info@flamelux.com。 涵盖,且也不应由本公司承担责任。 请勿试图自行拆卸或维修本产品。 6. 产品所有者/使用者应承担除法律规定外的所有其他 风险,包括任何因误用本产品导致的直接或间接地 损失或损坏。 7. 所有阐述的保修条款是针对产品的,其组件及配件 的任何义务与职责就本公司而言,是明确排除在外 的。 8. 本公司既不承担也没授权给第三方以本公司的名义 售后服务 去承担销售本产品相关的任何其他责任。 9. 本文档中列出的保修条款,并不适用于任何安装 或连接在本产品上的其他配件。 如本产品用于商业或工业,本保修条例则无效。 零 售 商 :...
- Page 58 FOR CUSTOMER SERVICE / SERVICE À LA CLIENTÈLE / SERVICIO DE ATENCIÓN AL CLIENTE/ 售后服务: 1-855-837-2569 info@flamelux.com IF YOU HAVE ANY PROBLEMS OR QUESTIONS, EMAIL OR CALL CUSTOMER SI TIENE ALGÚN PROBLEMA O DUDA, MANDE UN SERVICE BEFORE YOU RETURN THIS PRODUCT TO THE STORE WHERE IT CORREO ELECTRÓNICO O LLAME AL SERVICIO DE WAS PURCHASED.
Need help?
Do you have a question about the PARIS and is the answer not in the manual?
Questions and answers