Table of Contents
Advertisement
Quick Links
Advertisement
Table of Contents

Related Manuals for Gazelle G9701


Summary of Contents for Gazelle G9701
- Page 1 G9701 Industrial Thermal Imager User Manual...
- Page 2 G9701 Infrared Thermal Imager About this Manual The Manual includes instructions for using and managing the Product. Pictures, charts, images and all other information hereinafter are for description and explanation only. The information contained in the Manual is subject to change, without notice, due to firmware updates or other reasons.
- Page 3 G9701 Infrared Thermal Imager MANNER THAT DOES NOT INFRINGE ON THE RIGHTS OF THIRD PARTIES, INCLUDING WITHOUT LIMITATION, RIGHTS OF PUBLICITY, INTELLECTUAL PROPERTY RIGHTS, OR DATA PROTECTION AND OTHER PRIVACY RIGHTS. YOU SHALL NOT USE THIS PRODUCT FOR ANY PROHIBITED END-USES, INCLUDING THE DEVELOPMENT OR PRODUCTION OF...
- Page 4 G9701 Infrared Thermal Imager This device complies with part 15 of the FCC Rules. Operation is subject to the following two conditions: 1. This device may not cause harmful interference. 2. This device must accept any interference received, including interference that may...
- Page 5 G9701 Infrared Thermal Imager (2) l'utilisateur de l'appareil doit accepter tout brouillage radioélectrique subi, même si le brouillage est susceptible d'en compromettre le fonctionnement. Under Industry Canada regulations, this radio transmitter may only operate using an antenna of a type and maximum (or lesser) gain approved for the transmitter by Industry Canada.
- Page 6 G9701 Infrared Thermal Imager Laws and Regulations Use of the product must be in strict compliance with the local electrical safety ● regulations. Transportation and Storage Keep the device in original or similar packaging while transporting it. ● Keep all wrappers after unpacking them for future use. In case of any failure ●...
- Page 7 G9701 Infrared Thermal Imager service center. We shall not assume any responsibility for problems caused by unauthorized repair or maintenance. A few device components (e.g., electrolytic capacitor) require regular replacement. ● The average lifespan varies, so periodic checking is recommended. Contact your dealer for details.
-
Page 8: Table Of Contents
G9701 Infrared Thermal Imager Table of Contents Overview .................... 10 Device Description ................... 10 Main Functions ..................10 Appearance ..................... 12 Preparation ..................13 Charge Device ..................13 2.1.1 Charge Device via Charging Base ............13 2.1.2 Charge Device via Cable Interface............16 Power On/Off .................. - Page 9 G9701 Infrared Thermal Imager Set Laser ....................35 Client Software Connection ..............36 Connect via Wi-Fi ..................36 Connect via Hot Spot ................37 Maintenance..................38 View Device Information ................38 Upgrade Device ..................38 Restore Device ..................38 Appendix ..................39 10.1...
-
Page 10: Overview
1 Overview Device Description The handheld thermography camera is a device with both optical images and thermal images. It can do thermography, video recording, snapshot capturing, alarm, and it can connect to Wi-Fi, hotspot and Bluetooth. The built-in high-sensitivity IR detector and high-performance sensor detects the variation of temperature and measure the real-time temperature. - Page 11 Palette and Alarm Device supports multiple palettes, and you can set the palette mode according to the alarm function. Client Software Connection You can connect the device with online client software via Wi-Fi or hot spot. Then you can view live view, capture, and recording, etc. on your phone.
-
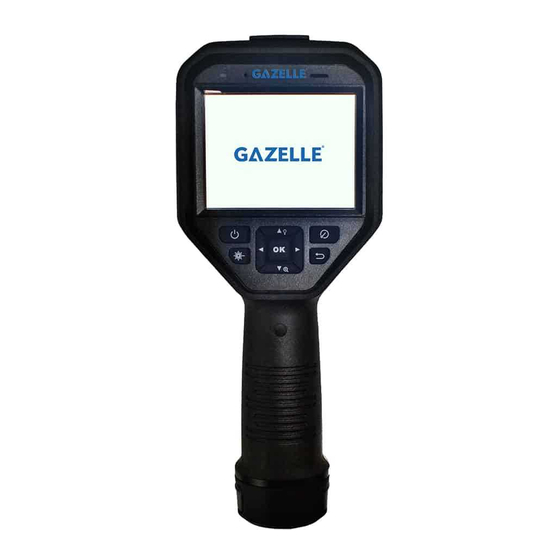
Page 12: Appearance
Appearance Audio LED Indicator Loudspeaker Touch Screen Lens Sheet ON/OFF Laser Back Navigation Focus Knob Lens Cover Thermal LED Light Lens Laser Tripod Interface Optical Lens Trigger Cable Interface SD Slot Battery Component Function Laser Button Hold the button to turn on laser, and release the button to turn off laser. -
Page 13: Preparation
Component Function Back Button Exit the menu or return to previous menu. Focus Knob Adjust lens focal length, refer to 3.1 Focus Lens Trigger Pull the trigger to record videos or capture snapshots. Cable Interface Connect the device to your PC via cable to export files. - Page 14 Steps: 1. Hold the device, and press both battery lock catches of the device. See figure below. 2. Hold the lock catches, and draw the battery base to take out the battery. See figure below.
- Page 15 3. Insert the battery into the charging base, see figure below. You can see the charging status via the pilot lamp on the charging base. Battery Charging Base Front View Side View 4. When the battery is fully charged, draw the battery from the charging base.
-
Page 16: Charge Device Via Cable Interface
Charge Device via Cable Interface 2.1.2 Please make sure the battery is installed before charging. Steps: Open the top cover of the device. Connect the interface and the power adaptor with Type-C cable. Power On/Off Power On Remove the lens cover, and hold the button for over three seconds to turn on the device. -
Page 17: Set Auto Power-Off Duration
When the monocular is turned on, hold the button for three seconds to power off the device. 2.2.1 Set Auto Power-off Duration Go to Local Settings ( ) > Device Settings > Auto Power-off Duration Settings to set the automatic shutdown time for device as required. -
Page 18: Menu Description
Press the △, ▽, ▷, and ◁ to move the cursor up/down/left/right. Press OK to confirm. Menu Description In the observation interface, tap the screen or press OK to show the menu bar, see figure below. -
Page 19: Display Settings
Real - time Temperature Color-Temperature Scale Menu Icons Min. Temperature Display Center Temperature Max. Display Temperature Display Status Icons 3 Display Settings Focus Lens Before you start: Adjust the lens focal length properly before you set any other configurations, or it may affect the image display and temperature accuracy. -
Page 20: Set Screen Brightness
Adjust the focus knob clockwise or anticlockwise, see figure below. DO NOT touch the lens to avoid affecting the display effect. Set Screen Brightness Go to Local Settings ( ) > Device Settings > Display Brightness to set the screen brightness. It can be set as Low, Medium, or High. -
Page 21: Set Palettes
Tap on the icons to select a view mode. Icon Mode Description In thermal mode, the device displays the Thermal thermal view. In fusion mode, the device displays the combined view of thermal channel and optical channel. Fusion in live view and press ▷ You can click and ◁... -
Page 22: Adjust Digital Zoom
Tap on the icons to select a palette type. Icon Palette Description White Hot: The hot part is light-colored in view. Black Hot: The hot part is black-colored in view. The target displays multiple colors, it’s Rainbow suitable for scene without obvious temperature difference. -
Page 23: Display Device Status
Display Device Status Go to Local Settings ( ) > Image Settings > Display Settings to enable the status icons display. Then you can view the device status in live view interface. Display Date and Time Go to Local Settings ( ) >... - Page 24 Set the Thermography Range, Emissivity, Distance, Background Temperature, Reflection Temperature, Humidity, and Temperature. Thermography Range Select the thermography range. The device can detect the temperature and switch thermography range automatically in Auto Switch mode. Emissivity Set the emissivity of your target as the effectiveness in emitting energy as thermal radiation.
-
Page 25: Set Units
The straight-line distance between the target and the device. You can customize the target distance or select the target distance as Near, Middle, or Far. Background Temperature The average temperature of the environment. Reflection Temperature If any object (not the target) of high temperature is in the scene, and the target emissivity is low, set the reflection temperature as the high temperature to correct the thermography effect. -
Page 26: Set Thermography Rule
Select Auto ( ) adjustment or Manual ( Auto Adjustment: Select Auto ( Press OK to confirm. The device adjusts temperature difference and temperature range parameters automatically. Manual Adjustment: Select Manual ( Press OK to confirm. The color-temperature bar displays. Press ▷... -
Page 27: Set Point Rule
The thermography parameters affect the accuracy of temperature measurement. Steps: Select Thermography Rule Configuration ( ) from the main menu. Set the point, line, or frame rules, see figure below. 4.3.1 Set Point Rule You can set Center Point Thermography, High-Temperature Point, Low-Temperature Point, and Custom Point Thermography. -
Page 28: Set Line Rule
Steps: Choose on the interface. Press OK. Move the point with the navigation buttons or tap on the touch-screen to select a point. Press OK to confirm. The temperature of custom point (e.g. P1) displays P1: XX. Repeat step 1 to 3 to set other custom points. At most ten custom points supported. -
Page 29: Delete Rules
Press OK to generate a default frame. Press the △, ▽, ▷, and ◁ to move the frame up/down/left/right. Press to enlarge the frame, and press contract the frame. Or you can drag the corner of the frame on touch-screen to enlarge or contract the frame. - Page 30 Tap on the icons to select an alarm rule type. (Optional) Press the △ and ▽ to select between upper limit and lower limit. Press the ◁ and ▷ to adjust the rule temperature. Icon Alarm Mode Description Set the alarm temperature, and the device Above Alarm alarms when target temperature is higher than rule temperature.
-
Page 31: Picture And Video
5 Picture and Video Before you start: Insert memory card into the device, then you can record videos, capture snapshots, and mark and save important data. • Device does not support capturing or recording when the menu is shown. • When the device is connected to your PC, it does not support capturing or recording. -
Page 32: Record Video
The live view freezes and device displays the snapshot editing interface. Set text remark or voice remark. to add text remarks. Tap the screen to show the keypad interface, enter the comment and confirm. to add voice remarks. Hold OK to start recording and release the button to stop recording. -
Page 33: View Recorded Files
Select Record. Press OK. You can set the Flashlight Setting ON/OFF if required. Press to exit. In the live view interface, pull the trigger to start recording. The recording icon and count down number display in the interface. When you finish, pull the trigger again to stop recording. The recording video will be saved automatically and exit. -
Page 34: Export Files
When you are viewing the videos or capture snapshots, you can switch the file by tapping When you are viewing the snapshots, You can tap to play the sound. Refer to 6 Connect Bluetooth to set the Bluetooth. ... -
Page 35: Connect Bluetooth
6 Connect Bluetooth Purpose: After pairing the device with bluetooth headsets successfully, you can record and hear the sound contained in the videos or images via bluetooth headsets Steps: Select Local Settings ( ) from the main menu. Go to Local Settings > Device Settings > Bluetooth. Tap on Bluetooth to enable the bluetooth function. -
Page 36: Client Software Connection
8 Client Software Connection The device supports both Wi-Fi connection and WLAN hot spot. Connect the device to client software, and you can control the device via mobile client. Connect via Wi-Fi Before you start: Download and install client software on your phone. Steps: Go to Local Settings >... -
Page 37: Connect Via Hot Spot
Connect via Hot Spot Before you start: Download and install client software on your phone. Steps: Go to Local Settings > Device Settings > Wi-Fi Hotspot Settings. Tap on Hot Spot to enable the WLAN hot spot function. Tap Set Hot Spot to set the WLAN hot spot. The hot spot name and password display automatically. -
Page 38: Maintenance
9 Maintenance View Device Information Go to Local Settings ( ) > Device Information to view the device information: Model, Version No., FPGA Version No., Serial No., IP address and so on. Upgrade Device Steps: onnect the device to your PC with cable and open the detected disk. -
Page 39: Appendix
10 Appendix 10.1 Common Material Emissivity Reference Material Emissivity Human Skin 0.98 0.91 Cement Concrete 0.95 Ceramics 0.92 Rubber 0.95 Paint 0.93 Wood 0.85 Asphalt 0.96 Brick 0.95 Sand 0.90 Soil 0.92 Cotton 0.98 Cardboard 0.90 White Paper 0.90 Water 0.96 10.2 Frequently Asked Questions (FAQ) Why the charge indicator flashes red? - Page 40 Refer to Focus Lens to adjust the focus knob clockwise or anticlockwise. Why the Wi-Fi cannot be found? Examine whether the Wi-Fi function is turned on. If not, refer to 8.1 Connect via Wi-Fi to turn on Wi-Fi. Capturing or recording fails. How to operate? Examine the items below: Whether the device is connected to your PC and disabled the capturing and recording.
- Page 41 sales@gazelleindustrial.com | www.gazelleindustrial.com...
Need help?
Do you have a question about the G9701 and is the answer not in the manual?
Questions and answers